Table of Contents
Advertisement
Quick Links
H.M.S B
H.M.S B
Kit design, instructions and
prototype model by Bob Crane
INSTRUCTION MANUAL
M
M
ODELING
ODELING
OUNTY
OUNTY
Manufactured by Model Shipways, Inc. • Hollywood, Florida
Model Shipways Kit No. MS1850
T
T
HE
HE
'
L
'
L
S
AUNCH
S
AUNCH
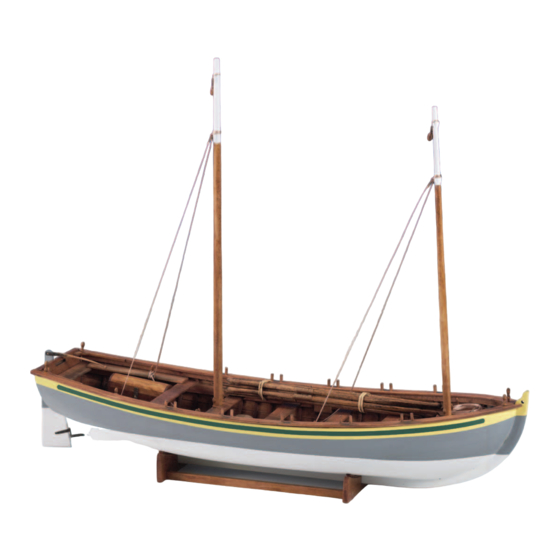
Technical Characteristics
Scale: 3/4" = 1'0" (1:16)
Overall length: 17-1/4" (438.3mm)
Height from bottom of keel with masts: 14-3/8" (365mm)
Beam: 5-3/8" (136.5mm)
,
,
1789
1789
©2006, Model Shipways, Inc.
Advertisement
Table of Contents

Related Manuals for Model Shipways H.M.S. Bounty's Launch 1789


Summary of Contents for Model Shipways H.M.S. Bounty's Launch 1789
- Page 1 Overall length: 17-1/4" (438.3mm) Height from bottom of keel with masts: 14-3/8" (365mm) Beam: 5-3/8" (136.5mm) Kit design, instructions and prototype model by Bob Crane ©2006, Model Shipways, Inc. Manufactured by Model Shipways, Inc. • Hollywood, Florida Model Shipways Kit No. MS1850...
-
Page 2: A Brief History
A BRIEF HISTORY A BRIEF HISTORY The Mutiny on the Bounty is without doubt one of the best Knowledge of the extraordinary adventure that followed is due known and most often written about sea stories of all time. It is to the fact that Bligh kept a log and submitted it to the admiral- also probably the most thoroughly documented mutiny in ty after his return to England. -
Page 3: Table Of Contents
crowded into this small craft navigating through tall seas under described in his log. The lines and scantlings of the launch are sail. The model construction method is in the traditional from the original builder’s plan of the launch from the Nautical fashion for carvel planked hulls of this size, upside down with a Maritime Museum, Greenwich, with additional information form or mold at each station. -
Page 4: Before You Begin
5. Laser Cut Planking and Floorboards your fingers deposit. Allow the parts to dry thoroughly before Model Shipways’ Launch of the Bounty kit is manufactured to a scale applying primer and painting or chemically blackening. of 3/4" = 1' 0" (1:16). Each sheet is drawn to that scale except areas enlarged to show detail. -
Page 5: What You'll Need To Start
Any of the hobby paints are satisfactory such as Model Shipways, b. small flat needle nose Testors, Humbrol, and Tamiya. Jo Sonja artists’ paints (used by bird 5. -
Page 6: Stage 1: Building The Construction Jig
Acrylics are difficult to spray and must definitely to be available for the period. be used with the manufacturer’s special thinner. Thinning water- The following Model Shipways acrylic paints match the colors based paints with water creates surface tension problems, resulting noted on the plans: in poor coverage and spray atomization. -
Page 7: Preparing The Keel, Stem & Sternpost
The keel and the two pieces of the stem are laminated from 3/32 will help you to align the pieces. basswood. An innovation introduced by Model Shipways is that Assemble and glue together the 3 pieces, stem, keel, and sternpost. -
Page 8: Cutting The Rabbet
Photo 4, cutting the rabbet 4. Cutting the rabbet the rabbet from the bearding line to the rabbet line. Of course, the rabbet is cut on both sides of the keel. The rabbet is a generic term referring to the entire groove where As you carve the rabbet, fit a scrap piece of 1/16"... - Page 9 Fairing the molds: We are now ready to fair the molds. Fairing is a most important part of hull construction. Beginners tend to rush this step and jump right into planking. Take your time and check the fairness thoroughly. Then you won't run into problems when you start planking.
-
Page 10: Stage 2: Bending On The Frames
STAGE 2: BENDING ON THE FRAMES Now we are going to have some fun bending on the frames. As is formed, it can go directly on the model. Because the wood’s previously noted this method of boat building is as in full size memory has been permanently altered, it will never spring back to practice for this size and type of boat hull. -
Page 11: Stage 3: Planking The Hull
bending to a mold, i.e., a pre-bend. This, of course, is after you the wood grain. This may have to be “wrestled” with to make your have hot soaked the frame. As you bend a frame in your fingers you frame conform and lay as you want it. - Page 12 in the water for about 1 minute or less. Remove the plank and with your fingers test the plank for its willingness to bend. They should bend easily. They will be hot when removed from the water but will cool rapidly in a few seconds so they can be safely touched. Clamp hot/wet plank into position to dry as shown in photo 11.
- Page 13 Begin fitting the shutter planks at the bow. Sand both edges of the plank until it fits at the bow. Continue along the length fitting a little at a time until the whole plank will drop in. The planking is done, time to sit back and admire your work.
-
Page 14: Stage 4: Fitting Out
STAGE 4: FITTING OUT Photo 18, installing the ‘tween frames and cant frames In this stage we will complete the interior structural members and are visible in the finished model. Review the plans and photos and details. These include the sheer clamps, thwart risers, windlass concentrate on those areas of frame and plank that will be visible. -
Page 15: Installing The Thwart Risers
3. Installing the thwart risers The thwart risers are from 3/32 x 5/16 bass- wood and are the support structure for the thwarts (seats). Cut the supplied mate- rial into two 12 inch lengths. The risers will need to bend in two directions, to fit the shape of the hull and to conform to a curve... -
Page 16: Staining & Painting
Photo 22, interior stained, exterior painted. Note filler blocks for installing the gunwale 6. Staining and painting say every inch or so than to attempt to scribe the entire line. 7. Mounting cradle Before installing the remaining parts, now is the time to think about finishes. -
Page 17: Bow Grate, Thwarts & Mast Partners
Photo 23, assembling the breasthook and gunwales to match the angle of the backrest, trim the fore ends if necessary ened, or they can be painted black. Begin the rudder installation and glue in place. Sand and round edges then finish to match the by locating and installing the upper gudgeon on the transom. -
Page 18: Stage 5: Masts, Spars, Sails & Boat Gear
STAGE 5: MASTS, SPARS, SAILS AND BOAT GEAR 1. Shaping and tapering masts and spars. not exist. Even the smallest stitch that can be made is grossly out of scale. This fact is just simply accepted by some as an inevitable Details of all mast and spars with dimensions are shown on plan fact and they prefer the look of sewn sails in spite of over scale sheet 5. -
Page 19: Blocks
Photo 25, Boat gear: oars, casks, grapnel, tool chest, canvas, bags, coils of line of line and simply glue them to the reef points. gourd calabashes. A carpenter’s chest of tools is believed to have been aboard. The seamen probably carried with them some 3. -
Page 20: Stage 6: Displaying Your Model
Ben Lankford. Hollywood, FL: Model Shipways, Inc., 2000. A book designed especially for the kit builder. Covers all facets of building models from kits, and features Model Shipways kits as well as others. The Appendix has a wealth of nautical terms defined, especially useful for the beginner.
Need help?
Do you have a question about the H.M.S. Bounty's Launch 1789 and is the answer not in the manual?
Questions and answers
there are no rib profiles in the manual, where do I find them?