Angelcare AC701 Owner's Manual
Touchscreen movement
& sound monitor
Hide thumbs
Also See for AC701:
- Owner's manual (54 pages) ,
- Owner's manual (32 pages) ,
- Owner's manual (64 pages)

Related Manuals for Angelcare AC701


Summary of Contents for Angelcare AC701
- Page 1 FOR YOUR PEACE OF MIND OWNER’S MANUAL TOUCHSCREEN MOVEMENT & SOUND MONITOR Model AC701...
-
Page 2: Table Of Contents
Keep small parts away from children when assembling. We, at Angelcare , stand behind all of our products. ® If you are not completely satisfied or have any questions, United States and Canada: please contact us at: angelcare@cdecinc.ca Other countries: please contact your local distributor. -
Page 3: Warnings
WARNINGS 1. THIS PRODUCT CANNOT REPL ACE 9. ALWAYS place both the Nursery Unit RESPONSIBLE ADULT SUPERVISION. This and the Parent Unit on a flat surface in product is designed to aid in the monitoring an upright position and allow for proper of your child. - Page 4 15. IMPORTANT SAFETY INSTRUCTIONS DO NOT place this product on an unstable cart, stand, tripod, bracket or table. The product may fall, causing serious injury 15.1 Read these instructions - All the safety to a child or adult and serious damage to instructions should be read before the the product.
- Page 5 Sensor Pad measuring at least 13” x 13” (33 x 33 cm) and 1/4 inch (6 mm) thick. Only use your Angelcare monitor in a stationary ®...
- Page 6 limits are designed to provide reasonable 16.10 DO NOT attempt to rejuvenate the protection against harmful interference in batteries provided with or identified for a residential installation. This equipment use with this product by heating them. generates, uses and can radiate radio Sudden release of battery electrolyte may frequency energy and, if not installed and occur, causing burns or irritation to eyes...
-
Page 7: Ac701 Setup Requirements
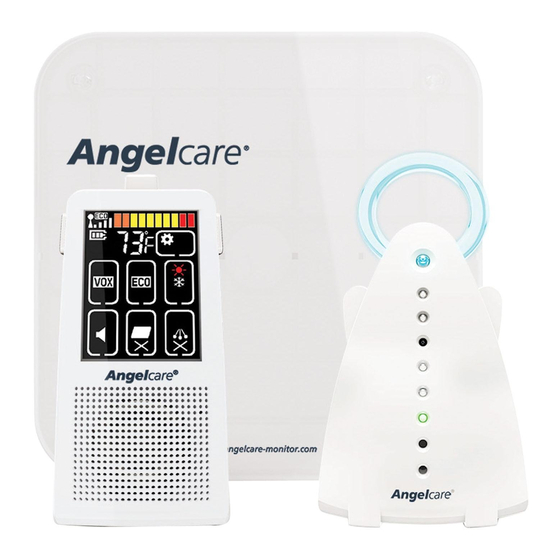
TOUCHSCREEN MOVEMENT SETUP REQUIREMENTS & SOUND MONITOR Model AC701 INCLUDED: Rechargeable Nursery Unit Charging Cradle Belt Clip Parent Unit Sensor Pad with pre-installed cord covers 2 AC Adapters 2 AAA Rechargeable Batteries for Parent Unit WHAT YOU WILL NEED (NOT INCLUDED):... -
Page 8: Step 1 - Charging The Parent Unit (10 Hours)
STEP 1 - CHARGING THE PARENT UNIT (10 HOURS) WARNING Never use regular alkaline batteries in the Parent Unit; they may explode. 1) Slide the button to unlock and open the battery cover. Insert the Rechargeable Batteries (included) as per picture. 2) Connect the AC Adapter to the Parent Unit and into an electrical outlet. -
Page 9: Step 2 - Installing The Sensor Pad
STEP 2 - INSTALLING THE SENSOR PAD Cord covers 1,2,3,4: Position on floor Cord cover 4: Contains double sided tape to securely install beneath crib leg Cord cover 5: Position vertically between mattress support and floor Sensor Pad with pre-installed cord covers Cord cover 6: Place under the mattress... - Page 10 2.2 SELECT THE CRIB LEG YOU WILL BE USING TO SECURE THE CORD COVERS RECOMMENDED 1) Use the crib leg by the wall closest to the Nursery Unit (Fig. 1). In cases where the Nursery Unit is across the room, use the leg closest to the Nursery Unit to position the covered wire (Fig.
- Page 11 3” 6) Place the 6 cord cover approximately 3’’ (8 cm) from the edge of the mattress support. 7) Snap together the remaining cord covers that will run along the floor. 8) Remove any cord slack to make sure no parts of the cord are loose. CLIC! 9) Peel off the double-sided tape on the cord cover and place it securely...
-
Page 12: Step 3 - Setting Up The Nursery Unit
STEP 3 - SETTING UP THE NURSERY UNIT 1) Unscrew the battery cover and insert 2 AA Alkaline Batteries (not included). 2) Place the Nursery Unit at a minimum of 3 ft. (0.9 m) away from the crib. 3) Connect the AC Adapter to the Nursery Unit and plug into an electrical outlet. -
Page 13: Step 4 - Turning On Your Monitor
STEP 4 - TURNING ON YOUR MONITOR 1) Press the Parent Unit ON/OFF button to open and display normal mode. 2) Push and hold the Nursery Unit left ‘wing’ button for 2 seconds. The LCD monitor has 30 seconds timeout to go to power saving mode (dimmer illumination). -
Page 14: Step 5 - Testing And Getting To Know Your Monitor
STEP 5 - TESTING AND GETTING TO KNOW YOUR MONITOR The Angelcare monitor can be used with the pre-program factory settings ® or you can also customise your settings to your preference. IMPORTANT NOTE: All changes When in Settings mode, sound... -
Page 15: To Activate Tic Function
TO STOP THE ALARM Press Nursery Press any key on Unit’s Hold button the Parent Unit to put on Hold (see Step 6.5) (see Step 6.5) Hold down left ‘wing’ button for two seconds Place your to turn OFF the Unit hand back on the mattress. - Page 16 5.2 - SOUND Level 0 TO ADJUST THE SOUND: Level 1 Raise volume Press (+) or (-) buttons to adjust level (+) the volume level. Level 2 Lower volume level (-) NOTE: Level 3 At level L0 the level bar will still appear on Level 4 the screen and the icon will blink.
-
Page 17: Default Settings
YOU ARE NOW READY TO USE YOUR MONITOR The Angelcare monitor can be used with the pre-program factory settings ® or you can also customise your settings to your preference. DEFAULT SETTINGS Sound Mode: ON Speaker Volume: Level 3 (of 5) -
Page 18: Step 6 - To Activate And Deactivate Additional Functions
ÉTAPE 6 - TO ACTIVATE AND DEACTIVATE ADDITIONAL FUNCTIONS MULTIFUNCTIONAL The Angelcare monitor is multifunctional. It can be use in different combinations ® according to your needs. SOUND & MOVEMENT: Allows you to detect the baby’s MOVEMENT & SOUND while using both Parent Unit and Sensor Pad. - Page 19 6.1 - VOICE ACTIVATION (VOX) OR CONTINUOUS SOUND MODE Allows you to select your option on how you monitor sound: VOX (voice activation picks up sound based on the selected sensitivity level settings) or Continuous (sound monitoring is continuously on, picking up all sounds). 1) Press the VOX icon to activate or deactivate the VOX function.
- Page 20 6.3 - TEMPERATURE CONTROL TO CHANGE THE MEASUREMENT UNIT: 1) Press the Settings icon to access setting mode. 2) Press the Temperature Settings Icon. 3) Press the Talk button on Parent Unit to change from Celsius to Fahrenheit. Celsius Fahrenheit 4) Press the Return icon to confirm your choice and return to normal screen.
-
Page 21: Hold
When in setting mode no sound or alarms will transmit to the Parent Unit, except the movement alarm (if this function was already activated). 6.5 - HOLD Allows you to put your Angelcare Monitor on HOLD. 1) Press the Settings icon to access the setting mode. - Page 22 6.6 - MUTE Allows you to activate the MUTE function. TO ACTIVATE MUTE: Press the Sound Icon. TO DEACTIVATE MUTE: Press the Sound Icon to deactivate. NOTE: The MUTE icon will blink on the Parent Unit. 6.7 - NIGHT LIGHT Allows you to use your monitor as a night light.
-
Page 23: Troubleshooting
TROUBLESHOOTING TAKING CARE OF YOUR RECHARGEABLE BATTERIES • Ensure that you fully charge your batteries for 10 hours before their first use. • To maintain maximum battery life it is recommended that you fully discharge your batteries periodically. Battery performance can be diminished by leaving the batteries constantly charging on the charging cradle. - Page 24 FALSE ALARMS • Turn OFF the Nursery Unit. • Verify the connection between Sensor Pad and Nursery Unit. Unplug and reconnect the cord. • Make sure there is no bedding between mattress and Sensor Pad. • If the crib has a spring or slat base, place a hardboard between the crib base and the Sensor Pad measuring at least 13”...
-
Page 25: Limited Warranty
® rechargeable TOUCHSCREEN MOVEMENT & SOUND MONITOR (model AC701) is free from any material and workmanship defects, for a period of one (1) year (Rechargeable batteries not included) from the date of the original purchase. If this monitoring system fails to... -
Page 26: Technical Specifications
(the exact frequency band varies among countries). Power Supply: 2 AA Alkaline batteries (not included) Hereby, Angelcare Monitors Inc, declares or 100-240V AC/5VDC Adapter this baby monitor is in compliance with the for Nursery Unit. essential requirements and other relevant provisions of Directive 1999/5/EC. -
Page 27: Français
PARA SU TRANQUILIDAD MANUAL DEL PROPIETARIO MONITOR DE MOVIMIENTOS Y SONIDOS CON PANTALLA TACTIL Modelo AC701... -
Page 28: Manual Del Propietario
ÍNDICE ADVERTENCIAS............... 57 REQUISITOS PARA LA INSTALACIÓN AC701 ......62 PASO 1 - Cargue la unidad para los padres (10 horas) ..63 PASO 2 - Instalación del detector de movimientos .....64 PASO 3 - Instalación de la unidad del bebé ......67 PASO 4 - Encendido del monitor ..........68... -
Page 29: Advertencias
ADVERTENCIAS 1. E S T E P R O D U C T O P U E D E PRECAUCIÓN R E E M P L A Z A R S U P E R V I S I Ó N RESPONSABLE DE UN ADULTO. - Page 30 un cortocircuito en los terminales de 15.8 Fuentes de calor: NO las coloque junto alimentación. Utilice ÚNICAMENTE las a fuentes de calor como radiadores, rejillas baterías recomendadas o equivalentes de calefacción, cocinas, televisores u otros (voltios y tamaño) y el adaptador correcto. dispositivos (incluidos amplificadores) Quite las baterías cuando el producto se que emitan calor.
- Page 31 Angelcare ® peligrosos o causar un cortocircuito que la alarma no sonará si continúa detectando podría ocasionar un riesgo de incendio o...
- Page 32 16. INSTRUCCIONES IMPORTANTES DE SEGURIDAD SOBRE EL USO DE BATERÍAS 16.1 Utilice SOLO el tipo y el tamaño de 16.9 N O intente recargar las baterías baterías especificados en el manual del suministradas o identificadas para su uso propietario. Si las baterías se reemplazan con este producto que no estén destinadas por un tipo incorrecto, existe riesgo de a ser cargadas.
- Page 33 WARNING (Solo para Norteamérica) 17.4 Este dispositivo cumple con la Parte 17.1 Las modificaciones no consentidas por 15 del Reglamento de la FCC y la licencia el fabricante pueden anular la autorización de Industry Canada excepto la(s) norma(s) de los usuarios para utilizar este dispositivo. RSS.
-
Page 34: Requisitos Para La Instalación Ac701
MONITOR DE MOVIMIENTOS REQUISITOS PARA LA Y SONIDOS CON PANTALLA TACTIL INSTALACIÓN Modelo AC701 INCLUYE: Unidad para los padres Unidad del bebé Base de carga Clip de cinturón recargable Detector de movimientos con protección 2 adaptadores de CA 2 baterías AAA... -
Page 35: Paso 1 - Cargue La Unidad Para Los Padres (10 Horas)
PASO 1 - CARGUE LA UNIDAD PARA LOS PADRES (10 HORAS) ADVERTENCIA Nunca utilice baterías alcalinas comunes en la unidad para los padres; podrían explotar. 1) Deslice el botón para destrabar y abrir la tapa del compartimiento de la batería. Inserte las baterías recargables (incluidas) como se muestra en la imagen. -
Page 36: Paso 2 - Instalación Del Detector De Movimientos
PASO 2 - INSTALACIÓN DEL DETECTOR DE MOVIMIENTOS Protección de cables 1,2,3,4: Posición en el suelo Protección de cables 4: Contiene cinta adhesiva de doble cara para instalarlo debajo da la pata de la cuna Protección de cables 5: Para ponerla verticalmente entre soporte del colchón y Detector de movimientos con protección... - Page 37 2.2 SELECCIONE LA PATA DE LA CUNA QUE QUIERE USAR PARA ASEGURAR LA PROTECCIÓN DE CABLES RECOMENDADO 1) Utilize la pata de la cuna al lado de la pared y más cerca a la unidad de bebé (imagen 1). Si la unidad de bebé está...
- Page 38 8 cm 6) Coloque la sexta protección a una distancia de unos 8 cm (3 pulgadas) dell borde del soporte del colchón. 7) Junte las protecciónes de cable restantes ¡CLIC! que estarán colocadas en el suelo. 8) Tire para entesar el cable y asegúrese que no haya partes flojas.
-
Page 39: Paso 3 - Instalación De La Unidad Del Bebé
PASO 3 - INSTALACIÓN DE LA UNIDAD DEL BEBÉ 1) Desenrosque la tapa del compartimiento de la batería e inserte 2 baterías AA alcalinas (no se incluyen). 2) Coloque la unidad del bebé a una distancia mínima de 0.9 m (3 pies) de la cuna. -
Page 40: Paso 4 - Encendido Del Monitor
PASO 4 - ENCENDIDO DEL MONITOR 1) Pulse el botón de encendido/apagado ON/OFF de la unidad para los padres para activar y mostrar el modo normal. 2) Pulse el botón del “ala” izquierda de la unidad del bebé y manténgalo presionado durante 2 segundos. -
Page 41: Paso 5 - Prueba Y Conocimiento Del Monitor
PASO 5 - PRUEBA Y CONOCIMIENTO DEL MONITOR El monitor Angelcare se puede utilizar con las configuraciones preprogramadas de ® fábrica o puede personalizar las configuraciones según su preferencia. IMPORTANTE NOTA: Ninguno de los En el modo de Configuración, se cambios y ajustes que se efectúen en el modo de... - Page 42 SUSPENSIÓN DE LA ALARMA Pulse el botón de Pulse cualquier Pausa de la unidad botón de la del bebé (vea el unidad para Paso 6.5). los padres para Pausar la unidad Mantenga presionado el (vea el Paso 6.5). botón del “ala” izquierda durante dos segundos Vuelva a colocar para apagar la unidad.
- Page 43 5.2 - SONIDO Nivel 0 PARA AJUSTAR EL SONIDO: Nivel 1 Suba el nivel de Pulse los botones (+) o (–) para ajustar volumen (+). el nivel de volumen. Nivel 2 Baje el nivel de volumen (-). NOTA: Nivel 3 Al nivel L0 la barra de nivel aún aparecerá...
- Page 44 AHORA PUEDE UTILIZAR SU MONITOR El monitor Angelcare se puede utilizar con las configuraciones preprogramadas de ® fábrica o puede personalizar las configuraciones según su preferencia. CONFIGURACIONES PREDETERMINADAS Modo sonido: ACTIVADO (ON) Botones de control de volumen del altavoz: Nivel 3 (de 5)
-
Page 45: Paso 6 - Activación Y Desactivación
PASO 6 - ACTIVACIÓN Y DESACTIVACIÓN DE FUNCIONES ADICIONALES MULTIFUNCIONAL El monitor Angelcare es multifuncional. Puede usarse en diferentes combinaciones ® según sus necesidades. SONIDOS Y MOVIMIENTOS: Le permite detectar LOS MOVIMIENTOS Y LOS SONIDOS del bebé al combinar la unidad para los padres y el detector de movimientos. - Page 46 6.1 - ACTIVACIÓN DE VOZ (VOX) O MODO DE SONIDO CONTINUO Le permite seleccionar la forma de monitorear el sonido: VOX (la activación de voz capta el sonido según el nivel de sensibilidad programado) o continuo (el monitoreo de sonido permanece activado, captando todos los sonidos). 1) Pulse el ícono de VOX para activar o desactivar a función VOX.
- Page 47 6.3 - CONTROL DE TEMPERATURA PARA CAMBIAR LA UNIDAD DE MEDIDA: 1) Pulse el ícono de configuración para acceder al modo de configuración. 2) Pulse el ícono de configuración de temperatura. 3) Pulse el botón para hablar en la unidad para los padres para cambiar de grados Celsius a Fahrenheit.
- Page 48 En el modo de configuración, no se transmite ningún sonido o alarma a la unidad para los padres, a excepción de la alarma de movimiento (si esta función ya estaba activada). 6.5 - PAUSA Le permite poner el monitor Angelcare en PAUSA. 1) Pulse el ícono de configuración para acceder al modo de configuración.
- Page 49 6.6 - SILENCIO Le permite activar la función SILENCIO. PARA ACTIVAR LA FUNCIÓN SILENCIO: Presione el ícono de sonido. ACTIVADO DESACTIVADO (OFF) (ON) PARA DESACTIVAR LA FUNCIÓN SILENCIO: Pulse el ícono de sonido para desactivar la función. NOTA: En la unidad para los padres, parpadeará...
-
Page 50: Resolución De Problemas
RESOLUCIÓN DE PROBLEMAS CUIDADO DE LAS BATERÍAS RECARGABLES • Asegúrese de cargar completamente las baterías durante 10 horas antes de usar la unidad por primera vez. • Para mantener la máxima duración de la batería es conveniente descargarla completamente en forma periódica. Si se deja la batería constantemente cargándose en el cargador, se puede reducir su rendimiento. - Page 51 FALSAS ALARMAS • Apague la unidad del bebé. • Verifique la conexión entre el detector de movimientos y la unidad del bebé. Desenchufe y vuelva a conectar el cable. • Asegúrese de que no haya ropa de cama entre el colchón y el detector de movimientos. •...
-
Page 52: Garantía Limitada
La garantía también excluye toda responsabilidad que no se mencione anteriormente. No se otorga ninguna otra garantía. Esta garantía no cubre productos ni accesorios que no sean de marca Angelcare ® ni problemas derivados de un uso no acorde a las instrucciones del producto, del... -
Page 53: Especificaciones Técnicas
(pida más información a las autoridades locales). CUMPLIMIENTO CON LA DIRECTIVA ERP SUDÁFRICA – BRASIL – ECUADOR – UNIÓN EUROPEA – REINO UNIDO Use solamente la fuente de alimentación de la marca Angelcare – número de modelo: T05005V001/ ®... - Page 54 www.angelcarebaby.com...
Need help?
Do you have a question about the AC701 and is the answer not in the manual?
Questions and answers