Table of Contents
Advertisement
Quick Links
Advertisement
Table of Contents

Related Manuals for Pro-Ject Audio Systems SIGNATURE 10


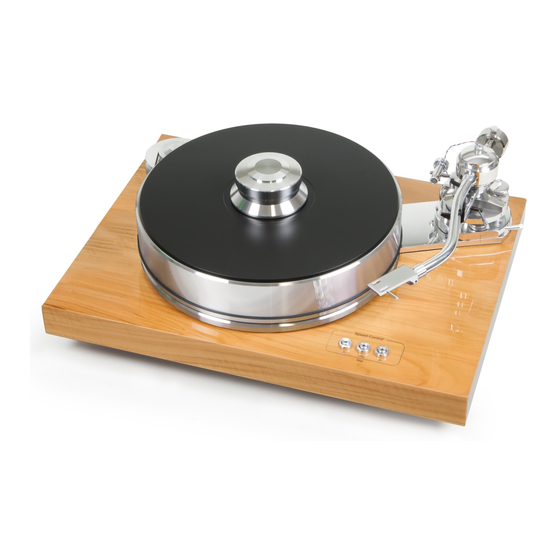
Summary of Contents for Pro-Ject Audio Systems SIGNATURE 10
- Page 1 INSTRUCTIONS FOR USE Pro-Ject SIGNATURE 10...
-
Page 2: Safety Instructions
The product shall not be used in damp or wet locations, next to a bathtub, sink, swimming pool or any other similar conditions. Keep plastic bags away from children to prevent any risk of suffocation. © Pro-Ject Audio Systems · Pro-Ject SIGNATURE 10 · Revision 2015.07.07... -
Page 3: Table Of Contents
7. Mounting distance adjustment 8. Leveling the turntable 9. Connecting the turntable, starting the motor, changing the speed 10. Technical specifications 11. Troubleshooting, warranty, service 12. Dimensions, exploded view of the packaging © Pro-Ject Audio Systems · Pro-Ject SIGNATURE 10 · Revision 2015.07.07... -
Page 4: Product Illustrations
© Pro-Ject Audio Systems · Pro-Ject SIGNATURE 10 · Revision 2015.07.07... -
Page 5: Control, Features, Connections
(Together with basic counterweight it balances cartridge with weights from 7,5 to 20 grams) Spirit level Tool for correct cartridge assembly Signature record puck Cartridge alignment protractor Universal power supply Instructions for use © Pro-Ject Audio Systems · Pro-Ject SIGNATURE 10 · Revision 2015.07.07... -
Page 6: Set-Up
The platter is floating on magnets. Take care not to damage the magnet when putting the platter on the shaft. © Pro-Ject Audio Systems · Pro-Ject SIGNATURE 10 · Revision 2015.07.07... -
Page 7: Drive Belt Installation
Do not stretch the belt too much. Please note: We recommend to use the record player without a mat on the platter. © Pro-Ject Audio Systems · Pro-Ject SIGNATURE 10 · Revision 2015.07.07... -
Page 8: Tonearm Assembly
Insert the connector (9) carefully into the socket on the top of the tonearm. Positioning pin must be directed to the counterweight. When the connector is inserted, secure it by screwing the locknut clockwise. © Pro-Ject Audio Systems · Pro-Ject SIGNATURE 10 · Revision 2015.07.07... -
Page 9: C) Headshell Installation
Put the counterweight (7) on the support rod. Tighten the locking screw gradually and put the shaft entry into thread groove. Tighten the locking screw. A correction of counterweight’s weight is possible by the additional counterweight which is tightened by the set screw. © Pro-Ject Audio Systems · Pro-Ject SIGNATURE 10 · Revision 2015.07.07... -
Page 10: Operating And Calibration
R- • • Blue left channel L- For correct cartridge alignment, use the two-point cartridge alignment protractor provided with SIGNATURE 10 accessories. If unfamiliar with two-point setup, please refer to your dealer. Tonearm details: • Effective length = 254mm (10”) (Distance between cartridge needle and the vertical rotation axis of the tonearm) •... - Page 11 For correct position of the cartridge in headshell grooves, use the small tool made out of transparent plexiglass. Please note that this tool is only useable for Pro-Ject Audio Systems‘ Signature tonearm headshells. Step 1: Place the tool with groove to the headshell as shown.
-
Page 12: Vertical Tracking Force Adjustment (Vtf)
VTF, away will reduce VTF. In order to avoid damage of the cartridge, all cartridge movements must be done in upper tonearm lift position. Repeat the measuring procedure until you achieved the correct VTF. © Pro-Ject Audio Systems · Pro-Ject SIGNATURE 10 · Revision 2015.07.07... -
Page 13: Setting Range Of The Counterweight
If the additional weight is placed unsymmetrically (as shown in the picture bellow, 12mm visible part from the rear side), it can balance cartridges with weight of 17 to 20 grams. © Pro-Ject Audio Systems · Pro-Ject SIGNATURE 10 · Revision 2015.07.07... -
Page 14: Vertical Tracking Angle Adjustment (Vta)
VTA locking screws in the tonearm base just enough to allow vertical movement of the arm pillar without force. By turning VTA adjustment screw set the correct vertical tracing angle. Carefully retighten VTA locking screws without applying excessive force which would deform the arm pillar. © Pro-Ject Audio Systems · Pro-Ject SIGNATURE 10 · Revision 2015.07.07... -
Page 15: Anti-Skating Assembly And Adjustment
Put the eye of the anti-skating thread around the hole for the HOOK SCREW and screw the HOOK SCREW into the tonearm through the eye of the anti-skating thread as shown in the illustration below. © Pro-Ject Audio Systems · Pro-Ject SIGNATURE 10 · Revision 2015.07.07... - Page 16 Tonearm downforce: Anti-skating groove: Lower than 13 mN or 1.3 grams groove from bearing 13–18 mN or 1.3–1.8 grams groove from bearing 18–25 mN or 1.8–2.5 grams groove from bearing © Pro-Ject Audio Systems · Pro-Ject SIGNATURE 10 · Revision 2015.07.07...
-
Page 17: Azimuth Adjustment
Correct position can be checked from the front view, preferably with needle placed on a mirror which is placed on platter. Examples of incorrect azimuth setup Too much left angle: Too much right angle: The correct position is 100% perpendicular to the record. © Pro-Ject Audio Systems · Pro-Ject SIGNATURE 10 · Revision 2015.07.07... -
Page 18: Mounting Distance Adjustment
Additional this feature opens the possibility to use different alignment tools. There are different versions of alignment tools for setting and optimization of null points. With different settings, you can achieve small sound variations. © Pro-Ject Audio Systems · Pro-Ject SIGNATURE 10 · Revision 2015.07.07... -
Page 19: Leveling The Turntable
It is advisable to check level from several positions on the subchassis. To achieve a perfect balance is supplied Pro-Ject Audio Systems Level It © Pro-Ject Audio Systems · Pro-Ject SIGNATURE 10 · Revision 2015.07.07... -
Page 20: Connecting The Turntable, Starting The Motor, Changing The Speed
33 rpm or 45 rpm. When you want to stop the turntable, or when it is not in use, switch it to STANDBY mode by pressing the button labeled Stby. © Pro-Ject Audio Systems · Pro-Ject SIGNATURE 10 · Revision 2015.07.07... -
Page 21: Technical Specifications
15 V DC/1.6 A, 90-264 V AC, 47 - 63Hz Dimensions (W x H x D) 475 x 354 x 195mm Weight (without box) 23 kg Weight (with box) 40 kg © Pro-Ject Audio Systems · Pro-Ject SIGNATURE 10 · Revision 2015.07.07... -
Page 22: Troubleshooting, Warranty, Service
This guide was produced by: Pro-Ject Audio Systems notice as deemed necessary to uphold the ongoing © Copyright 2015. All rights reserved. process of technical development. © Pro-Ject Audio Systems · Pro-Ject SIGNATURE 10 · Revision 2015.07.07... -
Page 23: Dimensions, Exploded View Of The Packaging
© Pro-Ject Audio Systems · Pro-Ject SIGNATURE 10 · Revision 2015.07.07...
Need help?
Do you have a question about the SIGNATURE 10 and is the answer not in the manual?
Questions and answers