
Related Manuals for Delta NovoConnect B360


Summary of Contents for Delta NovoConnect B360
-
Page 1: User Manual
NovoConnect™ B360 Wireless Presentation & Collaboration System User Manual Version 1.2.1 Copyright © 2013 DELTA Electronics, Inc. All rights reserved. Page 1... -
Page 2: Table Of Contents
1. GETTING STARTED ................4 Package contents ..................4 Setting up your NovoConnect B360 device ..........5 1.2.1 How to connect your NovoConnect B360 device............5 1.2.2 The NovoConnect Home Screen ................. 6 Software download and installation ............7 2. WI-FI SETUP ..................10 Hotspot Mode .................. - Page 3 3.3.3.2 Role change, screen preview, and four-way split screen ............... 59 3.3.3.3 Pause, resume, and disconnect ....................61 3.3.3.4 Reset and rename local device ..................... 62 3.4 Presenting with the NovoConnect B360 device ........... 63 4. B360 CONFIGURATION ..............66 5. SPECIFICATIONS ................... 71 6.
-
Page 4: Getting Started
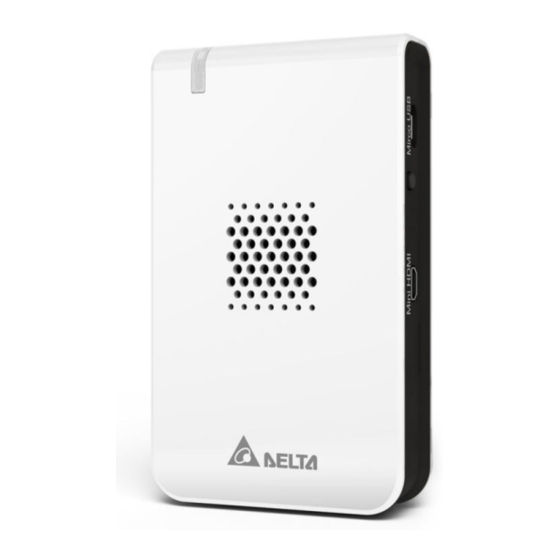
1. Getting Started 1.1 Package contents (a) NovoConnect B360 main unit (b) Micro-HDMI-to-HDMI cable (c) Micro-USB-to-USB power cable (d) USB power adapter (e) NovoConnect Mount Copyright © 2013 DELTA Electronics, Inc. All rights reserved. Page 4... -
Page 5: Setting Up Your Novoconnect B360 Device
3. At this stage the NovoConnect B360’s green LED power indicator should be illuminated. (See above illustration for Power LED location.) Note: In this manual, your NovoConnect B360 will also be referred to as B360 for short. Note: You may connect an optional USB mouse or a memory drive to the USB port. -
Page 6: The Novoconnect Home Screen
1.2.2 The NovoConnect Home Screen The NovoConnect B360 device will power up with the below display after steps 1 and 2 listed above. This display is referred to as the “NovoConnect home screen” or just the “home screen” in this document. The home screen is generated by the presentation management software, in the B360 device, which is also known as the remote viewer. -
Page 7: Software Download And Installation
Education Edition. 1.3 Software download and installation The NovoConnect B360 device supports connections of up to 64 concurrent participants across a mix of PC and tablet devices. Each participant’s device will need to set up a connection through the presentation application, Remote Viewer, residing on the B360 to make a presentation. - Page 8 Follow the installation instructions on the PC to complete the installation and allow all security permissions for NovoConnect Desktop Streamer and all of its subcomponents. Copyright © 2013 DELTA Electronics, Inc. All rights reserved. Page 8...
- Page 9 On Android tablets, the Android version of NovoPresenter is required. You can download and install it from the Google Playstore. Once you have downloaded and installed the presentation software, you are ready to make a wireless presentation from your tablet device. Copyright © 2013 DELTA Electronics, Inc. All rights reserved. Page 9...
-
Page 10: Wi-Fi Setup
C) Neither – for when your content is residing on your microSD card The NovoConnect B360 defaults to start up in Wi-Fi Hotspot mode, which is the most direct way to create a wireless presentation without using a Wi-Fi access point (AP). If this is your preferred mode, go to section 2.1 “Hotspot Mode”... -
Page 11: Client Mode
Note: When operating in Hotspot Mode, all participating presentation devices must be connected to the same NovoConnect B360 Wi-Fi hotspot. Note: Up to eight simultaneous participants are supported in Hotspot Mode. 2.2 Client Mode In this mode, the B360 device functions as a Wi-Fi client and a Wi-Fi AP is needed for network connectivity. -
Page 12: Making A Presentation
3. Making a Presentation The NovoConnect B360 device supports up to 64 concurrent participants across a mix of PC and tablet devices. To make a presentation, each participant’s device will need to connect to the B360 and join the presentation group hosted by the B360. There are four key features that help facilitate smooth collaboration and coordination of presentations using the NovoConnect: 1) A participant list is included with the individuals’... -
Page 13: Step 1: Presentation Software Configuration
If PIN is required for a presentation group, check the “PIN required” box and enter the four-digit PIN shown on the home screen. Click to expand the Settings tab to access additional settings options. Copyright © 2013 DELTA Electronics, Inc. All rights reserved. Page 13... -
Page 14: Step 2: Connect To Your B360 Device
TV display. You can also slide the PIN requirement switch to OFF or ON to enable the use of an access PIN code for the presentation group. Copyright © 2013 DELTA Electronics, Inc. All rights reserved. Page 14... -
Page 15: Step 3: Make A Presentation
There may be situations in which you want to write, highlight, mark, record video or cut-and-paste portions of your presentation materials directly on the desktop screen. Delta provides a simple-to-use tool for all of these functions – NovoScreenote. You can download the Windows PC or Mac PC versions of NovoScreenote from http://www.deltaww.com/EduSolution. - Page 16 2. The symbol indicates that the participant denies screen preview by the host. 3. If you do not see the symbol, the participant allows screen preview by the host. Copyright © 2013 DELTA Electronics, Inc. All rights reserved. Page 16...
-
Page 17: Role Change, Screen Preview, And Four-Way Split Screen
*: In the Education Edition, host preview is always allowed as all participants will automatically allow screen preview and will not appear. Mouse over to highlight and click on the middle part of the entry for Jennifer. Copyright © 2013 DELTA Electronics, Inc. All rights reserved. Page 17... -
Page 18: Pause, Resume, And Disconnect
(Note: Education Edition does not have the screen preview control tab or the symbol.) Function Description To pause/resume a presentation: Click the tab to bring up the presentation control page. Copyright © 2013 DELTA Electronics, Inc. All rights reserved. Page 18... - Page 19 The first to respond to the prompt will assume the host role. Copyright © 2013 DELTA Electronics, Inc. All rights reserved. Page 19...
-
Page 20: Presenting With Ios Tablet (Ipad)
3.2.1 Step 1: Connect to your B360 device There are two ways to connect to your B360 device: 1. Connect to your B360 device automatically via QR code. 2. Connect to your B360 device manually. Copyright © 2013 DELTA Electronics, Inc. All rights reserved. Page 20... -
Page 21: Connect To Your B360 Device Automatically Via Qr Code
NovoPresenter will automatically login to your B360. Should automatic login fail, follow the manual configuration option in section 3.2.1.2 Connect to your B360 device manually. QR Code Scan Area Copyright © 2013 DELTA Electronics, Inc. All rights reserved. Page 21... -
Page 22: Connect To Your B360 Device Manually
If you need to configure login information manually before connecting to your B360, this is the preferred connection option. After launching the NovoPresenter app, tap the tab (as seen in the screenshot below) to access the configuration options. Copyright © 2013 DELTA Electronics, Inc. All rights reserved. Page 22... - Page 23 (Note: Education Edition does not have the screen preview control tab or the symbol.) Function Description Manual configuration option: Toggle the QR Code / Manual Inputs switch to the Manual Inputs position. Copyright © 2013 DELTA Electronics, Inc. All rights reserved. Page 23...
- Page 24 If you are the first participant, this will start a presentation group on your B360. If you are not the first participant, you will be joining a presentation group. Copyright © 2013 DELTA Electronics, Inc. All rights reserved. Page 24...
-
Page 25: Step 3: Make A Presentation
Tap this tab to present an image stored on your iPad. Tap this tab to present a document stored on your iPad. Tap this tab to present a Web page. Copyright © 2013 DELTA Electronics, Inc. All rights reserved. Page 25... -
Page 26: Presenting An Image
3.2.3.1 Presenting an image To import presentation files to an iPad, please refer to the iPad user manual. A sample iTunes screen is presented in the diagram below. Copyright © 2013 DELTA Electronics, Inc. All rights reserved. Page 26... - Page 27 To return to the Image Thumbnails page, tap the tab. To use the on-screen annotation tools, tap the tab. Copyright © 2013 DELTA Electronics, Inc. All rights reserved. Page 27...
-
Page 28: Presenting A Document (Local Storage)
If you wish to sort the folder list into a desired order, tap the Sort by… tab on the drop-down menu, then select one of the following options: - Sort by Name (default) - Sort by Date - Sort by Extension Copyright © 2013 DELTA Electronics, Inc. All rights reserved. Page 28... -
Page 29: Presenting A Document (With Dropbox)
Scroll Bar 3.2.3.2 Presenting a document (with Dropbox) (Note: Education Edition does not have the screen preview control tab or the symbol.) Copyright © 2013 DELTA Electronics, Inc. All rights reserved. Page 29... - Page 30 Dropbox list (you will be returned to your Dropbox list’s home directory). You can tap the tab at any time to refresh the screen contents. Copyright © 2013 DELTA Electronics, Inc. All rights reserved. Page 30...
- Page 31 If you need to unlink the NovoPresenter app from your Dropbox account, tap and hold the tab for a few seconds. When the Request Confirmation appears, tap Yes to proceed. Copyright © 2013 DELTA Electronics, Inc. All rights reserved. Page 31...
-
Page 32: Presenting With A Browser
Set your B360 to Client Mode: Set your B360’s Wi-Fi mode to Client Mode and connect to a router with Internet access. Please refer to the Remote Viewer chapter for more details. Copyright © 2013 DELTA Electronics, Inc. All rights reserved. Page 32... - Page 33 Note: The bookmark list may initially be empty. You can add a Web page to the bookmark list at any time while browsing and presenting Web pages. Copyright © 2013 DELTA Electronics, Inc. All rights reserved. Page 33...
-
Page 34: Annotation
NovoPresenter provides an on-screen annotation tool for the presenter to annotate the presentation material directly without changing the original. You can enable the annotation tool by toggling the tab on, as shown in the screenshot below. Copyright © 2013 DELTA Electronics, Inc. All rights reserved. Page 34... -
Page 35: Step 4: Presentation Management
3.2.4 Step 4: Presentation management Once you are done starting/joining a presentation group, you are ready to make a presentation and collaborate with other participants. A sample screen view is provided below. Copyright © 2013 DELTA Electronics, Inc. All rights reserved. Page 35... -
Page 36: Role Assignment
Example 2: Kevin, Amber, Jennifer, and Katy are the four presenters, and there are currently 6 participants. (For non-host participants in Corporate Edition only) Toggle between to accept or deny screen preview by the host, respectively. Copyright © 2013 DELTA Electronics, Inc. All rights reserved. Page 36... -
Page 37: Role Change, Screen Preview, And Four-Way Split Screen
5. Tap one of the four boxes (#1-4) in the split screen selection area to allow Amber to perform a presentation on one of the four boxes of the four-way split screen. Copyright © 2013 DELTA Electronics, Inc. All rights reserved. Page 37... - Page 38 No button to reject the host assignment. To perform screen preview: Tap the tab to show the participant list. The participant Amber does not have an icon, indicating that she has allowed screen preview. Copyright © 2013 DELTA Electronics, Inc. All rights reserved. Page 38...
- Page 39 To perform a four-way split screen presentation: Tap the tab to show the participant list. Select a participant to make a presentation. In this example, Amber has been selected. Copyright © 2013 DELTA Electronics, Inc. All rights reserved. Page 39...
-
Page 40: Pause, Resume, And Disconnect
(Note: Education Edition does not have the screen preview control tab or the symbol.) Function Description To pause a presentation: Tap the tab to enter the presentation control page. Copyright © 2013 DELTA Electronics, Inc. All rights reserved. Page 40... -
Page 41: Reset
(Note: Education Edition does not have the screen preview control tab or the symbol.) Function Description To perform a reset: First tap the tab and tap the arrow of the Device’s Reset window. Copyright © 2013 DELTA Electronics, Inc. All rights reserved. Page 41... - Page 42 Tap the Quick Reset to reset the presentation group to allow a presentation group to start over again. Tap the Full Reset button to reset the NovoConnect B360 device. The B360 device will restart automatically. Conflicts may occur when multiple participants simultaneously attempt to reset the presentation group or the B360.
-
Page 43: Presenting With Android Tablet
3.3.1 Step 1: Connect to your B360 Device There are two ways to connect to your B360 device: 1. Connect to your B360 device automatically via QR Code. 2. Connect to your B360 device manually. Copyright © 2013 DELTA Electronics, Inc. All rights reserved. Page 43... -
Page 44: Connect To Your B360 Device Automatically Via Qr Code
NovoPresenter will automatically login to your B360. Should automatic login fail, follow the manual configuration option in the section 3.3.1.2 Connect to your B360 device manually. QR Code Scan Area Copyright © 2013 DELTA Electronics, Inc. All rights reserved. Page 44... -
Page 45: Connect To Your B360 Device Manually
If you need to configure login information manually before connecting to your B360, this is the preferred connection option. After launching the NovoPresenter app, tap the tab (as seen in the screenshot below) and access the configuration options. Copyright © 2013 DELTA Electronics, Inc. All rights reserved. Page 45... - Page 46 (Note: Education Edition does not have the screen preview control tab or the symbol.) Function Description Manual configuration option: Toggle the QR code / Manual Inputs switch to the Manual Inputs position. Copyright © 2013 DELTA Electronics, Inc. All rights reserved. Page 46...
- Page 47 TV. You can slide the PIN requirement switch to OFF or ON to disable or enable usage of a PIN code. Copyright © 2013 DELTA Electronics, Inc. All rights reserved. Page 47...
-
Page 48: Step 2: Make A Presentation
One quick way to import presentation files onto an Android tablet is to connect to a computer via USB cable. Drag and drop photos and documents onto the tablet as you would with a USB storage device. A sample screen is provided below. Copyright © 2013 DELTA Electronics, Inc. All rights reserved. Page 48... - Page 49 Example: Tap the ancient building image thumbnail. Note: Tap the tab or the back key at any time to return to the previous folder. Tap the tab at any time to refresh the screen. Copyright © 2013 DELTA Electronics, Inc. All rights reserved. Page 49...
-
Page 50: Presenting A Document (Local Storage)
3.3.2.2 Presenting a document (local storage) (Note: Education Edition does not have the screen preview control tab or the symbol.) Copyright © 2013 DELTA Electronics, Inc. All rights reserved. Page 50... - Page 51 Scroll Bar To return to the Document List page, tap the tab. To use the on-screen annotation tools, tap the tab. Copyright © 2013 DELTA Electronics, Inc. All rights reserved. Page 51...
-
Page 52: Presenting A Document (With Dropbox)
Note: If your Android tablet is disconnected from your B360 during the Dropbox setup, simply reconnect to your B360 using the procedures in “Step 2: Connect to your B360 device”. Copyright © 2013 DELTA Electronics, Inc. All rights reserved. Page 52... - Page 53 Scroll Bar To return to the Document List page, tap the tab. To use the on-screen annotation tools, tap the tab. Copyright © 2013 DELTA Electronics, Inc. All rights reserved. Page 53...
-
Page 54: Presenting A Document (With A Browser)
. It will light up blue. Select one of the three options to access a Web page: - Go to… (enter URL address [default]) - Snap a QR code - Browse My Bookmarks (Web site bookmarks) Copyright © 2013 DELTA Electronics, Inc. All rights reserved. Page 54... - Page 55 To add a Web page to the bookmark list, tap the tab. To return to Browse My Bookmarks, tap the tab. To use the on-screen annotation tools, tap the tab. Copyright © 2013 DELTA Electronics, Inc. All rights reserved. Page 55...
-
Page 56: Annotation
Annotate with a blue marker Annotate with a black marker Annotate with a yellow transparent marker Change from annotation (writing) mode to touch panel (operation) mode Trash can Eraser Undo Copyright © 2013 DELTA Electronics, Inc. All rights reserved. Page 56... -
Page 57: Step 3: Presentation Management
To view all current participants who have joined the presentation group, tap the tab. (Note: Education Edition does not have the screen preview control tab or the symbol.) Copyright © 2013 DELTA Electronics, Inc. All rights reserved. Page 57... - Page 58 Example 2: Kevin, Amber, John, and Katy are the four presenters, and there are currently 6 participants. (For non-host users in Corporate Edition only) Toggle between to accept or deny screen preview by the host, respectively. Copyright © 2013 DELTA Electronics, Inc. All rights reserved. Page 58...
-
Page 59: Role Change, Screen Preview, And Four-Way Split Screen
The participant has 20+ seconds to tap the Yes button to accept the new role or tap the No button to reject. Copyright © 2013 DELTA Electronics, Inc. All rights reserved. Page 59... - Page 60 To perform a four-way split screen presentation: Tap the tab to show the participant list. Select a participant to make a presentation. In this example, Amber is selected. Copyright © 2013 DELTA Electronics, Inc. All rights reserved. Page 60...
-
Page 61: Pause, Resume, And Disconnect
To Pause a presentation: Tap the tab to enter the presentation control page. Pausing and resuming a presentation: While presenting, toggle between to pause and resume the presentation respectively. Copyright © 2013 DELTA Electronics, Inc. All rights reserved. Page 61... -
Page 62: Reset And Rename Local Device
Reset. Resetting: Tap Quick Reset to start a presentation group. Tap the Full Reset button to reset the NovoConnect B360 device. The B360 device will restart automatically. Conflicts may occur when multiple participants simultaneously attempt to reset the presentation group or the B360. -
Page 63: Presenting With The Novoconnect B360 Device
3) You can also save your presentation files in the local storage of your B360 or in your Dropbox online. Note: You need a USB mouse to operate the following steps. You are now ready to make a direct presentation with your B360. Copyright © 2013 DELTA Electronics, Inc. All rights reserved. Page 63... - Page 64 (Note: If you do not see the app list as shown on the left, click the home button , next click the apps button , and then click Remote Viewer Copyright © 2013 DELTA Electronics, Inc. All rights reserved. Page 64...
- Page 65 To return to Remove Viewer: Click the back key one or more times until the system bar disappears. Copyright © 2013 DELTA Electronics, Inc. All rights reserved. Page 65...
-
Page 66: B360 Configuration
4. B360 Configuration 4.1 B360 System Configuration Remote Viewer is the application software on the NovoConnect B360 device that hosts the presentation group. The main function of Remote Viewer is to manage and control all presentation sessions between the participant devices and the NovoConnect B360. In addition... - Page 67 Click Save to confirm the selection, or click Cancel to abort the selection. Settings: For more device settings for your B360, click the Settings button to access the Android system menu. Copyright © 2013 DELTA Electronics, Inc. All rights reserved. Page 67...
- Page 68 For all users that are connected to the B360 device, there is no screen preview control tab , and all participants will automatically allow screen preview as will not appear for any participant. Copyright © 2013 DELTA Electronics, Inc. All rights reserved. Page 68...
- Page 69 B360. 3. Click to access the device settings, reset, and device upgrade function as shown below. Copyright © 2013 DELTA Electronics, Inc. All rights reserved. Page 69...
- Page 70 Wi-Fi router with an Internet connection. Click . The computer will automatically check for the latest firmware upgrade for your device. If new upgrades are available, your B360 will automatically download and install them. Copyright © 2013 DELTA Electronics, Inc. All rights reserved. Page 70...
-
Page 71: Specifications
1024x768, 1280x800, or higher are recommended iOS Mobile Device Application Requirements Operating iOS 5.1 and above System Device Type iPad, iPad 2, iPad 3, iPad 4, iPad mini, and iPad Air Copyright © 2013 DELTA Electronics, Inc. All rights reserved. Page 71... -
Page 72: Troubleshooting
For your PC to link to NovoConnect, your PC must either have a built-in a Wi-Fi module or an external Wi-Fi adapter, and Wi-Fi must be enabled. If the NovoConnect B360 is set to Hotspot Mode (factory default mode), choose NovoConnect’s SSID from the available SSID list. - Page 73 NovoConnect’s output resolution to a 16:9 or 16:10 option). Try to set the display resolution on the NovoConnect B360 so that it has an aspect ratio that either matches that of your device or is as close to your device’s screen aspect ratio as possible.
-
Page 74: Safety Information
To prevent the risk of electric shock, do not operate this device near water or in environments of high moisture. Do not disassemble or try to repair this device by yourself. Contact your local Delta service center for assistance. -
Page 75: Copyright Information
VGA and XGA are registered trademarks of International Business Machines Corporation. Product names, logos, brands, and other trademarks featured or referred to in this materials are the property of their respective trademark holders. Copyright © 2013 DELTA Electronics, Inc. All rights reserved. Page 75... -
Page 76: Index
25. Mac 26. mobile 27. mouse 28. NovoConnect 29. NovoConnect Desktop Streamer 30. NovoPresenter 31. PC 32. PIN 33. participant 34. power 35. presentation 36. presenter 37. preview 38. projector Copyright © 2013 DELTA Electronics, Inc. All rights reserved. Page 76...