Table of Contents
Advertisement
Quick Links
Advertisement
Table of Contents

Subscribe to Our Youtube Channel
Related Manuals for ACTi CAM-6200


Summary of Contents for ACTi CAM-6200
-
Page 1: Hardware Installation
IP Speed Dome Hardware Installation Guide Ver. 061031 Model: CAM-6200/6220... -
Page 2: Copyright
Copyright This manual is the intellectual property of ACTi and is protected by copyright. All rights are reserved. No part of this document maybe reproduced or transmitted for any purpose by any means including electronic or mechanical without the official written permission from ACTi. -
Page 3: Fcc/Ce Regulation
and manuals without prior notice. FCC/CE Regulation NOTE: This equipment has been tested and found to comply with the limits for a Class A digital device, pursuant to Part 15 of the FCC Rules. These limits are designed to provide reasonable protection against harmful interference when the equipment is operated in a commercial environment. -
Page 4: Table Of Contents
Table of Contents PRECAUTIONS....................0-1 Copyright .............................0-1 Trademarks ..........................0-1 Liability............................0-1 FCC/CE Regulation ........................0-2 INTRODUCTION..................... 1-5 Package Contents ....................1-5 Features and Benefits..................1-6 Safety precautions ....................1-7 Warning indications for use ................1-7 Environmental requirements ................1-7 Precautions on installation ................. 1-8 H/W Installation Procedure ................ - Page 5 Appendix......................3-25 Camera ID Sep up..................... 3-25...
-
Page 6: Introduction
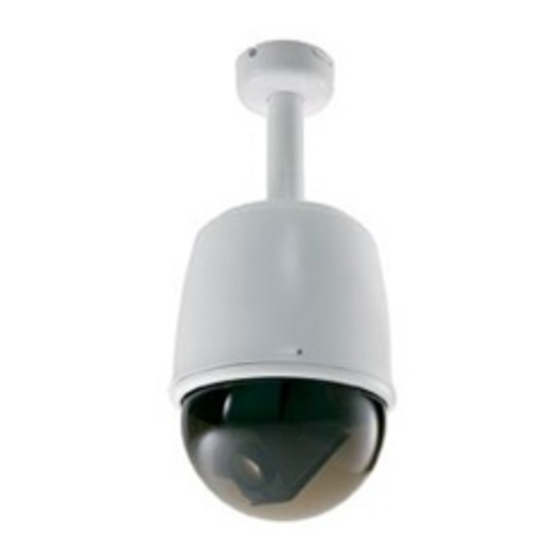
INTRODUCTION 1.1 Package Contents CAM-62xx SERIES Power Cord Warranty Card Cable Software CD Adapter (Indoor) -
Page 7: Features And Benefits
Remote control from any place at any time The CAM-62xx Series adopts SoC base embedded system and web server which enables remote control of the camera. Through ACTi bundled AP, you can pan/tilt/zoom the camera, set up motion detection to a specified area, perform tour monitoring, set up different video resolutions, etc. -
Page 8: Safety Precautions
1.3 Safety precautions Select a proper location and use safe hoist for installing speed dome cameras. Confirm that the hoist is capable of lifting to the installation position. Proper protective measures must be provided in the hoist, for protecting engineering staffs. Confirm that power supply is 110V/220V. -
Page 9: Precautions On Installation
1.6 Precautions on installation Basic requirements for installation Follow local regulations about installation safety request. Check out if accessories are complete. Optional accessories are required for different installation sites. Please contact your local distributors for proper installation accessories, so that the camera could be installed safely without causing danger. - Page 10 turn 90 degrees down vertically, then start horizontal scanning. This will last for 20-30 seconds. Speed dome camera will then stop at the Preset Position 1. On completion of these, the speed dome camera is in normal condition. Please keep the original packaging After unpacking the camera, take good care of the original packaging.
-
Page 11: W Installation Procedure
H/W Installation Procedure 2.1 Connections Indoor IP speed dome connection is different from the outdoor IP speed dome. Follow the description below to connect to respective apparatus. 2.1.1 Indoor connections 1. Analog Video-out connector Connect it to the video-in port of respective apparatus. The signal is 75Ω Composite Video Signal. -
Page 12: Outdoor Connections
speed of local network segment (10Base-T/100Base-TX Ethernet). The WAN port is for FTTH and connects to a xDSL or cable modem. 2.1.2 Outdoor connections 1. Analog Video-out connector Connect it to the video-in port of respective apparatus. The signal is 75Ω Composite Video Signal. -
Page 13: Speed Dome Set Up
2.2 Speed dome set up Follow the description below setup IP speed dome’s hardware camera ID, baud rate and protocol. AP (Streaming Video platform setup Speed dome setup Activator) setup Camera ID, baud rate and protocol setting in these 3 item should be the same for PTZ control function to work. - Page 14 ● Protocol and baud rate switch SW10 PELCO D-2400 PELCO P-4800 PELCO P-9600 (Recommended) EYEVIEW ● Camera ID address setting Please refer to the Appendix. A “Camera hardware ID setup” 2-13...
-
Page 15: Indoor H/W Installation Procedures
2.3 Indoor H/W Installation Procedures 2.3.1 Indoor installation Punching a hole in the ceiling: Remove the target ceiling first, then attach the hole-sticker supplied with the camera to the ceiling and make the desired hole accordingly with a proper tool. Installing the camera: Take out the camera upper casing, as shown below: Fit the upper casing into the ceiling as illustrated below:... - Page 16 Wiring After completion of the above works, connect the wires for video/DC12V Power Input/ LAN/WAN according to the instructions shown as following figure: On completion of the above steps, place the complete camera (except the dome cover), back to the ceiling as shown below: Electrification test Before connecting the power, make a final check to confirm correct wiring.
- Page 17 self-test. This routine consists of vertical scanning following by horizontal scanning. Then the camera automatically swings to Position 1. This concludes the initialization of self-test. Install the dome cover Finishing all the above, the transparent dome cover can be installed. Make sure the screws are driven tightly.
-
Page 18: Outdoor H/W Installation Procedures
2.4 Outdoor H/W Installation Procedures There are 4 kinds of outdoor application. And each of them requires two steps to install the outdoor IP speed dome. Please refer to the picture below to understand each application type. Then follow the procedure below to install it. 2.4.1 Understand Outdoor applications Outdoor Wall mount... -
Page 19: Install The Mount
Outdoor Corner mount Outdoor Housing outdoor Wall mount outdoor Corner bracket Outdoor Pole mount Outdoor Housing outdoor Wall mount outdoor Pole bracket 2.4.2 Install the mount The mounting wall must be strong enough for holding the camera. Minimum loading capacity should be at least 35 kg or above, for prevention of fall and personal injury. - Page 20 shown below: 170mm 200mm 114mm 140mm Drill 4 holes Ø 6.5mm: Use the 4 screws provided to fix the mount on the wall 2-19...
-
Page 21: Detailed Dimensions
2.5 Detailed dimensions 2.5.1 Outdoor Housing 2-20... -
Page 22: Outdoor Wall Mount
2.5.2 Outdoor Wall mount 2-21... -
Page 23: Outdoor Ceiling Mount
2.5.3 Outdoor Ceiling mount 2-22... -
Page 24: Outdoor Corner Mount
2.5.4 Outdoor Corner mount 3/4" PT 2-23... -
Page 25: Outdoor Pole Mount
2.5.5 Outdoor Pole mount These four holes are symmetrical to each 2-24... - Page 26 Appendix 3.1 Camera ID Sep up Symbol “○” in the following tables denote setting “ON” 1 2 3 4 5 6 7 8 3-25...
- Page 27 1 2 3 4 5 6 7 8 3-26...
- Page 28 1 2 3 4 5 6 7 8 3-27...
- Page 29 1 2 3 4 5 6 7 8 3-28...
- Page 30 1 2 3 4 5 6 7 8 3-29...
Need help?
Do you have a question about the CAM-6200 and is the answer not in the manual?
Questions and answers