Table of Contents
Advertisement
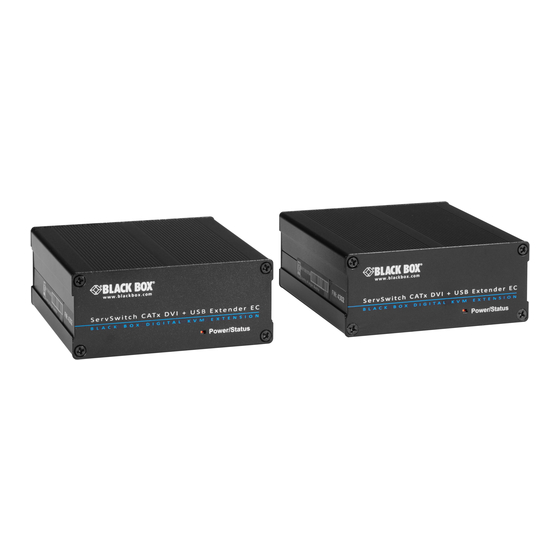
CATx DVI/HDMI + USB Extender EC
Provides Full HD and USB extension
up to 426 feet (130 m) over CATx.
Supports resolution up to 1920 x 1200.
Customer
Order toll-free in the U.S.: Call 877-877-BBOX (outside U.S.
Support
call 724-746-5500) • FREE technical support 24 hours a day, 7 days
Information
a week: Call 724-746-5500 or fax 724-746-0746
www.blackbox.com • info@blackbox.com
ACX300
ACX300-T
ACX300-R
Advertisement
Table of Contents

Related Manuals for Black Box ACX300


Summary of Contents for Black Box ACX300
- Page 1 ACX300 ACX300-T ACX300-R CATx DVI/HDMI + USB Extender EC Provides Full HD and USB extension up to 426 feet (130 m) over CATx. Supports resolution up to 1920 x 1200. Customer Order toll-free in the U.S.: Call 877-877-BBOX (outside U.S.
-
Page 2: Trademarks Used In This Manual
Disclaimer Black Box Network Services shall not be liable for damages of any kind, including, but not limited to, punitive, consequential or cost of cover damages, resulting from any errors in the product information or specifications set forth in this document and Black Box Network Services may revise this document at any time without notice. -
Page 3: Instrucciones De Seguridad
FCC RFI and NOM Statements FEDERAL COMMUNICATIONS COMMISSION AND INDUSTRY CANADA RADIO FREQUENCY INTERFERENCE STATEMENTS This equipment generates, uses, and can radiate radio-frequency energy, and if not installed and used properly, that is, in strict accordance with the manufacturer’s instructions, may cause inter ference to radio communication. It has been tested and found to comply with the limits for a Class A computing device in accordance with the specifications in Subpart B of Part 15 of FCC rules, which are designed to provide reasonable protection against such interference when the equipment... - Page 4 NOM Statement 4. Todas las instrucciones de operación y uso deben ser seguidas. 5. El aparato eléctrico no deberá ser usado cerca del agua—por ejemplo, cerca de la tina de baño, lavabo, sótano mojado o cerca de una alberca, etc. 6.
- Page 5 NOM Statement 16. El cable de corriente deberá ser desconectado del cuando el equipo no sea usado por un largo periodo de tiempo. 17. Cuidado debe ser tomado de tal manera que objectos liquidos no sean derramados sobre la cubierta u orificios de ventilación. 18.
-
Page 6: Table Of Contents
Table of Contents Table of Contents 1. Specifications ....................8 2. Overview ....................9 Introduction .....................9 Features ....................9 What’s Included ..................9 Hardware Description ................12 2.4.1 Transmitter (Local Unit) .............12 2.4.2 Receiver (Remote Unit)..............14 3. Installation ....................16 Cable Requirements ................16 Installing the Transmitter and the Receiver ..........17 4. - Page 7 Master View Item “W” — Console Extender List ....29 5.8.4 Master View Item “S” — PC Extender List .......30 5.8.5 Master View Item “H” — Multi-Head Config ......30 Switching Between Different Computers ..........32 6. Troubleshooting ....................33 Contacting Black Box ................33 Shipping and Packaging.................33 724-746-5500 | blackbox.com Page 7...
-
Page 8: Specifications
Chapter 1: Specifications 1. Specifications Approvals CE, CSA, FCC, RoHS2, TUV, UL , WEEE ® Connectors Transmitter: (2) HDMI F with HDMI to DVI-D adapter cable, (1) USB Type B F, (1) RJ-45 F, (1) 2.1-mm barrel connector; Receiver: (1) HDMI F with HDMI to DVI-D adapter cable, (4) USB Type A F, (1) RJ-45 F, (1) 2.1-mm barrel connector... - Page 9 Chapter 1: Specifications Heat Dissipation 40.91 BTU/hr. maximum Indicators Each unit (Transmitter or Receiver): (1) Power/Status LED Environmental Operating Temperature: 32 to 113° F (0 to 45° C); Storage Temperature: -4 to +158° F (-20 to +70° C); Operating Humidity: 80% noncondensing;...
-
Page 10: Overview
- ACX300-DRM (Din Rail Mount Kit for a single unit). - ACX300-RMK (19" Rackmount kit for up to 4 units). • Extender pair (ACX300-T and ACX300-R) works with a network switch to connect several PCs with several monitors, or to control several PCs from one workstation. - Page 11 Chapter 2: Overview ACX300: • (1) transmitter • (1) receiver • (2) HDMI to DVI-D adapter cables • (2) 12-VDC, 1-A power supplies w/US, UK, EU, and AU power clips • (2) packs of (4) rubber feet • (2) packs of self-adhesive pads •...
-
Page 12: Hardware Description
Chapter 2: Overview ACX300-U2: • Enables USB 2.0 External Storage Device Support ACX3-SW: • Receiver Switching License NOTE: The ACX3xx can also support matrix switching if you purchase the ACX3-SW switching license. The license is applied to the receiver only and will allow it to communicate and switch among multiple transmitters. - Page 13 Chapter 2: Overview Table 2-1. Transmitter’s components. Number Component Description Power Status LED (not shown Lights when power to the in Figure 2-1, located on the transmitter is on. front panel of the transmitter) (1) HDMI connector Connects to the PC. (1) barrel connector Links to 12-VDC, 1-A power.
-
Page 14: Receiver (Remote Unit)
Chapter 2: Overview 2.4.2 Receiver (Remote Unit) Front Panel The receiver’s front panel is blank except for a Power Status LED, which is described in Table 2-2. Back Panel The receiver’s back panel is shown in Figure 2-2. Table 2-2 describes its components. - Page 15 Chapter 2: Overview Table 2-2. Receiver’s components. Number Component Description Power Status LED (not shown Lights when power to the in Figure 2-2, located on the receiver is on. front panel of the receiver) Connects to DVI monitor with (1) HDMI connector FA790 or to HDMI monitor.
-
Page 16: Installation
Chapter 3: Installation 3. Installation 3.1 Cable Requirements Use CAT5/6/7 cable. The pins are connected 1:1. NOTE: Both cable ends must comply with either EIA/TIA-568A or EIA-TIA-568B. If they don’t comply, a cable tester won’t find the cable pinnings. Pinning The pins of the green pair of wires are not together. -
Page 17: Installing The Transmitter And The Receiver
(Remote Unit) (Local Unit) Keyboard Monitor Monitor Mouse Figure 3-1. Connecting the extender units. Connect the respective workstations (via Remote Extenders) and computers (via Local Extenders) with the network switch. ACX300-T Workstation ACX300-R LGB5052A ACX300-T Network Switch Workstation ACX300-T ACX300-R Figure 3-2. - Page 18 The entire switching network system requires its own dedicated network. For security reasons, it cannot be integrated into an existing company network. The network switch must have true port-to-port transfer rates of 1 Gbps. Black Box switches that we have tested with the extenders include: • LGB5028A • LGB5052A 724-746-5500 | blackbox.com...
-
Page 19: Operation
This option is used to update the firmware. Download the latest version of the firmware from blackbox.com. Go to blackbox.com, type in the part number "ACX300", and navigate to the proper device. Once on the product page of the device you need firmware for, click on the "Resources" tab to view all available firmware. -
Page 20: Menu Item "D" - Ddc Option
IDs, determine which license you need (switching: ACX300-SW/storage devices: ACX300-U2). Once you have determined which license you need, contact Black Box at 724-746-5500, or send an email to info@blackbox.com. Include all of the Request Keys, Device IDs, and the license you would like to purchase so that the proper activation codes can be generated. -
Page 21: Menu Item "W" - Network Settings
Chapter 4: Operation Figure 4-3. DDC Option menu. Press “0“ to use the DDC information from the monitor attached to the remote Extender. Press “1“ to use the DDC information from the monitor attached to the local Extender. Press “2“ to save the current DDC information. Use keys “4“... -
Page 22: Menu Item "S" - Show Last Image
Chapter 4: Operation Menu Item “S” – Show Last Image When this option is enabled, the console extender will not show a black screen when it is no longer connected to a PC extender. Instead it will keep the last image that it received. -
Page 23: Menu Item "N" - Noise Filter
Chapter 4: Operation Menu Item “P” – Power Save When in power saving mode, the remote extender will turn its video off when it receives no video for more than a minute. This enables the monitor to enter sleep mode if supported. To wake, press any key on keyboard. Menu Item “N”... -
Page 24: Switching Menu Guide/Settings
Press “W” in the main menu of the OSD to access the Switching Option settings and configure your network. NOTE: This menu item is only active when the Switching Option is unlocked on the Remote Extender. The ACX300-SW is the license to support the Switching Option. To unlock an Option, see Section 4.1.2. -
Page 25: Switching Item "R" - Reset To Factory Default
Chapter 5: Switching Menu Guide/Settings 5.1 Switching Item “R” – Reset to Factory Default This will reset the extenders to factory settings. ATTENTION: All user/console/computer tables will be deleted. 5.2 Switching Item “P” – Passwords Disabled Enter the passwords to activate user groups and rights and login access. For more information about user groups and rights, see Section 5.8.2, User List. -
Page 26: Switching Item "D" - Disconnect On Pc Power Down
Chapter 5: Switching Menu Guide/Settings Users with Master or Admin rights can access the switching menu as usual once they enter their login details. 5.7 Switching Item “D” – Disconnect on PC Power Down When enabled, any local extender connected to a PC that is powered down will automatically break its connection, allowing the remote extender to find a different local extender to connect to. -
Page 27: Master View Item "U" - User List
Chapter 5: Switching Menu Guide/Settings Figure 5-4. Master View connections overview screen. Figure 5-5. Master View connections detail screen. 5.8.2 Master View Item “U” – User List With this menu item, you can manage user details, rights and groups. Press the “a” key to add a new user. Press the “r” key to delete a user. Press “i” to display details about the user that you can edit. - Page 28 Chapter 5: Switching Menu Guide/Settings Figure 5-7. Master View user list screen. User: Assign each user a login name with max. 16 characters. Full Name: For clarity, you can enter a user's full name. This name is displayed when informing other users who interrupted their connection. Password: Each user requires a password (max.
-
Page 29: Master View Item "W" - Console Extender List
Chapter 5: Switching Menu Guide/Settings Bound PC: When in User-PC Binding mode (see Section 5.6), each user must have a PC bound to them. That user will only be able to connect to that PC. To select the User Details for a specific PC, press “RETURN” and a list of PCs on the network will be displayed to select from. -
Page 30: Master View Item "S" - Pc Extender List
Chapter 5: Switching Menu Guide/Settings 5.8.4 Master View Item “S” – PC Extender List In the computer list, you may view all the PC extenders (local extenders) in the switching network, their group, and current status. Again, you can change extender name and user group details in the submenu by pressing the “i". - Page 31 Chapter 5: Switching Menu Guide/Settings Figure 5-11. Master View multi-head configuration screen. Bring up the Multi-Head menu and create a new Multi-Head set by pressing <A>. The Detail menu will open; in this menu, you can give the Multi-Head Set a name. In this menu, you can add individual extenders to the set by pressing <A>.
-
Page 32: Switching Between Different Computers
Chapter 5: Switching Menu Guide/Settings 5.9 Switching Between Different Computers You can access the menu for the switching option via a USB keyboard on the Remote Extender. Press “Ctrl+Alt+F12” to display the switching menu (see Figure 5-13). The switching menu will list all the computers (Local Extenders) connected to the switching network. -
Page 33: Troubleshooting
• Package it carefully. We recommend that you use the original container. • If you are returning the unit, make sure you include everything you received with it. Before you ship for return or repair, contact Black Box to get a Return Authorization (RA) number. - Page 34 NOTES 724-746-5500 | blackbox.com Page 34...
- Page 35 NOTES 724-746-5500 | blackbox.com Page 35...
- Page 36 724-746-5500 or blackbox.com. About Black Box Black Box provides an extensive range of networking and infrastructure products. You’ll find everything from cabinets and racks and power and surge protection products to media converters and Ethernet switches all supported by free, live 24/7 Tech Support available in 60 seconds or less.
Need help?
Do you have a question about the ACX300 and is the answer not in the manual?
Questions and answers