Table of Contents
Advertisement
Quick Links
USER MANUAL
ACX310-R2, ACX310F-R2, ACX310FIA-R2, ACX310S-R2
DVI + USB
KVM
EXTENDER EC
24/7 TECHNICAL SUPPORT AT 1.877.877.2269 OR VISIT BLACKBOX.COM
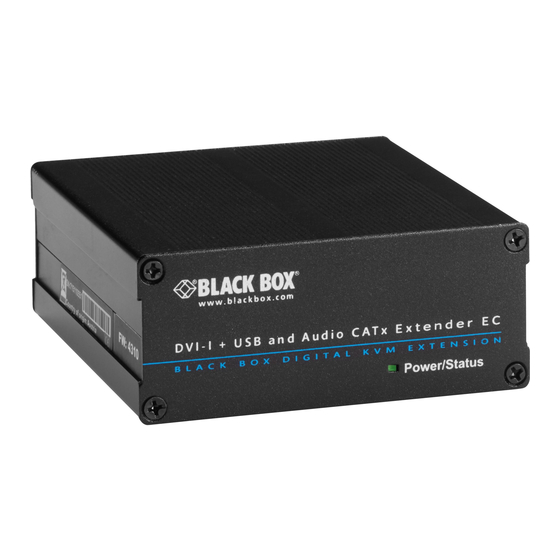
S e r v S w i t c h C AT x D V I + U S B E x t e n d e r E C
S e r v S w i t c h C AT x D V I + U S B E x t e n d e r E C
S e r v S w i t c h C AT x D V I + U S B E x t e n d e r E C
B L A C K
B L A C K
B L A C K
B O X
B O X
B O X
D I G I T A L
D I G I T A L
D I G I T A L
K V M
K V M
K V M
E X T E N S I O N
E X T E N S I O N
E X T E N S I O N
Power/Status
Power/Status
Power/Status
S e r v S w i t c h C AT x D V I + U S B E x t e n d e r E C
S e r v S w i t c h C AT x D V I + U S B E x t e n d e r E C
S e r v S w i t c h C AT x D V I + U S B E x t e n d e r E C
B L A C K
B L A C K
B L A C K
B O X
B O X
B O X
D I G I T A L
D I G I T A L
D I G I T A L
K V M
K V M
K V M
E X T E N S I O N
E X T E N S I O N
E X T E N S I O N
Power/Status
Power/Status
Power/Status
Advertisement
Table of Contents

Related Manuals for Black Box ACX310-R2


Summary of Contents for Black Box ACX310-R2
- Page 1 USER MANUAL ACX310-R2, ACX310F-R2, ACX310FIA-R2, ACX310S-R2 DVI + USB EXTENDER EC 24/7 TECHNICAL SUPPORT AT 1.877.877.2269 OR VISIT BLACKBOX.COM S e r v S w i t c h C AT x D V I + U S B E x t e n d e r E C...
-
Page 2: Table Of Contents
2.1 Introduction .......................................9 2.2 Intended Use ......................................9 2.3 What’s Included ......................................9 2.4 Hardware Description .................................... 11 2.4.1 ACX310-R2 Local Extender .................................... 11 2.4.2 ACX310-R2 Remote Extender ..................................12 2.4.3 ACX310F-R2 Local Extender ..................................13 2.4.4 ACX310F-R2 Remote Extender ..................................14 2.4.5 ACX310FIA-R2 Local Extender ..................................15 2.4.6 ACX310FIA-R2 Remote Extender .................................16... - Page 3 7. TROUBLESHOOTING ................................... 57 8. DISPOSAL ....................................58 9. TECHNICAL SUPPORT ................................59 9.1 Contacting Black Box Technical Support .............................59 9.2 Shipping and Packaging ..................................59 APPENDIX A. REQUIREMENTS FOR CAT5/6/7 CABLES ......................60 APPENDIX B. REQUIREMENTS FOR FIBER OPTIC CABLES ......................61 B.1 Requirements for Multimode Fiber Optic Cable ..........................61...
- Page 4 NEED HELP? LEAVE THE TECH TO US LIVE 24/7 TABLE OF CONTENTS TECHNICAL SUPPORT 1.877.877.2269 APPENDIX C. REQUIREMENTS FOR A NETWORK SWITCH ......................62 APPENDIX D. REGULATORY INFORMATION ..........................63 D.1 FCC Information .....................................63 D.2 NOM Statement .....................................64 APPENDIX E. DISCLAIMER/TRADEMARKS..........................65 E.1 Disclaimer .......................................65 E.2 Trademarks Used in this Manual ................................65 1.877.877.2269...
-
Page 5: Safety Instructions
NEED HELP? LEAVE THE TECH TO US LIVE 24/7 SAFETY INSTRUCTIONS TECHNICAL SUPPORT 1.877.877.2269 WARNING! Read and understand all safety instructions. Š Follow all the instructions. This will avoid accidents, fire, explosions, electric shocks or other hazards that may result in damage to Š... -
Page 6: Specifications
CHAPTER 1: SPECIFICATIONS TECHNICAL SUPPORT 1.877.877.2269 SPECIFICATIONS Approvals FCC, TUV, CE, RoHS, WEEE Connectors ACX310-R2: Local unit: (1) DVI-D output, (1) DVI-D input, (1) USB Type B female, (1) RJ-45 interconnect, (2) 3.5-mm bidrectional analog audio, (1) barrel connection for power;... - Page 7 (1) RJ-45 interconnect, (1) DB9 RS-232 serial, (1) 2.1-mm barrel connector for power Distance ACX310-R2, ACX310S-R2: Up to 426 feet (130 m); ACX310F-R2, ACX310FIA-R2: Up to 1640 feet (500 m) via multimode fiber optic cable Indicators (1) Power LED Operating System Windows ®...
- Page 8 NEED HELP? LEAVE THE TECH TO US LIVE 24/7 CHAPTER 1: HEADLINE CHAPTER 1: SPECIFICATIONS TECHNICAL SUPPORT 1.877.877.2269 SPECIFICATIONS (CONTINUED) Power (continued) ACX310S-R2: Source: External in-line power supply, Input: 100–240 VAC, 50/60 Hz, 0.5 A, Output: 12 V, 1 A, Consumption: 12 W max.
-
Page 9: Overview
ACX KVM Extender is referred to as an extender. The Local Extender is referred to as the local unit and the Remote Extender is referred to as the remote unit. 2.3 WHAT’S INCLUDED Your package should contain the following items. If anything is missing or damaged, contact Black Box Technical Support at 877-877-2269 or info@blackbox.com ACX310-T-R2: ACX310-R-R2: •... - Page 10 NEED HELP? LEAVE THE TECH TO US LIVE 24/7 CHAPTER 2: OVERVIEW CHAPTER 1: HEADLINE TECHNICAL SUPPORT 1.877.877.2269 ACX310F-T-R2: ACX310F-R-R2: • (1) Transmitter • (1) Receiver • (1) DVI-D M/M cable • (1) 12-VDC Power Supply w/ US, UK, EU and AU power clip •...
-
Page 11: Hardware Description
2.4 HARDWARE DESCRIPTION 2.4.1 ACX310-R2 LOCAL EXTENDER Figures 2-1 and 2-2 show the front and back panels of the ACX310-R2 Local Extender. Table 2-1 describes its components. FIGURE 2-1. FRONT PANEL OF THE ACX310-R2 LOCAL EXTENDER FIGURE 2-2. BACK PANEL OF THE ACX310-R2 LOCAL EXTENDER TABLE 2-1. -
Page 12: Acx310-R2 Remote Extender
1.877.877.2269 2.4.2 ACX310-R2 REMOTE EXTENDER Figures 2-3 and 2-4 show the front and back panels of the ACX310-R2 Remote Extender. Table 2-2 describes its components. FIGURE 2-3. FRONT PANEL OF THE ACX310-R2 REMOTE EXTENDER FIGURE 2-4. BACK PANEL OF THE ACX310-R2 REMOTE EXTENDER TABLE 2-2. -
Page 13: Acx310F-R2 Local Extender
NEED HELP? LEAVE THE TECH TO US LIVE 24/7 CHAPTER 1: HEADLINE CHAPTER 2: OVERVIEW TECHNICAL SUPPORT 1.877.877.2269 2.4.3 ACX310F-R2 LOCAL EXTENDER Figures 2-5 and 2-6 show the front and back panels of the ACX310F-R2 Local Extender. Table 2-3 describes its components. FIGURE 2-5. -
Page 14: Acx310F-R2 Remote Extender
NEED HELP? LEAVE THE TECH TO US LIVE 24/7 CHAPTER 1: HEADLINE CHAPTER 2: OVERVIEW TECHNICAL SUPPORT 1.877.877.2269 2.4.4 ACX310F-R2 REMOTE EXTENDER Figures 2-7 and 2-8 show the front and back panels of the ACX310F-R2 Remote Extender. Table 2-4 describes its components. FIGURE 2-7. -
Page 15: Acx310Fia-R2 Local Extender
NEED HELP? LEAVE THE TECH TO US LIVE 24/7 CHAPTER 1: HEADLINE CHAPTER 2: OVERVIEW TECHNICAL SUPPORT 1.877.877.2269 2.4.5 ACX310FIA-R2 LOCAL EXTENDER Figures 2-9 and 2-10 show the front and back panels of the ACX310FIA-R2 Local Extender. Table 2-5 describes its components. FIGURE 2-9. -
Page 16: Acx310Fia-R2 Remote Extender
NEED HELP? LEAVE THE TECH TO US LIVE 24/7 CHAPTER 1: HEADLINE CHAPTER 2: OVERVIEW TECHNICAL SUPPORT 1.877.877.2269 2.4.6 ACX310FIA-R2 REMOTE EXTENDER Figures 2-11 and 2-12 show the front and back panels of the ACX310FIA-R2 Remote Extender. Table 2-6 describes its components. FIGURE 2-11. -
Page 17: Acx310S-R2 Local Extender
NEED HELP? LEAVE THE TECH TO US LIVE 24/7 CHAPTER 1: HEADLINE CHAPTER 2: OVERVIEW TECHNICAL SUPPORT 1.877.877.2269 2.4.7 ACX310S-R2 LOCAL EXTENDER Figures 2-13 and 2-14 show the front and back panels of the ACX310S-R2 Local Extender. Table 2-7 describes its components. FIGURE 2-13. -
Page 18: Acx310S-R2 Remote Extender
NEED HELP? LEAVE THE TECH TO US LIVE 24/7 CHAPTER 1: HEADLINE CHAPTER 2: OVERVIEW TECHNICAL SUPPORT 1.877.877.2269 2.4.8 ACX310S-R2 REMOTE EXTENDER Figures 2-15 and 2-16 show the front and back panels of the ACX310S-R2 Remote Extender. Table 2-8 describes its components. FIGURE 2-15. -
Page 19: Led Indicators
V. Fast — — — Yes* — — Red/ V. Fast — — — — — — Green RJ-45 Socket LEDs (ACX310-R2 and ACX310S-R2 models only) Yellow — — — — — — — Yellow Slow — — — — —... -
Page 20: Installation
NEED HELP? LEAVE THE TECH TO US LIVE 24/7 CHAPTER 1: HEADLINE CHAPTER 3: INSTALLATION TECHNICAL SUPPORT 1.877.877.2269 3.1 MOUNTING OPTIONS 3.1.1 MOUNTING PADS AND RUBBER FEET The mounting pads and rubber feet can be used to hold the extenders in place and prevents them from sliding and falling. To attach the mounting pads or rubber feet: 1. - Page 21 NEED HELP? LEAVE THE TECH TO US LIVE 24/7 CHAPTER 1: HEADLINE CHAPTER 3: INSTALLATION TECHNICAL SUPPORT 1.877.877.2269 Computers Local Units Network Switch Remote Units Users FIGURE 3-2. NETWORK SWITCH SETUP To install the product with/without a Network Switch: 1. Position the local unit close to the host computer. 2.
-
Page 22: Startup
2. Pull the metal latch of the SFP module forwards until it is at a right angle. 3. Replace the SFP module with the other module. Put the metal latch back in position. Only use SFP modules from Black Box, or recommended by Black Box Technical Support (call 877-877-2269 or email info@blackbox.com). -
Page 23: Removing A Catx Cable
NEED HELP? LEAVE THE TECH TO US LIVE 24/7 CHAPTER 1: HEADLINE CHAPTER 3: INSTALLATION TECHNICAL SUPPORT 1.877.877.2269 3.5 REMOVING A CATX CABLE To remove a CATx cable: Š Press the latch down and slowly pull the cable out. Š l o c l i n FIGURE 3-4. -
Page 24: Extender Menu/Settings
NEED HELP? LEAVE THE TECH TO US LIVE 24/7 CHAPTER 1: HEADLINE CHAPTER 4: EXTENDER MENU/SETTINGS TECHNICAL SUPPORT 1.877.877.2269 4.1 ACCESS THE MAIN MENU Use the monitor and keyboard to get access to the main menu. To access the main menu: 1. -
Page 25: Determine The Current Firmware Version
NEED HELP? LEAVE THE TECH TO US LIVE 24/7 CHAPTER 4: EXTENDER MENU/SETTINGS CHAPTER 1: HEADLINE TECHNICAL SUPPORT 1.877.877.2269 4.3 DETERMINE THE CURRENT FIRMWARE VERSION To view the firmware version: Make sure the main menu is open. The currently installed firmware versions of the remote and local units are displayed below (e.g., 4267) FIGURE 4-3. - Page 26 1.877.877.2269 FIGURE 4-4. UNLOCK OPTION SCREEN 3. Contact Black Box Technical Support at 877-877-2269 or info@blackbox.com to get the unlock code from your supplier by providing us with the 9-character device ID and the serial number of your KVM-extender. 4. Press the M key to enter the unlock code.
-
Page 27: Enable Or Disable The Usb Memory Option
NEED HELP? LEAVE THE TECH TO US LIVE 24/7 CHAPTER 1: HEADLINE CHAPTER 4: EXTENDER MENU/SETTINGS TECHNICAL SUPPORT 1.877.877.2269 4.6 ENABLE OR DISABLE THE USB MEMORY OPTION The USB Memory Option allows the user to enable or disable the memory option. When the USB Memory Option is enabled, USB flash storage and external storage devices can be accessed via the extender. -
Page 28: Define What Ddc Information Is Used By The Pc
NEED HELP? LEAVE THE TECH TO US LIVE 24/7 CHAPTER 1: HEADLINE CHAPTER 4: EXTENDER MENU/SETTINGS TECHNICAL SUPPORT 1.877.877.2269 4.7 DEFINE WHAT DDC INFORMATION IS USED BY THE PC The DDC Option menu allows the user to define what DDC information is used by the PC. To define what DDC information is used by the PC: 1. -
Page 29: Change The Extender Settings
NEED HELP? LEAVE THE TECH TO US LIVE 24/7 CHAPTER 1: HEADLINE CHAPTER 4: EXTENDER MENU/SETTINGS TECHNICAL SUPPORT 1.877.877.2269 4.9 CHANGE THE EXTENDER SETTINGS The Extender Settings menu allows the user to change a range of further preferences, which can be enabled or disabled by pressing the applicable key. -
Page 30: Optimize Vga Preferences
NEED HELP? LEAVE THE TECH TO US LIVE 24/7 CHAPTER 1: HEADLINE TECHNICAL CHAPTER 4: EXTENDER MENU/SETTINGS SUPPORT 1.877.877.2269 Š Press the R key to access the Remote Settings menu. Š FIGURE 4-10. REMOTE EXTENDER SETTINGS MENU 4.9.1 OPTIMIZE VGA PREFERENCES The VGA preferences can be set and optimized. -
Page 31: Enable Or Disable The Usb Compatibility Mode
NEED HELP? LEAVE THE TECH TO US LIVE 24/7 CHAPTER 1: HEADLINE CHAPTER 4: EXTENDER MENU/SETTINGS TECHNICAL SUPPORT 1.877.877.2269 FIGURE 4-11. VGA PREFERENCES SCREEN 4.9.2 ENABLE OR DISABLE THE USB COMPATIBILITY MODE The USB compatibility mode can be enables or disabled. To enable/disable the USB compatibility mode: 1. -
Page 32: Set The Audio Volume
SUPPORT 1.877.877.2269 4.9.3 SET AUDIO VOLUME (ACX310-R2 AND ACX310FIA-R2 ONLY) The volume of the audio input (microphone) on the remote unit can be changed. The default value is 5 but can be set to any value in between 0 and 9. At 0 the audio input on the remote unit is disabled. - Page 33 NEED HELP? LEAVE THE TECH TO US LIVE 24/7 CHAPTER 4: EXTENDER MENU/SETTINGS TECHNICAL SUPPORT 1.877.877.2269 The baud rate can be set in the menu. There is a universal setting for baud rates up to 9600, which transmits all different RS-232 configurations transparently.
-
Page 34: Show The Last Received Image
NEED HELP? LEAVE THE TECH TO US LIVE 24/7 CHAPTER 4: EXTENDER MENU/SETTINGS TECHNICAL SUPPORT 1.877.877.2269 4.9.5 SHOW THE LAST RECEIVED IMAGE This function lets you show the last image that is received instead of a black screen when the monitor extender is disconnected from the PC extender. -
Page 35: Turn On Or Off Monitor Synchronization
NEED HELP? LEAVE THE TECH TO US LIVE 24/7 CHAPTER 4: EXTENDER MENU/SETTINGS TECHNICAL SUPPORT 1.877.877.2269 4.9.6 TURN ON OR OFF MONITOR SYNCHRONIZATION he monitor synchronization can be turned on and off. When enabled, the refresh rate of the graphics card of the PC and that of the remote monitor are adjusted to match one another. -
Page 36: Use The Power Saving Mode
NEED HELP? LEAVE THE TECH TO US LIVE 24/7 CHAPTER 1: HEADLINE CHAPTER 4: EXTENDER MENU/SETTINGS TECHNICAL SUPPORT 1.877.877.2269 4.9.8 USE THE POWER SAVING MODE The power saving mode lets the extender turn off its video out when the remote extender does not receive a video signal for more than a minute. -
Page 37: Select Your Type Of Keyboard
NEED HELP? LEAVE THE TECH TO US LIVE 24/7 CHAPTER 1: HEADLINE CHAPTER 4: EXTENDER MENU/SETTINGS TECHNICAL SUPPORT 1.877.877.2269 4.9.9 SELECT YOUR TYPE OF KEYBOARD The Keyboard Locale menu lets you switch between keyboard layouts for navigating the on screen display menu (OSD). You can choose between French (Azerty), English (Qwerty) and German (Qwertz). -
Page 38: Change Keyboard Shortcuts
NEED HELP? LEAVE THE TECH TO US LIVE 24/7 CHAPTER 1: HEADLINE CHAPTER 4: EXTENDER MENU/SETTINGS TECHNICAL SUPPORT 1.877.877.2269 FIGURE 4-21. SELECT KEYBOARD FALLBACK MODE 4.9.11 CHANGE KEYBOARD SHORTCUTS The Keyboard Shortcuts menu lets you edit the preferred shortcuts for common commands. To edit the shortcuts: 1. -
Page 39: Close The Extender Settings Menu
NEED HELP? LEAVE THE TECH TO US LIVE 24/7 CHAPTER 1: HEADLINE CHAPTER 4: EXTENDER MENU/SETTINGS TECHNICAL SUPPORT 1.877.877.2269 4.9.12 CLOSE THE EXTENDER SETTINGS MENU To close the Extender Settings menu: Š Press Q to close the Extender Settings menu. Š... - Page 40 NEED HELP? LEAVE THE TECH TO US LIVE 24/7 CHAPTER 4: EXTENDER MENU/SETTINGS TECHNICAL SUPPORT 1.877.877.2269 Š To see the screen of other consoles on the network: Š Press the G key on the keyboard of the extender that should display the user‘s screen. The key “G“ stands for “get screen“. If the console unit from which this command is executed currently has a partner, a disconnect is executed before the video of the other local unit is displayed.
-
Page 41: Network Settings
NEED HELP? LEAVE THE TECH TO US LIVE 24/7 CHAPTER 1: HEADLINE CHAPTER 5: NETWORK SETTINGS TECHNICAL SUPPORT 1.877.877.2269 5.1 ACCESS THE NETWORK SETTINGS MENU (MASTER VIEW AND NETWORK MODE) The Network Settings menu includes the preferences and settings for the Switching Option. NOTE: This menu is only available when the Switching Option has been unlocked (see Section 4.5, Unlock an Option). -
Page 42: Force Disconnect Or Select A Workstation From The Current Connected Devices
NEED HELP? LEAVE THE TECH TO US LIVE 24/7 CHAPTER 1: HEADLINE CHAPTER 5: NETWORK SETTINGS TECHNICAL SUPPORT 1.877.877.2269 FIGURE 5-2. NETWORK SETTINGS SCREEN 5.2 FORCE DISCONNECT OR SELECT A WORKSTATION FROM CURRENT CONNECTED DEVICES The Connection Overview provides an overview of the current connections as well as the free PCs and consoles on the network. You may break a connection remotely, or assign a PC a new console or vice versa. - Page 43 NEED HELP? LEAVE THE TECH TO US LIVE 24/7 CHAPTER 1: HEADLINE CHAPTER 5: NETWORK SETTINGS TECHNICAL SUPPORT 1.877.877.2269 FIGURE 5-4. CONNECTION OVERVIEW SCREEN 3. Press the I key. The Connection Details window opens. Š Press the D key to force disconnect the selected device/connection. Š...
-
Page 44: Manage User Details, Rights And Groups
NEED HELP? LEAVE THE TECH TO US LIVE 24/7 CHAPTER 1: HEADLINE CHAPTER 5: NETWORK SETTINGS TECHNICAL SUPPORT 1.877.877.2269 5.3 MANAGE USER DETAILS, RIGHTS AND GROUPS The Console Extender List allows you to manage user details, rights and groups. To manage user details, rights and groups: 1. - Page 45 NEED HELP? LEAVE THE TECH TO US LIVE 24/7 CHAPTER 5: NETWORK SETTINGS TECHNICAL SUPPORT 1.877.877.2269 3. To edit a user, press the I key. The User Detail menu opens. FIGURE 5-8. USER DETAIL MENU 4. Select the user detail you want to edit and press the E key. Š...
-
Page 46: View The Status Of All Remote Units
NEED HELP? LEAVE THE TECH TO US LIVE 24/7 CHAPTER 5: NETWORK SETTINGS TECHNICAL SUPPORT 1.877.877.2269 5.4 VIEW THE STATUS OF ALL REMOTE UNITS The Console Extender List allows you to view all remote units in the switching network and their current status. To view the status of all remote extenders: 1. -
Page 47: View The Status Of All Local Units
NEED HELP? LEAVE THE TECH TO US LIVE 24/7 CHAPTER 5: NETWORK SETTINGS TECHNICAL SUPPORT 1.877.877.2269 5.5 VIEW THE STATUS OF ALL LOCAL UNITS The PC Extender List allows you to view all local units in the switching network and their current status. To view the status of all local units: 1. -
Page 48: Set Up Dual-Head Or Multi-Head Systems
NEED HELP? LEAVE THE TECH TO US LIVE 24/7 CHAPTER 5: NETWORK SETTINGS TECHNICAL SUPPORT 1.877.877.2269 Example: There are the following 3 PCs: Department PC, Team A PC and Team B PC. The users Alex, Blair and Charlie should have access to the Department PC and the Team A PC. - Page 49 NEED HELP? LEAVE THE TECH TO US LIVE 24/7 CHAPTER 5: NETWORK SETTINGS TECHNICAL SUPPORT 1.877.877.2269 FIGURE 5-14. MULTI-HEAD CONFIGURATION MENU 3. Press the A key. The multi-head detail menu opens. Š Press the R key to remove an extender from the multi-head set. Š...
-
Page 50: Enable User Groups And Rights And Login Access
NEED HELP? LEAVE THE TECH TO US LIVE 24/7 CHAPTER 5: NETWORK SETTINGS TECHNICAL SUPPORT 1.877.877.2269 5.7 ENABLE USER GROUPS AND RIGHTS AND LOGIN ACCESS IThe Passwords option allows to activate user groups and rights and login access. For more information about user groups and rights see Section 5.3, Manage User Details, Rights and Groups. -
Page 51: Auto-Connect To A Free Computer After An Interruption
NEED HELP? LEAVE THE TECH TO US LIVE 24/7 CHAPTER 5: NETWORK SETTINGS TECHNICAL SUPPORT 1.877.877.2269 5.8 AUTO-CONNECT TO A FREE COMPUTER AFTER AN INTERRUPTION The Auto Connect option allows you to connect automatically with a free computer if your connection is interrupted by another user. -
Page 52: Set Up A Private Connection
NEED HELP? LEAVE THE TECH TO US LIVE 24/7 CHAPTER 5: NETWORK SETTINGS TECHNICAL SUPPORT 1.877.877.2269 5.9 SET UP A PRIVATE CONNECTION The Auto Connect option allows you to set up a private connection with a computer, which can’t be interrupted by other users. To enable the private connection option: 1. -
Page 53: Enable The Disconnect On Pc Power Down Option
NEED HELP? LEAVE THE TECH TO US LIVE 24/7 CHAPTER 5: NETWORK SETTINGS TECHNICAL SUPPORT 1.877.877.2269 5.11 ENABLE THE DISCONNECT ON PC POWER DOWN OPTION The Auto Connect option allows you to break the connection of any local unit that is connected to a PC that is powered down, allowing the remote unit to find a different local extender to connect to. -
Page 54: Reconnect On Startup
NEED HELP? LEAVE THE TECH TO US LIVE 24/7 CHAPTER 5: NETWORK SETTINGS TECHNICAL SUPPORT 1.877.877.2269 5.13 RECONNECT ON STARTUP To reconnect on startup: 1. Make sure the Network Mode menu is open (see Access the Switching menu, Master View and Network Mode). 2. -
Page 55: Set The Password Timeout
NEED HELP? LEAVE THE TECH TO US LIVE 24/7 CHAPTER 5: NETWORK SETTINGS TECHNICAL SUPPORT 1.877.877.2269 5.15 SET THE PASSWORD TIMEOUT When the password system is activated, you can define under what circumstances the user will be required to re-enter their login details when switching. -
Page 56: Maintenance And Care
NEED HELP? LEAVE THE TECH TO US LIVE 24/7 CHAPTER 1: HEADLINE CHAPTER 6: MAINTENANCE AND CARE TECHNICAL SUPPORT 1.877.877.2269 CAUTION! Do not use solvent-containing cleansers. Do not use wipes, alcohols (e.g. spiritus) or chemicals as these could damage the surface. To clean the product: Š... -
Page 57: Troubleshooting
If this still LED is lighting red No connection between local and remote does not work, contact Black Box Technical Support at 877-877-2269 or info@blackbox.com Check if the local (PC) cable is connected securely. -
Page 58: Disposal
NEED HELP? LEAVE THE TECH TO US LIVE 24/7 CHAPTER 8: DISPOSAL TECHNICAL SUPPORT 1.877.877.2269 This symbol on the product, the accessories or packaging indicates that this product must not be treated as unsorted municipal waste, but must be collected separately! Dispose of the product via a collection point for the recycling of waste electrical and electronic equipment within the EU and in other European countries that operate separate collection systems for waste electrical and electronic equipment. -
Page 59: Technical Support
If you determine that your Extender is malfunctioning, do not attempt to alter or repair the unit. It contains no user-serviceable parts. Contact Black Box Technical Support at 877-877-2269 or info@blackbox.com. Before you do, make a record of the history of the problem. We will be able to provide more efficient and accurate assistance if you have a complete description, including: Š... -
Page 60: Appendix A. Requirements For Cat5/6/7 Cables
NEED HELP? LEAVE THE TECH TO US LIVE 24/7 APPENDIX A: REQUIREMENTS FOR CAT5/6/7 CABLES TECHNICAL SUPPORT 1.877.877.2269 A CAT5/6/7 cable should meet the following requirements: Š The pins are connected 1:1. Š CAUTION: The cable pairs must be twisted to EIA/TIA- 568A (rare) or EIA/TIA-568 B (common) pairs. Š... -
Page 61: Appendix B. Requirements For Fiber Optic Cables
NEED HELP? LEAVE THE TECH TO US LIVE 24/7 APPENDIX B: REQUIREMENTS FOR FIBER CABLES TECHNICAL SUPPORT 1.877.877.2269 B.1 REQUIREMENTS FOR MULTIMODE FIBER CABLE A mulitmode fiber cable should meet the following requirements: Š Maximum length should be 1640 feet (500 meters). The ACX310F-R2 and ACXFIA-R2 include a mulitmode fiber optic SFP module Š... -
Page 62: Appendix C. Requirements For A Network Switch
NEED HELP? LEAVE THE TECH TO US LIVE 24/7 APPENDIX C: REQUIREMENTS FOR A NETWORK SWITCH TECHNICAL SUPPORT 1.877.877.2269 The entire switching network system requires its own dedicated network. For security reasons it cannot be integrated into an existing company network. The network switch must fulfil the following specifications: Š... -
Page 63: Appendix D. Regulatory Information
NEED HELP? LEAVE THE TECH TO US LIVE 24/7 APPENDIX D: REGULATORY INFORMATION TECHNICAL SUPPORT 1.877.877.2269 D.1 FCC STATEMENT This equipment generates, uses, and can radiate radio-frequency energy, and if not installed and used properly, that is, in strict accordance with the manufacturer’s instructions, may cause interference to radio communication. It has been tested and found to comply with the limits for a Class A computing device in accordance with the specifications in Subpart B of Part 15 of FCC rules, which are designed to provide reasonable protection against such interference when the equipment is operated in a commercial environment. -
Page 64: Nom Statement
NEED HELP? LEAVE THE TECH TO US LIVE 24/7 APPENDIX D: REGULATORY INFORMATION TECHNICAL SUPPORT 1.877.877.2269 D.2 NOM STATEMENT 1. Todas las instrucciones de seguridad y operación deberán ser leídas antes de que el aparato eléctrico sea operado. 2. Las instrucciones de seguridad y operación deberán ser guardadas para referencia futura. 3. -
Page 65: Appendix E. Disclaimer/Trademarks
E.1 DISCLAIMER Black Box Corporation shall not be liable for damages of any kind, including, but not limited to, punitive, consequential or cost of cover damages, resulting from any errors in the product information or specifications set forth in this document and Black Box Corporation may revise this document at any time without notice. - Page 66 NEED HELP? LEAVE THE TECH TO US LIVE 24/7 NOTES TECHNICAL SUPPORT 1.877.877.2269 __________________________________________________________________________________________________ __________________________________________________________________________________________________ __________________________________________________________________________________________________ __________________________________________________________________________________________________ __________________________________________________________________________________________________ __________________________________________________________________________________________________ __________________________________________________________________________________________________ _________________________________________________________________________________________________ __________________________________________________________________________________________________ __________________________________________________________________________________________________\ __________________________________________________________________________________________________ __________________________________________________________________________________________________ __________________________________________________________________________________________________ __________________________________________________________________________________________________ _________________________________________________________________________________________________ __________________________________________________________________________________________________ __________________________________________________________________________________________________ 1.877.877.2269 BLACKBOX.COM...
- Page 67 NEED HELP? LEAVE THE TECH TO US LIVE 24/7 NOTES TECHNICAL SUPPORT 1.877.877.2269 __________________________________________________________________________________________________ __________________________________________________________________________________________________ __________________________________________________________________________________________________ __________________________________________________________________________________________________ __________________________________________________________________________________________________ __________________________________________________________________________________________________ __________________________________________________________________________________________________ _________________________________________________________________________________________________ __________________________________________________________________________________________________ __________________________________________________________________________________________________\ __________________________________________________________________________________________________ __________________________________________________________________________________________________ __________________________________________________________________________________________________ __________________________________________________________________________________________________ _________________________________________________________________________________________________ __________________________________________________________________________________________________ __________________________________________________________________________________________________ 1.877.877.2269 BLACKBOX.COM...
- Page 68 NEED HELP? LEAVE THE TECH TO US LIVE 24/7 TECHNICAL SUPPORT 1.877.877.2269 © COPYRIGHT 2017 BLACK BOX CORPORATION. ALL RIGHTS RESERVED.
Need help?
Do you have a question about the ACX310-R2 and is the answer not in the manual?
Questions and answers