Table of Contents
Advertisement
Advertisement
Table of Contents

Related Manuals for Vista VK2-600PTZ


Summary of Contents for Vista VK2-600PTZ
- Page 1 Configuration and User manual...
- Page 2 VK2-600PTZ User manual...
-
Page 3: Explanation Of Graphical Symbols
The exclamation point within an equilateral triangle is intended to alert the user to the presence of important operating and maintenance (servicing) instruction in the literature accompanying the product. VK2-600PTZ User manual... -
Page 4: Ce Compliance Statement
CE COMPLIANCE STATEMENT WARNING THIS IS A CLASS A PRODUCT. IN A DOMESTIC ENVIRONMENT THIS PRODUCT MAY CAUSE RADIO INTERFERENCE IN WHICH CASE THE USER MAY BE REQUIRED TO TAKE ADEQUATE MEASURES. VK2-600PTZ User manual... -
Page 5: Important Safety Instructions
SERVICE PERSONNEL ONLY. TO REDUCE THE RISK OF ELECTRIC SHOCK DO NOT PERFORM ANY SERVICING OTHER THAN THAT CONTAINED IN THE OPERATING INSTRUCTIONS UNLESS YOU QRE QUALIFIED TO DO SO. 16. Use satisfy clause 2.5 of IEC60950-1/UL60950-1 or Certified/Listed Class 2 power source only. VK2-600PTZ User manual... -
Page 6: Table Of Contents
3.5.5 System ............................31 1) Information ........................ 31 2) Security ........................32 3) Date & Time ....................... 35 4) Network ........................36 5) Language ........................43 6) Maintenance ......................44 7) Support ........................45 3.6 PTZ Control ............................. 46 VK2-600PTZ User manual... - Page 7 • SYSTEM MENU ......................66 • SYSTEM INFORMATION ..................... 68 4.12 Factory Setup ..........................68 5 Dome Communication (RS485 Addressing etc) ............... 69 Appendix A — Specifications ....................70 Appendix B — Troubleshooting..................... 73 Appendix C — Glossary ......................73 VK2-600PTZ User manual...
-
Page 8: Chapter 1 - Introduction
Up to 255 selectable camera addresses. Multi-language Menu Display, Password Confirmation. Function Run menu using DVR without function key (Pattern, Scan,..) Built-in RS-485 receiver driver. 12VDC or PoE operation. Use a Certified/Listed Class 2 power supply only. VK2-600PTZ User manual... -
Page 9: Chapter 2 - Installation And Configuration
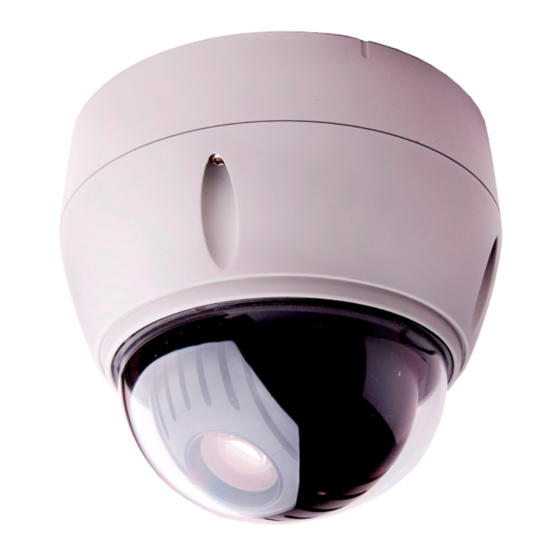
Chapter 2 — Installation and Configuration 2.1 Package Contents VK2-600PTZ is design to be a compact, ,vandal resistant dome camera. The housing is constructed of aluminum, steel and plastic. The housing is designed to be mounted both wall and ceiling type. -
Page 10: Installation
VK2-600PTZ is for use in surface mounting applications and the mounting surface should be capable of supporting loads up to 3.5lb (1.6kg). VK2-600PTZ‘s base should be attached to a structural object, such as hard wood, wall stud or ceiling rafter that supports the weight of VK2-600PTZ. - Page 11 If it is too difficult to lock the dome in position after the mounting bracket has been installed readjust the screws "A" by unscrewing them a small amount and try to install dome camera again. VK2-600PTZ User manual...
-
Page 12: Basic Configuration Of Dome Camera System
Ethernet: RJ45 Modular Jack Yellow Video Composite Output: BNC Jack Audio line output: RCA Jack White Audio line input: RCA Jack VK2-600PTZ must be installed by qualified service personnel in accordance with all local electrical and building codes. VK2-600PTZ User manual... -
Page 13: Connections
• Connecting Alarms AI (Alarm In) You can use external devices to signal VK2-600PTZ to react on events. Mechanical or electrical switches can be wired to the AI (Alarm In) and G (Ground) connectors. See ―4.5.4 Event > 1) Event-In >... -
Page 14: Ip Assignment
2.5 IP Assignment When VK2-600PTZ, encoder or decoder is first connected to the network it has no IP address. So, it is necessary to allocate an IP address to the device with the ―SmartManager‖ utility on the Connect VK2-600PTZ / device to the network and power up. -
Page 15: Getting Started
2.6 Getting Started Once installed apply power to VK2-600PTZ. It will start a configuration sequence. PRESET TITLE AREA TITLE AF AE STATUS of FUNCTION FOCUS and AE UNDER RUNNING CAMERA TITLE EMPTY DATA INFORMATION DISPLAY CAMERA ID DOMEID:0001 ALARM:1 W→360.0,090.0 PAN &... -
Page 16: Chapter 3 - Operation By Web Browser
Chapter 3 — Operation by Web Browser The VK2-600PTZ can be used with Windows operating system and browsers. The recommended browsers are Internet Explorer, Safari, Firefox, Opera and Google Chrome with Windows. Note: To view streaming video in Microsoft Internet Explorer, set your browser to allow ActiveX controls. -
Page 17: Access From The Internet
The live view page comes in seven screen modes like 704x576(480), 704x288(240), 352x288(240), 176x144(120), 640x480, 320x240 and 160x120. Users are allowed to select the most suitable one out of those modes. Please, adjust the mode in accordance with your PC specifications and monitoring purposes. VK2-600PTZ User manual... - Page 18 The Full Screen button causes the video image to fill the entire screen area. No other windows will be visible. Press the 'Esc' button on the computer keyboard to cancel full screen view. The Manual Trigger button activates a pop-up window to manually start or stop the event. VK2-600PTZ User manual...
-
Page 19: Network Camera Setup
Basic, Live View, Video & Image, Audio, Event, and System Configuration. You can configure the network camera by clicking Setup in the top right-hand corner of the Live View page. Click on this page to access the online help that explains the setup tools. VK2-600PTZ User manual... -
Page 20: Basic Configuration
An administrator has unrestricted access to the Setup tools Administrator and can determine the registration of all other users. Enable anonymous viewer login: Check the box to use the webcasting features. Refer to ―4.5.2 Video & Image‖ for more details. VK2-600PTZ User manual... -
Page 21: Network
2. The ARP/Ping service is automatically disabled two minutes after the unit is started, or as soon as an IP address is set. 3. Pinging the unit is still possible when this service is disabled. VK2-600PTZ User manual... -
Page 22: Video & Image
Web Browser or PC program. The screen size control comes in seven modes like 4CIF(704x576(480)), 2CIF(704x288(240)), CIF(352x288(240)), QCIF(176x144(120)), VGA(640x480), QVGA(320x240), and QQVGA(160x120). Users can reset the selected screen size anytime while monitoring the screen on a real-time basis. VK2-600PTZ User manual... - Page 23 For the purpose of general monitoring, please do not change a basic value. Such act may cause a problem to the system performance. When satisfied with the settings, click Save, or click Reset to revert to previously saved settings. VK2-600PTZ User manual...
-
Page 24: Audio
This mode requires that the client PC has a sound card with support for full-duplex audio. Uncheck the box enable Simplex mode. The simplex mode only transmits audio from the network camera to any web client. It does not receive audio from other web clients. VK2-600PTZ User manual... -
Page 25: Date & Time
- Synchronize with computer time: sets the time from the clock on your computer. - Synchronize with NTP Server: the video encoder will obtain the time from an NTP server every 60 minutes. - Set manually: this option allows you to manually set the time and date. VK2-600PTZ User manual... -
Page 26: Video & Image
Note: To use webcasting service, the Enable Anonymous viewer login option must be checked. Refer to ―3.5.1 Basic Configuration > 1) Users‖ for more details. VK2-600PTZ User manual... -
Page 27: Audio
Refer to ―3.5.1 Basic Configuration > 4) Audio‖ for more details. 3.5.4 Event 1) Event-In On Boot This is used to trigger the event every time the Network Transmitter is started. Select ―Enable‖ to activate the motion event. VK2-600PTZ User manual... - Page 28 - Type: Choose the type of alarm you wish to use from the drop-down list. - Dwell Time: Set the dwell time an event lasts for the specified dwell time from the point of detection of an alarm input. Manual Trigger VK2-600PTZ User manual...
- Page 29 To create a motion or mask window, follow steps: 1. Click the right button of mouse to see the mouse menu. 2. Select New Motion (or Mask) Window in the mouse menu. VK2-600PTZ User manual...
- Page 30 You can also modify or delete a motion index. Select an index and then, click the Modify or Delete button. Select ―Enable‖ to activate the motion window. Network Loss This is used to trigger the event every time the network connection is failed. Select ―Enable‖ to activate the Network Loss event. VK2-600PTZ User manual...
-
Page 31: Event-Out
SMTP authentication, you must define the weakest authentication method allowed. - Login Method: Set the Weakest method allowed to the highest/safest method supported by the mail server. The most secure method is listed in the drop-down list: Login / Plain VK2-600PTZ User manual... - Page 32 - Remote directory: Specify the path to the directory where the uploaded images will be stored. If this directory does not already exist on the FTP server, there will be an error message when uploading. - User name / Password: Provide your log-in information. • JPEG Setting: VK2-600PTZ User manual...
- Page 33 - URL: The network address to the server and the script that will handle the request. For example: http://192.168.12.244/cgi-bin/upload.cgi - User name/Password: Provide your log-in information. • HTTP Server Test: When the setup is complete, the connection can be tested by clicking the Test button. VK2-600PTZ User manual...
- Page 34 - Enable: When you select ―Enable alarm out‖, the output will be activated for as long as the event is active. Audio Alert When the network camera detects an event, it can output a predefined audio data to external speaker. Check the box to enable the service. VK2-600PTZ User manual...
- Page 35 PC, the main window will be displayed as below. Click ―Tool‖ in the menu of the main window and select Audio Recorder to start Audio Recorder. Audio Recorder window will be appeared. The description of each button in the ARecorder window follows. VK2-600PTZ User manual...
- Page 36 5. Click the Encode button to encode a current audio file to G.726 format for Audio Alert. Set the file name and encode parameters. Caution: All parameters must be synchronized with ones in audio setting page of network devices for a proper operation. VK2-600PTZ User manual...
-
Page 37: Event Map
The event map allows you to change the settings and establish a schedule for each event trigger from the network camera. You can register the event map up to max. 15. Click Add button to make a new event map and you can see a popup window as below. VK2-600PTZ User manual... -
Page 38: System
The Audio alert file must first be configured on the Event In page. 3.5.5 System 1) Information You can enter the system information. This page is very useful when you refer device information after installation. VK2-600PTZ User manual... -
Page 39: Security
User access control is enabled by default, when the administrator sets the root password on first access. New users are authorized with user names and passwords, or the administrator can choose to allow anonymous viewer login to the Live View page, as described below: • User Setting: VK2-600PTZ User manual... - Page 40 For greater security, the network camera can be configured to use HTTPS (Hypertext Transfer Protocol over SSL (Secure Socket Layer)). That is, all communication that would otherwise go via HTTP will instead go via an encrypted HTTPS connection. • HTTPS Connection Policy: VK2-600PTZ User manual...
- Page 41 Note that users from IP addresses that will be allowed must also be registered with the appropriate access rights (Guest, Operator or Administrator). This is done from Setup > System > Security > Users, on ―4.5.5 System > 2) Security > Users‖. VK2-600PTZ User manual...
-
Page 42: Date & Time
60 minutes. - Set manually: this option allows you to manually set the time and date. Note: Note that if using a host name for the NTP server, a DNS server must be configured under TCP/IP settings. VK2-600PTZ User manual... -
Page 43: Network
* Subnet mask: Specify the mask for the subnet the network camera is located on. * Default router: Specify the IP address of the default router (gateway) used for connecting devices attached to different networks and network segments. VK2-600PTZ User manual... - Page 44 - Enable ARP/Ping setting of IP address: The IP address can be set using the ARP/Ping method, which associates the unit's MAC address with an IP address. Check this box to enable the service. Leave disabled to prevent unintentional resetting of the IP address. VK2-600PTZ User manual...
- Page 45 * Maximum time interval: Set a time interval to synchronize with the DDNS server. Select an item in the interval drop-down list. * Register local network IP address: Register a Network Video Server IP address to the DDNS server. VK2-600PTZ User manual...
- Page 46 On the other hand, if a network status is poor, enter a higher value. When there are many network cameras or users, a higher value may cause a heavy load to the network. For a detailed setting, please consult with a network manager. VK2-600PTZ User manual...
- Page 47 Note: UPnP™ must be installed on your workstation if running Windows XP. To do this, open the Control Panel from the Start Menu and select Add/Remove Programs. Select Add/Remove Windows Components and open the Networking Services section. Click Details and then select UPnP™ as the service to add. VK2-600PTZ User manual...
- Page 48 The following types of traffic are marked: - Live Stream DSCP: - Event/Alarm DSCP: - Management DSCP: • Auto Traffic Control: Set a limitation on user network resources by designating the maximum bandwidth. VK2-600PTZ User manual...
- Page 49 - For NAT traversal to work, this must be supported by the broadband router. - The broadband router has many different names: ―NAT router‖, ―Network router―, ―Internet Gateway‖, ―Broadband sharing device‖ or ―Home firewall‖ but the essential purpose of the device is the same. VK2-600PTZ User manual...
-
Page 50: Language
Save. 5) Language It will be able to select a user language. The type of language it will be able to select is the English, the French, the German, the Spanish and the Italian. VK2-600PTZ User manual... -
Page 51: Maintenance
• Restore: Import and apply a setting value saved to a user PC. Note: Backup and Restore can only be used on the same unit running the same firmware. This feature is not intended for multi-configurations or for firmware upgrades. VK2-600PTZ User manual... -
Page 52: Support
- Server Report: Click the Server Report button to get the important information about the server‘s status and should always be included when requesting support. - Parameter List – Click the Parameter List button to see the unit‘s parameters and their current settings. VK2-600PTZ User manual... -
Page 53: Ptz Control
Navigate through the menu items. - Up/Down button: Navigate through the menu items - PAN/TILT Speed: It sets a speed when adjusting the PTZ Camera. The higher a value is, the faster a speed will be. VK2-600PTZ User manual... -
Page 54: Help
The Help information window will be provided as a popup window so that users can open and read it without a need for log-in. It will offer a description on setting and Help page by which users can manipulate the network camera without a reference to the manual. VK2-600PTZ User manual... -
Page 55: Resetting To The Factory Default Settings
3.9 System Requirement for Web Browser Operating System: Microsoft Windows 98, Microsoft Windows ME, Microsoft Windows 2000, Microsoft Windows XP, or Microsoft Windows Vista CPU: Over Pentium IV 2.4Ghz, 512MB RAM, 10GB free disk or higher VGA: AGP, Video RAM 32MB or higher (1024x768, 24bpp or higher) -
Page 56: Chapter 4 - Program And Operation (Rs485 Telemetry)
Please be aware that whilst the commands in BOLD in the table below are generic for most keyboards, DVR‘s and popular protocols, if you are not using a Vista controller and Protocol then you may need to refer to the user manual for that controlling device to generate the required command. -
Page 57: Auto Scan
Follow steps below to set up the Auto Scan: 1. TITLE – this can be changed one of two ways: Moving the Joystick left and right to select the cursor location and (TELE/WIDE) to change the character. VK2-600PTZ User manual... -
Page 58: Preset
There are two pages of Preset menu. Each page has 60 Presets. The pages can be scrolled by moving the Joystick to the left or right on the first or last No. of Preset on the line. VK2-600PTZ User manual... - Page 59 SAVE AND EXIT(ESC TO CANCEL) Set ‗FOCUS‘ : AUTO, MANUAL, ONE PUSH – adjust with (TELE/ZOOM) Set ‗MOTION‘ : OFF, ON – adjust with (TELE/ZOOM) Select ‗MOTION SETUP‘ and move the Joystick to the right, the ‗MOTION SETUP‘ menu is displayed. VK2-600PTZ User manual...
- Page 60 The D/N mode option removes the IR cut filter of the camera and makes the camera sensitive to near infrared. AUTO Camera goes into monochrome mode at low light (determined by the GAIN setting) Permanent monochrome mode COLOUR Permanent colour mode VK2-600PTZ User manual...
-
Page 61: Quick Setting A Preset
--- T02 --- --- --- --- --- --- --- --- --- --- --- --- --- --- --- --- --- --- --- SAVE AND EXIT(ESC TO CANCEL) : Blank position SCAN TYPE : NORMAL, VECTOR DWELL : 03~99 SEC : Preset (1~120) VK2-600PTZ User manual... -
Page 62: Pattern (Learn Tour)
Follow steps below to program the Pattern: 1. Select the desired Pattern to be programmed by moving the Joystick up or down. If the Pattern is not 000, a Pattern has already been recorded. Patterns can be overwritten. VK2-600PTZ User manual... -
Page 63: Area Title
3. Select ‗START ANGLE‘. Press the (IO/FN) key, then ‗CTRL‘ is displayed. Move to the desired position. Press the (IC/FF) key then ‗CTRL‘ disappears. To adjust at the 0.1 degree interval, twist the Joystick at the pan field and the tilt field. VK2-600PTZ User manual... -
Page 64: Privacy Zone
PRIVACY AREA MENU (CTRL KEY) CONTROL NUMBER 001 354.8 344.8 3. To select between on or off - adjust with (TELE/WIDE) 4. To save changes highlight ‗SAVE AND EXIT‘ and move Joystick right. Joystick left exits without saving. VK2-600PTZ User manual... -
Page 65: Camera Menu
MF (focal control override) ONE PUSH – In MF mode when moving, once stopped goes to AF until moved again (focal control override) CONSTANT MANUAL – Permanently in MF mode (focal control override) Use manual mode in normal use. VK2-600PTZ User manual... -
Page 66: Wb (White Balance) Control
: --- BACK LIGHT : OFF : --- WDR LEVEL : --- D/N MODE : AUTO SAVE AND EXIT(ESC TO CANCEL) MODE AE1 / AE2 / SHUTTER PRIO / MANUAL Auto exposure mode1 (Use to normal surroundings: indoor) VK2-600PTZ User manual... -
Page 67: Dnr Control
NOTE: DNR (1) applied when motor stopped. DNR (2) applied when motor moving. • LINE LOCK CONTROL Use the Joystick to move the cursor and (Tele/Wide) to adjust. To save changes highlight ‗SAVE AND EXIT‘ and move Joystick right. Joystick left exits without saving. VK2-600PTZ User manual... -
Page 68: Dome Setup
FUNCTION ENABLE : OFF SAVE AND EXIT(ESC TO CANCEL) HOME FUNCTION : None / Tour / Pattern / Auto Scan / Preset FUNCTION NUMBER : - - - WAITING TIME : 10~240 seconds FUNCTION ENABLE : ON / OFF VK2-600PTZ User manual... -
Page 69: Osd Display
ON: FOCUS and EXPOSURE displays. (AF AE) OSD POSITION SETUP Select the OSD option with the Joystick up and down, press the (IO/FN) key and adjust the position by the Joystick . Press the (IC/FF) key to release. VK2-600PTZ User manual... -
Page 70: View Angle Setup
NOTE: The Dome needs to be under the 90 degree vertical. When the flip mode is 90 , 100 , 110 or 120 and you move over 90 vertically, the panning range operates on the opposite side. VK2-600PTZ User manual... -
Page 71: Initialize Data
PRESET FOCUS DEFAULT EXIT(ESC TO EXIT) FACTORY DEFAULT Select ‗FACTORY DEFAULT‘ to initialize the Data. Use the Joystick to move the cursor and right or (IO/FN) to accept selection. FACTORY DEFAULT ARE YOU SURE ? CANCEL ERASE PROGRAMMED DATA VK2-600PTZ User manual... -
Page 72: Origin Offset
SAVE AND EXIT(ESC TO CANCEL) This feature is useful in aligning a new dome camera exactly the same as the previously installed Dome camera. Dome camera‘s origin set and all data initialize option do not override offset VK2-600PTZ User manual... -
Page 73: Dome Reset
ON. MOTOR SETUP Use the Joystick to move the cursor and (Tele/Wide) to adjust. To save changes highlight ‗SAVE AND EXIT‘ and move Joystick right. Joystick left exits without saving. VK2-600PTZ User manual... - Page 74 If you find the wrong position of the dome during operation, execute this origin check and the dome camera will arrange the right position after the origin check operation. Use the Joystick to move the cursor and right or (IO/FN) to accept selection. ORIGIN CHECK ARE YOU SURE ? CANCEL VK2-600PTZ User manual...
-
Page 75: System Information
SAVE AND EXIT(ESC TO CANCEL) TOUR DWELL TIME: is the default dwell time between Tour elements. ANSWER DELAY: is the default response time of the dome, you should only change this if requested to do so by your supplier. VK2-600PTZ User manual... -
Page 76: Dome Communication (Rs485 Addressing Etc)
MUX x No. of camera IN. (e.g. multiplexer ID= n, Camera IN= m then ID of Dome =16x(n-1)+m ) Each dome is factory defaulted to address 1. It is therefore necessary to individually address each dome on the network. VK2-600PTZ User manual... -
Page 77: Appendix A - Specifications
4 privacy zone masking (2 methods selectable : Block / video off) Electrical Power Source 12V DC Power Consumption 12W / 1.2A Control RS-485, baud rate: 2400~19.2k bps (default: 9600 bps) ID (Camera Address) 1 ~ 255 * Specifications are subject to change without notice * VK2-600PTZ User manual... - Page 78 0 C to 45 C (32 F to 113 F) Operating humidity 0 to 90%RH (non-condensing) Storage temperature -20 C to 60 C (-4 F to 140 F) * Specifications are subject to change without notice * VK2-600PTZ User manual...
- Page 79 Figure – Dimension VK2-600PTZ User manual...
-
Page 80: Appendix B - Troubleshooting
Appendix C — Glossary Alarm Action The assigned responses for VK2-600PTZ when input change from normal to abnormal states. The dome may run a Preset, Pattern, or have no assigned action for 1 dome input. The dome may also send alarm state to the host controller for processing. See also Input Alarm and Normal Input State. -
Page 81: Home Position
The default position to which VK2-600PTZ returns after an assigned period of inactivity passes. The default position may be a Preset, Tour, Pattern, or No Action. Input Alarm A connection point on VK2-600PTZ that enables the system to monitor Input Devices. There are 1 input available for VK2-600PTZ. Input Device External devices that provide information about the condition of system components that connect to the input on VK2-600PTZ. -
Page 82: Slow Shutter
Presets may be programmed for VK2-600PTZ. Privacy Zone Masked areas of VK2-600PTZ's viewing area. These masks prevent operators of the surveillance system from viewing these designated zones. The Privacy Zones move in relation to VK2- 600PTZ‘s pan/tilt position. In addition, the apparent size of the Privacy Zone adjusts automatically as the lens zooms in or out. - Page 83 VK2-600PTZ User manual...
- Page 84 - MEMO - VK2-600PTZ User manual...
- Page 85 Norbain SD Ltd 210 Wharefdale Road I Q Winnersh Wokingham Berkshire Subject to change with out notice RG41 5TP VK2-600PTZ User manual...
Need help?
Do you have a question about the VK2-600PTZ and is the answer not in the manual?
Questions and answers