Table of Contents
Advertisement
Quick Links
Advertisement
Table of Contents
Troubleshooting

Related Manuals for Vista VK2-1080BXDNe


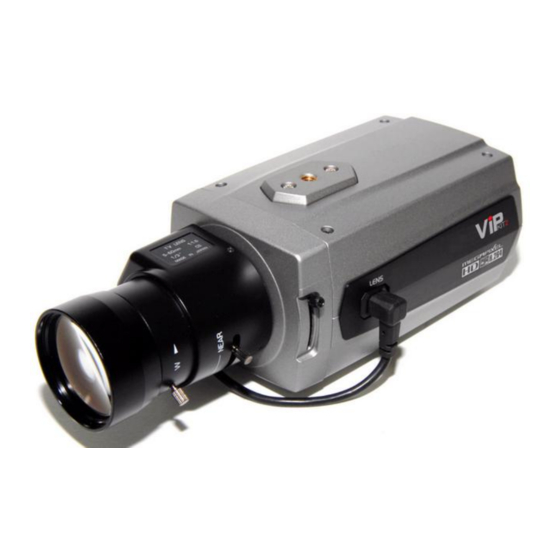
Summary of Contents for Vista VK2-1080BXDNe
- Page 1 VK2-1080BXDNe Configuration and user manual...
- Page 2 VK2-1080BXDNe manual V1.0...
-
Page 3: Explanation Of Graphical Symbols
WARNING TO REDUCE THE RISK OF FIRE OR ELECTRIC SHOCK, DO NOT EXPOSE THIS PRODUCT TO RAIN OR MOISTURE. DO NOT INSERT ANY METALLIC OBJECTS THROUGH THE VENTILATION GRILLS OR OTHER OPENINGS ON THE EQUIPMENT. CAUTION CAUTION RISK OF ELECTRNIC SHOCK DO NOT OPEN CAUTION: TO REDUCE THE RISK OF ELECTRIC SHOCK, DO NOT REMOVE COVER (OR BACK). -
Page 4: Ce Compliance Statement
This is a Class A product. In a domestic environment this product may cause radio interference in which case the user may be required to take adequate measures. CAUTION RISK OF EXPLOSION IF BATTERY IS REPLACED BY AN INCORRECT TYPE. DISPOSE OF USED BATTERIES ACCORDING TO THE INSTRUCTIONS VK2-1080BXDNe manual V1.0... -
Page 5: Important Safety Instructions
IMPORTANT SAFETY INSTRUCTIONS 1. Read these instructions. 2. Keep these instructions. 3. Heed all warnings. 4. Follow all instructions. 5. Do not use this apparatus near water. 6. Clean only with dry cloth. 7. Do not block any ventilation openings. Install in accordance with the Manufacturer’s instructions. - Page 6 VK2-1080BXDNe manual V1.0...
-
Page 7: Table Of Contents
Contents Contents ............7 DESCRIPTION ........... 10 1.1 Key Features ........................10 1.2 Camera overview ....................... 12 INSTALLATION .......... 14 2.1 DC Auto Iris Lens Installation & Adjustment ............... 14 2.2 Audio Connection ......................18 2.3 Alarm Connection ......................18 IP address set up ........ - Page 8 4.6.1 System - Information ....................69 4.6.2 System - Date & Time ....................76 4.6.3 System - Network ....................78 4.6.3.3 System - Network - RTP ..................81 4.6.4 System - Language ....................89 4.6.5 System - Maintenance ..................... 90 VK2-1080BXDNe manual V1.0...
-
Page 9: Troubleshooting
4.6.6 System - Support ..................... 92 4.7 About ..........................93 5. Troubleshooting ........... 94 Upgrading Firmware ......... 95... -
Page 10: Description
DESCRIPTION The VK2-1080BXDNe camera is an internet protocol based megapixel network camera with a built- in web based viewer on Internet Explorer®. The camera has a connection feature for third-party applications and compatible with supplied Utility software for easy installation and Client software to search, configure, manage, live view, record and playback. - Page 11 - Voice Alert Linked to Alarm Detection The VK2-1080BXDNe can play the audio file stored in the camera in synchronization with alarm detection by the sensor input or the motion detection function.
-
Page 12: Camera Overview
Executes the factory default. Note: Video Output is used for an easy zoom and focus control when installing lens. After lens installation, you must set Video Switch to Off to provide the best performance of the Network Camera. VK2-1080BXDNe manual V1.0... - Page 13 • LED Indicators Color Indication Steady for connection to a 100 Mbit/s network. Flashes for Green network activity. Network Steady for connection to 10 Mbit/s network. Flashes for Amber network activity. Unlit No network connection. Status Steady red for failed upgrade or booting. Steady green for normal operation or booting.
-
Page 14: Installation
NOTES - Use megapixel lens for higher image quality. - Megapixel lenses are designed and tested to deliver optimal image quality to the VK2-1080BXDNe megapixel cameras. - If the standard definition lens was installed on megapixel camera, the image quality will be poor than expected. - Page 15 Attach the video-type auto iris lens to the lens mount on the front of the camera. Name Wire Color Voltage + Open Video White Ground Black 2. IMPORTANT: The minimum Plug the connector from the lens into the auto iris jack on the back of the camera.
- Page 16 Tighten the back focus lock screw. Fine tune the focus with the focus ring on the lens. Remove the welder's glass from in front of the lens. Adjust the iris of the lens for the best picture quality. VK2-1080BXDNe manual V1.0...
- Page 17 Zoom lens back focus adjustment The objective of back focusing a zoom lens is similar to that of a fixed focal length camera except the back focus is also adjusted to maintain the focus when "zooming" the lens in and out on a scene. Choose an object at the farthest range set for viewing with a zoom lens.
-
Page 18: Audio Connection
The camera provides two alarm input for external signalling devices and one alarm output for activating external devices. Both Normally Open and Normally Closed devices are supported. Figure 4. Alarm connector Alarm Input 1 Alarm Ground Alarm Input 2 Alarm Output Alarm Ground RS485 - RS485 + VK2-1080BXDNe manual V1.0... -
Page 19: Ip Address Set Up
Minimum conditions for using web browser The minimum system requirements to use a Web browser with this IP camera are as follows: - CPU: Pentium® 4 microprocessor, 2.0GHz - Operational System: Windows XP® or Windows Vista® or Windows7® - System Memory: RAM 512 Mbyte... -
Page 20: Smartmanager
Select the camera on the list and click right button of the mouse. You will see the pop-up menu as below. Select Assign IP. You will see an assign IP window. Enter the required IP address. Note: For more information, refer to the Smart Manger User’s Manual. VK2-1080BXDNe manual V1.0... -
Page 21: Operation
3.2 Operation The Network Camera can be used with Windows operating system and browsers. The recommended browsers are Internet Explorer, Safari, Firefox, Opera and Google Chrome with Windows. NOTE: To view streaming video in Microsoft Internet Explorer, set your browser to allow ActiveX controls. 3.2.1 Access from a browser Start a browser (Internet Explorer). -
Page 22: Live View Page
The Pause button pause the video stream being played. The Snapshot button takes a snapshot of the current image. The location where the image is saved can be specified. The digital zoom activates a zoom-in or zoom-out function for video image on the live screen. VK2-1080BXDNe manual V1.0... - Page 23 The Full Screen button causes the video image to fill the entire screen area. No other windows will be visible. Press the 'Esc' button on the computer keyboard to cancel full screen view. The Manual Trigger button activates a pop-up window to manually start or stop the event. The PTZ button activates a pop-up window for Pan, Tilt and Zoom control.
-
Page 24: Playback
The list can be tailored to show only one type or all events. Calendar: Use the calendar to select a specific day Playback Control Buttons: details below of individual icons Go to the first. Fast backward play Backward play Backward step Pause Forward step VK2-1080BXDNe manual V1.0... - Page 25 Forward play Fast forward play Go to the last Clip copy Digital Zoom Full Image Clip Copy: Downloads an avi format file. 1. Select Start Date/Time and End Date/Time. 2. Set Export Path. 3. Click Estimate button which is shown the file FPS and Size. 4.
- Page 26 3. In case of no image data between the Start Date/Time and End Date/Time, the following windows will be appeared. Please retry to set the Start or End Date/Time. 4. The buttons from indicate an Hours and the number from 0 to 60 indicate a minutes. VK2-1080BXDNe manual V1.0...
-
Page 27: Setup
SETUP 4.1 Basic Configuration Use this section to set up the basic settings of the camera. It will allow the user to gain access to the live image and audio. NOTE The setting menu might not be available if the user does not have the permission to access this feature. -
Page 28: Basic - Users
An administrator has unrestricted access to the Setup tools and Administrator can determine the registration of all other users. Enable anonymous viewer login: Check the box to use the webcasting features. Refer to “3.5.2 Video & Image” for more details. VK2-1080BXDNe manual V1.0... - Page 29 To add a new user: 1. Click the Add button, new pop-up window above will appear. 2. Click in the User name box and type a new user name (1 to 14 alphanumeric characters). User names are not case sensitive. 3.
- Page 30 3. Click the OK button. The user profile is removed from the User List. NOTE The administrator can’t be removed. - Click the Save button to save the settings, or click the Reset button to clear all of the information you entered without saving it. VK2-1080BXDNe manual V1.0...
-
Page 31: Basic - Network
4.1.2 Basic - Network The network camera supports both IP version 4 and IP version 6. Both versions may be enabled simultaneously, and at least one version must always be enabled. When using IPv4, the IP address for the network camera can be set automatically via DHCP, or a static IP address can be set manually. If IPv6 is enabled, the network camera receive an IP address according to the configuration in the network router. -
Page 32: Basic - Video & Image
Profile has been defined. H.264 BP(Base Profile): Originally intended as the mainstream consumer profile for broadcast and storage applications, the importance of this profile faded when the High profile was developed for those applications. MPEG4 SP(Simple Profile): VK2-1080BXDNe manual V1.0... - Page 33 Mostly aimed for use in situations where low bit rate and low resolution are mandated by other conditions of the applications, like network bandwidth, device size etc. MPEG4 ASP(Advanced Simple Profile): Its notable technical features relative to the Simple Profile, which is roughly similar to H.263, including "MPEG"-style quantization, interlaced video, B pictures (also known as B Frames), Quarter Pixel motion compensation (Qpel), Global motion compensation (GMC).
- Page 34 Such act may cause a problem to the system performance. • Stream3 Setting Same as the Stream1 Setting. Click the checkbox to activate the 3 stream. When satisfied with the settings, click Save, or click Reset to revert to previously saved settings. VK2-1080BXDNe manual V1.0...
-
Page 35: Basic - Audio
4.1.4 Basic - Audio Use the Audio tab to manage the basic audio settings for the camera. The Network Camera can transmit audio to other clients using an external microphone and can play audio received from other clients by attaching a speaker. •... - Page 36 If the sound from the speaker is too low or high it is possible to adjust the output gain for the active speaker attached to the network camera. When satisfied with the settings, click Save, or click Reset to revert to previously saved settings. VK2-1080BXDNe manual V1.0...
-
Page 37: Basic - Date & Time
4.1.5 Basic - Date & Time Use the Date and Time tab to set the camera’s date and time values, manually or automatically. • Current Server Time It displays the current date and time (24h clock). The time can be displayed in 12h clock format in the overlay (see below). -
Page 38: Video And Image
Choose the form of video encoding you wish to use from the drop-down list: H.264 MP(Main Profile): Primarily for low-cost applications that requires additional error robustness, this profile is used rarely in videoconferencing and mobile applications, it does add additional error resilience tools to the VK2-1080BXDNe manual V1.0... - Page 39 Constrained Baseline Profile. The importance of this profile is fading after the Constrained Baseline Profile has been defined. H.264 BP(Base Profile): Originally intended as the mainstream consumer profile for broadcast and storage applications, the importance of this profile faded when the High profile was developed for those applications. MPEG4 SP(Simple Profile): Mostly aimed for use in situations where low bit rate and low resolution are mandated by other conditions of the applications, like network bandwidth, device size etc.
-
Page 40: Video & Image - Appearance
Stream3 Setting Same as the Stream1 Setting. Click the checkbox to activate the 3 stream. When satisfied with the settings, click Save, or click Reset to revert to previously saved settings. 4.2.2 Video & Image - Appearance VK2-1080BXDNe manual V1.0... -
Page 41: Video & Image - Ae & Awb
• Image Appearance This page provides access to the advanced image settings for the network camera. Brightness: The image brightness can be adjusted in the range 1-10, where a higher value produces a brighter image. Color level: Select an appropriate level by entering a value in the range 1-10. Lower values mean less color saturation. - Page 42 2600K. Fixed Fluorescent: Fixed color adjustment; good for fluorescent lighting with a color temperature around 4000K to 5000K. Fixed Outdoor: Fixed color adjustment for sunny, with a color temperature around 6500K to 7500K. VK2-1080BXDNe manual V1.0...
-
Page 43: Video & Image - Day & Night
4.2.4 Video & Image - Day & Night Select the day/night mode from among three modes. - Automatic: Normally works in day mode. It switches automatically to night mode in a dark place. - Day: Always works in day mode. - Night: Always works in night mode. -
Page 44: Video & Image - Privacy Mask
Click and drag mouse to designate a mask window area. You can also modify or delete a mask window index. Select an index and then, modify items or delete button. Select “Enable” to activate the privacy masking function. VK2-1080BXDNe manual V1.0... -
Page 45: Video & Image - Webcasting
4.2.6 Video & Image - Webcasting The VK2-1080BXDNecan stream live video to a website. Copy the HTML code generated on the screen and paste it in page code of the website NOTE To use webcasting service, the Enable Anonymous viewer login option must be enabled. -
Page 46: Audio
- There are two slightly different versions; μ-law, which is used primarily in North America, and A- law, which is in use in most other countries outside North America. G.711 μ-law tends to give more resolution to higher range signals while G.711 A-law provides more quantization levels at lower signal levels. VK2-1080BXDNe manual V1.0... -
Page 47: Audio Input
Audio Input: Input volume: The Input volume can be adjusted in the range from -21.00 to 21.00 dB. The default setting is 0 dB. Click the Mute box if you do not want the audio input. Audio Output: Output volume: The Output volume can be adjusted in the range from -18.1 to 6.0 dB. -
Page 48: Event
This page allows you to configure the 2 inputs supported by the camera. Ports can be given as Normally Open or Normally Close state. Select “Enable” to activate the alarm event. The network camera supports 1 alarm input port. Type: Choose the type of alarm you wish to use from the drop-down list. VK2-1080BXDNe manual V1.0... - Page 49 Dwell Time: Set the dwell time of an event lasts for the specified dwell time from the point of detection of an alarm input...
- Page 50 Dwell time means how long time the alarm output signal hold on as an output signalling source. - Click the Save button to save the settings, or click the Reset button to clear all of the information you entered without saving it. VK2-1080BXDNe manual V1.0...
- Page 51 4.4.1.4 Event - Event In – Motion Motion detection is used to generate an alarm whenever movement occurs (or stops) in the video image. A total of 8 Motion and/or Mask windows can be created and configured. Motion is detected in defined Motion windows, which are placed in the video image to target specific areas. Movement in the areas outside the motion windows will be ignored.
- Page 52 You can also modify or delete a motion index. Select an index and then, click the Modify or Delete button. Select “Enable” to activate the motion window. 4.4.1.5 Event - Event In – Network loss This is used to trigger an event every time the network connection fails. Select “Enable” to activate the Network Loss event. VK2-1080BXDNe manual V1.0...
-
Page 53: Event - Event Out
4.4.2 Event - Event Out 4.4.2.1 Event - Event Out – SMTP (Email) Use the Simple Mail Transfer Protocol (SMTP) server to send an email notification when an event is activated. If your mail server requires authentication, click the Use (SMTP) authentication checkbox for use authentication to log in to this server. - Page 54 Test button. Enter the recipient’s email address as the receiver to test. Receiver: - Click the Save button to save the settings, or click the Reset button to clear all of the information you entered without saving it. VK2-1080BXDNe manual V1.0...
- Page 55 4.4.2.2 Event - Event Out – FTP & JPEG Save the JPEG of the activated event to a defined FTP server. When the network camera detects an event, it can record and save images to an FTP server. Images can be sent as e-mail attachments.
- Page 56 URL: The network address to the server and the script that will handle the request. For example: http://192.168.12.244/cgi-bin/upload.cgi User name/Password: Provide your log-in information. • HTTP Server Test When the setup is complete, the connection can be tested by clicking the Test button. VK2-1080BXDNe manual V1.0...
- Page 58 When the network camera detects an event, it can control external equipment connected to its alarm output port. Check the box to enable and then select either: Enable: When you select “Enable alarm out”, the output will be activated for as long as the event is active. VK2-1080BXDNe manual V1.0...
- Page 59 4.4.2.5 Event - Event Out – Audio Alert When the network camera detects an event such as Alarm or Motion, it can output a predefined audio recording to external speakers. When the network camera detects an event, it can output a predefined audio data to external speaker. Check the box to enable the service.
- Page 60 If you don’t need to make any PCM file, skip this step and then go to the step 5 directly. 4. Click the Open button and then select the file name to open an audio file in PCM format. VK2-1080BXDNe manual V1.0...
- Page 61 5. Click the Encode button to encode a current audio file to G.711 format for Audio Alert. Set the file name and encode parameters. NOTE All parameters must be synchronized with ones in audio setting page of network devices correct operation.
-
Page 62: Event - Event Out - Ptz Preset
This screen is used to specify which preset an external PTZ device will be sent to on an event. Check the Enable PTZ preset box, Choose the preset position the external device is to be sent to on an event input. VK2-1080BXDNe manual V1.0... -
Page 63: Event - Event Out - Record
4.5.7 Event - Event Out – Record When the network camera detects an event, it can record video stream in the Micro SD Memory (not supplied) or NAS (Network Attached Device) as a storage device. Check the Enable record checkbox to enable the service. - Page 64 * IP/Password: Enter ID and Password. The network camera will ask them whenever you access NAS device. * Check: Press the Check button to check the validity of Device Setting data. • Format Click the Format button to format storage device. • Device Information Show current storage device information. VK2-1080BXDNe manual V1.0...
-
Page 65: Event - Event Map
4.4.3 Event - Event Map This lists the events which will cause either: the Event to be recorded to the SD card; or upload images to a specified destination; or send an email; or active an output port. The event map allows you to change the settings and establish a schedule for each event trigger from the Network Camera. - Page 66 Select the Home position box, if the external PTZ device is to return to its home position after the event is cleared. Record: Check the record box if an event is to be recorded to the cameras SD card. VK2-1080BXDNe manual V1.0...
-
Page 67: Device
4.5.1 Device - PTZ When an event occurs the VK2-1080BXDNe can output an RS485 telemetry string via the port on its rear panel, this can send an external PTZ dome to a preset position. To configure the port to the correct protocol and ID use the following page. -
Page 68: Device - Rs485
Parity: Selects one of the Parity bit. The default value is NONE. - Click the Save button to save the settings, or click the Reset button to clear all of the information you entered without saving it. VK2-1080BXDNe manual V1.0... -
Page 69: System
4.6 System 4.6.1 System - Information • Device Name Configuration Enter the device name., this name will appear on the Smart manger Listings so making it easier to quickly identify the camera. • Location Configuration Enter the location information. Up to 4 lines can be added... - Page 70 The default User Name is admin and the password of admin is admin. User Name: Shows the names which registered to access the camera. User Group: Shows the assigned permissions given to users. User Authority: Shows the permission status to access the menus. VK2-1080BXDNe manual V1.0...
- Page 71 To add a new user: 1. Click the Add tab, a new pop-up window appears. 2. Click in the User name box and type a new user name (1 to 14 alphanumeric characters). User names are not case sensitive. 3. Click in the Password box and type a password (1 to 8 alphanumeric characters). Passwords are case sensitive.
- Page 72 3. Click the OK button. The user profile is removed from the User List Setting profile. NOTE The admin user name can’t be deleted. - Click the Save button to save the settings, or click the Reset button to clear all of the information you entered without saving it. VK2-1080BXDNe manual V1.0...
- Page 73 4.6.1.2 System -Security - HTTPS Use the HTTPS tab to allow user access to the camera using web browser encrypted communication. HTTPS Connection Policy: Provides the connection policy when accessing the camera using a web browser. Connection mode: The default setting is HTTP&HTTPS. -- HTTP: The sensitive data will be transfer without encrypted during transmission.
- Page 74 Please refer to the home page of your preferred CA for information on where to send the request. For more information, please see the online help. - Click the Save button to save the settings, or click the Reset button to clear all of the information you entered without saving it. VK2-1080BXDNe manual V1.0...
- Page 75 4.6.1.3 System -Security - IP Filtering Use the IP Filtering tab to activate the IP address filtering function. This decides which IP address ranges will be allowed access. IP Filtering Setting: Provides the IP filtering elements such as On/Off, Priority, Policy and IP Ranges.
-
Page 76: System - Date & Time
Time zone: The default setting is GMT. Time mode: The default setting is Set manually. Synchronize with computer time: Sets the time according to the clock on your computer, this is the default setting. VK2-1080BXDNe manual V1.0... - Page 77 Synchronize with NTP Server: This option will obtain the correct time from an NTP server every 60 minutes. The NTP server's IP address or host name is specified in the time server. Set manually: Using this option allows you to manually enter the date and time. Date &...
-
Page 78: System - Network
Use the following IP address: Select the choice box if you want to assign the IP address manually. IP address: The address of the camera connected to the network. Specify a unique IP address for this network camera. VK2-1080BXDNe manual V1.0... - Page 79 Subnet mask: The address that determines the IP network that the camera is connected to (relative to its address). Specify the mask for the subnet the network camera is located on. Default router: The router that accesses other networks. Specify the IP address of the default router (Gateway) used for connecting devices attached to different networks and network segments.
- Page 80 Enter the registered host name. User name: Enter the registered user name to be used for accessing the DDNS server. Password: Enter user password to be used for accessing the DDNS server. Confirm password: Enter user password again to confirm. VK2-1080BXDNe manual V1.0...
-
Page 81: System - Network - Rtp
Maximum time interval: Set the interval at which to regularly update the Dynamic DNS service. The default setting is 10 minutes. □ Register local network IP address: Register a network camera IP address to the DDNS server. - Click the Save button to save the settings, or click the Reset button to clear all of the information you entered without saving it. - Page 82 Network Cameras or users, a higher value may cause a heavy load to the network. For a detailed setting, please consult with a network manager. - Click the Save button to save the settings, or click the Reset button to clear all of the information you entered without saving it. VK2-1080BXDNe manual V1.0...
- Page 83 4.6.3.4 System - Network - UPnP (Universal Plug and Play) UPnP is enabled by default, and the network camera then is automatically detected by operating systems and clients that support this protocol. UPnP Setting: Click the Enable UPnP checkbox to disable the UPnP. The default setting is enabling.
- Page 84 NOTES The main benefits of a QoS-aware network can be summarized as: - The ability to prioritize traffic and thus allow critical flows to be served before flows with lesser priority. VK2-1080BXDNe manual V1.0...
- Page 85 - Greater reliability in the network, thanks to the control of the amount of bandwidth an application may use, and thus control over bandwidth races between applications. - Click the Save button to save the settings, or click the Reset button to clear all of the information you entered without saving it.
- Page 86 If you attempt to manually enter a port that is already in use, an alert message will be displayed. When the port is selected automatically it is displayed in this field. To change this enter a new port number and click Save. VK2-1080BXDNe manual V1.0...
- Page 87 4.6.3.7 System - Network - Zeroconfig Zeroconfig allows the network camera to create and assign IP address for network cameras and connect to a network automatically. Internet Zero configuration networking (zeroconf), is a set of techniques that automatically creates a usable Protocol (IP) network without manual operator intervention or special configuration servers.
- Page 88 Note: Bonjour - Also known as zero-configuration networking, Bonjour enables devices to automatically discover each other on a network, without having to enter IP addresses or configure DNS servers. Bonjour is a trademark of Apple Computer, Inc. VK2-1080BXDNe manual V1.0...
-
Page 89: System - Language
4.6.4 System - Language Use the Language tab to configure the language supported. Language Setting: Provides the option of language supported. Language: The default setting is English. - Click the Save button to save the settings, or click the Reset button to clear all of the information you entered without saving it. -
Page 90: System - Maintenance
The Default button should be used with caution. Pressing this returns the camera’s Default: settings to the factory default values including the IP address. Upgrade: Upgrades the camera to the latest firmware version. NOTE Always read the upgrade instructions and release notes before upgrading the firmware. VK2-1080BXDNe manual V1.0... - Page 91 Upgrade procedure: 1. Save the firmware file to a known location on yourcomputer. 2. Browse to the desired firmware file on your computer. 3. Click the Upgrade button. NOTES - Do not disconnect power to the unit during the upgrade. The unit restarts automatically after the upgrade has been completed.
-
Page 92: System - Support
Provides information about the server status and should be included when requesting report. Information be found here includes the camera’s firmware version, MAC address, system information, IP address and network connections. Shows the server’s parameters and their current settings. Parameter List: VK2-1080BXDNe manual V1.0... -
Page 93: About
4.7 About Here you can fine basic information about this camera. The About page shows basic information about this camera as follows: - Megapixel / High Definition (HD) Network Camera - Firmware version: - MAC address:... -
Page 94: Troubleshooting
Check that the Enable multicast checkbox are enabled in the System/Network/RTP tab. Checks with your network administrator to see if there is a firewall preventing viewing. 13. Multicast H.264 only accessible by local clients. VK2-1080BXDNe manual V1.0... -
Page 95: Upgrading Firmware
→ Check if your router supports multicasting, or if the router settings between the client and the server need to be configured. The TTL value may need to be increased. 14. Colour saturation is different in H.264 and Motion JPEG. →... - Page 96 Norbain SD Ltd 210 Wharfedale Road Winnersh Triangle Wokingham Berkshire England RG41 5TP Subject to change without notice 0118 9125 000 VK2-1080BXDNe manual V1.0...
Need help?
Do you have a question about the VK2-1080BXDNe and is the answer not in the manual?
Questions and answers