
Related Manuals for Vista VK2-3MPVRDIR3V9F


Summary of Contents for Vista VK2-3MPVRDIR3V9F
- Page 1 VK2-3MPVRDIR3V9F Quick Guide Please read this manual thoroughly before use, and keep it handy for future reference.
-
Page 3: Installation
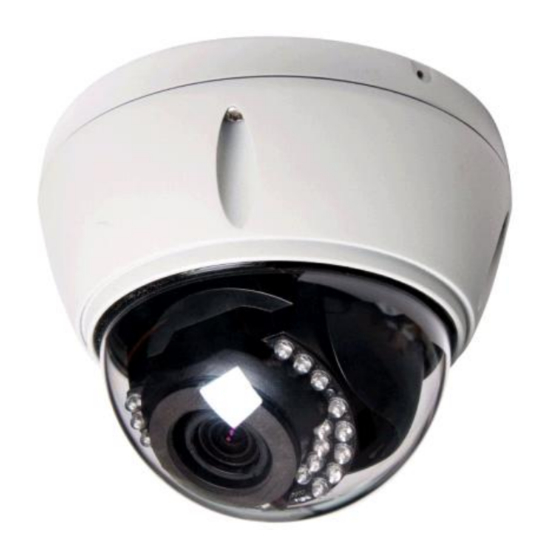
1. Description This manual applies to the VK2-3MPVRDIR3V9F 3 mega pixel Vandal resistant vari-focal dome with IR illumination. • Installation Steps Follow these steps to install the network camera on your local network (LAN): 1. Check the package contents against the list below. - Page 4 2.1 Connection Connection Cable Wire Color Description Ethernet, RJ-45 port compatible with 10/100Mbps having PoE Yellow functionality. Modular Jack Red: AC24V/DC12V Main Power, 3 pin terminal, White: AC24V/GND Pink: GND Gray: Alarm Input Alarm Input and Output, 4pin terminal. Brown: GND Yellow: Alarm Out Red : Audio In...
- Page 5 If using PoE, the heater will not operate at all. If PoE and DC 12V are both applied, this camera will get supplied with power from PoE. • Connecting Service Monitor Port (using VK2-LCT) Service monitor output port (J7) is located on the board of the dome camera, and is used for an easy OSD setup.
-
Page 6: Network Connection And Ip Assignment
Heater Kit Installation(Optional) 1. Place the heater element is slot “A”. Please ensure that the cables are facing upwards and the heater is pointing towards the Dome. 2. Place the plug in the Connector “B” (J13) which is found on the controller board. •... -
Page 7: Operation
Select Assign IP. You cam see a Assign IP window. Enter the required IP address. 3. Operation The Network Camera can be used with Windows operating system and browsers. The recommended browsers are Internet Explorer, Safari, Firefox, Opera and Google Chrome with Windows. 3.1 Access from a browser Start a browser (Internet Explorer). -
Page 8: Access From The Internet
3.2. Access from the internet Access from the internet once connected, the Network Camera is accessible on your local network (LAN). To access the network camera from the Internet you must configure your broadband router to allow incoming data traffic to the network camera. To do this, enable the NAT-traversal feature, which will attempt to automatically configure the router to allow access to the network camera. - Page 9 The resolution drop-down list allows you to select the most suitable one out of video resolutions to be displayed on live view page. The protocol drop-down list allows you to select which combination of protocols and methods to use depends on your viewing requirements, and on the properties of your network.
- Page 10 Focus and Zoom Control You can control Zoom and Focus in the live screen. Press the button on the left top in the live screen to activate the Zoom & Focus control panel. • Adjusting Zoom: Click “<” button to zoom out and click “>” button to zoom in. The focus is moved slightly after adjusting zoom;...
-
Page 11: Network Camera Setup
3.5 Network Camera Setup This section describes how to configure the network camera, and is intended for product Administrators, who have unrestricted access to all the Setup tools; and Operators, who have access to the settings for Basic, Live View, Video & Image, Audio, Event, and System Configuration. You can configure the network camera by clicking Setup in the top right-hand corner of the Live View page. - Page 12 Norbain SD Ltd 210 Wharfedale Road Winnersh Triangle Wokingham RG41 5TP 01189 125 000...
Need help?
Do you have a question about the VK2-3MPVRDIR3V9F and is the answer not in the manual?
Questions and answers