Table of Contents
Advertisement
Available languages
Available languages
Do not use this equipment before reading this manual!
Model Number:
Complete
700-3000
Printed in the U. S. A.
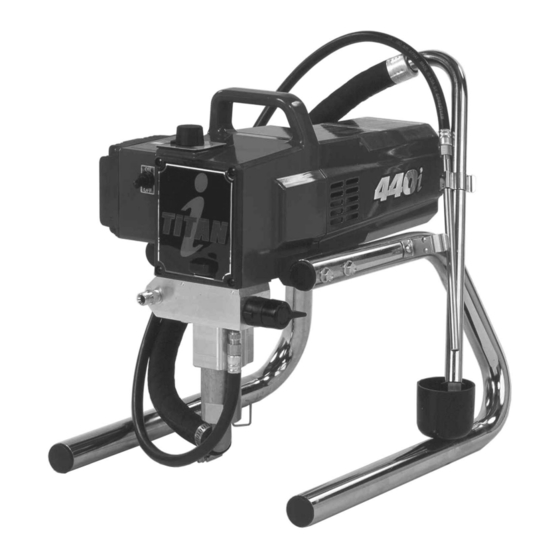
440
Airless Sprayer
Owner's Manual
Notice d'utilisation
Manual del Propietario
For professional use only
i
NOTE: This manual contains important warnings
NOTE: This manual contains important warnings
and instructions. Please read and retain for
and instructions. Please read and retain for
reference.
reference.
0602 © 2002 Titan Tool Inc. All rights reserved. Form No. 313-1632, REV D
Español
Français
English
Advertisement
Chapters
Table of Contents

Related Manuals for Titan 440i


Summary of Contents for Titan 440i
- Page 1 NOTE: This manual contains important warnings and instructions. Please read and retain for and instructions. Please read and retain for reference. reference. 0602 © 2002 Titan Tool Inc. All rights reserved. Form No. 313-1632, REV D Printed in the U. S. A. Español Français English...
-
Page 2: Table Of Contents
• NEVER aim the gun at any part of the body. • Plastic can cause static sparks. Never hang plastic to enclose spray area. Do not use plastic drop cloths when spraying flammable materials. • Use lowest possible pressure to flush equipment. © Titan Tool Inc. All rights reserved. English... -
Page 3: Grounding Instructions
3200PSI/221 BAR. • Do not spray outdoors on windy days. • Wear clothing to keep paint off skin and hair. • Always unplug cord from outlet before working on equipment. © Titan Tool Inc. All rights reserved. English... -
Page 4: General Description
8. Move the PRIME/SPRAY valve up to the SPRAY position. Always use a minimum 12 gauge, three-wire extension cord 9. Turn the unit on. with a grounded plug. Never remove the third prong or use an adapter. © Titan Tool Inc. All rights reserved. English... -
Page 5: Painting
Fluid Section Wear — if a solid yellow pressure manuals. indicator appears when using a new tip and the Trigger lock pressure is set at maximum, service may be required in locked position. (worn packings, worn piston, stuck valve, etc...). © Titan Tool Inc. All rights reserved. English... -
Page 6: Pressure Relief Procedure
The cloth should be removed as soon as wider spray pattern. If runs, sags, or excessive paint occur, possible. Titan gun extensions are extremely helpful in these change to a spray tip with a smaller orifice. If there is an situations. -
Page 7: Practice
For short-term storage when using latex paint, will spatter out in gobs rather pump water mixed with Titan Liquid Shield than in a fine spray. through the entire system (see the Accessories Paint tailing pattern section of this manual for part number). -
Page 8: Replacing The Motor
Replacing the Motor Brushes 4. If you have any further questions concerning your TITAN Airless Sprayer, call TITAN: Perform this procedure using Motor Brush Kit P/N 704-276. Customer Service (U.S.) .......1-800-526-5362 1. Loosen and remove the four motor cover screws. -
Page 9: Replacing The Transducer
7. Insert the groove pin into the valve handle and through may cause damage to the transducer gasket. the valve stem to secure the valve handle in position. Pump Block Gasket Valve Stem Cam Base Valve Handle Groove Pin Valve Housing Assembly © Titan Tool Inc. All rights reserved. English... -
Page 10: Servicing The Fluid Section
NOTE: Coat the piston guide tool and the piston rod with grease before inserting them into the pump block. © Titan Tool Inc. All rights reserved. English... -
Page 11: Replacing The Filters
4. Turning counterclockwise, thread the new or cleaned filter into the pump block. 5. Slide the filter housing over the filter and thread it into the pump block until secure. Filter Housing Filter Seal Pump Block © Titan Tool Inc. All rights reserved. English... -
Page 12: Troubleshooting
2. Adjust 3. Dirty gun 3. Clean Gun does not spray 1. No paint 1. Check fluid supply 2. Plugged filter or tip 2. Clean 3. Broken needle in gun 3. Replace © Titan Tool Inc. All rights reserved. English... -
Page 13: Spray Patterns
3. Tip too large or worn 3. Replace with a new or smaller tip Patents These products are covered by one or more of the following U.S. patents: 4,500,119 4,768,929 © Titan Tool Inc. All rights reserved. English... -
Page 14: Consignes De Sécurité
être extrêmement bien aéré. La pompe à Pression de service maximale du fluide dans l’appareil : peinture contient des pièces pouvant créer des étincelles 3200 lb/po2 / 221BAR. et enflammer les vapeurs présentes dans l’air. © Titan Tool Inc. Tous droits réservés. Français... - Page 15 Si vous devez utiliser une rallonge à l’extérieur, celle-ci doit comprendre la marque W-A après la désignation indiquant le type de cordon. Par exemple, la désignation SJTW-A indique que le cordon est conçu pour être utilisé à l’extérieur. © Titan Tool Inc. Tous droits réservés. Français...
-
Page 16: Description Générale
5. Mettre l’appareil en marche en mettant le Max. commutateur à la position ON. 6. Laisser le vaporisateur fonctionner pendant 15 à 30 secondes pour évacuer le solvant usé par le flexible de retour, jusqu’au contenant de purge. © Titan Tool Inc. Tous droits réservés. Français... -
Page 17: Peinture
à sa position normale, au-dessus du contenant de produit de peinture. 9. Soulever la soupape AMORÇAGE/VAPORISATION à la position SPRAY. 10. Mettre l’appareil en marche. 11. Déverrouiller le pistolet en mettant le verrou de détente à la position appropriée. © Titan Tool Inc. Tous droits réservés. Français... -
Page 18: Procédure De Décompression
Cette toile doit cependant être retirée dans les plus brefs délais. Les rallonges de pistolet Titan peuvent, elles aussi, s’avérer fort utiles dans de telles situations. Les objets comme les voitures, l’ameublement de jardin, etc. -
Page 19: Essais Préliminaires
20 litres (5 gallons). composants d’eau mélangée au protecteur Titan Liquid Shield (se reporter à la section • L’endroit choisi doit être exempt de vapeurs inflammables. Accessoires du présent manuel pour obtenir le •... -
Page 20: Maintenance
Corps du pistolet ses recommandations à cet effet. 4. Pour toute autre question relative à ce vaporisateur à dépression, il suffit de communiquer avec Titan : Service à la clientèle (É.-U.)....1-800-526-5362 Télécopieur........1-800-528-4826 Joint Service à... -
Page 21: Remplacement Du Moteur
électrique. Le vaporisateur doit toujours être débranché 8. Glisser le carter sur le moteur en le fixant au moyen des avant d’être entretenu ou réparé. quatre vis prévues. © Titan Tool Inc. Tous droits réservés. Français... -
Page 22: Maintenance De La Section Des Liquides
4. Retirer l’agrafe qui fixe le bloc d’aspiration à la soupape avant de retenue; disjoindre ces éléments. Bloc Transducteur pompe 5. Incliner la pompe vers l’arrière pour accéder plus facilement à la section des liquides. Vis de montage du bloc pompe © Titan Tool Inc. Tous droits réservés. Français... - Page 23 (no l’avant jusqu’à ce Tige du 730-401), laquelle contient les éléments qui que cette dernière piston garantiront les meilleurs résultats pour cette sorte de la rainure procédure. en T de la bielle. © Titan Tool Inc. Tous droits réservés. Français...
-
Page 24: Dépannage
3. Nettoyer Le pistolet ne vaporise pas 1. Absence de produit de peinture 1. Vérifier la source de liquide 2. Filtre ou embout obstrués 2. Nettoyer 3. Aiguille du pistolet brisée 3. Remplacer © Titan Tool Inc. Tous droits réservés. Français... - Page 25 3. Embout de vaporisation trop gros ou 3. Remplacer par un embout neuf ou plus petit usé Brevets Ces produits sont protégés par un ou plusieurs des brevets (U.S.A.) suivants : 4,500,119 4,768,929 © Titan Tool Inc. Tous droits réservés. Français...
-
Page 26: Precauciones De Seguridad
• El equipo que se utilice, así como los objetos que estén dentro y alrededor del área de atomización, deben conectarse a tierra de manera apropiada para prevenir las descargas eléctricas y las chispas. © Titan Tool Inc. Todos los derechos reservados. Español... - Page 27 W-A después de la designación del tipo de cable. Por ejemplo, SJTW-A para indicar que el cable es apropiado para uso en exteriores. © Titan Tool Inc. Todos los derechos reservados. Español...
-
Page 28: Descripción General
Max. conexión a tierra apropiada a una distancia mínima de 25 5. Encienda la unidad moviendo el pies del área de rociado. interruptor de ON/OFF (ENCENDIDO/APAGADO) a la posición ON (ENCENDIDO). © Titan Tool Inc. Todos los derechos reservados. Español... -
Page 29: Pintura
8. Retire la manguera de retorno del recipiente para desecho y colóquela en la posición de operación, sobre el recipiente de pintura. 9. Mueva hacia arriba la válvula PRIME/SPRAY (CEBADO/ROCIADO) a la posición SPRAY (ROCIADO). 10. Encienda la unidad. © Titan Tool Inc. Todos los derechos reservados. Español... -
Page 30: Procedimiento Para Aliviar La Presión
La tela debe quitarse lo más pronto alternada de izquierda a derecha y viceversa. Comience el posible. Las extensiones de pistola Titan son sumamente movimiento de la pistola antes de presionar el gatillo. útiles en estas situaciones. -
Page 31: Práctica
• El área debe estar libre de vapores inflamables. mezclada con Titan Liquid Shield a través del • Siga todas las instrucciones de limpieza. sistema completo (para ver el número de pieza, consulte la sección Accesorios de este manual). -
Page 32: Mantenimiento
5. Revise que el sello del mango esté en posición y atornille el mango en la pistola hasta que quede firme. 4. Si tiene otras preguntas referentes al rociador Titan, llame 6. Mueva el seguro del gatillo de la pistola a la posición a Titan: bloqueada. -
Page 33: Reemplazo Del Motor
3. Incline la bomba hacia atrás para ingresar más fácilmente 8. Coloque la cubierta del motor. Asegure la cubierta del a la sección de líquido. motor con los cuatro tornillos correspondientes. © Titan Tool Inc. Todos los derechos reservados. Español... -
Page 34: Reemplazo De La Válvula De Cebado/Rociado
Use las instrucciones a Junta tórica continuación para limpiar las válvulas e invertir o reemplazar los asientos. Caja de la válvula de pie © Titan Tool Inc. Todos los derechos reservados. Español... - Page 35 NOTA: Se ofrece el juego para reemplazar ilustración a continuación para ver la orientación correcta empaquetaduras N/P 730-401. Para obtener de las empaquetaduras. óptimos resultados use todas las piezas suministradas en este juego. © Titan Tool Inc. Todos los derechos reservados. Español...
-
Page 36: Solución De Problemas
3. Limpie La pistola no rocía 1. No hay pintura 1. Verifique el suministro de líquido 2. Filtro o punta obstruido 2. Limpie 3. Aguja rota en la pistola 3. Reemplace Español © Titan Tool Inc. Todos los derechos reservados. - Page 37 50 pies (15 metros) 3. Punta demasiado grande o desgastada 3. Reemplace por un punta nueva o más pequeña Patentes Estos productos están protegidos por una de las siguientes patentes (U.S.A.): 4,500,119 4,768,929 © Titan Tool Inc. Todos los derechos reservados. Español...
-
Page 38: Parts Listings
313-1629 Etiqueta de la cubierta del motor 313-1673 Etiqueta de advertencia (inyección/explosión) 313-1847 Etiqueta del peligro de choque 313-1715 Etiqueta de control de presión 313-1743 Etiqueta de la luz indicadora © Titan Tool Inc. All rights reserved. English Français Español... -
Page 39: Motor Assembly
NOTA: Tous les travaux d’électricité NOTA: Todo trabajo eléctrico debe performed by an authorized doivent être effectués par le realizarlo un centro de service center. personnel d’un centre de servicio autorizado. service autorisé. © Titan Tool Inc. All rights reserved. Español Français English... -
Page 40: Gear Box Assembly
Gear Box Assembly • Boîte d’engrenages • Ensamblaje de la caja de engranajes © Titan Tool Inc. All rights reserved. English Français Español... - Page 41 Montaje del potenciómetro.......1 704-279 Cubierta del diodo emisor de luz .....1 765-063 Alivio de tensión ........1 704-282 Tornillo ............1 765-054 Cable de alimentación ......1 704-281 Tapón del orificio ........1 704-229 Tornillo ............1 © Titan Tool Inc. All rights reserved. Español Français English...
-
Page 42: Fluid Section Assembly
(no 700-793). NOTA: Juego de empaquetaduras N/P 730-401 incluye los artículos marcados con un *. También se incluye grasa de empaquetadura N/P 700-203 y herramienta guía de pistón N/P 700-793. © Titan Tool Inc. All rights reserved. English Français Español... - Page 43 Bola de la válvula de pie........1 tórica opcional de Teflon (700-897). Instale con 762-137 Asiento de la válvula de pie ........1 una herramienta para juntas tóricas (700-890). 762-058 Junta tórica............1 © Titan Tool Inc. All rights reserved. Español Français English...
-
Page 44: Stand Assembly
(incluye artículos 2–4 y 7) ......1 704-179 Pata, izquierda, completa 755-135 Sujetador ..........1 (incluye artículos 1 y 3-5) 700-805 Malla de entrada........1 704-178 Pata, derecha, completa (incluye artículos 3 y 6-8) © Titan Tool Inc. All rights reserved. English Français Español... -
Page 45: Electrical Schematic
Ensamblaje Placa de control de cables ROJO electrónico (704-258, Rojo) ROJO Ensamblaje de cables (765-072) ROJO NEGRO Disyuntor NOTA: Todo trabajo eléctrico debe realizarlo un centro de Interruptor servicio autorizado. © Titan Tool Inc. All rights reserved. Español Français English... -
Page 46: Accessories
314-171 ...Lubriplate, 14 ounce individual 314-171 ...Lubriplate, contenant d’environ 400 g (14 oz) 314-172 ...Lubriplate, 6 lb. can 314-172 ...Lubriplate, contenant d’environ 3 kg (6 lb) 700-1037 ..Electrostatic discharge (ESD) wrist strap © Titan Tool Inc. All rights reserved. English Français Español... -
Page 47: Accesorios
Varios Part No. Description 490-012 ...Acoplamiento de manguera, 1/4 x 1/4 de pulgada 730-397 ...Fl.de alta presión Medidor 314-171 ...Lubriplate, individual de 14 onzas 314-172 ...Lubriplate, lata de 6 lb. © Titan Tool Inc. All rights reserved. Español Français English... -
Page 48: Warranty
Warranty • Garantie • Garantía Titan Tool, Inc., (“Titan”) warrants that at the time of delivery to the original purchaser for use (“End User”), the equipment covered by this warranty is free from defects in material and workmanship. Titan’s obligation under this warranty is limited to replacing or repairing without charge those parts which, to Titan’s reasonable satisfaction, are shown to be defective within twenty-five (25) months after sale to the End User.
Need help?
Do you have a question about the 440i and is the answer not in the manual?
Questions and answers