Table of Contents
Advertisement
Quick Links
I
NTRODUCTION
English
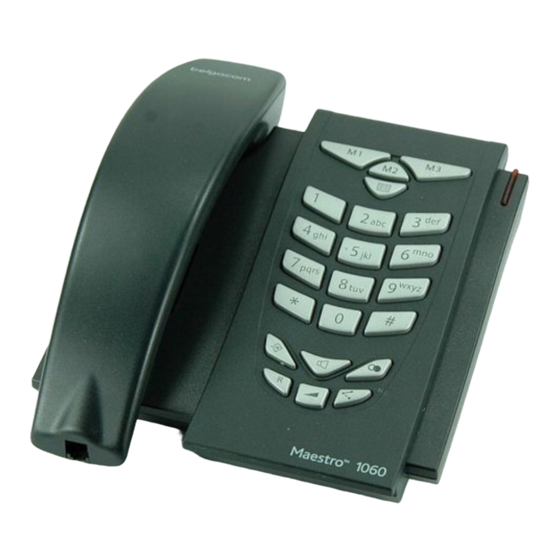
MAESTRO 1060
Introduction
Belgacom thanks you for choosing the Maestro 1060, a telephone for both the home and
the office, which offers many advanced services such as :
> Dialling via direct memories and via Phonebook > Hands-free and Group listening functions
EU Statement of Compliance
Industrie Dial Face S.p.A., based at 4 Via Canzo 20068 - Peschiera Borromeo (MI) Italy, declares under
its own responsibility that the Maestro 2060 telephone equipment complies with the following stan-dards:
EN 55024, EN 55022 – Electro-magnetic compatibility
EN 60950 – Electrical Safety
and meets the requirements of Directive 1999/5/CE of the European Parliament and Council dated 9
March 1999 in relation to radio equipment and telecommunication terminals and the recognition of
reciprocal compliance.
Compliance with these provisions is demonstrated by the mark
Use of the telephone
The telephone has been designed for connection to Belgacom analogue telephone network.
Important advice
Do not use the telephone in an environment which is excessively humid, dusty, gas saturated or with
risk of water contact. In addition, do not expose it to direct sunlight or other sources of heat. It is advised
not to place the device on slippery or delicate surfaces but to install it at a distance of at least one meter
from other devices that are the source of parasites such as cordless equipment, beepers, televisions and
industrial machinery, etc. Clean it by using a damp cloth or antistatic wipe. Do not use dry cloths or
corrosive cleaners.Where the device remains unplugged from the network in order to preserve it, it is advi-
sable to remove the batteries from their housing to avoid any damage by contacts due to the leakage of
the liquid they contain.Each of these conditions can affect the operating and appearance of the pro-
duct over time.For safety reasons, always unplug the network cable before removing the
batteries,when replacing them and also during telephone maintenance.Keep this user manual
safe and observe environmental standards when discarding the equipment.
The equipment that you bought has required the extraction and use of natural resources for its production.
It may content hazardous substances for the health and the environment.
In order to avoid the dissemination of those substances in our environmentand to diminish the pressure on
the natural resources, we encourage you to use the appropriate take-back systems. Those systems will reuse
or recycle most of the materials of your end life equipment in a sound way.
The crossed-bin symbol invites you to use those systems.
If you need more information on the collection, reuse and recycling systems, please contact your local or re-
gional waste administration.
You can also contact us for more information on the environmental performances of our products.
1
User manual MAESTRO 1060
Advertisement
Table of Contents

Related Manuals for BELGACOM MAESTRO 1060


Summary of Contents for BELGACOM MAESTRO 1060
- Page 1 MAESTRO 1060 Introduction Belgacom thanks you for choosing the Maestro 1060, a telephone for both the home and the office, which offers many advanced services such as : > Dialling via direct memories and via Phonebook > Hands-free and Group listening functions EU Statement of Compliance Industrie Dial Face S.p.A., based at 4 Via Canzo 20068 - Peschiera Borromeo (MI) Italy, declares under...
-
Page 2: Table Of Contents
Warranty ................. . 13 User manual MAESTRO 1060... -
Page 3: Installation And Start-Up
1.2 LED The telephone is equipped with a red LED.The LED will light as follows: - when a call incomes (during the ring), also if the ringer has been deactivated. - when the telephone line is engaged. User manual MAESTRO 1060... -
Page 4: Content Of The Box
Plastic screw (E) Fig. 2 Line plug in Handset plug in (C) 1.3 Content of the box 1 handset 1 line cord 1 line plug in 1 spiral cord 1 base 1 user manual (with warranty card)) User manual MAESTRO 1060... -
Page 5: Installing The Telephone
3) Insert the four-poles plug into the telephone socket. After this operation, the Maestro 1060 installation is finished. 1.5 Wall installation The Maestro 1060 can be fixed to the wall: 1) Drill two holes of 5mm diameter at a distance of 100 mm. -
Page 6: Technical And Functional Features
- 2nd call dedicated key with pause insertion (1sec. or 1,5 sec. ) between R and 2 - PABX prefix programmability (1 number from 0 to 9) - Pause insertion after PABX prefix (1, 2 or 3 seconds) - Wall mounting User manual MAESTRO 1060... -
Page 7: Setting The Ringer
The level changes each time the key is pressed passing from the minimum to maximum and then to the minimum again. The level stored is the one audible when the line is goig to be released. User manuali MAESTRO 1060... -
Page 8: Programming The Direct Memories
2.4 Programming the Phonebook The Maestro 1060 can store 10 numbers (max. = 26 digits,pauses included) into a Phonebook To store a number into the Phonebook,proceed as follows: ∂... -
Page 9: Programming Pabx Prefix And Associated Pause
2.8 Reset code The Reset code is a 4 digits number to set the telephone back to manufacturing configuration. Proceed as follows: ∂ ° Press the ° Enter the code 0000 ∂ ° Press the key to confirm. User manual MAESTRO 1060... -
Page 10: Use Of The Telephone
∑ ° Pick the handset up or press the key and wait for dial tone. The LED will light steady. ° Enter the number to be dialled out. ° Release the line to end the conversation.. User manual MAESTRO 1060... -
Page 11: Calling A Direct Memory Number
"3" to pass to a 3 party conference with other partners. ≈ ° Press the key and then press "1" to end the on going communication and to carry on whith the partner on hold. ° Release the line to end the conversation. User manual MAESTRO 1060... -
Page 12: Adjusting The Loudspeaker Volume Level
,allowing the people close to the telephone to hear the conversation. The user can go back to hand- set mode by pressing the ∑ key or can pass to Hands-free mode by holding the ∑ key pressed ,replacing the handset and then releasing the ∑ key. User manual MAESTRO 1060... -
Page 13: Warranty
......................................... . *delete as appropriate User manual MAESTRO 1060... - Page 14 The general sale terms of our terminal equipment may be obtained by simply making a request to any Belgacom department open to the public and on in- ternet site www.belgacom.be.