Table of Contents
Advertisement
Quick Links
Advertisement
Table of Contents

Related Manuals for BELGACOM Twist 545


Summary of Contents for BELGACOM Twist 545
- Page 2 NTRODUCTION Dear customer: Thank you for purchasing a DECT telephone; we appreciate your trust in us. This product was manufactured with the upmost care, should you encounter any difficulties during its use, we recommend that you refer to this user guide. For your comfort and safety, we ask that you read the following paragraph carefully: Recommendations and safety instructions Your DECT telephone must not be installed in a humid room (wash room, bathroom, laundry room,...
-
Page 3: Table Of Contents
Getting started Viewing the events log Activate/deactivate the new events Making a call information screen Belgacom smart services Accessories Services when not in communication Receiving a call Alarm clock During a call Setting the alarm clock... - Page 4 ONTENTS Handset settings Registering a new handset to a base Modifying the base preference Resetting the handset Personal registering Base settings Using a handset to put the base in registration mode Resetting the base De-registering a handset Renaming the base Line settings Modifying the network type Modifying the dialling mode...
-
Page 5: Your Telephone
OUR TELEPHONE Unpacking Place the box in front of you, open it and make sure it contains the following items: • one base, • one handset, • one battery compartment cover, • one equipped power adapter, • one telephone line cord, •... -
Page 6: Your Handset
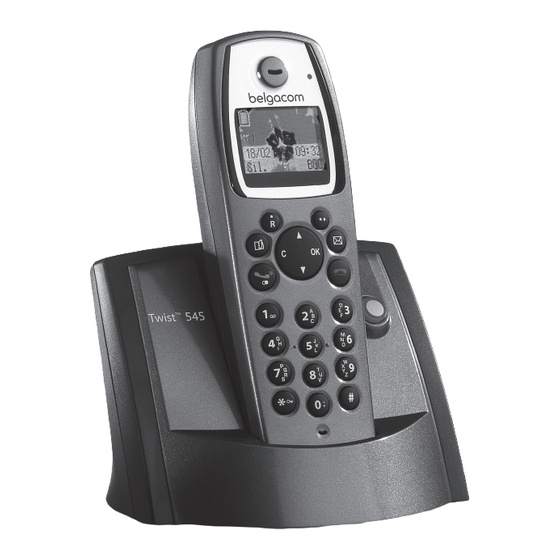
OUR TELEPHONE Your handset With its user-friendly design, you will appreciate how easy it is to hold and its quality during conversations. Incoming message warning beeps and Colour display Phonemail Speaker Direct SMS access Program keys R key Navigator Phonebook key Hang up Pick up Handsfree... - Page 7 OUR TELEPHONE The visual display of your handset Status icons Alarm clock on Battery indicator Phonemail In use In use intercom Timer on Silent mode on Keypad lock SMS Reception Number of handset 03/01 00:00 Time Date Mute Icon showing the programmed function Icon of operator Services...
-
Page 8: Connecting The Base
OUR TELEPHONE Connecting the base Before making any connections, please refer to the safety instructions presented at the beginning of this user guide. On the bottom part of the base, click in the Power socket Telephone socket telephone jack in its socket (as shown on the drawing) and connect the other end of the lead to the wall telephone socket. -
Page 9: Handset Turning On And Off
. The "OFF" message is displayed on the screen. Your handset is now switched off. To turn on your handset, hold down the green key . The name BELGACOM is displayed on the screen. Information is displayed on the screen, including the battery charging indicator icon, the handset number (for example 1), the date, the time and the function keys. -
Page 10: Getting Started
FW. BUSY OFF (#67#) - Deactivation of forward call in case of line busy function. Belgacom smart services 2 CALL ON (*43#) - Activation of 2 Call signal. Your handset makes Comfort services simpler to use. -
Page 11: Receiving A Call
- SECRET: to mute the handset PHONEMAIL (1230) - Listen to messages microphone. left by your callers by means of the - OPER. SERVICES: to access the Belgacom answering machine Phonemail services. After each service activation or Handsfree deactivation, wait for the... -
Page 12: Call Transfer
ETTING STARTED Receiving a second call whilst on line Call transfer During the call, you will hear a beep to tell you This function is only accessible when two that there is a second call handsets or more are registered to the same waiting. -
Page 13: Getting Started
ETTING STARTED To end one of the calls and continue the Accessing the phonebook or call log other one During a call, you can access your Press Menu phonebook to look up a telephone number, a name contained in an entry or information on Select HANGING UP using . -
Page 14: Getting Started
ETTING STARTED Ending a call At the end of the conversation, press the red Communication between two handsets To communicate between handsets, both handsets must be matched to a single base, and must be within range of the base. From the idle screen, enter the number of the handset. -
Page 15: Menu Structure
ENU STRUCTURE You can navigate through the menus using the navigator key PHONEBOOK VIEW EDIT SMS CALL READ SMS EDIT MEMORY SEARCH EMPTY BOX Option RING TONE SETTINGS SEND SMS SMS CENTERS SUB-ADDRESS ADD NUMBER NEW ENTRY PRIVATE BOX DELETE ACCESSORIES ALARM CALLS... - Page 16 ENU STRUCTURE SETTINGS PROGRAM KEYS DATE/TIME AUTO HANG UP AUTO PICKUP VOICE BOX No LANGUAGE ADVANCED SET. SET HANDSET BASE PRIORITY RESET HANDSET PERSON.REGISTR SET BASE REGISTR.MODE RESET BASE DELETE HANDSET RENAME BASE SET LINE NETWORK TYPE DIAL FLASHING PABX PREFIX 2ND CALL SET SMS OPER.
-
Page 17: Your Phonebook
OUR PHONEBOOK - CALL: to call the number associated to the OUR PHONEBOOK entry. You can store 40 phonebook entries in your - EDIT: to edit the entry (name, number, phonebook. icon). Each phonebook entry can contain the name - SEARCH: to search for another entry. of your contact which can be a maximum of - RING TONE: to assign a unique ring tone to 12 characters long (spaces included), your... -
Page 18: Using A Phonebook Entry To Place A Call
OUR PHONEBOOK Using a phonebook entry to On the navigator key , press place a call until the PHONEBOOK screen is displayed, press OK to confirm. On the navigator key , press Select New. Press Valid. until the PHONEBOOK screen is displayed, press OK to confirm. -
Page 19: Performing A Refined Search
OUR PHONEBOOK Performing a refined search • To correct the number, press C on the navigator key to delete the In the phonebook menu, press Option numbers. Enter the new number and press Valid. Select SEARCH using . Press Valid. Select the icon according to the type of number entered using . - Page 20 OUR PHONEBOOK Select SEND SMS using . Press Valid. A text input screen appears. refer to paragraph Sending a text message, page...
-
Page 21: Sms Service
Valid. . Follow the instructions displayed on the screen. For further If your Twist 545 is the only SMS details, refer to the paragraph appliance connected to your line, do Creating a personal box, page 25. not configure anything. If this is not... -
Page 22: Sending An Sms
SERVICE List of special characters: Making a correction If you enter the wrong letter, press C on the navigator key to delete one character at a time. You can also move through the text to delete Sending an SMS characters or insert new ones. Once you are done writing your text to move through the text. - Page 23 SERVICE A confirmation screen appears. It indicates Enter the box code and press Valid the type of transmission and the number to Once you are done, a screen displays your which your message will be sent. receiver's number. • If the information is accurate. Press •...
-
Page 24: Reading A Message
SERVICE Reading a message Using , select the folder containing the message you would like to view. Press Your telephone has 4 different folders in Valid. which your SMS messages are stored. The list of messages contained in the folder is then displayed, starting with the most - NEW: contains the unread messages. -
Page 25: Modify The Sms Mode
SERVICE - TRANSMIT: to forward this message to a Once the maximum storage new recipient. You will be able to modify the capacity is reached, you cannot original message. receive new SMS. To receive new - CALL: to call the SMS sender number. message, please delete some of the - STORE NUMBER: to save the SMS sender stored messages. - Page 26 SERVICE Select the folder you want to empty by pressing . Press Valid. to delete all messages in the selected folder. A delete confirmation screen appears. • Press No if you do not want to empty the folder. • Press Yes to empty the folder.
-
Page 27: Sms Settings
Select SETTINGS using . Press you do not usually need to modify it, if the Valid. Twist 545 terminal is the only compatible terminal connected on your telephone line. Select SMS CENTERS using . Press However, if several SMS terminals are installed on your line, they must have Valid. -
Page 28: Sms Boxes
SETTINGS MOTHER FATHER SISTER BROTHER COLLECTIVE • To keep the terminal number, press Telephone line 0123456789 Confirm Terminal number To exit the menu, press the red key For example, in the case of an SMS message SMS boxes addressed to the device FATHER your contact will send his SMS to: "Personal boxes"... -
Page 29: Creating A Personal Box
SETTINGS If you enter a name that already If you use the same sub-address exists, a message tells you that the twice for the same telephone line, name already exists. The box name your units may not receive the SMS can have no more than 6 characters. -
Page 30: Modifying Or Removing A Personal Box
SETTINGS Select the folder NEW or INBOX using If an SMS is sent to a personal box . Press Valid. not listed on your telephone (or if this box was removed), the SMS will Select the message using . Press not be delivered. -
Page 31: Call Log
ALL LOG To view the previous calls, use . The ALL LOG calls are organised in chronological order, This menu enables you to view the call or from the most recent call to the oldest call. event lists of your telephone. The dialled call log presents the calls you By pressing Option , a list of various... -
Page 32: Calling A Number Listed In The Dialled And Received Call Log
ALL LOG Calling a number listed in the A summary screen appears. It informs you as to the various events that took place during dialled and received call log your absence: • reception of an SMS, On the navigator key , press •... -
Page 33: Accessories
CCESSORIES - the time at which the handset will ring, CCESSORIES - if the alarm is on or off. This menu offers you numerous additional • To keep these settings, press Valid. functionalities: • To change the alarm time or status (on or •... -
Page 34: Timer
CCESSORIES Changing the programmed time of Press Volume to access the volume the timer setting screen. Select SET DURATION in the list. Press Press to increase or decrease the Valid. volume. Enter the desired time. Press Valid. Once the volume is set, press Valid. Press Return to display the timer An information screen shows the alarm clock... -
Page 35: Birthday Alarms
CCESSORIES Viewing a birthday alarm A screen appears indicating if you want to show the timer, press Yes or press In the birthday alarm list screen, select the Return alarm you would like to view using and press OK to confirm. To exit the menu, press the red key The birthday alarm entry appears on the screen. - Page 36 CCESSORIES On the receiver handset: To stop monitoring: - Press Stop on the transmitter set. The On the navigator key , press receiver set will automatically return to the until ACCESSORIES screen standby screen. displayed, press OK to confirm. - Press Stop on the receiver set and Select ROOM MONITOR.
-
Page 37: Customising The Handset
USTOMISING THE HANDSET Activating or deactivating the USTOMISING THE beeps HANDSET On the navigator key , press This menu allows you to modify the ring tones and the visual interface of the handset, until the PERSONALIZ. screen is displayed, and particularly: press OK to confirm. -
Page 38: Modify The Idle Screen
USTOMISING THE HANDSET Modify the colour of the menu On the navigator key , press backgrounds until the PERSONALIZ. screen is displayed, press OK to confirm. This menu is for changing the menu background colour. Select RING TONE using . Press Valid. -
Page 39: Security
ECURITY Once it is activated, the emergency number ECURITY will be automatically dialled when the green This menu enables you to change or is pressed from the idle screen. customise the security parameters of your telephone. You can: • Once activated, you can however call a •... -
Page 40: Defining The Call Time Limit
- EDIT TIME: To modify the emergency Refer to paragraph Defining the call number. time limit. The emergency number takes priority over the Belgacom Select EDIT TIME using . Press "fixed call service". Valid. Defining the call time limit Enter the new time limit using the keypad (maximum 999 minutes). -
Page 41: Defining Forbidden Prefixes - Call Barring
ECURITY Select RESTRICTION using . Press On the navigator key , press until Valid. the SECURITY screen is displayed, press Enter the base code. Press Valid. OK to confirm. The prefix screen appears. Select an empty Select CHANGE CODE using . - Page 42 ECURITY Select INTRUSION using . Press Valid. A screen displays the current status (on or off). • To change the status, press Edit • To keep the status, press Valid. To exit the menu, press the red key...
-
Page 43: Settings
ETTINGS ETTINGS Once the key is programmed, a screen invites you to programme the key This menu enables you to change or • To modify the function, press Edit customise the handset and base parameters. • To keep the function, press Valid. Programming a key To exit the menu, press the red key This function enables you to programme the... -
Page 44: Modifying The Voice Box Number
ETTINGS The programmed number is displayed on the On the navigator key , press screen, until the SETTINGS screen is displayed, • The number is correct, press Valid. press OK to confirm. • To modify the number, press Edit Select AUTO HANG UP (or AUTO PICKUP) Delete the numbers using the navigator C using . -
Page 45: Handset Settings
Put the base to which you want to register the base preference for your handset. handset in registration mode: • To keep the preference, press Valid. • For the Twist 545, press on the • To modify the preference, press Edit... -
Page 46: Resetting The Handset
ETTINGS A list provides the bases among which you To exit the menu, press the red key can choose the preferred base to which you want your handset to be registered. With the Personal registering automatic mode you are not required to specify the preference. -
Page 47: Base Settings
Press Valid. handset in registration mode: Select SET BASE using . Press • For the Twist 545, press on the Valid. button on the base for a few seconds. • For other base stations, refer to their Select REGISTR.MODE using user guides. -
Page 48: De-Registering A Handset
ETTINGS A confirmation screen will prompt you to To exit the menu, press the red key confirm your request: Renaming the base • To reset the base, press Yes • If you do not wish to reset the base, press No On the navigator key , press until the SETTINGS screen is displayed,... -
Page 49: Modifying The Dialling Mode
Contact your administrator, who will supply Modifying the dialling mode the appropriate time period, and proceed to the new settings. The value for Belgacom is If you telephone is connected to an old 120 ms. PABX, you might have to change the number system. -
Page 50: Setting A Pabx Prefix
ETTINGS An information screen presents the current Select the desired option: flash duration. - ACTIVATE/DEACTIVATE: to select a status. • To keep the duration, press Confirm - PREFIX: to enter the number giving you • To modify the duration, press Edit access to the outside line. - Page 51 ETTINGS Select ADVANCED SET.. Press Valid. Select SET LINE. Press Valid. Select 2ND CALL using . Press Valid A screen displays the current status (on or off). • To keep the status, press Valid • To change the status, press Edit To exit the menu, press the red key...
-
Page 52: Appendix
You cannot send or receive Make sure you have subscribed to a caller display service. SMSs Contact Belgacom to check if the SMS service is activated on your line. Make sure that the server number is 1717 for transmissions and 01717 for reception. -
Page 53: Features
EATURES Functions Default settings Functions Default settings Beeps All active SMS sending centre 1717 Screen background Flowers SMS reception centre 01717 Ambiance Color 1 ACCESSORIES SETTINGS Alarm clock Program keys Silence / Alarm Timer Date/Time 00:00 // 01/01/03 Room monitor Auto Hang up SECURITY Auto Pick up... -
Page 54: Guarantee
Customer removes or tampers with the manufacturer's serial numbers and/or brand names on the terminal Equipment. Belgacom shall not be liable for any indirect or immaterial loss sustained by the Customer as a result of the malfunctioning of the terminal Equipment, such as any loss of production, revenue or contracts. - Page 55 NVIRONMENTAL INFORMATION • The equipment that you bought has required the extraction and use of natural resources for its production. It may content hazardous substances for the health and the environment. • In order to avoid the dissemination of those substances in our environment and to diminish the pressure on the natural resources, we encourage you to use the appropriate take-back systems.
Need help?
Do you have a question about the Twist 545 and is the answer not in the manual?
Questions and answers