
Related Manuals for Evolis Elypso


Summary of Contents for Evolis Elypso
-
Page 1: User Guide
USER GUIDE Evolis Card Printer © 2013. All rights reserved. March 2013. Ref. KU-ELY1-036-ENG Rev.A0... -
Page 2: Copyright Notice
All the information contained in this document is subject to change without prior notice. Evolis Card Printer cannot be held liable for any errors that may be found in this manual, or for any loss or damage arising accidentally or as a result of dissemination or use of this manual. -
Page 3: Warranty Registration
Using your new printer, you will be able to create a wide variety of high-quality cards and badges which can be printed in various thicknesses, colours and styles. This printer uses consumables and accessories available from Evolis. For further details, visit our website at www.evolis.com. -
Page 4: Getting Started
Evolis dealer, who will tell you the procedure to follow. Evolis takes great care over the quality of its packaging and we ask that you keep this packaging somewhere clean and dry. -
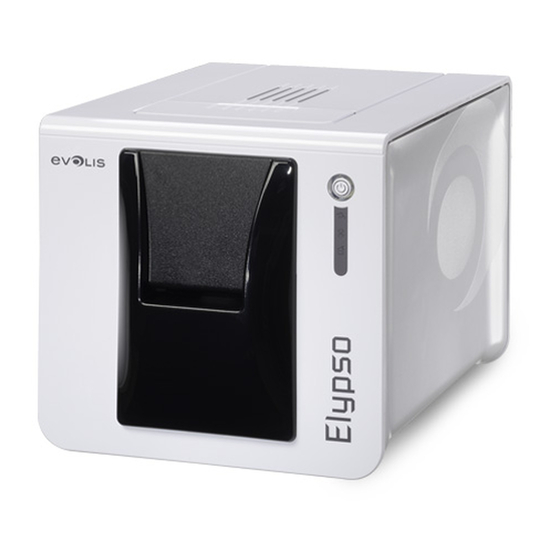
Page 5: Description Of The Printer And Its Functions
1-2 Description of the printer and its functions - Manual card feeder - Power cable socket - Control panel - Place for Kensington lock - USB connector (type A) - Pre-cut slot for the optional reject tray - USB connector (type B) -... - Page 6 - Thermal print head - Cleaning roller - Side panel opening mechanism - Serial number label (unplugged) before carrying out any work on it. Look at the getting started video described in the following section.
-
Page 7: Installation
1-3 Installation 1-3a CONNECTING THE PRINTER Connection to the power supply The printer must be connected to a properly protected and earthed electrical installation. FI: Laite on liitettävä suojamaadoitus koskettimilla varustettuun pistorasiaan. NO: Apparatet må tilkoples jordet stikkontakt. SE: Apparaten skall anslutas till jordat uttag. Connect the power cable to the power supply unit, then plug the power supply unit connector into the printer. -
Page 8: Fitting The Ribbon
1-3b RIBBONS Evolis original High Trust ribbons optimise your printer’s operation and avoid causing damage to it. The use of ribbons from other suppliers is liable to damage your printer and voids the manufacturer’s warranty for the printer. For optimum print quality, Evolis recommends that the printer is fully cleaned every time the ribbon is changed. See the Servicing and Maintenance section of this manual. -
Page 9: Loading The Cards
1-3c CARDS Use only the card types recommended by Evolis. Keep your cards protected from dust. Loading the cards After starting your print task, insert card into the manual feeder. Ensure the cards are positioned as illustrated in the diagram. -
Page 10: Removing Printed Cards
To empty it, just remove the cards in it. Evolis recommends that you empty this box regularly. The printed card can be programmed in Evolis Print Center to be ejected either from the manual feeder or the reject tray if you choose the option. -
Page 11: Installing The Print Driver
Printing 2-1 Installing the print driver To install a print driver, insert the CD into your computer and select the print driver menu. A program will guide you through the entire installation process. Do not connect your USB cable to your computer until prompted to do so by the installation program. For the connection procedure, see the section on Connecting the Printer. - Page 12 Once the ribbon has been installed, your Evolis printer will automatically adapt its parameters and settings to suit the ribbon. To access this application: From the Start button on the bottom left of your screen in the Windows task bar, select All programs, Evolis Card Printer, Evolis Premium Suite, Evolis Print Center...
- Page 13 Right click the name of the printer, select Properties to access the settings or double (left) click the name of the printer. dealer for any advice and assistance needed before making any changes. Please refer to the Evolis Print Center manual for more detail on the meanings of each of the settings.
- Page 14 Warnings about problems which have stopped the printer. When the Evolis Printer Manager is active, a small icon is displayed in the bar on the bottom right of your screen. The colour of the icon varies according to the status of the printer: : Printer ready Orange: Information message issued -...
-
Page 15: Printing A Card
In Microsoft Word ® After having set the Evolis printer as the default: Start the MS-Word application Click on the File in the menu bar, then on Page Setup In the Margins tab, set all margins to ‘0’, then in the Orientation section, select Landscape. -
Page 16: Double-Sided Printing
If your printer prints on only one side of the card and you want to print on both sides, you can purchase a double-sided printing upgrade by contacting your Evolis dealer. This printing upgrade is an activation key to put into the printer. This operation is quick and easy to perform. - Page 17 Open the card printer (1) and remove the activation key (2). Put the ribbon back. Close the cover.
- Page 18 2-6 Connecting to a network (Ethernet and Wi-Fi) Printer connected in a subnet, in DHCP mode By its IP address. In addition, the Ethernet connection wizard will automatically detect all installed Evolis printers. IP address of the printer Subnetwork mask technical knowledge may result in a malfunction of the printer, and may even extend to a more widespread failure of all or part of the LAN.
-
Page 19: Maintenance
In addition, the use of Evolis brand ribbons (‘Evolis High Trust ’) also ensures that your equipment operates properly. Use of ribbons not approved by Evolis may as a consequence affect the quality and reliability of print jobs, produce low quality printed output and even affect the printer’s operation. -
Page 20: Routine Printer Cleaning
Number of cards remaining Cleaning required after: Warranty invalid after: Printer before warranty voided (warning light steady) (warning light steady) Zenius 1000 cards 200 cards 1200 cards Primacy 1000 cards 200 cards 1200 cards Elypso 1000 cards 200 cards 1200 cards... - Page 21 Follow the procedure below to ensure you have carried out regular cleaning properly: Repeatedly running the adhesive card through the printer cleans the cleaning roller in order to maintain print quality and increases the service life of the print head. Open the printer cover.
- Page 22 Cleaning starts. The used cleaning card is ejected automatically by the manual feeder. Routine cleaning may also be carried out from the Evolis Print Center by clicking on “Start cleaning”.
- Page 23 However, to maintain the original print quality and to absorb surplus ink on the print head, we recommend that you regularly clean the print head (whenever the ribbon is changed and during the routine cleaning) using the cotton buds supplied by Evolis.
- Page 24 Follow the procedure below: Take an Evolis cotton bud and press the middle of the tube until the end of the cotton bud is impregnated with alcohol. Close the cover. Reconnect the printer. Wait for 2 minutes after cleaning before using your printer.
-
Page 25: Advanced Cleaning
3-3 Advanced cleaning Evolis provides an Evolis High Trust maintenance kit consisting of 2 adhesive cards, 2 impregnated “T” shaped cards, a cleaning pen and a box of 60 wipes. The “T” shaped card is used to clean the card feed rollers and the magnetic encoder head. To ensure advanced cleaning is carried out properly, the procedure given below must be followed. - Page 26 The used adhesive card is ejected automatically by the manual feeder. Routine cleaning may also be carried out from the Evolis Print Center by clicking on “Start cleaning”. Warning, the “T” shaped card must be used just after the sachet is opened.
- Page 27 3-3b SERVICING THE PRINT HEAD Recommended cleaning cycle: every 5 routine cleaning cycles. Servicing accessory: cleaning pen Unplug the printer from its power supply before cleaning the print head. Follow the cleaning cycles scrupulously. Avoid any contact between the print head and any metal or sharp objects. the print head.
- Page 28 3-3c SERVICING THE DUST FILTER once a year or every 10,000 cards depending on your working environment. To replace it, insert it in its slot (notch towards you) and lower it until you hear it click indicating it is correctly positioned.
-
Page 29: Warnings And Diagnosis
Evolis technical support. 4-1 Warnings and diagnosis Although the Evolis printer was designed to work independently, keeping user involvement to a minimum, it may nonetheless prove useful to gain some familiarity with the main warnings. - Page 30 Card loading error. recognized. Check card have been Check the condition of the loaded. For any other ribbon in the printer. If you problem contact your Evolis have a print job in progress, dealer. this restarts with a new card.
- Page 31 Open the cover and hold down the pushbutton in order to eject the jammed card. For more details, refer to section 4-3b. If the problem persists, contact your Evolis dealer for assistance. ROUTINE CLEANING ADVANCED CLEANING CLEANING (after 1,000 cards have been...
- Page 32 WAITING FOR A CARD COOLING MODE TO BE INSERTED OR REMOVED The cooling system has The printer is waiting for been activated. a card to be inserted or The printer pauses for a few removed. seconds and restarts once Insert a card or remove the it has returned to its normal card from the manual feeder operating temperature.
-
Page 33: Diagnosis Help
The graphic test card is used to check the print quality in colour or monochrome, the offsets and whether the ribbon is synchronised correctly. Evolis Print Center, select System information and click on the Test cards tab. Then click the Graphic test card button. The card is printed and the printed card is ejected by the manual feeder. - Page 34 4-2C IDENTIFYING INSTALLED SOFTWARE VERSIONS In Evolis Print Center, double click the name of the printer to display its Properties. Click System information, then System information.
-
Page 35: Troubleshooting
See elsewhere in this section for the procedure to be followed. Blank card ejected Check the ribbon The print head may be damaged Print a test card. If the test card does not print, contact an Evolis dealer for technical support or visit the website at www.evolis.com. - Page 36 Check that the ribbon is correctly positioned in the printer. Poor ribbon synchronisation. Open and close the printer cover to synchronise the ribbon. Dirty printer or cleaning roller. Clean the printer Use of incompatible cards. We recommend that you obtain your cards from an Evolis dealer.
-
Page 37: Partial Or Incorrect Printing
Should horizontal straight lines appear on printed cards, it is likely that the print head is dirty or damaged. See the section on maintenance and troubleshooting. If the problem persists, contact an Evolis dealer or visit the website at www.evolis.com. - Page 38 4-3b FREEING JAMMED CARDS Control panel displays: MECHANICAL ERROR Card jammed in the printer. Print jobs are interrupted. Do not turn off your printer as this cancels pending print jobs in the printer’s memory. Remove the card as follows: Open the printer cover and remove the ribbon. Press the pushbutton to turn the card transport rollers.
- Page 39 Evolis has designed a unique device enabling users to undertake such replacement with no tools needed, simply by following the instructions very carefully. Before doing anything else, please contact your Evolis dealer in order to check the advisability of replacing the print head. The dealer will supply a new print head if need be.
- Page 40 To exchange the print head, please proceed as follows: Before changing the print head, please unplug the power cable. Step 1 - Removing the defective print head Open the printer cover. Locate the print head. Press on the plastic part behind the head (pressure plate) and pull on the head with the other hand as shown in the diagram in order to free the lugs from the holding fork, then remove the lugs from their slots.
- Page 41 Step 2 - Installing the new print head Take the new head and insert it vertically (white connector upwards) raising it in the two guides so as to trap the lugs of the fork in their slots . Then lower it by pressing on the two forks , a click will be heard.
- Page 42 Power up the printer and check that it is properly connected to a computer on which the printer’s Evolis Print Center is installed. In Maintenance of Evolis Print Center, click on the Change print head tab. Enter PKN no., the number you noted down in step 2. Then click If the print head kit number is not entered correctly, printer malfunctions may occur and the warranty may be voided.
- Page 43 4-3d UPDATING THE FIRMWARE (under Windows) Before any update, please contact your Evolis dealer who will be able to guide you on the advisability or otherwise of carrying out an dealer. Updates can be downloaded from the website at www.evolis.com: Support &...
- Page 44 4-3e UPDATING THE PRINT DRIVER Before any update, please contact your Evolis dealer who will be able to guide you on the advisability or otherwise of carrying out an upgrade. Updates can be downloaded from the website at www.evolis.com: Support & Drivers menu, then select your printer model and click on the Print drivers and Firmware link.
-
Page 45: Technical Support
Evolis will pass on the contact details of your nearest Evolis dealer. When calling an Evolis dealer, you do need to be close to your computer and ready to provide the following information: A description of the incident that has occurred A description of the steps that you have taken to resolve the problem. -
Page 46: General Technical Features
Appendix A This section presents your printer’s technical printing properties. General technical features Single side or double sided print module, edge-to-edge printing Colour sublimation and monochrome thermal transfer 16 million colours 16MB RAM Printing speed Full card print Card management and technical data Manual feeder Optional reject box: 30 cards Card thickness: 0.50 to 1.25 mm (20 to 50 mil) - Page 47 LEDs Dependant on your version of Windows Software Supplied with Evolis Premium Suite for Windows: Linux platform on request SDK available on request For older versions of Windows, you can only use the printer via a printer driver (there is no Print Center or Printer Manager).
-
Page 48: Warranty Conditions
Warranty conditions 1-year’ warranty (printer and print head) Warranty extension available (please contact your Evolis dealer ) Dimensions and weight Weight: 2.95 kg Acoustics (tested in accordance with ISO 7779) Sound pressure in assistant positions L Security Place for Kensington lock... -
Page 49: Options And Accessories
Options & accessories Double-sided printing upgrade kit Reject box Encoding options CE, FCC, IEC, VCCI, CCC , RoHS Expected in September 2013 Power supply Environment Humidity: 20% to 65% without condensation Storage humidity: 20% to 70% without condensation Ventilation in operation: open air Other Resident fonts... -
Page 50: B1 - Compliance Statements
FCC Rules for Class B digital devices. EN62311:2008 Article 3.1 b: (electromagnetic compatibility protection requirements) the express, written consent of Evolis Card Printer may cause harmful interference and void the FCC authorisation to operate this equipment. EMC standard applied EN55022:2006 + A1 ... -
Page 51: C1 - Encoding Options
Location of the magnetic encoder The magnetic encoder is a module installed either in the factory or on site by your Evolis dealer. The read and write head is located under the path taken by the cards and before the print head. The encoding sequence for a card is always carried out before the printing. -
Page 52: Card Positioning
Card positioning Magnetic stripe cards must be placed in the manual card feeder so that the magnetic stripe is facing downwards as shown below: Insert a magnetic card. Hold the cards as shown in the diagram (magnetic stripe downwards). -
Page 53: Magnetic Encoder» Dialogue Box
Evolis Print Center Properties by right-clicking the name of the printer. «Magnetic Encoder» dialogue box The Magnetic Encoding dialog box is opened by clicking Encoding followed by Magnetic. allows you to select the desired format for each stripe. See the table in this Appendix for information regarding ISO 7811 standards. -
Page 54: Cleaning The Magnetic Encoder
Cleaning the magnetic encoder The magnetic encoder head requires regular maintenance in order to ensure the integrity of the data encoded onto cards. Cleaning of the magnetic encoder is carried out when the printer runs an advanced cleaning sequence with impregnated «T» cards (see the “Maintenance”... -
Page 55: C1B - Contact Smartcard Encoding
Contact station location The contact station is a module installed either in the factory or on site by your Evolis dealer. It is located over the path taken by the cards and after the print head. To contact the smartcard, the contact station descends mechanically against the smartcard. The programming sequence for a chip is always carried out before the card is printed. - Page 56 Card positioning Smartcards must be placed in the manual card feeder so that the chip contact is facing upwards as shown below: Insert a card. Ensure the cards are positioned as illustrated in the diagram.
-
Page 57: Contact Station Interface
Contact station interface This connector, directly connected to the contact station inside the printer, is also connected to an external coupler to program the chip. DB-9 connector pins Smartcard contact points C1 (V c.c.) C2 (reset) C3 (clock) C5 (ground) C6 (Vpp) C8 (reserved) Card present signal... - Page 58 Refer to the Programming Guide for the Evolis printer for more information on programming a smartcard and the The Evolis product catalogue also includes printers equipped with a chip contact station and a built-in encoder. These encoders connect to the PC via a USB interface.
-
Page 59: C1C - Contactless Smartcard Encoding
Evolis printers may be equipped with an encoding device for contactless smartcards (RFID). This consists of an encoding module and a built-in antenna. A module such as this must be installed by a specialist. The Evolis product catalogue includes printers equipped with a built-in encoder for contactless chips. -
Page 60: Computer Connection
A card is moved from the feeder towards the antenna and is positioned nearby. The chip is programmed via the computer’s serial (or USB) interface connecting the built-in encoder and the computer. Refer to the Evolis Programming Guide for further details on programming contactless smartcards. -
Page 61: D1 - Consumables And Accessories
D1 - Consumables and accessories Evolis offers a full range of consumables and accessories Evolis High Trust specially designed to work with its printers. Tested and approved by Evolis’ R&D and Quality departments, these consumables and accessories provide optimum print quality and reliability. - Page 62 Cards and accessories Ref. Description ZENIUS PRIMACY ELYPSO Accessoires de nettoyage Regular cleaning kit (for servicing the cleaning roller and print head) ACL001 5 adhesive cards, 5 cotton buds Advanced cleaning kit (for a thorough clean of the printer) ACL002 2 “T”...
Need help?
Do you have a question about the Elypso and is the answer not in the manual?
Questions and answers