Advertisement
Table of Contents
- 1 Washing Machine
- 2 Table of Contents
- 3 Parts and Features
- 4 Safety Notices
- 5 Installation
- 6 The Functions of the Control Panel
- 7 How to Use Washer
- 8 Cleanins Routine
- 9 Poor Wash Results
- 10 Stain Removal Guide
- 11 Geneal Trouble Shootings
- 12 Troubleshooting Guide
- 13 Specification
- Download this manual
Advertisement
Table of Contents
Troubleshooting

Related Manuals for Daewoo DWD-GM1011


Summary of Contents for Daewoo DWD-GM1011
-
Page 1: Washing Machine
USER MANUAL FOR YOUR Daewoo Model DWD-GM1011 60 cm 6 kg Freestanding Washing Machine Customer Helpline Number : 0844 887 2525 Spare Parts : 0844 557 0290 or www.4daewoo.co.uk / DAEWOO ELECTRONICS Web Site www.daewooelectronics.co.uk DWD-GM1011_영국향.indd 1 2013-09-23 오전 11:41:56... -
Page 2: Table Of Contents
A NOTE TO YOU Thank you for buying a DAEWOO appliance. DAEWOO washers are easy to use, save time, and help you manage your home better. This manual contains valuable information about how to operate and maintain your washer properly and safely. -
Page 3: Parts And Features
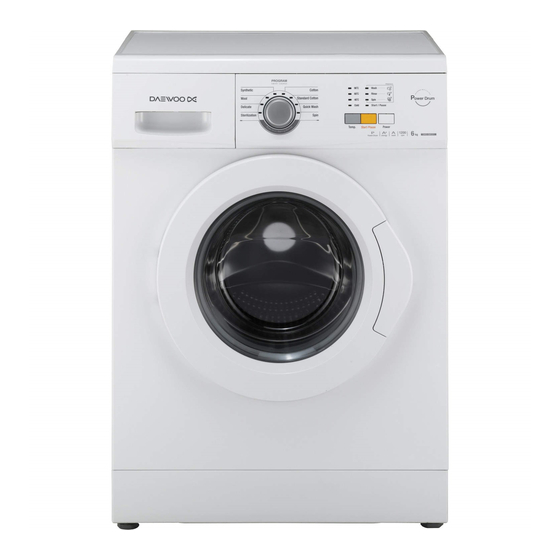
PARTS AND FEATURES NOTE : Unscrew the drain pump filter to let water run out when the machine is not used for a long time. Top cover Drawer (for detergent or fabric softener) Knob Control panel Case body Door glass Door seal Drain hose Adjustable feet... -
Page 4: Safety Notices
SAFETY NOTICES WARNING : Read and understand thoroughly these safety instructions before use. The items indicated here are very important safety precautions, which must be followed. We cannot be held liable for damage caused by non-compliance with the warning and safety instructions or resulting from incorrect use or operation. - Page 5 Correct use ● To avoid the risk of personal injury or damage to the washing machine, do not install it in place where it is damp and where it suffers from rainfall. ● Do not install the washing machine in place where it suffers from the sun directly, in which plastic or components will be damaged.
-
Page 6: Installation
INSTALLATION Packaging ● Remove all the packing (including the foam base) or the vibration and noise may occur. ● Dispose all the wrappage safely and keep them out of the reach of children. Danger of suffocation! ● It is normal that water drops appear on the packing plastic bag and the door glass, which are resulted from the water left in the tub for checking out. -
Page 7: Installation Place Requirement
Installation place requirement ● A concrete floor is the most suitable installation surface for a washing machine, being far less prone to vibration during the spin cycle than wooden floorboards or a carpeted surface. ● The machine must be level and securely positioned. The distance between the machine and wall must be more than 10 ●... - Page 8 2. Connected securely to a standpipe. Firstly form a hook in the end of the drain hose using the “U” piece” supplied. Place the drain hose into your standpipe, which should have an internal diameter of approximately 38mm thus ensuring there is an air break between the drain hose and standpipe. When discharging into a standpipe ensure that the top of the standpipe is no more than 90cm and no less than 60cm above floor level.
-
Page 9: The Functions Of The Control Panel
THE FUNCTIONS OF THE CONTROL PANEL PROGRAMME 1. Knob Turn this knob clockwise or anticlockwise to select a required wash program. The available programs are Synthetic, Wool, Delicate, Sterilization, Cotton, Standard, Quick Wash and Spin. Once the “Start/ Pause” button is pressed and the machine is running, the program can not be changed. The details of programs are on page 9. - Page 10 THE FUNCTIONS OF THE CONTROL PANEL Time Spin speed Program Temp.(℃) Rinse times MAX. Load (kg) (min) (rpm) Cotton Cold/20/40/60 1000 Standard Cold/20/40/60 1000 Cotton Quick Wash Cold/20/40 1000 Spin 1000 Sterilization 1000 Delicate Cold/20/40 Wool Cold/20/40 Synthetic Cold/20/40/60 NOTE : The running time above is for the default programs, which is only for reference, and it may different because of different laundries, weights and washing temperature.
-
Page 11: How To Use Washer
HOW TO USE WASHER Before washing clothes for the first time, you must run a complete cycle without clothes. To do these: 1. Connect the power and turn on the tap. 2. Press the “Power’ button, then turn the knob to position “Cotton”. 3. - Page 12 Using the detergent drawer 1. Open the drawer and add adequate detergent into main wash compartment marked “ ” or “ ”. 2. Add the fabric softener into compartment marked “ ” or “ ”. Do not exceed the maximum level mark. It does not benefit the appliance or improve performance.
- Page 13 Programme Washing symbol Fabric Cottons, linens or cotton mix fabrics, e.g. table linen, Cotton towelling, underwear, T-shirts etc. Small loads of items which require freshening up and which Quick Wash can be washed in a Cotton programme. Spin Separate spin for cotton and linen items Cottons, linens or cotton mix fabrics, e.g.
-
Page 14: Cleanins Routine
CLEANINS ROUTINE Disconnect the machine from the mains electricity supply and withdraw the plug from the socket before cleaning the machine. The washing machine must not be hosed down. Cleaning the exterior Clean the exterior with a mild non-abrasive cleaning agent or soap and water using a well wrung-out cloth. Wipe dry with a soft cloth. - Page 15 Cleaning the drawer housing Use a bottle brush to remove detergent residues inside the drawer housing. Cleaning the water inlet filter Use pointed nose pliers to withdraw the plastic filter. Clean, put back and secure. These filter should be checked every 6 months or so, or more often if there are frequent interruptions to the water supply.
-
Page 16: Poor Wash Results
POOR WASH RESULTS My garments are looking grey and there are limescale deposits present in the drum of my washing machine. ● There is not enough detergent being added. ● The incorrect detergent is being used. ● Stains are not being pre-treated. ●... -
Page 17: Stain Removal Guide
STAIN REMOVAL GUIDE Stain Removal Method Alcoholic The stain should be first washed with cold water, then wiped with glycerine and water and rinsed beverages with water mixed with vinegar. Shoe polish The stain should be softly scratched without ruining the material, then rubbed with detergent and rinsed. -
Page 18: Geneal Trouble Shootings
GENERAL TROUBLE SHOOTINGS Problem Possible solutions The washing machine does not ● Close the washing machine’s door. work. ● Confirm and press the start button. ● The control panel might be locked – see the “Child lock” section and try unlocking the control panel. Water leakage. -
Page 19: Troubleshooting Guide
TROUBLESHOOTING GUIDE Problem Error Code Possible Cause Solutions The machine “Spin” LED flickers. 1. The water tap is not open. 1. Open the water tap. fills overtime. 2. The drain hose is put down. 2. hook up the hose. 3. The water inlet valve is 3. -
Page 20: Specification
SPECIFICATION MODEL DWD-GM1011 Power Source A.C 220~240V/50Hz Power Consumption 2100W Dimension (mm) 595 x 470 x 845 (W x D x H) Maximum mass of textile (kg) 6 kg Unit Weight (kg) 64(NET) / 68(GROSS) Standard Water Consumption 43ℓ Operating Water Pressure 0.02MPA ~ 0.8MPa (0.2kgf/cm... - Page 21 DWD-GM1011_영국향.indd 21 2013-09-23 오전 11:42:02...
- Page 22 PRODUCT FICHE Supplier : DAEWOO ELECTRONICS ▪ Model : DWD-GM1011 ▪ Capacity : 6.0 kg ▪ Energy efficiency class : A+ ▪ Energy consumption 180 kWh per year, based on 220 standard washing cycles for cotton ▪ programmes at 60 °C and 40 °C at full and partial load, and the consumption of the low-power modes.
- Page 23 HGD2YR (4) Register your FREE Daewoo Electronics guarantee DWD-GM1011_영국향.indd 23 2013-09-23 오전 11:42:03...
- Page 24 Your free 24 month guarantee provided by Daewoo Electronics means that your appliance will be repaired or replaced in the event of a fault or problem. And the best part is that it won’t cost you a penny.
Need help?
Do you have a question about the DWD-GM1011 and is the answer not in the manual?
Questions and answers