Table of Contents
Advertisement
Washing Machine Instruction Manual
DWD-MV
, DWD-FV
INSTRUCTION MANUAL
CONTENTS
Page
Before Using The Appliance ......................................................................................................................2
Overview Of Your Device ..........................................................................................................................18
Installation Of The Machine ....................................................................................................................23
Introduction Of Control Panel ...........................................................................................................32
Preliminary Preparation For Laundering .......................................................................................38
Program Table ...............................................................................................................................................57
Maintenance And Cleaning Of Your Machine ..................................................................................66
Flush Stopper / BODY / DRUM ....................................................................................................................71
Trouble Shooting .........................................................................................................................................72
Automatic Fault Warnings And What To Be Done .........................................................................77
Practical Information ...............................................................................................................................78
Describing Energy Label And Saving Energy .................................................................................82
Disposal Of Your Old Machine ...............................................................................................................84
UK( )(6 7 8kg)( ).indd 1
2015-11-26
10:44:28
Advertisement
Table of Contents

Related Manuals for Daewoo DWD-MV SERIES


Summary of Contents for Daewoo DWD-MV SERIES
-
Page 1: Instruction Manual
Washing Machine Instruction Manual DWD-MV , DWD-FV INSTRUCTION MANUAL CONTENTS Page BEFORE USING THE APPLIANCE ........................2 OVERVIEW OF YOUR DEVICE ..........................18 INSTALLATION OF THE MACHINE ........................23 INTRODUCTION OF CONTROL PANEL ......................32 PRELIMINARY PREPARATION FOR LAUNDERING ..................38 PROGRAM TABLE ...............................57 MAINTENANCE AND CLEANING OF YOUR MACHINE ..................66 FLUSH STOPPER / BODY / DRUM ........................71 TROUBLE SHOOTING ............................72 AUTOMATIC FAULT WARNINGS AND WHAT TO BE DONE .................77... -
Page 2: Before Using The Appliance
CHAPTER -1: BEFORE USING THE APPLIANCE (SAFETY WARNINGS) Do not install your machine on a carpet or such grounds that would prevent the ventilation of its base. The appliance is not intended for use by people (including children) with reduced physical, sensory or mental capabilities, or lack of experience and knowledge unless they have been given supervision or instruction... - Page 3 CHAPTER -1: BEFORE USING THE APPLIANCE (SAFETY WARNINGS) Use only the new water inlet hose coming with your machine while making water inlet connections of your machine.Never use old, used or damaged water inlet hoses. This appliance can be used by children aged from 8 years and above and persons with reduced physical, sensory or mental capabilities or lack of experience...
- Page 4 CHAPTER -1: BEFORE USING THE APPLIANCE (CORRECT USAGE) • Definitely read the user’s manual. • Your machine is designed to be used domestically. Commercial use will cause your warranty to be cancelled. • Keep your pets away from your machine. •...
- Page 5 CHAPTER -1: BEFORE USING THE APPLIANCE (CORRECT USAGE) • Use your machine only for laundries that have been specified as suitable for washing by the manufacturer. • Before operating the washing machine, re- move the 4 transportation screws and rubber spacers from the back of the machine.
-
Page 6: Detergent Drawer
CHAPTER -1: BEFORE USING THE APPLIANCE (GENERAL WARNINGS) • The necessary ambient temperature for your machine’s ideal operation is 15-25°. • Frozen hoses can tear and explode. In regions where temperature is below zero, ambient tem- perature might endanger the safe operation of electronic card. - Page 7 CHAPTER -1: BEFORE USING THE APPLIANCE (GENERAL WARNINGS) • As detergent or softener exposed to air for a long time may cause residues, put your deter- gent or softener in the detergent drawer at the beginning of every washing. • It is advised that you unplug your machine and close the water inlet tap if you will not use your machine for a long time.
- Page 8 CHAPTER -1: BEFORE USING THE APPLIANCE (GENERAL WARNINGS) • Never open the detergent drawer when the appliance is running. • In case of any breakdown, unplug the appliance first and then turn the tap off. Do not attempt to repair by yourself, always contact an engineer authorized service.
- Page 9 CHAPTER -1: BEFORE USING THE APPLIANCE (GENERAL WARNINGS) • Please adhere to detergent/fabric condition- er manufacturers’ for the use of fabric conditioner or similar products in your machine. • Set up your machine in a place where its door can be completely opened. (Do not set up your machine in places where its door can- not be fully opened.) •...
- Page 10 CHAPTER -1: BEFORE USING THE APPLIANCE (SAFETY WARNINGS) You must read these warnings. You can thus protect yourself and your beloved ones against fatal injuries and risks. DANGER OF GETTING BURNT! Do not touch discharging hose and water during discharging as the appliance may reach high temperatures when running.
- Page 11 CHAPTER -1: BEFORE USING THE APPLIANCE (SAFETY WARNINGS) DEATH RISK DUE TO ELECTRICAL CURRENT! • Do not use multiple receptacles or extension cord. • Do not plug in damaged plug sockets • Never pull the cable when un- plugging – always grip the plug itself.
-
Page 12: Flooding Risk
CHAPTER -1: BEFORE USING THE APPLIANCE (SAFETY WARNINGS) Flooding risk! • Check whether the water runs fast or not be- fore placing the discharge hose on the sink. • Take necessary measures to prevent the slipping of your hose. • The backfiring force of a hose that is not placed appropriately can displace the hose. - Page 13 CHAPTER -1: BEFORE USING THE APPLIANCE (SAFETY WARNINGS) Danger of Fire! • Do not keep inflammable liquids near your machine. • The sulphure content of paint removers might cause corrosion. For this reason, never use paint-removing materials in your machine. •...
- Page 14 CHAPTER -1: BEFORE USING THE APPLIANCE (SAFETY WARNINGS) Fall and injury hazard! • Do not climb on your machine. The upper ta- ble of your machine may break and you might get injured. • Tidy the hose, cable and packaging of your machine during installation.
-
Page 15: Child Safety
CHAPTER -1: BEFORE USING THE APPLIANCE (SAFETY WARNINGS) Child safety! • Do not leave children unattended near the machine. Children might lock themselves up into the machine and death risk might occur. • Door glass and surface might be extremely hot while your machine operates. - Page 16 CHAPTER -1: BEFORE USING THE APPLIANCE PACKAGING AND ENVIRONMENT Removal of packaging materials Packaging materials protect your machine from any damage that might occur during transportation. Packaging materials are en- vironment friendly as they are recyclable. Recycling material provides both raw mate- rial savings and decreases waste produc- tion.
- Page 17 CHAPTER -1: BEFORE USING THE APPLIANCE SAVINGS INFORMATION Some important information to get more effi- ciency out of your machine: • The amount of laundry you put in your wash- ing machine should not exceed the maximum amount indicated. By this way, your machine shall run in saving mode.
-
Page 18: Overview Of Your Device
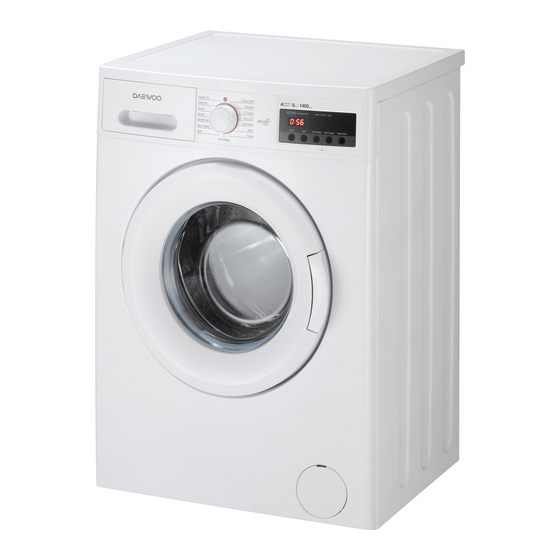
CHAPTER -2: OVERVIEW OF YOUR DEVICE GENERAL APPEARANCE Electronic display Programme knob Upper Tray Detergent drawer Container Cover of pump filter EN -18- EN -18- UK( )(6 7 8kg)( ).indd 18 2015-11-26 10:44:38... - Page 19 CHAPTER -2: OVERVIEW OF YOUR DEVICE GENERAL APPEARANCE Transportation Safety Bolts Water Inlet Valve Drain Hose Power Cable Transportation Safety Bolts Transportation Safety Bolts Transportation Safety Bolts EN -19- EN -19- UK( )(6 7 8kg)( ).indd 19 2015-11-26 10:44:39...
-
Page 20: Technical Specifications
CHAPTER -2: OVERVIEW OF YOUR DEVICE TECHNICAL SPECIFICATIONS • 6kg / 1000 rpm Maximum Laundry Capacity (kg) / Spin speed(rpm) • 6kg / 1200 rpm *** Spin speed is the model dependent.*** Operating voltage / (220-240) V~/50Hz frequency (V/Hz) Total current (A) Maximum: 1 Mpa Water pressure Minimum : 0.1 Mpa... - Page 21 CHAPTER -2: OVERVIEW OF YOUR DEVICE TECHNICAL SPECIFICATIONS • 7kg / 1200 rpm Maximum Laundry Capacity (kg) / Spin speed(rpm) • 7kg / 1400 rpm *** Spin speed is the model dependent.*** Operating voltage / (220-240) V~/50Hz frequency (V/Hz) Total current (A) Maximum: 1 Mpa Water pressure Minimum : 0.1 Mpa...
- Page 22 CHAPTER -2: OVERVIEW OF YOUR DEVICE TECHNICAL SPECIFICATIONS Maximum Laundry Capacity (kg) / • 8kg / 1400 rpm Spin speed(rpm) *** Spin speed is the model dependent.*** Operating voltage / (220-240) V~/50Hz frequency (V/Hz) Total current (A) Maximum: 1 Mpa Water pressure Minimum : 0.1 Mpa Total power (W)
-
Page 23: Installation Of The Machine
CHAPTER -3: INSTALLATION OF THE MACHINE REMOVING TRANSPORTATION SAFETY SCREWS Before operating the wash- ing machine, remove the 4 transportation screws and rubber spacers from the back of the machine. If the screws are not removed, it may cause heavy vibration, noise and product malfunc- tion, (voiding the guarantee). - Page 24 CHAPTER -3: INSTALLATION OF THE MACHINE (REMOVING TRANSPORTATION SAFETY SCREWS) Transportation bolts shall be removed by pull- ing out. Fit the plastic transporta- tion bolts taps delivered in accessories bag to the palces where transporta- tion screws have been removed. The transportation safety screws should be stored to be used in case of...
-
Page 25: Adjusting Adjustable Stays
CHAPTER -3: INSTALLATION OF THE MACHINE Adjusting Adjustable Stays • Do not install your machine on a carpet or such grounds that would prevent the ventilation of its base. • To ensure silent and vibration-free operation of your ma- chine, it should be deployed on a non-sliding and firm ground. •... - Page 26 CHAPTER -3: INSTALLATION OF THE MACHINE (ADJUSTING ADJUSTABLE STAYS) • Adjust the stays upward and downward by rotating them. • After maintaining the balance, compress the plastic adjust- ment nut upward again. EN -26- EN -26- UK( )(6 7 8kg)( ).indd 26 2015-11-26 10:44:43...
- Page 27 CHAPTER -3: INSTALLATION OF THE MACHINE (ADJUSTING ADJUSTABLE STAYS) • Never put cardboard, wood or suchlike materials under your machine if you are intending to stabilize the distor- tions on the ground. • When cleaning the ground, on which your machine rests, be careful not to disorder stays stabilization.
- Page 28 CHAPTER -3: INSTALLATION OF THE MACHINE (ELECTRICAL CONNECTION) • Your washing machine is set to 220-240V and 50Hz. • The mains cord of your washing machine is equipped with a specific earthed plug. This plug should always be inserted to a earthed socket of 10 amps.
- Page 29 CHAPTER -3: INSTALLATION OF THE MACHINE (WATER INLET HOSE CONNECTION) • Your machine may have either a single inlet (cold) or double water inlets (cold/hot) based on its specifications. White-capped hose should be connected to cold water inlet and red-capped hose to hot water inlet (applicable for machines with double water inlets).
- Page 30 CHAPTER -3: INSTALLATION OF THE MACHINE (WATER INLET HOSE CONNECTION) • Ensure that the new water inlet hoses are not bent, bro- ken, crushed and resized. • If your machine has double hot water inlets, the tempera- ture of hot water inlet should be maximum 70°C. Note: Use only the new water inlet hose coming with your machine while making water inlet connections of your machine.
- Page 31 CHAPTER -3: INSTALLATION OF THE MACHINE (WATER DISCHARGE CONNECTION) • The end of water discharge hose can be fitted to a specific apparatus directly at- tached to dirty water discharge hole or outlet joint of the basin elbow. • Never attempt to extend the water dis- charge hose by jointing.
-
Page 32: Introduction Of Control Panel
CHAPTER-4: INTRODUCTION OF CONTROL PANEL Programme knob Display Panel Detergent drawer EN -32- EN -32- UK( )(6 7 8kg)( ).indd 32 2015-11-26 10:44:46... - Page 33 CHAPTER -4: INTRODUCTION OF CONTROL PANEL (DETERGENT DRAWER) You can use the liquid level determination plate when you want to wash your laundry with liquid detergent. You can use your liquid detergents in all programs without prewashing. Place the liquid detergent aparatus in the second compartment (which is available inside the machine) of the...
- Page 34 CHAPTER -4: INTRODUCTION OF CONTROL PANEL (DETERGENT DRAWER) SECTIONS Main wash detergent compartment: In this compartment, only materials like detergent (liquid or powder), lime preventer and such can be used. You can find the liquid detergent aparatus inside your machine at first installation. (*) Fabric conditioner, starch, detergent compartment: You can use softener for your laundry...
- Page 35 CHAPTER -4: INTRODUCTION OF CONTROL PANEL (PROGRAM KNOB) • You can select the programme you want to wash your laundry in through programme knob. • You may set the programme selection operation by rotat- ing the programme knob in both directions. •...
-
Page 36: Electronic Display
CHAPTER -4: INTRODUCTION OF CONTROL PANEL (ELECTRONIC DISPLAY) ■ 6, 7kg DWD-****2* Display Panel Washing Additional Rinsing Function Leds Spinning Finished Start/Pause button Auxiliary function button 2 Auxiliary function button 1 Spin speed selection adjustment Delayed start auxiliary function ■ 8kg DWD-****4* Display Panel Rinsing Washing... - Page 37 CHAPTER -4: INTRODUCTION OF CONTROL PANEL (ELECTRONIC DISPLAY) On the display panel, you can see the washing water tem- perature of your machine, speed setting of your machine, the auxiliary functions you have selected and the stage of the programme you are running on your machine. Furthermore, electronic display will warn you by means of led combinations that will turn on its display when a fault oc- curs on your machine and notify you of the completion of the...
-
Page 38: Preliminary Preparation For Laundering
CHAPTER -5: PRELIMINARY PREPARATION FOR LAUNDERING (SEPARATING LAUNDRIES) • Your laundry has product labels on them that their Wash or dry your laundry according to the specifciations on the product label. • Separate your laundries according to their types (cotton, synthetic, sensitive, wool etc.), their temperatures (Eco 20°, 40°, 60°, 90°) and degree of contamination (slightly stained, stained, highly stained). - Page 39 CHAPTER -5: PRELIMINARY PREPARATION FOR LAUNDERING (SEPARATING LAUNDRIES) Whitening Normal available whitening washing Ironing temperature Ironing temperature No ironing is maximum 150°C is maximum 200°C Dry cleaning No dry cleaning Leave on a flat available place Drying by Hang when wet Dry by hanging twirling is not allowed...
-
Page 40: Washing Programmes
CHAPTER -5: PRELIMINARY PREPARATION FOR LAUNDERING PUTTING LAUNDRIES IN THE MACHINE • Open the door of your machine. • Spread your laundries in your machine. NOTE: Note: Maximum loading capacity may vary based on the laundry type you will wash, degree of contamination and the programme you have chosen. - Page 41 CHAPTER -5: PRELIMINARY PREPARATION FOR LAUNDERING (ADDING DETERGENT INTO MACHINE) The amount of detergent you will put in your machine will depend on the following criteria: • Your detergent utilization will be based on the degree of contamination of your laundries. Do not prewash your less stained laundries and put your slight amount of detergent in the 2nd compartment of the detergent drawer.
-
Page 42: Selecting Programme
CHAPTER -5: PRELIMINARY PREPARATION FOR LAUNDERING (OPERATING YOUR MACHINE) • Plug your machine in. • Open the water faucet. • Open the machine door. • Spread your laundries in your machine. • Push the door of your machine until hearing the locking sound to close it. - Page 43 CHAPTER -5: PRELIMINARY PREPARATION FOR LAUNDERING (OPERATING YOUR MACHINE) ■ 6, 7kg DWD-****2* AUXILIARY FUNCTIONS Before starting the pro- gramme, you can optionally select an auxiliary function. • Press on the button of auxiliary function you would like to select. ■...
- Page 44 CHAPTER -5: PRELIMINARY PREPARATION FOR LAUNDERING (OPERATING YOUR MACHINE) HALF-LOAD DETECTION SYSTEM Your machine features a half-load detection system. In case you put approximately half or less amount of laun- deries of maximum laundry capacity in your machine, your machine will run so as to save washing time, water con- sumption and energy in some programmes.When the half- load function is active, the machine can complete the pro- gramme you have set in a shorter time.
- Page 45 CHAPTER -5: PRELIMINARY PREPARATION FOR LAUNDERING AUXILIARY FUNCTIONS 1- Delay timer (DWD-****2* only) By using this auxiliary function, you can make your machine to start the washing operation with delays between “3h, 6h, 9h, 12h”. Auxiliary function Auxiliary button 1 function button 1 To use auxiliary function of delayed start:...
- Page 46 CHAPTER-5: PRELIMINARY PREPARATION FOR LAUNDERING AUXILIARY FUNCTIONS If you have skipped the time delay you want to set, you can go back to the time desired by keeping pressed on time delay button. If you want to cancel the time delay, you are required to press the time delay button once symbol will no longer flash on electronic display.
- Page 47 CHAPTER-5: PRELIMINARY PREPARATION FOR LAUNDERING AUXILIARY FUNCTIONS 2- Spin Speed Selection (DWD-****2* only) You can adjust the spin speed of your laundry with the spin speed setting button. When you select a new programme, the max. spin speed of the programme you have selected shall be displayed on Auxiliary the display panel.
- Page 48 CHAPTER-5: PRELIMINARY PREPARATION FOR LAUNDERING AUXILIARY FUNCTIONS 3- Anti-Allergic(*) (DWD-****2* only) In the programmes where this auxiliary function is active, you may have your machine perform an extra rinsing operation on your laundries prior to latest rinsing operation. Auxiliary You may make the programme active by function pressing the anti-allergic button on the display button 3 or 4...
- Page 49 have selected shall be displayed on the display panel. By pressing the spin speed setting Auxiliary button, you can change the spin speed of the function selected programme between its max. value. button 2 If you have skipped the spin speed you want ГЛ...
- Page 50 ГЛ CHAPTER-5: PRELIMINARY PREPARATION FOR LAUNDERING AUXILIARY FUNCTIONS 6- Spin speed selection (DWD-****4* only) You can set the spin revolution for your laundries via revolution speed setting button. When you select a new programme, the maximum spin revolution speed of the programme you have selected will be viewed on the display of revolution speed.
- Page 51 ГЛ CHAPTER-5: PRELIMINARY PREPARATION FOR LAUNDERING AUXILIARY FUNCTIONS 7- Time Delay (DWD-****4* only) 5- Time Delay By using this auxiliary function, you can set the time when your machine start washing. This time can vary from an hour to 23 hours. To use auxiliary function of delay Time Delay timer:...
- Page 52 CHAPTER -5: PRELIMINARY PREPARATION FOR LAUNDERING AUXILIARY FUNCTIONS 9- Start/Pause button(6, 7kg DWD-****2*) By pressing on the Start/Pause button, Wash 60° you may start the programme you have Rinse 40° Spin 30° selected or suspend a running programme. If you switch your machine Temp.
- Page 53 CHAPTER-5: PRELIMINARY PREPARATION FOR LAUNDERING (CHILD LOCK) ■ 6, 7kg DWD-****2* To avoid programme flow from being affected if programme buttons are pressed or programme button is turned when performing washing operation in your machine, child lock is available. Child lock will be activated in case pressed on both auxiliary functions 3 and 4 at the same time for more than 3 seconds.
- Page 54 CHAPTER-5: PRELIMINARY PREPARATION FOR LAUNDERING (CHILD LOCK) ■ 8kg DWD-****4* To avoid programme from being affected if programme buttons are pressed or programme button is turned when performing washing operation in your machine, child lock is available. Child lock will be activated in case pressed on both auxiliary functions 3 and 4 at the same time for more than 3 seconds.
- Page 55 CHAPTER -5: PRELIMINARY PREPARATION FOR LAUNDERING (CANCELLING PROGRAMME) If you want to cancel any programme running: 1- Switch the programme knob to “CANCEL” position. 2- Your machine will stop the washing operation and the programme will be cancelled. 3- To get rid of the water accumulated in the machine switch the programme knob to any programme.
- Page 56 CHAPTER-5: PRELIMINARY PREPARATION FOR LAUNDERING FINISHING PROGRAMME Your machine will stop by itself as soon as the programme you have selected - End led will blink on the display panel. ■ 6, 7kg DWD-****2* ■ 8kg DWD-****4* - You can open the machine’s door and remove the laundry. - Leave the door of your machine open to allow the inner part of your machine to dry after removing your laundries.
-
Page 57: Program Table
CHAPTER -6: PROGRAM TABLE COTTON 90° DWD-****2* DWD-****2*/DWD-****4* Program Washing 90° 90° 90° temperature (°C) Maximum dry laundry amount (kg) Detergent compartment Programme duration (Min.) Very dirty, cotton and Very dirty, cotton and Very dirty, cotton and flax textiles. flax textiles. flax textiles. - Page 58 CHAPTER -6: PROGRAM TABLE COTTON 60° DWD-****2* Program Washing 60° 60° temperature (°C) Maximum dry laundry amount (kg) Detergent compartment Programme duration (Min.) Dirty cotton and flax textiles. Dirty cotton and flax textiles. Laundry type / (Underwears, linen, tablecloth, (Underwears, linen, tablecloth, Descriptions towel (maximum 3,0 kg), towel (maximum 3,5 kg),...
- Page 59 CHAPTER -6: PROGRAM TABLE COTTON DWD-****4* Program Washing temperature (°C) 60° Maximum dry laundry amount (kg) Detergent compartment Programme duration (Min.) Dirty cotton and flax textiles. Laundry type / Descriptions (Underwears, linen, tablecloth, towel (maximum 4,0 kg), bedclothes, etc. ECO 20° DWD-****2* DWD-****2*/DWD-****4* Program...
- Page 60 CHAPTER -6: PROGRAM TABLE SYNTHETICS DWD-****2* DWD-****2*/DWD-****4* Program Washing 40° 40° 40° temperature (°C) Maximum dry laundry amount (kg) Detergent compartment Programme duration (Min.) Very dirty or synthetic- Very dirty or synthetic- Very dirty or synthetic- mixed textiles. (Nylon mixed textiles. (Nylon mixed textiles.
- Page 61 CHAPTER -6: PROGRAM TABLE RINSE DWD-****2* DWD-****2*/DWD-****4* Program Washing temperature (°C) Maximum dry laundry amount (kg) Detergent compartment Programme duration (Min.) If you want to If you want to If you want to additionally rinse your additionally rinse your additionally rinse your laundries upon laundries upon laundries upon...
- Page 62 ГЛ CHAPTER -6: PROGRAM TABLE SPIN DWD-****2* DWD-****2*/DWD-****4* Program Washing temperature (°C) Maximum dry laundry amount (kg) Detergent compartment Programme duration (Min.) If you want to If you want to If you want to additionally Spinning additionally Spinning additionally wring your your laundries upon your laundries upon laundries upon...
- Page 63 ГЛ CHAPTER -6: PROGRAM TABLE SPORTS WEAR DWD-****2* DWD-****2*/DWD-****4* Program Washing 30° 30° 30° temperature (°C) Maximum dry laundry amount (kg) Detergent compartment Programme duration (Min.) Laundry type / Sportswear. Sportswear. Sportswear. Descriptions MIXED DWD-****2* DWD-****2*/DWD-****4* Program Washing 30° 30° 30°...
- Page 64 ГЛ CHAPTER -6: PROGRAM TABLE SHIRTS DWD-****2* DWD-****2*/DWD-****4* Program Washing 60° 60° 60° temperature (°C) Maximum dry laundry amount (kg) Detergent compartment Programme duration (Min.) Dirty cotton, synthetic Dirty cotton, synthetic Dirty cotton, synthetic Laundry type / and syntheticmixed and syntheticmixed and syntheticmixed Descriptions shirts and blouses can...
- Page 65 ГЛ CHAPTER -6: PROGRAM TABLE SPEED 15’ DWD-****2* DWD-****2*/DWD-****4* Program Washing 30° 30° 30° temperature (°C) Maximum dry laundry amount (kg) Detergent compartment Programme duration (Min.) You can wash your You can wash your You can wash your slightly stained, slightly stained, slightly stained, Laundry type /...
-
Page 66: Maintenance And Cleaning Of Your Machine
CHAPTER -7: MAINTENANCE AND CLEANING OF YOUR MACHINE (WARNING) Unplug your machine before starting the maintenance and cleaning of your machine. Turn the tap water off before starting the maintenance cand cleaning of your machine. CAUTION: Your machine’s parts might be damaged if cleaners with solvent agents are used. - Page 67 CHAPTER -7: MAINTENANCE AND CLEANING OF YOUR MACHINE (WATER INLET FILTERS) Filters to avoid dirt and foreign substances in the water from penetrating into the machine are available both on the side of faucet and on the ends of water valves along the water inlet hose of your machine.
- Page 68 CHAPTER -7: MAINTENANCE AND CLEANING OF YOUR MACHINE (PUMP FILTER) A filter system which avoids threads remaining from your laun- dries and tiny materials from entering into the pump during water discharging operation carried out by your machine after complet- ing washing so prolonging the lifecycle of your pump is avail- able.
- Page 69 CHAPTER -7: MAINTENANCE AND CLEANING OF YOUR MACHINE (PUMP FILTER) • Clean the foreign materials in the with a brush. • After cleaning the cover and tighten it by rotating it in clockwise direction. • While closing the pump cover, ensure that the parts on the inner side of the cover to match the holes on the front panel side.
- Page 70 CHAPTER -7: MAINTENANCE AND CLEANING OF YOUR MACHINE (DETERGENT DRAWER) Your detergents may deposit residue in detergent drawer and housing of detergent drawer over time. To clean the residue formed, disassemble the detergent drawer in particular periods. It is recommended that you clean your pump filter every 2 months.
-
Page 71: Flush Stopper / Body / Drum
CHAPTER -8: FLUSH STOPPER / BODY / DRUM Flush stopper Disassemble the detergent drawer. Disassemble the flush stop- per and clean the softener residues completely. Refit the flush stopper after cleaning it. Check whether it has settled properly. Body Clean the outer body of your machine with warm water and a non-inflammable cleaning agent that will not abrade the body of your machine. -
Page 72: Trouble Shooting
CHAPTER -9: TROUBLESHOOTING All repairing operations required for your machine should be carried out by our authorised service provider.If your machine requires a repair or if you cannot remove the fault by the help of the information provided as follows: •... -
Page 73: Your Machine
CHAPTER -9: TROUBLESHOOTING POSSIBLE TROUBLE- FAULT CAUSE SHOOTING Discharging Check the discharg- hose clogged or ing hose, then either twisted. clean or untwist. Your machine does not Pump filter Clean the discharge water. clogged. pump filter. (*) Laundries settled in Spread your laun- the machine non- dry in the machine... - Page 74 CHAPTER -9: TROUBLESHOOTING POSSIBLE TROUBLE- FAULT CAUSE SHOOTING Press on Start/Pause button. To eliminate foam formation, mix a spoon of softener with half litres of water, and pour the mixture in the deter- gent drawer. After 5-10 Excessive amount minutes, Press on Start/ of detergent used.
- Page 75 CHAPTER -9: TROUBLESHOOTING POSSIBLE TROUBLE- FAULT CAUSE SHOOTING Water being hard. Adjust the amount of ( Contaminated, lime detergent based on the water etc.) instruction of detergent manufacturer. Unsatisfactory washing result. Laundries distributed Spread your laun- in your machine non- dries in the ma- homogenously.
- Page 76 CHAPTER -9: TROUBLESHOOTING POSSIBLE TROUBLE- FAULT CAUSE SHOOTING Unbalanced load control system will try to spread your laundries homoge- neously. Spinning operation is No fault. Unbalanced Spinning operation will not performed or runs load control system begin after your laundry late.
-
Page 77: Automatic Fault Warnings And What To Be Done
CHAPTER -10: AUTOMATIC FAULT WARNINGS AND WHAT TO BE DONE Your machine is equipped with the systems which are capa- ble of both taking necessary precautions and warning you in case of any breakdown by means of continuous self-check- ing during washing operations. TROUBLE POSSIBLE CODE... -
Page 78: Practical Information
CHAPTER -11: PRACTICAL INFORMATION Alcoholic drinks: Spotted area should ini- tially be washed using cold water, and then be wiped with glycerine and water and rinsed with vinegar-mixed water. Shoe shine: Spot should be rubbed out gently without damaging the cloth and be scrubbed and rinsed with detergent. - Page 79 CHAPTER -11: PRACTICAL INFORMATION Tomato paste: After rubbing out the dried substances without damaging your laundry, submerge it in water for 30 minutes, and then scrub and wash it with detergent. Bouillon-Egg: Remove dried spot residues on your laundry, and then wipe it with a sponge or soft cloth submerged in cold water previously.
- Page 80 CHAPTER -11: PRACTICAL INFORMATION Fruit: Stretch the spotted area of your laun- dry throughout the opening of a vessel, and pour cold water on it. Do not pour hot water on the spot. Wipe with cold water and apply glycerine. Allow 1-2 hours, wipe with a few drops of white vinegar, and rinse it.
- Page 81 CHAPTER -11: PRACTICAL INFORMATION Blood stain: Submerge your laundries in cold water for 30 minutes. If the stain is not removed, then submerge in a mixture of wa- ter and ammoniac (3 spoons of ammoniac in 4 litres of water) for 30 minutes. Crema, ice cream and milk: Submerge your laundries in cold water and scrub the spotted area with detergent.
-
Page 82: Describing Energy Label And Saving Energy
DESCRIBING ENERGY LABEL AND SAVING ENERGY Model Brand Number Energy Class Energy Consumption Noise Value While Washing Noise Value While Spinning Spinning Performance Class Dry Laundry Capacity Annual Water Consumption EN -80- EN -82- UK( )(6 7 8kg)( ).indd 82 2015-11-26 10:45:19... - Page 83 DESCRIBING ENERGY LABEL AND SAVING ENERGY Energy and water consumption may vary based on water pressure, water hardness, water temperature, ambient tem- perature, laundry amount, additional function selection, volt- age fluctuations. It will reduce energy and water consump- tion to use your machine with the laundry capacity proposed for the selected programme, wash your laundries less dirty or daily laundries in short programmes, carry out cleaning and maintenance periodically, use your machine in conveni-...
-
Page 84: Disposal Of Your Old Machine
DISPOSAL OF YOUR OLD MACHINE This symbol on the product or package implies that the product should not be treated as domestic waste. Instead, it should be delivered to applicable waste col- lection places recycling electrical and electronic equip- ment. You will contribute to avoid potential negative results regarding environment and human health, which will arise due to wrong waste procedure for the product by... -
Page 85: Product Fiche
PRODUCT FICHE Rated capacity (Cotton 60° full load) (kg) Energy efficiency class Energy consumption (kWh/annum)* Water consumption (L/annum)** Spin-drying efficiency class Noise (Washing) (dB(A)) Noise (Spinning) (dB(A)) Max spin speed (rpm)*** Remaining moisture content (%)*** Energy consumption (cotton 60° full load)(kWh/cycle) Energy consumption (cotton 60°... - Page 86 PRODUCT FICHE Rated capacity (Cotton 60° full load) (kg) Energy efficiency class Energy consumption (kWh/annum)* Water consumption (L/annum)** Spin-drying efficiency class Noise (Washing) (dB(A)) Noise (Spinning) (dB(A)) Max spin speed (rpm)*** Remaining moisture content (%)*** Energy consumption (cotton 60° full load)(kWh/cycle) Energy consumption (cotton 60°...
- Page 87 PRODUCT FICHE Rated capacity (Cotton 60° full load) (kg) Energy efficiency class Energy consumption (kWh/annum)* Water consumption (L/annum)** Spin-drying efficiency class Noise (Washing) (dB(A)) Noise (Spinning) (dB(A)) Max spin speed (rpm)*** Remaining moisture content (%)*** Energy consumption (cotton 60° full load)(kWh/cycle) Energy consumption (cotton 60°...
- Page 88 PRODUCT FICHE Rated capacity (Cotton 60° full load) (kg) Energy efficiency class Energy consumption (kWh/annum)* Water consumption (L/annum)** Spin-drying efficiency class Noise (Washing) (dB(A)) Noise (Spinning) (dB(A)) Max spin speed (rpm)*** Remaining moisture content (%)*** Energy consumption (cotton 60° full load)(kWh/cycle) Energy consumption (cotton 60°...
- Page 89 Manufacturer : Importer: Dongbu Daewoo Electronics Corp. Dongbu Daewoo Electronics UK Ltd. Dongbu Finance Centre, 432, Teheran-ro, 640 Wharfedale Road, Winnersh Triangle, Gangnam-gu, Seoul 135-523, South Korea Wokingham, Berkshire RG41 5TP, U.K. www.dongbudaewooelec.com www.daewooelectronics.co.uk Tel.: +82 2 360 7114 Tel: +44 (0) 118 9252 500 UK( )(6 7 8kg)( ).indd 89...
- Page 90 ABOUT THIS MANUAL ABOUT THIS MANUAL VISION CREATIVE. INC. 서울 종로구 통의동 6번지 이룸빌딩 4층 담 당 정세훈 님_영국향 브 랜 드 DAEWOO 언 어 영어 1***CF2 (6, 7Kg F2 panel type) F.MODEL 1***CF4 (8kg F4 panel type) B.MODEL DWD-MV****, DWD-FV**** B U Y E R 인...
Need help?
Do you have a question about the DWD-MV SERIES and is the answer not in the manual?
Questions and answers
Washing machine indicator lights blinks without starting
The Daewoo DWD-MV SERIES washing machine indicator light blinks without starting because the machine is in standby mode. This occurs when the Start/Pause button is pressed but the programme has not yet started.
This answer is automatically generated
@Mr. Anderson so whats the solution onwards, ? i am facing this issue and the machine is not working at all.
I want to know the timing for each programme because the washing machine takes very long
The Daewoo DWD-MV SERIES washing machine has a 15-minute program for slightly stained cotton, colored, and flax textiles. However, the program duration may change depending on laundry amount, tap water, ambient temperature, and selected additional functions.
This answer is automatically generated