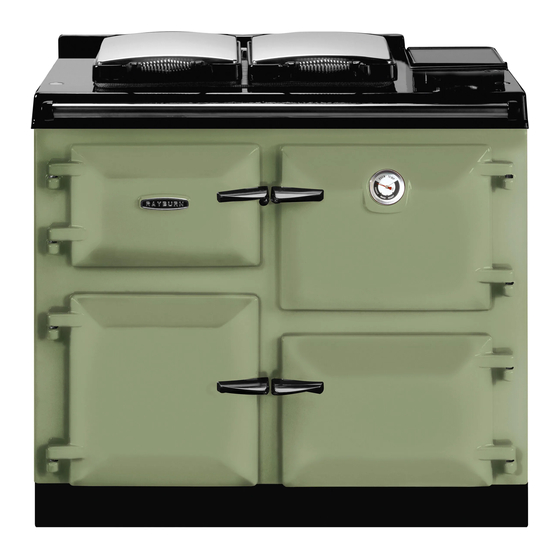
Rayburn Heatranger 60K User's Manual & Installation Instructions

Rayburn Heatranger 60K User's Manual & Installation Instructions

Table of Contents

Advertisement

Quick Links

LPRT 517972
Rayburn Heatranger®
60K, 80K, 100K
User Guide &
Installation Instructions
CAUTION: THIS UNIT IS HEAVY, PROPER EQUIPMENT AND ADEQUATE MANPOWER MUST BE USED IN MOVING THE
RANGE TO AVOID DAMAGE TO THE UNIT OR THE FLOOR.
REMEMBER, when replacing a part on this appliance, use only spare parts that you can be assured conform to the safety and
performance specification that we require.
DO NOT use reconditioned or copy parts that have not been clearly authorised by Rayburn.
PLEASE READ THESE INSTRUCTIONS BEFORE USING THIS APPLIANCE
AND KEEP IN A SAFE PLACE FOR FUTURE REFERENCE.
For use in GB and IE
06/22 EINS 517973

Advertisement

Table of Contents
loading

Summary of Contents for Rayburn Heatranger 60K

  • Page 1 REMEMBER, when replacing a part on this appliance, use only spare parts that you can be assured conform to the safety and performance specification that we require. DO NOT use reconditioned or copy parts that have not been clearly authorised by Rayburn. PLEASE READ THESE INSTRUCTIONS BEFORE USING THIS APPLIANCE AND KEEP IN A SAFE PLACE FOR FUTURE REFERENCE.
  • Page 2 Useful Information It maybe useful to make a note of your Rayburn appliance Serial Number when it is being installed. The serial number can be found on the rear of the appliance. My Rayburn Details: Serial No: Rayburn Service No:...
  • Page 3: Table Of Contents

    Contents Health and Safety Introduction Rayburn Heatranger® Overview GENERAL NOTE ON SETTING THE PROGRAMMER Operating the Rayburn Heatranger® GENERAL NOTE ON SETTING THE PROGRAMMER SETTING THE CORRECT TIME AND DAY OPERATING THE OVEN MANUALLY SETTING THE COOKING PROGRAMME PROGRAMMING CENTRAL HEATING, HOT WATER OR OVEN PREHEAT...
  • Page 4 Installation Process LOCATION HEARTH CONSTRUCTION ELECTRICAL SUPPLY TO ACCESS THE CONTROL PANEL PRE-INSTALLATION CHECK CHIMNEY SEALING FLUE HEIGHT FLUE SYSTEM DRAUGHT REQUIREMENTS FLUE LINERS FACTORY MADE INSULATED CHIMNEYS VENTILATION & COMBUSTION AIR REQUIREMENTS OUTSIDE AIR CONNECTION HEATING PIPE FITTINGS DOWN DRAUGHTS WATER PIPE SIZE DRAINING INTERNAL PUMP THERMOSTAT...
  • Page 5: Health And Safety

    Rayburn or a separate remote-control been given supervision or instruction concerning use of the system.
  • Page 6 General • In the event of a fire, cover the pan with a lid and switch OFF the electricity. • Smother the flames on the hob rather than attempting to remove the pan to the outside. • Burns and injuries are caused almost invariably by picking up the burning pan to carry outside.
  • Page 7: Introduction

    Introduction To help you make the best use of your cooker, PLEASE READ Important: Control of Substances Harmful to Health - THIS BOOKLET CAREFULLY. It is the Users/Installers responsibility to ensure that the To ensure safety, satisfaction and reliable operation, this necessary personal clothing is worn when handling materials quality cooker should be installed and commissioned by a that could be interpreted as being injurious to health and...
  • Page 8: Rayburn HeatrangerĀ® Overview

    Rayburn Heatranger® Overview Set HOT Fig. 3.1 Central ‘F’ Set DAY/TIME WATER Oven Lock Current Heating Button Light Light Pre-Heat Button Time Set Boiler Temperature “+” Button Day Marker Switch On Time Oven Dial On/Off Period “-” Button Switch Off Time...
  • Page 9: Operating The Rayburn Heatranger

    Operating the Rayburn Heatranger® GENERAL NOTE ON SETTING THE PROGRAMMER Fig. 4.1 When there is a time or setting that can be edited, or adjusted by the user, then that time flashes to indicate that it is editable. Editing is carried out by scrolling the + or – buttons.
  • Page 10: Programming Central Heating, Hot Water Or Oven Preheat

    If desired, you can leave the oven timer selected, in Fig. 4.4 which case the oven will come on to the selected temperature at the same time every day. PROGRAMMING CENTRAL HEATING, HOT WATER OR OVEN PREHEAT The heating can be set individually for both Central Heating, Hot Water, and Oven preheat and each setting has 3 on/off programmes for each day.
  • Page 11: Setting The Alarm Timer

    SETTING THE ALARM TIMER Fig. 4.7 The alarm timer allows cooking to be timed up to a period of 99 minutes. (it does not turn the oven on or off ) The alarm can be set by following the procedure below: Press the “alarm”...
  • Page 12: Power Failure

    POWER FAILURE Fig. 4.9 Your clock has a built-in battery to ensure correct operation after a mains supply power cut. No action should be necessary following a power loss. Diagnostics If an error occurs in the appliance the electronics will detect it and narrow down the problem area.
  • Page 13: Cooking Utensils

    Grease spillages will burn off from the oven interior, when the oven is hot and any other loose materials can be wiped Rayburn cookers are finished in a high gloss vitreous enamel. out with a cloth, when cold. Stubborn stains in the area and...
  • Page 14: General Information

    GENERAL INFORMATION GRILLING Turn the oven thermostat to a reasonably high setting and this will give a greater temperature at the top of the main oven. The flue gases are passing over the top face of this oven, so this face is being heated on both sides. The roasting tin supplied with the cooker contains a grill rack.
  • Page 15: Cookware

    You do not have to rush out and buy a new set of pans Eggs used are size 3 unless otherwise stated. All herbs used when you take delivery of your new Rayburn cooker, but are fresh unless otherwise stated. If unavailable use dried it is advisable to check your cookware.
  • Page 16 TYPE OF MEAT TEMPERATURE TIMING per 500g (1 lb) BEEF ON THE BONE 180oC RARE 10 mins + 10 mins over MED 12mins + 12 mins over SIRLOIN WELL DONE 20 mins + 20 mins over FORE RIB BEEF BONED AND ROLLED 180oC RARE 12 mins + 12 mins over TOPSIDE...
  • Page 17: User Cooking Tips

    12. Baking: When making fruit cakes, wash the dried fruit, place on a baking sheet and allow to dry off in the lower You will soon come to look upon the Rayburn as a reliable oven before use. Moist fruit will sink to the bottom of a companion to help you during a busy baking session or when cake and spoil it.
  • Page 18: Fault Findings

    FAULT FINDINGS PROBLEM CAUSE REMEDY Poor Flue Draught: Obstruction. Clear and clean. Chimney too low. Raise height above ridge. Chimney too wide. Fit flue liner 150mm (6”) Crack in wall. Repair cracks. No flue liner Fit flue liner Excessive Flue Draught High chimney.
  • Page 19: Installation Introduction

    Installation Introduction Congratulations on purchasing this fine Oil-fired Central Heating Cooker. It is built to exacting standards and it will give you every satisfaction in use. Please read the following information before operating this excellent product. This appliance is hot while in operation and retains its heat for a long period of time after use.
  • Page 20: Product Dimensions Rayburn Heatranger

    Product Dimensions Rayburn Heatranger® Fig. 6.1 DESN 517978 NOTE: When surveying for a appliance installation the actual clearance required for the ‘body’ of the appliance should be increased overall by 10 mm beyond the figures quoted above. This allows safe margin to take into account the natural dimensional variations found in major castings in particular the width across an appliance recess could be critical.
  • Page 21: Technical Data

    Technical Data FUEL: 28 Sec Kerosene MAINS CURRENT: 230v - 240v, 50 Hz A.C. I.P. PROTECTION: IP 20 ELECTRICAL INPUT: 90 Watts SUPPLY FUSE RATING: MAX BOILER WORKING PRESSURE: 1.9 bar 27.3 P.S.I. TEST PRESSURE OF BOILER: 3 bar 43.5 P.S.I OPERATING TEMPERATURE LIMIT IN BOILER: 96°C (205°F) 100K...
  • Page 22 THIS APPLIANCE MUST BE CONNECTED TO A FULLY PUMPED SYSTEM. BURNER SPECIFICATION Burner Input COOKER BURNER 100K 100K/80K/60K (kW) Continuous Running 34.2 27.7 21.4 19.5 (kW) Cycling (Btu’s) Continuous Running 116,760 94,600 73,000 66,875 (Btu’s) Cycling 14,950 Boiler Output 100K 100K/80K/60K (kW) Continuous Running 29.3...
  • Page 23 • Health and Safety at Work Act. • BS 7671: Requirements for Electrical Regulations. Safety Document 635: The Electricity at Work Regulations. • BS 7593: Treatment of Water in Domestic Hot Water Systems. • BS 7074 Part 1 & 2: Hot Water Supply. •...
  • Page 24: Installation Process

    225mm (9 inches) to the front. When bringing your kitchen units up to the sides of the cooker leave a 10mm gap between the Rayburn and adjacent ELECTRICAL SUPPLY units, (see Fig. 8.2). Likewise the base of your units can be All wiring external to the appliance must conform to the brought up flush to the Rayburn’s built-in plinth.
  • Page 25: Pre-Installation Check

    (You should discuss the installation of your Rayburn cooker with your builder in this regard in the case of a newly fitted kitchen.
  • Page 26 Flue greater than 125mm (5”) Diameter Fig. 8.7 Fig. 8.5 DESN 517988 DESN 517986 Fig. 8.6 DESN 517987...
  • Page 27: Flue Height

    The combustion products will have a descaling effect on ways clean, read the operating instructions. hardened soot deposits left from burning solid fuels. RAYBURN CAST IRON PIPES AND BENDS ARE HIGHLY ALTHOUGH THE CHIMNEY MAY HAVE BEEN CLEANED OF RECOMMENDED FOR INTERIOR USE.
  • Page 28: Factory Made Insulated Chimneys

    FACTORY MADE INSULATED CHIMNEYS 10. If there is an air extraction fan fitted in the room or adjacent rooms where this appliance is fitted, additional Factory-made insulated chimneys should be constructed and air vents will be required to aleviate the possibility of tested to meet the relevant standards and recommendations spillage of combustion products from the appliance/ given in:...
  • Page 29: Down Draughts

    DOWN DRAUGHTS Fig. 8.8 However well designed, constructed and positioned, the satisfactory performance of the flue can be adversely affected by down draught caused by nearby hills, adjacent tall buildings or trees. These can deflect wind to blow directly down the flue or create a zone of high pressure over the terminal.
  • Page 30: Draining

    e. Remove tape from pipes and boiler ports. Connect Fig. 8.11 pipes to boiler. f. Replace blanking plates. g. Plug the boiler tappings on the left hand side of the boiler with 1” BSP plugs. h. Test for leaks. DRAINING Key-operated drain taps to BS 2879 should be provided in accessible positions in all low parts of the system.
  • Page 31: Servicing

    SERVICING Fig. 8.12 To ensure continued efficient and safe operation of the appliance, it is recommended that it is checked and serviced by an Authorised Service Engineer at least once a year. Safety Valve 28mm Flow Pipe IMPORTANT:- Flexible oil lines should be inspected at each and every 1.5m By-pass Lock service visit.
  • Page 32 Fig. 8.13 OPEN SYSTEM (WITH PUMP ON RETURN) RAYBURN RAYBURN HEATRANGER HEATRANGER SEALED SYSTEM (WITH PUMP ON FLOW) RAYBURN RAYBURN HEATRANGER HEATRANGER DESN 517995...
  • Page 33 Fig. 8.14 RAYBURN HEATRANGER DESN 517996 RAYBURN HEATRANGER DESN 517997...
  • Page 34 Fig. 8.15 Fig. 8.17 PROVISION FOR FILLING SEALED SYSTEM S PLAN SYSTEM COLD FEED PIPE & OPEN VENT PIPE NOT MORE THAN 150mm (6”) APART DESN 517998 DESN 517999 Fig. 8.16 If wires are a different colour MAINS code, please refer to the manufacturers instructions.
  • Page 35 Fig. 8.18 WIRING DIAGRAM 100 / 80 / 60 DESN 518001...
  • Page 36 Fig. 8.19 S PLAN WIRING DIAGRAM USING MULTI TIMER FOR ALL CENTRAL HEATING ZONES DESN 518002...
  • Page 37: Zone Heating System

    4 ZONE HEATING SYSTEM When connecting the Heatranger cooker to a 4 - zoned heating system (i.e. separate time switches and thermostats for domestic hot water and four central heating zones), the domestic hot water and one zone must be controlled directly from the cooker enabling the inter thermostat to operate if necessary.
  • Page 38 Fig. 8.21 S PLAN WIRING DIAGRAM SHOWING ZONE CONTROLLED BY UNDERFLOOR HEATING ZONE DESN 518004...
  • Page 39: Fuel Installation

    Fuel Installation OIL STORAGE TANKS underground should be avoided if at all possible. If joints have to be fitted in pipes laid below ground, access to them Oil storage tanks made of steel and all connecting equipment must be provided. (eg: filling pipes and vent pipes) should comply with B.S.
  • Page 40: Tiger Loop Oil Supply

    fitted close to the burner and is linked to the tank by a single Check temperature differential between flow and return pipe, thus saving the return pipe required by the two pipe 11°C (20°F) and adjust pump or bypass accordingly. system as described previously.
  • Page 41: Removal Of Transport Screw/S

    “Normal Start”. On flame failure, immediately after DESN 518006 burner start, the control will initiate re-ignition. Flame monitoring Fig. 9.3 RAYBURN RAYBURN HEATRANGER HEATRANGER The flame is monitored by a photocell unit. Note: In accordance with the latest ISO and DIN standards, type LOA activates the safety relay if the photocell unit is exposed to light in the pre-purging period.
  • Page 42 Fig. 9.6 Fig. 9.11 DESN 518010 DESN 518015 Fig. 9.7 Fig. 9.12 DESN 518011 DESN 518016 Fig. 9.8 DESN 518011 Fig. 9.9 Boiler Burner flue gas test point Oven Burner flue gas test point DESN 518013 Fig. 9.10 DESN 518014...
  • Page 43: 10. Installation Checklist

    10. Installation Checklist Flue System The relevant guidelines must be adhered to for the relevant flue system A, B & C: A. Use of an Existing Chimney If connecting to an existing chimney, the appliance should be connected to a 150mm (6”) diameter continuous, rigid or flexible flue pipe suitable for oil-fired appliances that terminates in excess of 0.6 metres from the nearest ...
  • Page 44 For further advice or information contact your local Rayburn Specialist. With AGA Rangemaster’s policy of continuous product improvement, the Company reserves the right to change specifications and make modifications to the appliances described and illustrated at any time. Manufactured By...

This manual is also suitable for:

Heatranger 80kHeatranger 100k

Table of Contents