Table of Contents
Advertisement
Quick Links
Advertisement
Table of Contents
Troubleshooting

Related Manuals for Neopost MACH 5


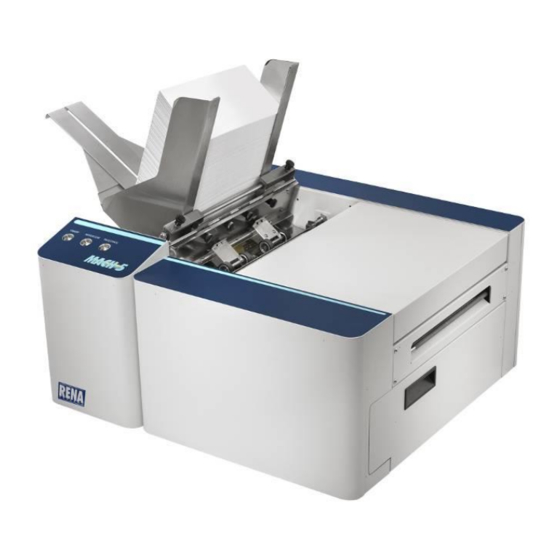
Summary of Contents for Neopost MACH 5
- Page 1 MACH 5, AS-950C, HJ950C DIGITAL COLOR PRINTER SERVICE GUIDE Rev 7-8-11...
-
Page 2: Table Of Contents
TABLE OF CONTENTS Table of Contents SECTION 1 – GETTING ACQUAINTED ....................6 SAFETY PRECAUTIONS......................... 6 ............................... 7 RONT ..............................8 ........................... 9 RINT NGINE ........................10 EHIND THE ........................11 CCESSORY ONTENTS ........................12 ONTROL ANEL UNCTIONS Printer Status Light Indicators ......................13 .................. - Page 3 TABLE OF CONTENTS To open the Toolbox:..........................50 User Interface Screen ........................... 51 Ink Usage Screen..........................52 Diagnostics Screen ..........................52 Service Menus............................53 SECTION 5 – MEASUREMENTS AND ADJUSTMENTS ..............57 ..........................57 RIVE ENSION ............................58 OWER UPPLY ............................
- Page 4 TABLE OF CONTENTS Removing the Service Station ....................... 91 Cleaning the Service Station......................... 92 Replacing damaged/worn items in the Service Station................. 93 Reinstalling or Replacing the Service Station ..................93 ..................94 NSPECTING EPLACING THE ASTE ........................95 LEANING RINTER ................
- Page 5 TABLE OF CONTENTS NOTES ______________________________________________________ ______________________________________________________ ______________________________________________________ ______________________________________________________ ______________________________________________________ ______________________________________________________ ______________________________________________________ ______________________________________________________ ______________________________________________________ ______________________________________________________ ______________________________________________________ ______________________________________________________ ______________________________________________________...
-
Page 6: Section 1 - Getting Acquainted
In addition, follow any specific occupational safety and health standards for your workplace or area. This manual is intended solely for the use and information of Neopost USA, its designated agents, and their employees. The information in this guide was obtained from several different sources that are deemed reliable by all industry standards. -
Page 7: Front View
SECTION 1 GETTING ACQUAINTED Front View Exit Roller Cover – This cover plate must be removed to install the Service Station. Control Panel – Provides printer controls. See “Control Panel Functions” section. Side Guide Locking Knob – Used to secure the position of the side guide. Rear Media Support Guide –... -
Page 8: Rear View
SECTION 1 GETTING ACQUAINTED Rear View Main Power Switch, Receptacle and Fuse – Plug in AC power cord here. Switch turns main power on or off. Fuse provides over-current protection. Fuse rating: 2.5A, 250V, slow blow. CAUTION: Make sure power cord is disconnected from printer before checking/replacing fuse. WARNING: Press the ON/OFF Button, located on control panel, to properly shut-down the print engine. -
Page 9: Print Engine Area
SECTION 1 GETTING ACQUAINTED Print Engine Area Print Engine with printhead cartridge installed and printhead latch closed. Antistatic Brush Assembly – This assembly contains a conductive brush that is used to help reduce static energy and remove paper dust from the media. This assembly also contains upper pressure rollers and fingers that help guide the paper into the print engine. -
Page 10: Behind The Ink Tank Door
SECTION 1 GETTING ACQUAINTED Behind the Ink Tank Door Ink Tank Securing Latches – Used to hold the Ink Tanks in the slots. NOTE: Please be sure that both sides, at the bottom part of the latch, are engaged. Ink Tanks – Five Ink Tanks are used in the printer. Cyan (C), Yellow (Y), Magenta (M), Black (K), Black (K) Ink Waste Tray –The purpose of this tray is to catch any waste ink produced by the system. -
Page 11: Accessory Box Contents
SECTION 1 GETTING ACQUAINTED Accessory Box Contents Accessory Box Contents Items contained in the Accessories Box The following items are included with your printer: The following items are included with your printer: Qty [Image Reference] Description [A] Ink Tanks - Cyan, Magenta, Yellow, Black, Black [B] Printhead Cartridge and packaging [C] Rear Media Support Guide - thumb screw attached to printer... -
Page 12: Control Panel Functions
SECTION 1 GETTING ACQUAINTED Control Panel Functions BUTTON FUNCTION(s) Press to power-up or power-down the print engine. Note: The Main Power Switch must be ON, to power-up the print engine. Powering-up: It takes approximately 45 seconds for the print engine to power-up; after pressing this button. -
Page 13: Printer Status Light Indicators
SECTION 1 GETTING ACQUAINTED Printer Status Light Indicators The lights on the three buttons, shown below, indicate the status of the printer. LEGEND (For the Status Light Indicator chart on the next page.): Description ON steady OFF steady Flashing (once per second) Fast Flash (twice per second) fast fast... - Page 14 SECTION 1 GETTING ACQUAINTED Printer Status Light Indicator Chart (see legend on previous page) PAPER PAUSE Printer Status ON/OFF Feeding Possible Solution RESUME CANCEL corresponding Toolbox message Print engine is powered-OFF In this condition, it is safe to turn the Main Power Switch OFF or ON. Print engine is powered-ON and ready Printer is Ready Print engine powering-down...
- Page 15 SECTION 1 GETTING ACQUAINTED Printer Status Light Indicator Chart (continued) PAPER PAUSE Printer Status ON/OFF Feeding Possible Solution RESUME CANCEL corresponding Toolbox message Printhead Missing Replace missing Printhead. Toolbox = PRINTHEAD_MISSING Remove Printhead Cartridge, wet print nozzles using deionized or Printhead Not Primed distilled water and re-install printhead cartridge.
-
Page 16: Recommended Troubleshooting Supplies
• Parts Manual; when available. • Access to internet. Note: Part numbers, shown above (with “-N”), are for Neopost. Remove “-N” for Rena Systems. Add “-H” for Hasler. Common Service Tools Needed: This list is in addition to standard tools. -
Page 17: Preparing The Printer For Service
Installation and Service Videos (where to find) Installation and Service Videos are also available for this product. Neopost/Hasler Technicians: Please see the Knowledgebase or NeoU for Installation and Service Videos. Rena Systems Technicians: Please see the Rena Dealer Net area for Installation and Service Videos. -
Page 18: Section 2 - Installing The Service Station, Ink Tanks And Printhead
SECTION 2 INSTALLING THE SERVICE STATION, INK TANKS AND PRINTHEAD Section 2 – Installing the Service Station, Ink Tanks and Printhead Please refer to the “Operator’s Guide” for complete Installation and Operation instructions. Tools Needed for Installation • Knife and scissors to open packaging •... -
Page 19: Installing The Service Station
SECTION 1 GETTING ACQUAINTED Installing the Service Station Due to the technical nature of this procedure; this process should only be performed by a qualified technical support person. This process is normally performed when the printer is first installed or when technical maintenance is needed on the printer. - Page 20 SECTION 2 INSTALLING THE SERVICE STATION, INK TANKS AND PRINTHEAD 5. Carefully remove the Service Station from its packaging. NOTE: Loose parts may fall out. Keep wiper roller side facing up, when removing the packaging. CAUTION! Make sure latches on the Wiper Roller are fully latched before installing the Service Station. Check the latch at each end of the wiper roller.
- Page 21 SECTION 1 GETTING ACQUAINTED 8. Once the Ribbon Cable is properly connected to the Service Station Circuit Board; gently slide the Service Station, wiper roller end first, into the Service Station Slot until it stops. The Service Station fits into the slot immediately above the Ink Tank slots. NOTE: The Ink Tank Door must be open to perform this procedure.
- Page 22 SECTION 2 INSTALLING THE SERVICE STATION, INK TANKS AND PRINTHEAD 10. GENTLY push in on the Service Station with one hand, while slowly turning the “Large Gear” clockwise with the other hand. It should be easy to turn this gear and the service station should start to drive into the print engine squarely.
-
Page 23: Install The Ink Tanks
SECTION 1 GETTING ACQUAINTED Install the Ink Tanks The Digital Color Printer uses five Ink Tanks (two Black, one Cyan, one Magenta, and one Yellow). The Ink Tank is a delicate, precision device. Handle with extreme care to avoid damage. Ink Tank Anatomy The ink used in this system may be harmful if swallowed. -
Page 24: Procedure (Installing The Ink Tanks)
SECTION 2 INSTALLING THE SERVICE STATION, INK TANKS AND PRINTHEAD Procedure (Installing the Ink Tanks): This procedure assumes that you are installing Ink Tanks into a printer that doesn’t have any Ink Tanks installed. If you are replacing an empty Ink Tank, please refer to the “Replacing the Ink Tanks” section. 1. - Page 25 SECTION 1 GETTING ACQUAINTED seals on the tank and the tank contacts make a good electrical connection with the system): Insert the Ink Tank firmly. Then pull the Ink Tank back out about an inch. Then push the Ink Tank back in, firmly.
-
Page 26: Installing The Printhead Cartridge
SECTION 2 INSTALLING THE SERVICE STATION, INK TANKS AND PRINTHEAD Installing the Printhead Cartridge The Digital Color Printer uses a single Memjet® printhead cartridge. The Printhead Cartridge is a delicate, precision device. Handle with extreme care to avoid damage and issues that could degrade print quality. -
Page 27: Procedure (Installing The Printhead)
SECTION 1 GETTING ACQUAINTED CAUTION! Hold the Printhead Cartridge by the handles ONLY. DO NOT touch the ink couplings, nozzle surface or electrical contacts. DO NOT unpack the Printhead Cartridge until the Printer is ready for installation. Once unwrapped, delay in installing the Printhead can compromise print quality due to dehydration. - Page 28 SECTION 2 INSTALLING THE SERVICE STATION, INK TANKS AND PRINTHEAD 6. Prepare the printhead cartridge. Carefully remove the Printhead Cartridge from the foil vacuum packaging. Tear at notch or cut end with scissors. CAUTION: DO NOT touch the ink couplings, printhead nozzle surface or electrical contacts.
- Page 29 SECTION 1 GETTING ACQUAINTED 7. To aid the cartridge priming process; wet the printhead nozzle surface, just before inserting the printhead. Wet a lint free cloth with deionized or distilled water and then wipe the entire length of the printhead nozzle surface with the wet cloth. NOTE: The use of deionized water is preferred;...
- Page 30 SECTION 2 INSTALLING THE SERVICE STATION, INK TANKS AND PRINTHEAD 11. Watch the Toolbox screen on your computer again. Notice that some of the information is in red. As the printer circulates ink and primes the system these fields should all turn black. This may take a few minutes.
-
Page 31: Section 3 - Troubleshooting
SECTION 3 TROUBLESHOOTING SECTION 3 – Troubleshooting The following troubleshooting guides are provided to assist you in solving any problems that might occur with the Digital Color Printer. We have tried to make them as complete as possible, but this section will always be evolving. -
Page 32: Examples Of Print Quality Issues (Including Possible Causes And Solutions)
SECTION 3 TROUBLESHOOTING Examples of Print Quality Issues (including possible causes and solutions) The Memjet printhead cartridge contains over 70,000 inkjet nozzles. These nozzles are divided into ten rows; two rows of nozzles for each color channel. Due to the high number of nozzles; it is not uncommon for some nozzles to become contaminated or clogged. - Page 33 SECTION 3 TROUBLESHOOTING Clogged Nozzles: Clogged/dehydrated nozzles will normally show as thin, crisp, vertical lines of missing color. Multiple adjacent clogged nozzles will show as wider, crisp, vertical lines of missing color. Clogged nozzles are normally due to Printhead nozzle dehydration or partial contamination. Possible Solutions: •...
- Page 34 SECTION 3 TROUBLESHOOTING Color Mixing Issues: Color mixing will show as muddy, mottled or distorted (grainy) colors. Color mixing occurs when the ink from one color channel crosses over into another color channel. Since the inkjet nozzle rows are located very close to one another (ten rows of ~7,000 nozzles, located within a 0.8 mm space), it is easy for partials or fibers to create bridges across color channels.
-
Page 35: The Printhead Cartridge
SECTION 3 TROUBLESHOOTING The Printhead Cartridge The Memjet printhead cartridge contains over 70,000 inkjet nozzles. These nozzles are divided into ten rows; two rows of nozzles for each color channel. Due to the high number of nozzles; it is not uncommon for some nozzles to become contaminated or clogged. -
Page 36: The Printer
SECTION 3 TROUBLESHOOTING The Printhead Cartridge (continued) CONDITION PROBLEM SOLUTION System will not prime the Printhead nozzles dry (air pulled Wet the Printhead nozzles printhead after installing through nozzles is not allowing using distilled water and a system to create vacuum) wet, lint-free cloth. -
Page 37: Power Problems
SECTION 3 TROUBLESHOOTING Power Problems CONDITION PROBLEM SOLUTION No power being Check that the power cord is plugged in. Main Power Switch is ON, but the ON/OFF button does delivered to printer. Check that the wall power outlet is live. not illuminate. -
Page 38: Interface Communication Problems
SECTION 3 TROUBLESHOOTING Interface Communication Problems CONDITION PROBLEM SOLUTION Wrong USB port selected in “M Verify that you are selecting the M Series Driver does not respond to printer being Series Driver”. appropriate USB port in the connected via USB. driver Ports Tab. -
Page 39: Feeding Problems
SECTION 3 TROUBLESHOOTING Feeding Problems CONDITION PROBLEM SOLUTION Intermittent feeding Media Support Wedge not used. The Media Support Wedge adds a slope to the stack and helps feeding. Side Guides set too tight to media. Readjust Side Guides. Dirty Feed Rollers. Clean the Feed Roller with distilled water and a cloth. - Page 40 SECTION 3 TROUBLESHOOTING Feeding Problems (continued) CONDITION PROBLEM SOLUTION Feeding problems Double feeding, overlapping or Check/readjust the sheet separators and skewing media. guides. Media is not compatible. Use compatible media. Media jams Double feeding. Readjust Sheet Separators. Media is curled or bent. Uncurl media.
-
Page 41: Error's And Warnings
SECTION 3 TROUBLESHOOTING Error’s and Warnings Alert Window Messages Messages sent from the driver and displayed on PC screen in a small popup window. MESSAGE SOLUTION …. Ink Low Reorder Ink Example: Black Ink Low Multiple Inks Low Reorder Ink Replace empty Ink Tank …. -
Page 42: Toolbox System Status Messages
SECTION 3 TROUBLESHOOTING Toolbox System Status Messages Displayed, in red, in the M Series Toolbox utility. SYSTEM STATUS PROBLEM SOLUTION Out of Paper Load media into printer and press the PAPERPATH_FEED_TIME PAPER/RESUME button. No media is reaching the If media is present; check/adjust the print engine. - Page 43 SECTION 3 TROUBLESHOOTING Toolbox System Status Messages (continued) SYSTEM STATUS PROBLEM SOLUTION CARTRIDGE_MISSING_X Missing Ink Tank, or Ink X = Color (CYMKK) Tank not being Insert missing Ink Tank or pop tank in INK_TANK_MISSING_X recognized and out to improve connection. Clear error by cycling print engine power, using ON/OFF button.
-
Page 44: Clearing Media Jams
SECTION 3 TROUBLESHOOTING Clearing Media Jams When the printer detects a media jam, it will stop automatically. The control panel PAPER/RESUME and PAUSE/CANCEL lights will blink simultaneously. The message “PAPERPATH_PRINTZONE_BLOCKED” will be displayed in the Toolbox. Once the jam has been removed from the system and the print engine is closed; press the PAPER/RESUME button to continue printing. -
Page 45: How To Clear A Tilt Error
SECTION 3 TROUBLESHOOTING How to Clear a Tilt Error CAUTION! Prior to using this option, verify that your printer is on a sturdy, level surface. This is of utmost importance, since being out of level can cause the printer to perform poorly. If the printer was recently powered on, wait at least 20 minutes before performing this task. -
Page 46: Section 4 - Printer Driver And Toolbox Features
SECTION 4 PRINTER DRIVER AND TOOLBOX FEATURES SECTION 4 – Printer Driver and Toolbox Features Printer Driver Properties The Printer Driver for the Digital Color Printer works the same as any other Printer Driver for Windows. It does have some enhancements to help you maximize the ability of the printer to print variable addressed pieces quickly and efficiently. -
Page 47: Layout Tab
SECTION 4 PRINTER DRIVER AND TOOLBOX FEATURES • Borderless Print – Also known as “full-bleed” printing. Select this option to print to the edge of the page. The document is enlarged so the image extends slightly beyond the edge of the media. Take this into account when creating your document or artwork. -
Page 48: Media Tab
SECTION 4 PRINTER DRIVER AND TOOLBOX FEATURES Media Tab The Media tab provides the following features: • Position Adjustment – This feature will allow you to make small corrections in the horizontal and vertical position of the image. Horizontal Offset – allow you to set a plus or minus number. -
Page 49: Services Tab
SECTION 4 PRINTER DRIVER AND TOOLBOX FEATURES Services Tab The Services tab provides the following features: • Print Configuration Page – Prints out the current configuration of the printer including current Firmware version, Network Connection, printer Serial Number and more. •... -
Page 50: Toolbox Utility (M Series Toolbox)
SECTION 4 PRINTER DRIVER AND TOOLBOX FEATURES Toolbox Utility (M Series Toolbox) Once the M Series Driver and Software is installed you will have access to the “M Series Toolbox”. This Toolbox utility lets you monitor ink usage, perform diagnostic checks, print reports and run maintenance tasks on the printer from your computer. -
Page 51: User Interface Screen
SECTION 4 PRINTER DRIVER AND TOOLBOX FEATURES User Interface Screen The User Interface (Printer User Control) window opens by default when you start the Toolbox utility. From this screen you can Clear Errors, Cancel a Job, Reset the Job Counter, and Reset the Page Counter. -
Page 52: Ink Usage Screen
SECTION 4 PRINTER DRIVER AND TOOLBOX FEATURES Ink Usage Screen Provides the estimated volume of ink used, for each completed print job. - Does not include ink used during maintenance cycles - Pieces printed during the job will be separated by any maintenance cycles and manual pauses that occurred during the run. -
Page 53: Service Menus
SECTION 4 PRINTER DRIVER AND TOOLBOX FEATURES Service Menus For authorized personnel only (password protected). PW: servicepw Provides the technician with access to more advanced printer control and maintenance menus. Enter password to view the service menus. Once you enter the password you will notice that several new menu options are available: "Printer Maint Config,"... - Page 54 SECTION 4 PRINTER DRIVER AND TOOLBOX FEATURES Printing Control Configuration Screen Allows you to make fine adjustments to image alignment, and how media should be recognized. NOTE: At the time of this documents printing; we did not have complete descriptions of the function or use of these features.
- Page 55 SECTION 4 PRINTER DRIVER AND TOOLBOX FEATURES Printer Maintenance Configuration Screen Allows you to enable or disable certain maintenance functions, zero the tilt sensor and print-out configuration/diagnostic information. Active Maintenance Tasks The settings, shown in the screen-shot above, are the normal settings for the Digital Color Printer. Everything should be checked except “disable_maint”.
- Page 56 SECTION 4 PRINTER DRIVER AND TOOLBOX FEATURES Printer Commands Help Screen: Provides a list of available EWS service commands. These commands can be used to help troubleshoot issues within the print engine. WARNING: To avoid accidently causing problems with the function of the printer; do NOT play with these commands unless you have been instructed to do so by Technical Support.
-
Page 57: Section 5 - Measurements And Adjustments
SECTION 5 MEASUREMENTS & ADJUSTMENTS SECTION 5 – Measurements and Adjustments CAUTION ALWAYS WEAR A WRIST STRAP THAT IS GROUNDED WHEN TOUCHING ELECTRONIC DEVICES. Drive Belt Tension Adjustment: 1. Unplug the machine and remove the non-operator Side Cover. (five screws). 2. -
Page 58: Power Supply
SECTION 5 MEASUREMENTS & ADJUSTMENTS Power Supply The Power supply converts the incoming AC voltage into 24 VDC. The DC output provides power to the electronics for the entire printer. Power Supply Measurements: Input: 100 – 240 VAC (This is an auto-switching power supply) Output: 24 VDC (+ or –... -
Page 59: Media Sensors
SECTION 5 MEASUREMENTS & ADJUSTMENTS Media Sensors Feed Sensor The feed sensor detects the media as it feeds between the sheet separation area and the print engine. This is a retro-reflective sensor. The sensor is located below the deck of the printer (see image below). The sensor looks up at a reflector, which is attached to the underside of the plate on the center pressure rollers. -
Page 60: Print Engine Sensors
SECTION 5 MEASUREMENTS & ADJUSTMENTS Print Engine Sensors There are two media sensors within the feed path of the print engine that are used to monitor paper entering and exiting the print engine area. There is also a Margin sensor in the paper feed path, but this sensor is not active (not used). Entry Sensor Receiver Mark Sensor... -
Page 61: Feed Encoder Sensor And Encoder Wheel
SECTION 5 MEASUREMENTS & ADJUSTMENTS Feed Encoder Sensor and Encoder Wheel The Feed Encoder is responsible for matching the speed of the feed section with the speed of the print engine. If a problem develops with this sensor (example: encoder wheel gets dirty), then you will normally see issues with the transition of media from the feed section to the print engine. -
Page 62: Print Engine Open Switch
SECTION 5 MEASUREMENTS & ADJUSTMENTS Print Engine Open Switch The Print Engine Open Switch is activated by the Print Engine Latch on the non-operator side. When the latch is released, to open the top section of the Print Engine, the switch position is toggled. Note: This switch is not on early printer models. -
Page 63: Clutch (Feed Roller Drive)
SECTION 5 MEASUREMENTS & ADJUSTMENTS Clutch (Feed Roller Drive) The clutch is used to engage/disengage drive to the feed rollers. When the feed motor is driving and the clutch is engaged; the feed rollers are driven to deliver media into the print engine. Measurement: To check the clutch for proper operation: Measure from TP3 to the bottom pin on J8 (Clutch Out), on... -
Page 64: Interface Board Test Points
SECTION 5 MEASUREMENTS & ADJUSTMENTS Interface Board Test Points This board is located on the non-operator side of the printer GND: Logic Ground Connect your ground lead here for all measurements except TP3 (clutch). 12VDC: Power In Improperly tagged; should be 24VDC. Hopefully this will be corrected in a future revision. TP2: Counter 3 VDC open (no paper);... -
Page 65: Section 6 - Disassembly/Assembly Procedures
SECTION 6 DISASSEMBLY & ASSEMBLY SECTION 6 – Disassembly/Assembly Procedures WARNING THE FOLLOWING DISASSEMBLY SHOULD ONLY BE DONE BY A QUALIFIED, TRAINED SERVICE REPRESENTATIVE. CAUTION ALWAYS WEAR A WRIST STRAP THAT IS GROUNDED WHEN TOUCHING ELECTRONIC DEVICES. Replacing the Sheet Separators (Separation Tips) The sheet separators (90-103-09) insure separation of the pieces as they are being fed. -
Page 66: Removing The Antistatic Brush Assembly
SECTION 6 DISASSEMBLY & ASSEMBLY Removing the Antistatic Brush Assembly To Remove Antistatic Brush Assembly [A] from its mounting studs. Unlatch the two latches (one on either side of the Assembly) and lift the assembly off the four mounting pins, as shown. Do not bend the guide fingers! When reinstalling, pay attention to the following: •... -
Page 67: Removing Covers And Identifying Components Behind Covers
SECTION 6 DISASSEMBLY & ASSEMBLY Removing Covers and Identifying Components Behind Covers Operator Side Covers (removal) 1. Power-down and unplug the printer from power. 2. Remove the screws (2 top, 3 bottom), that secure the Operator Side Cover. Then remove the cover. 3. -
Page 68: Non-Operator Side Cover (Removal)
SECTION 6 DISASSEMBLY & ASSEMBLY Non-operator Side Cover (removal) 1. Power-down and unplug the printer from power. 2. Remove the screws (2 top, 3 bottom) that secure the Side Cover. Then remove the cover. Identifying Components behind the Non-Operator Side Cover 1. -
Page 69: Ink Tank Door (Removal)
SECTION 6 DISASSEMBLY & ASSEMBLY Ink Tank Door (removal) The Ink Tank Door provides access to the Ink Tanks and Ink Waste Tray. Tip: You don’t normally need to remove the Ink Tank Door to service the printer. Power-down and unplug the printer from power. Using a spring hook or needle-nose pliers;... -
Page 70: Exit Roller Cover (Removal)
SECTION 6 DISASSEMBLY & ASSEMBLY Exit Roller Cover (removal) The exit roller cover is normally removed when installing/removing the Service Station or replacing the Print Engine. Power-down and unplug the printer from power. Using a Philips head screwdriver. Remove the four screws that secure the Exit Roller Cover to the body of the printer. -
Page 71: Replacing Motor Drive Belt Or Motor
SECTION 6 DISASSEMBLY & ASSEMBLY Replacing Motor Drive Belt or Motor 1. Power-down and unplug the printer from power. 2. Follow the instructions for removing the non- operator side cover. NOTE: To remove the motor, also remove the entrance side cover. 3. - Page 72 SECTION 6 DISASSEMBLY & ASSEMBLY 4. Push the clutch toward the pulley to get access to the retaining pin. Remove the retaining pin. 5. Remove the clutch from the feed roller shaft. 6. Reassemble in reverse order. Make sure to get the clutch aligned with the three splines on the pulley, when installing the clutch onto the feed shaft.
-
Page 73: Replacing Feed Rollers And Forwarding Rollers
SECTION 6 DISASSEMBLY & ASSEMBLY Replacing Feed Rollers and Forwarding Rollers 1. Power-down and unplug the printer from power. 2. Follow the instructions for removing the operator and non-operator side covers, motor drive belt and clutch. 3. Follow the instructions for removing the Antistatic Brush Assembly. 4. - Page 74 SECTION 6 DISASSEMBLY & ASSEMBLY 10. Lift the Center Plate Assembly from the machine and set it aside. 11. Remove the screw holding the Clutch Support Bracket and remove the bracket. TIP: Take note to how the clutch sits on the finger of the Clutch Bracket.
- Page 75 SECTION 6 DISASSEMBLY & ASSEMBLY 14. Remove the two screws holding the Bearing Housing to the side frame. Push the Rear Feed Roller Assembly toward you to release it from the bearing on the other side of the machine. Tip: Take note as to how the inner belt is attached, before removing shaft and belt.
-
Page 76: Replacing Delivery Rollers
SECTION 6 DISASSEMBLY & ASSEMBLY Replacing Delivery Rollers The Delivery Rollers are located between the Pull-Out Shaft/Rollers and the Print Engine. 1. Power-down and unplug the printer from power. 2. Follow the instructions for removing the operator and non-operator side covers. 3. - Page 77 SECTION 6 DISASSEMBLY & ASSEMBLY 10. Remove the two screws holding Front Center Plate Assembly (see image in next step) to the Intermediate Side Frame on the operator side. 11. From the non-operator side: Remove the screws that secure the Fan Assembly #2 (upper dust exhaust fan) to the side frame.
-
Page 78: Replacing The Print Engine
SECTION 6 DISASSEMBLY & ASSEMBLY 12. Remove the two screws holding the Delivery Roller Shaft to the Assembly. NOTE: you will have to remove the Bearing to remove Shaft from the Assembly. 13. Replacing the rollers on the shafts. The rollers are attached to the shafts with Allen screws. - Page 79 SECTION 6 DISASSEMBLY & ASSEMBLY 10. Disconnect the following wires from the Interface Board, located on the non-operator side of the printer.: [A] Clutch Out (J8), [B] S4 (J9) [C] Motor In (J2) [D] Disconnect the Encoder wire from the Encoder Printed Circuit Board.
- Page 80 SECTION 6 DISASSEMBLY & ASSEMBLY 13. Raise the Printer up on blocks so you can reach underneath to access and remove the four screws holding the bottom of the Print Engine to the Base Plate. Tip: If you don’t have blocks available, to raise the printer; you can slide the printer (operator side) a few inches off the edge of a sturdy worktable.
-
Page 81: Replacing The Interface Board
SECTION 6 DISASSEMBLY & ASSEMBLY Replacing the Interface Board 1. Power-down and unplug the printer from power. 2. Remove the non-operator side cover. 3. Unplug all the connections from the Interface Board. NOTE: Wires are labeled for easy reconnection. CAUTION DO NOT DAMAGE THE WIRES WHEN REMOVING THEM. -
Page 82: Replacing The Service Station Lifting Arms
SECTION 6 DISASSEMBLY & ASSEMBLY Replacing the Service Station Lifting Arms Kit Part # 42-600-10 (includes 2 Lifting Arms, 2 springs, 2 C-Clips) The Lifting Arms are responsible for raising and lowering the different sections of the Service Station. If the service station gets jammed (due to improper installation or use) the Lifting Arms can be damaged. - Page 83 SECTION 6 DISASSEMBLY & ASSEMBLY Notes...
-
Page 84: Section 7 - Maintenance
SECTION 7 MAINTENANCE SECTION 7 - Maintenance This section covers how to replace and care for the Ink Tanks, Printhead Cartridge and Service Station. Replacing the Ink Tanks This procedure describes how to replace the Ink Tank(s) when the ink runs out. Please refer to the section titled “Installing the Ink Tanks”... - Page 85 SECTION 7 MAINTENANCE 8. Remove the new Ink Tank(s) from the packaging. 9. Slide the new Ink Tank(s) (label side up) into their appropriate color slots. CYAN (C) YELLOW (Y) MAGENTA (M) BLACK (K) x 2 INSTALLATION TIP – To make sure the Ink Tank seats properly (septum needles penetrate the seals on the tank and the tank contacts make a good electrical connection with the system): Insert the Ink Tank firmly.
-
Page 86: Printhead Cartridge Storage And Handling
SECTION 7 MAINTENANCE Printhead Cartridge Storage and Handling Once installed, your printhead cartridge should remain in the printer until its useful life has expired. If you need to remove the printhead cartridge and store it for any specific reason: • Protect the printhead cartridge at all times from contamination by air-borne or surface contaminants such as dust or fibers. -
Page 87: Using The Clean Printhead Button
SECTION 7 MAINTENANCE Using the Clean Printhead Button: A “Level 1 Maintenance” can be activated by pressing the “Clean Printhead Button”, located on the print engine; as shown. The wiper roller, in the Service Station, will perform a quick cleaning of the printhead nozzles. Tip: The User Maintenance Levels, located under the Services Tab of the M Series Driver, should be used to do a more thorough cleaning. -
Page 88: Manually Cleaning The Printhead (Technician's Procedure)
SECTION 7 MAINTENANCE Manually Cleaning the Printhead (technician’s procedure) NOTE: Due to the dangers involved in this process; it is not a recommended operator procedure. This process should be performed by a qualified service person. We recommend the use of disposable gloves for this process. 1. -
Page 89: Still Experiencing Print Quality Issues
SECTION 7 MAINTENANCE Still Experiencing Print Quality Issues? If you still experience print quality issues after performing all possible printhead cleaning processes outlined in this section, please refer to the “Troubleshooting Guide” for additional help. If you have exhausted all cleaning and troubleshooting options then, in general, this would indicate that the Printhead Cartridge will need to be replaced. - Page 90 SECTION 7 MAINTENANCE 4. Open the Printhead Latch fully to disengage the ink couplings from the printhead cartridge. 5. Remove the old printhead as shown below. Rotate the cartridge back and then lift up to remove. To help reduce ink spills; place the printhead into the old protective packaging and discard. 7.
-
Page 91: Cleaning/Replacing The Service Station
SECTION 7 MAINTENANCE Cleaning/Replacing the Service Station The Service Station is responsible for cleaning excess ink and debris from the printhead nozzles, keeping the printhead capped (hydrated) and protected when not in use. In addition; during the printing process it provides a base to support the media and also captures ink used to keep nozzles clear, Removing the Service Station 1. -
Page 92: Cleaning The Service Station
SECTION 7 MAINTENANCE Cleaning the Service Station The Service Station Tray contains three separate areas/devices that are used to perform the following tasks. • Cleaning. The wiper roller cleans the Printhead nozzles of excess ink and debris. • Printing/Purging. This area acts as a base to support media during printing. It also contains a purging area;... -
Page 93: Replacing Damaged/Worn Items In The Service Station
SECTION 7 MAINTENANCE 2. Printing Platen and Capping Station. • Simply lift them out of the Service Station Tray. • Clean off ink buildup using a clean, damp, lint-free cloth. • Re-install into the Service Station Tray. 3. Service Station Tray. •... -
Page 94: Inspecting/Replacing The Ink Waste Tray
SECTION 7 MAINTENANCE Inspecting/Replacing the Ink Waste Tray The Ink Waste Tray is filled with an absorbent material, used to capture any ink that should drain from the system. 1. If the printer is on; press the ON/OFF button to power-down the print engine. Wait about 45 seconds until the system shuts down (all control panel lights will go off). -
Page 95: Cleaning Printer Body
SECTION 7 MAINTENANCE Cleaning Printer Body WARNING THE PRINTER IS A PRECISION MACHINE THAT SHOULD BE CLEANED REGULARLY TO INSURE MANY YEARS OF SERVICE. BEFORE PERFORMING ANY MAINTENANCE, DISCONNECT THE MACHINE FROM ITS POWER SOURCE! DO NOT REMOVE SIDE COVERS! HIGH VOLTAGES PRESENT. Clean the Printer regularly to remove accumulated paper dust and ink. -
Page 96: Firmware Download Procedure
SECTION 7 MAINTENANCE Firmware Download Procedure Firmware is loaded/updated using the M Series Toolbox utility. CAUTION: If this process isn’t performed properly it can render the printer inoperable. Be sure you have a stable power source for your computer and printer before performing this process. Do not disconnect the interface cable or power off the printer/computer during this process. -
Page 97: Appendix A - Specifications
APPENDIX Appendix A – Specifications SPEED (color or mono) Page Printing 8.5” x 11” Up to 3,600 per hour (1600 x 800 dpi @12 ips) Up to 7,500 per hour (1600 x 800 dpi @ 12 ips) No. 10 Envelopes MEDIA SIZE Minimum: 3"... -
Page 98: Appendix B - Supplies And Optional Hardware
When the system package (printer & conveyor) is ordered; the conveyor (with riser feet) will be included. If you are adding riser feet to an existing conveyor, use the following part number: Riser Feet Part #: Neopost: AS-CSD3FEET, Hasler: HJCSD3FEET, Rena: TB-390 M5 FEET. -
Page 99: Appendix C - Preparing Printer For Transport
APPENDIX Appendix C – Preparing Printer for Transport Please use this procedure if you ever need to transport the printer to a new location or ship the printer. Please refer to the appropriate sections in the manual for details on installing/removing items from the printer. - Page 100 APPENDIX 23. Remove all five Ink Tanks. Be careful to avoid spills or stains during this process. Wrap each ink tank in a clean, lint-free, absorbent material and place them in a sealed plastic bag as a precaution against any spillages during transport. 24.
-
Page 101: Appendix D - Wiring Diagram
APPENDIX Appendix D – Wiring Diagram... - Page 102 APPENDIX NOTES ________________________________________________________________________________ ________________________________________________________________________________ ________________________________________________________________________________ ________________________________________________________________________________ ________________________________________________________________________________ ________________________________________________________________________________ ________________________________________________________________________________...
- Page 103 INDEX INDEX Ink Waste Tray............10, 94 Inspecting the Ink Waste Tray.......... 94 Installation and Service Videos ........17 Installation, Choosing the Location........18 Installation, Tools Needed..........18 Accessory Box Contents...........11 Installing, Ink Tanks............23 Adjustable Media Side Guide ........7, 11 Installing, Printhead Cartridge..........
- Page 104 INDEX Print Quality Issues............31 Service Station Installation..........19 Print Speed................47 Service Tools Needed............16 Printer Driver Properties...........46 Sheet Separators ..............8 Printer Driver, General Tab ..........46 Specifications ..............97 Printer Driver, Layout Tab..........47 Supplies................98 Printer Driver, Services Tab ........48, 49 Printer Status Light Indicators ......13, 14, 15 Printhead Cartridge ............9, 11 Printhead Cartridge Conditioning ........88...
- Page 106 Copyright © 2011 All rights reserved...
Need help?
Do you have a question about the MACH 5 and is the answer not in the manual?
Questions and answers