
Related Manuals for Xterra MB8.5


Summary of Contents for Xterra MB8.5
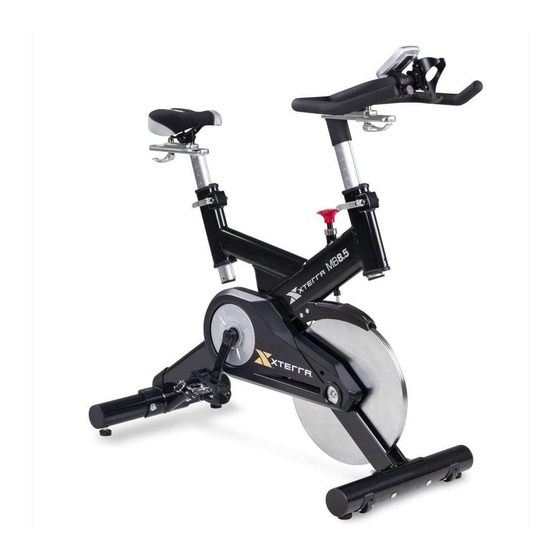
- Page 1 MB8.5 GROUP EXERCISE BIKE OWNER’S MANUAL PLEASE CAREFULLY READ THIS ENTIRE MANUAL BEFORE OPERATING YOUR NEW ELLIPTICAL...
-
Page 2: Table Of Contents
Table of Contents Important Safety Instructions……………………………………………………….…………3 Guidelines for Safe Operation…………………………………………………….…………..4 Hardware Assembly Pack……………………………………………………………………..5 Adjusting the Bike for a Proper Fit………………………………………………….………...10 How to Use Our Dual Function Pedal……………………….……………………….………11 Basic Operation / Maintenance Guidelines……………………………………….……..…..12 Parts list………………………………………………………………………………………….13 Exploded View Drawing..………………………………………………………………………16 MB8.5_ver.A... -
Page 3: Important Safety Instructions
IMPORTANT SAFETY INSTRUCTIONS READ ALL INSTRUCTIONS BEFORE USING THIS EXERCISE EQUIPENT Use this equipment only for its intended use as described in this manual. Do not attempt to ride this bike at high pedal speeds until you have ridden the bike for some time and are comfortable riding at slower pedal speeds. -
Page 4: Guidelines For Safe Operation
GUIDELINES FOR SAFE OPERATION WARNING! AS THE OWNER OF THIS EXERCISE EQUIPMENT, YOU SHOULD INSIST THAT ALL USERS FOLLOW THE SAME GUIDELINES: YOU SHOULD MAKE THIS MANUAL AVAILABLE TO ALL USERS. Obtain a complete physical examination from your medical doctor and enlist a health/fitness professional’s aid in developing an exercise program suitable for your current health status. -
Page 5: Hardware Assembly Pack
Hardware Assembly Pack #49. 5/16" × 1.5T_ #48. 5/16" × 16 × 1T_ #82. 3/8" Split Washer (4pcs) Flat Washer (4pcs) Cap Nut (4 pcs) #88. 5/16" × 5/8"_ #91. M5 × 10m/m_ #83. 3/8" × 23 × 1.5T_ Button Head Socket Bolt (4pcs) Phillips Head Screw (2pcs) Curved Washer(4pcs) #81.3/8"... - Page 6 STEP 1 Stabilizer Assembly • Install the front and rear stabilizers with four 3/8"×3-1/2" carriage bolts (81), four 3/8” curved washers(83) and four 3/8” cap nuts(82). The front and rear stabilizer are different. Be sure to assemble the stabilizer with the wheels onto the front of the bike.
- Page 7 STEP 2 Rear Cover • Install the rear stabilizer cover with two M5 x 10mm screws (91).
- Page 8 STEP 3 Handlebar and Drink Holder • Install the handlebars with four 5/16” x 15mm bolts (88), 5/16” split washers (49) and four 5/16” flat washers (48). Tighten the bolts securely. • Install the drink holder to the handlebars by loosening the thumb screw, clamp to the handlebars and re-tighten the thumb screw.
-
Page 9: Right Pedal
STEP 4 Pedal Assembly • Install the Left (25L) and Right (25R) pedals to the crank arms. Please note that the Left pedal has a reverse threaded bolt and needs to be tightened in a counterclockwise direction. The pedals are identified by either an R or L stamped into the end of the bolt. Right Pedal Left Pedal... -
Page 10: Adjusting The Bike For A Proper Fit
ADJUSTING THE BIKE FOR A PROPER FIT Take some time to learn how to properly adjust the bike to your body; it will make your workouts more pleasant and a safer experience too. Riding the bike when it is incorrectly adjusted can result in discomfort and increase your risk of injury. -
Page 11: How To Use Our Dual Function Pedal
HOW TO USE OUR DUAL FUNCTION PEDAL: Attaching Cleats to Your Shoes If you have questions it is recommended that you consult a bicycle dealer for assistance, and also refer to your shoe manufacturer’s instructions. When fixing the cleat the lateral center line should be under the center of the ball of the foot. Adjust forward and backward via the slots in the shoe sole. -
Page 12: Basic Operation / Maintenance Guidelines
BASIC OPERATION Now that you have established a proper riding position, take a few minutes to ride the bike and determine that your position is comfortable. Start pedaling at a slow pace with your toes and knees pointed directly forward. Hold the handlebar lightly and in a position that allows your shoulders and upper body to relax. -
Page 13: Parts List
PARTS LIST Description Main Frame Front Stabilizer Rear Stabilizer Handlebar Post Seat Post Handlebar Sliding Seat Mount Sliding Handlebar Mount Brake Pad Bracket Brake Pad - Wool Felt Bushing Spring M10 × P1.25 × 3T_Luck Nut Brake Tension Knob M6 × 15mm_Phillips Head Screw 8 ×... - Page 14 Description Crank Arm ( ) Crank Arm ( ) Crank Arm End Cap Crank Axle 5/16" × 1/2"_Button Head Socket Bolt 5/16" × 16 × 1T_Flat Washer 5/16" × 1.5T_Split Washer Transportation Wheel Rubber Foot 3/8"_Nut Stabilizer End Cap End Cap, Eye Tube Plastic Slide Insert, Eye Tube Bottom End Cap, Eye Tube Rear Stabilizer Cover...
- Page 15 3/8"_Cap Nut 3/8" × 23 × 1.5T_Curved Washer M5 × 12m/m_Tapping Screw 14/15m/m_Wrench M5_Combination M5 Allen Wrench & Phillips Head Screw Driver Drink Bottle (Optional) 5/16" × 5/8"_Button Head Socket Bolt M5 × 10m/m_Socket Head Cap Screw Ø5 × 10m/m_Tapping Screw M5 ×...
-
Page 16: Exploded View Drawing
Exploded View Drawing (OPTIONAL) (OPTIONAL)
Need help?
Do you have a question about the MB8.5 and is the answer not in the manual?
Questions and answers