Table of Contents
Advertisement
Quick Links
ASSEMBLY AND OPERATION MANUAL
Warranty
•
AquaCraft will warrant this kit for 90 days after
the purchase from defects in materials or
workmanship. AquaCraft will either repair or
replace, at no charge, the incorrectly made part.
•
Make sure you save the receipt or invoice you
were given when you bought your model! It is
your proof of purchase and we must see it before
we can honor the warranty.
•
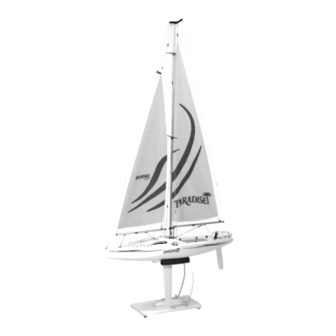
To return your Paradise Sailboat
covered under warranty you should send your
boat to:
Hobby Services
3002 N. Apollo Drive Suite 1
Champaign, Illinois 61822
Attn: Service Department
Phone: (217) 398-0007
9:00 am - 5:00 pm Central Time M-F
E-mail: hobbyservices@hobbico.com
Thank you for purchasing the Paradise sailboat! We at AquaCraft know how exciting a new R/C boat purchase can be and we
know you're anxious to get started, but please take time to read the instructions carefully and completely before attempting to
operate your model. This manual contains the instructions you need to safely build, operate, and maintain your R/C sailboat.
If for any reason you think that this model is not for you, return it to your local dealer immediately. PLEASE NOTE: Your
hobby dealer cannot accept a return on any model after the final assembly sequence has begun.
Entire Contents © Copyright 2004
for repairs
Before Building:
™
™
by
HCAZ3022 for HCAB01**
Advertisement
Table of Contents

Subscribe to Our Youtube Channel
Related Manuals for Hobbico Paradise AquaCraft


Summary of Contents for Hobbico Paradise AquaCraft
- Page 1 Attn: Service Department Phone: (217) 398-0007 9:00 am - 5:00 pm Central Time M-F E-mail: hobbyservices@hobbico.com Before Building: Thank you for purchasing the Paradise sailboat! We at AquaCraft know how exciting a new R/C boat purchase can be and we know you’re anxious to get started, but please take time to read the instructions carefully and completely before attempting to...
-
Page 2: Table Of Contents
3. Send written instructions which include: a list of all items TABLE OF CONTENTS returned, a THOROUGH explanation of the problem, SAFETY PRECAUTIONS............2 the service needed and your phone number during the REPAIR SERVICE ..............2 day. If you expect the repair to be covered under SPECIFICATION &... - Page 3 Mast Head Top Spreader Main Sail Lower Spreader Jib Sail Mast Boom Vang Main Boom Jib Boom Hull Rudder Keel...
-
Page 4: Final Assembly
TRANSMITTER ASSEMBLY FINAL ASSEMBLY Important Note: The transmitter is not water resistant and Carefully remove your Paradise sailboat and all remaining should never come in contact with water. components from the box. IMPORTANT: Use additional care Antenna not to bend the mast while removing the mast and sail Power Status assembly from the box. -
Page 5: Install The Receiver Batteries
3. Replace the thumbnut and tighten firmly. 2. Install 4 fresh “AA” batteries in the configuration molded into the battery holder. Leave the hatch open for now. INSTALL THE MAST AND SAILS Note: The snap rings and eyelets have been numbered for identification only;... -
Page 6: Checking The Radio System, Rudder Installation And Attaching The Sail Control Lines
4. Attach the remaining snap rings to their counterparts and tighten all of the lines. Once again, make sure that the mast stands as straight as possible. CHECKING THE RADIO SYSTEM, RUDDER INSTALLATION, AND ATTACHING THE SAIL CONTROL LINES 1. Turn the power “ON” to the transmitter and sailboat (in that order). -
Page 7: Sailing The Paradise Sailboat
5. Tighten the thumb screw on the rudder control arm NOTE: Since it is necessary to adjust the sail control lines firmly making sure that it contacts the flat spot on the rudder depending on wind conditions, they should not be shaft. -
Page 8: Reading The Wind
physical adjustments of the sails via the rigging lines. There is For medium wind (6-10MPH): Loosen the sails slightly in no substitute for actual “on-the-water” experience and after order to find the most efficient combination of sail shape and your first couple of outings you may want to read through this tension. -
Page 9: Launch Procedure
IN IRONS: A sailboat is said to be “in irons” when the boat time. It is important to make sure that all hardware is stalls with its bow pointed directly into the wind with its sails secure before operating your model. struggling to fill with air (luffing), keeping the boat from moving. -
Page 10: The Waiting Game
Hardware items (screws, nuts, bolts) are also available from these outlets. If you need assistance locating a dealer to purchase parts, visit www.hobbico.com and click on “Where to buy”. If this kit is missing parts, contact Hobbico Product Support. REPLACEMENT PARTS LIST... - Page 11 CHECK OUT THESE OTHER SENSATIONAL AQUACRAFT BOATS! HCAB60** Bristol Bay Fishing Boat ™ HCAB10** Hammer Electric RTR...
- Page 12 CHECK OUT THESE OTHER SENSATIONAL AQUACRAFT BOATS! ™ HCAB27** Air force RTR HCAB5027 Air Force ARR ™ HCAB12** Reef Racer ™ HCAB26** Nitro Hammer RTR Check us out on the web at www.aquacraftmodels.com and watch for more exciting AquaCraft releases coming soon!
Need help?
Do you have a question about the Paradise AquaCraft and is the answer not in the manual?
Questions and answers