Advertisement
Quick Links
ASSEMBLY OF YOUR ELECTRIC FREE-FLIGHT P-40 WARHAWK
WARNING: Read instructions carefully! Improper use of this product may result in personal injury or damage to the public.
WARNING: Choking hazard - Small parts. Not for children under 3 years. Use with adult supervision.
INSTALL THE MAIN WINGS
Top of
Wing
Bottom
of Wing
• Remove the backing paper from the double sided tape on
each wing.
• Attach the main wings to the bottom of the fuselage by lining
them up along the centerline of the fuselage. Make sure you are
able to see the screw holes between the wings. (see drawing)
• When attaching the main wings to the fuselage, the airplane will
be upside down. The wing brace will be upwards only during
assembly.The control surfaces need to face the tail of the plane.
1. Remove the back cover of the charger
and install 4 "AA" batteries according to the
diagram in the charger. Put the cover back
on the charger. CAUTION: Do not use
rechargeable (nickel cadmium) batteries.
Do not mix old and new batteries. Do not
mix alkaline, standard (carbon zinc), or
rechargeable (nickel cadmium) batteries.
2. Before charging your free flight P-40
Warhawk, make sure the "on-off" switch is
in the "off" position.
3.
Insert the charger into the charge
socket on the side of the P-40 Warhawk.
The charger will only fit one way so match
the tab on the charger with the notch on
the charge socket.
WARRANTY
Hobbico, Inc. guarantees this kit to be free of defects in both material and workmanship at the date of purchase. This warranty does not cover
any component parts damaged by use or modification. In no case shall Hobbico's liability exceed the original cost of the purchased kit. Further,
Hobbico reserves the right to change or modify this warranty without notice. In that Hobbico has no control over the final assembly, no liability
shall be assumed nor accepted for any damage resulting from the use of the final user-assembled product. By the act of using the user-
assembled product the user accepts all resulting liability. If the buyer is not prepared to accept the liability associated with the use of this
product, the buyer is advised to immediately return this kit in new and unused condition to the place of purchase.
Entire Contents © Copyright 2000
Requires 4AA Alkaline batteries
HCAA0232
(Not included)
• Note: The front of the wing cover is thicker than the back. The
thicker end goes to the front, closest to the propeller.
• Line up the holes in the wing cover and the fuselage. If the
thicker part of the cover is not placed to the front, the screw
holes will not line up.
• Carefully place the screws through the holes securing the
wing cover to the fuselage.
• Tighten the screws securely...DO NOT OVER TIGHTEN.
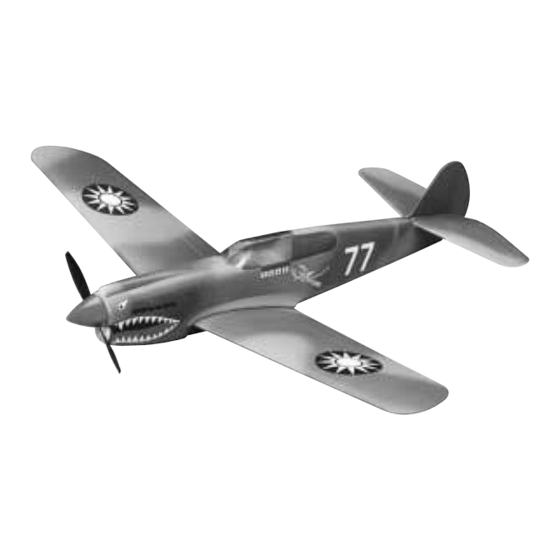
• Using the box photo as a guide, apply the decals to your
P-40 Warhawk.
CHARGING
™
Replacement Parts
HCAP9902 Charger
HCAQ3276 Propeller (2)
HCAA3282 Wing / Tail Assembly
INSTALL THE WING COVER
APPLYING THE DECALS
4. On the first charge, only charge the
P-40 Warhawk for 15 seconds. For longer
flights, you may increase the charge time
up to 60 seconds.
5. Never charge the P-40 Warhawk for
more than 60 seconds. If you do, you may
overheat the batteries in the P-40 Warhawk
or the charger and damage them.
6. When charging is complete, remove
the charger from the P-40 Warhawk
CAUTION: Keep fingers, face, clothing
and other objects away from the propeller
when running.
HCAZ3100 for HCAA0232
Advertisement

Related Manuals for Hobbico P-40 WARHAWK


Summary of Contents for Hobbico P-40 WARHAWK
- Page 1 WARRANTY Hobbico, Inc. guarantees this kit to be free of defects in both material and workmanship at the date of purchase. This warranty does not cover any component parts damaged by use or modification. In no case shall Hobbico's liability exceed the original cost of the purchased kit. Further, Hobbico reserves the right to change or modify this warranty without notice.
- Page 2 1. It is important to adjust, or “trim”, your electric free flight P-40 Warhawk correctly. 2. Before launching the P-40 Warhawk, grasp the airplane fuselage and with the motor off, gently toss the P-40 Warhawk into the wind. It should glide straight ahead and settle gently to the ground. See the diagram below.
Need help?
Do you have a question about the P-40 WARHAWK and is the answer not in the manual?
Questions and answers