Sun Microsystems Fire X4150 Installation Manual
Hide thumbs
Also See for Fire X4150:
- Service manual (186 pages) ,
- Administration manual (150 pages) ,
- Installation manual (107 pages)

Related Manuals for Sun Microsystems Fire X4150


Summary of Contents for Sun Microsystems Fire X4150
-
Page 1: Installation Guide
Sun Fire X4150 Server Installation Guide Sun Microsystems, Inc. www.sun.com Part No. 820-1851-10 September 2007, Revision A Submit comments about this document at: http://www.sun.com/hwdocs/feedback... - Page 2 Cette distribution peut des éléments développés par des tiers. Sun, Sun Microsystems, le logo Sun, Java, Netra, Solaris, StarOffice, Sun Ray, Galaxy Sun Fire X et le logo SunSpectrum Pac (Sunburst design) sont des marques de fabrique ou des marques déposées de Sun Microsystems, Inc.
-
Page 3: Table Of Contents
ESD Precautions 5 Sun Fire X4150 Server Description 6 Front Panel Features 6 Back Panel 7 Installing the Sun Fire X4150 Server Into a Rack with Slide-Rails 9 Before You Install 9 Server Installation Process Overview 10 Rail Assemblies 10... - Page 4 Installing the Server Into the Slide-Rail Assemblies 18 Installing the Cable Management Arm 20 Verifying Operation of the Slide-rails and CMA 28 Setting Up the Sun Fire X4150 Server 29 Embedded LOM Service Processor Software Overview 29 Connecting the Cables 31...
- Page 5 Configuring Solaris OS 44 Redirect the Console Output to the Video Port (Optional) 45 Using the GRUB Menu 45 Configuring Sun Fire X4150 Server RAID Drives 46 RAID Drive Overview 46 RAID Drive Options 47 Mirroring the Preinstalled Solaris OS with LSI RAID 48...
- Page 6 Sun Fire X4150 Installation Guide • September 2007...
-
Page 7: Preface
How to set up the Sun Fire X4150 server hardware. Chapter 2 How to place the Sun Fire X4150 server into a rack using the rail assembly. Chapter 3 How to connect cables and power up the Sun Fire X4150 server for the first time. -
Page 8: Typographic Conventions
Utilities Reference Manual for MSM. Support Obtain technical support, and download http://www.sun.com/support/ patches. Training Learn about Sun courses. http://www.sun.com/training/ Warranty Obtain specific details regarding your http://www.sun.com/service/support/w warranty. arranty/index.html Feedback Submit your comments. http://www.sun.com/hwdocs/feedback/ viii Sun Fire X4150 Installation Guide • September 2007... -
Page 9: Related Documentation
Related Documentation A Where To Find Documentation sheet lists available documents for the Sun Fire X4150 server and describes the Sun Fire X4150 server document set. The Where to Find Documentation sheet is packed with your system and is also posted at the product's documentation site. -
Page 10: Sun Welcomes Your Comments
You can submit your comments by going to: http://www.sun.com/hwdocs/feedback/ Please include the title and part number of your document with your feedback. The part number of this Sun Fire X4150 Installation Guide is 820-1851-10. x Sun Fire X4150 Installation Guide • September 2007... -
Page 11: Before You Begin
C H A P T E R Before You Begin This chapter describes how to set up the Sun Fire X4150 server hardware. It includes the following topics: “Tools and Equipment Needed” on page 1 ■ “Installation Process Flowchart” on page 2 ■... -
Page 12: Installation Process Flowchart
Rack with Slide-Rails” on page Service label on the top cover of the server. “Connecting the Cables” on page “Setting Up the Sun Fire X4150 Server” on page “Connecting to the Embedded LOM Service Processor for the First Time” on page Sun Fire X4150 Server Service Manual. - Page 13 Continued See: “Applying Power for the First Time” on page “Configuring Sun Fire X4150 Server RAID Drives” on page Sun StorageTek: Sun StorageTek RAID Manager User's Guide LSI: x64 Utilities Reference Manual for MSM Sun Fire X4150 Operating System Installation...
-
Page 14: Opening The Box
FIGURE 1-2 packing contents: Unpacking the Box FIGURE 1-2 Package Contents Inventory The following items should be packaged with the Sun Fire X4150 server: Sun Fire X4150 server ■ Sun Fire X4150 server accessory kit, including the following documentation and ■... -
Page 15: Options
Additional license, safety, and registration documentation ■ Sun Fire X4150 Server Tools and Drivers CD ■ (includes drivers and additional software) DB9-RJ45 Adapter (for serial system management port) ■ Optional rackmount kit ■ Optional cable management kit ■ Options Power cables, keyboard, and mouse are packaged separately from the other items. -
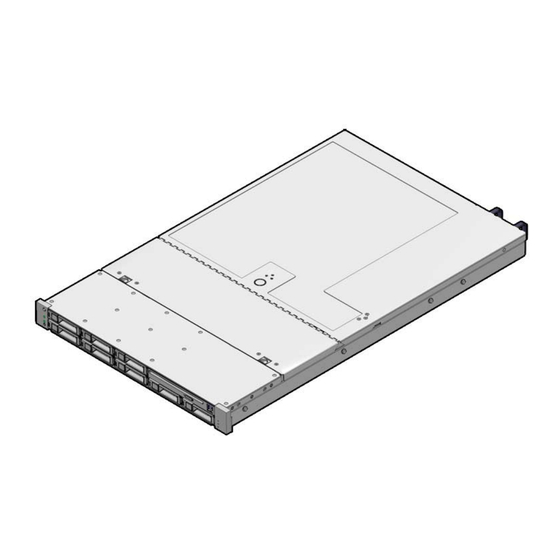
Page 16: Sun Fire X4150 Server Description
Sun Fire X4150 Server Description This section shows the front and back of the Sun Fire X4150 server. Front Panel Features shows the front panel. the front panel describes features. FIGURE 1-3 TABLE 1-1 Front Panel - 8 drive configuration shown... -
Page 17: Back Panel
Back Panel shows the back panel describes the back panel features. FIGURE 1-4 TABLE 1-2 Back Panel FIGURE 1-4 Back Panel Legend TABLE 1-2 Label Item Label Item Power supply unit 0 connector PCI-express slot (0) Power supply unit 0 status indicator LEDs PCI-express slot (1) •... - Page 18 Sun Fire X4150 Installation Guide • September 2007...
-
Page 19: Installing The Sun Fire X4150 Server Into A Rack With Slide-Rails
Installing the Sun Fire X4150 Server Into a Rack with Slide-Rails This chapter describes how to place the Sun Fire X4150 server into a rack using the rail assembly in the rackmount kit. Perform this procedure if the rail assembly is purchased. -
Page 20: Server Installation Process Overview
Instructions for both types are included in this chapter. Service Label Refer to the service label on the Sun Fire X4150 server top cover for instructions on how to install your server into a four-post rack, using the slide-rail and cable management arm options. -
Page 21: Checking Compatibility
Consider the total airflow requirements of all equipment installed in the rack to ensure that the equipment is operated within its specified temperature range. Chapter 2 Installing the Sun Fire X4150 Server Into a Rack with Slide-Rails... -
Page 22: Disassembling Slide-Rails
4. Push the mounting bracket release button toward the front of the mounting bracket, as shown in , and simultaneously withdraw the mounting FIGURE 2-1 bracket from the slide-rail assembly. 5. Repeat for the remaining slide-rail assembly. Sun Fire X4150 Installation Guide • September 2007... -
Page 23: Disassembling Tool-Less Slide-Rails
Slide-rail lock Disassembling Tool-less Slide-Rails To remove the mounting brackets from the tool-less slide-rail assemblies, refer to the install card instructions included with the kit. Chapter 2 Installing the Sun Fire X4150 Server Into a Rack with Slide-Rails... -
Page 24: Installing The Mounting Brackets Onto The Server
1. Position a mounting bracket against the chassis so that the slide-rail lock is at the server front, and the three keyed openings on the mounting bracket are aligned with the three locating pins on the side of the chassis. Sun Fire X4150 Installation Guide • September 2007... -
Page 25: Attaching The Slide-Rail Assemblies To The Rack
Do one of the following procedures to attach the slide-rail assemblies to the rack: “Disassembling Bolt-On Slide-Rails” on page 12 ■ “Disassembling Tool-less Slide-Rails” on page 13 ■ Chapter 2 Installing the Sun Fire X4150 Server Into a Rack with Slide-Rails... -
Page 26: Attaching Bolt-On Slide-Rail Assemblies
Slide-Rail Assembly Mounting to Rack Post FIGURE 2-4 Slide-rail assembly Rack post Slide-rail assembly bracket on outside of rack post 3. Repeat Step 1 Step 2 for the remaining slide-rail assembly. Sun Fire X4150 Installation Guide • September 2007... - Page 27 6. Remove the spacer and confirm that the rails are attached tightly to the rack. Step 4 Step 6 7. Repeat through for rear of the rack. Chapter 2 Installing the Sun Fire X4150 Server Into a Rack with Slide-Rails...
-
Page 28: Attaching Tool-Less Slide-Rail Assemblies
Caution – This procedure requires a minimum of two people because of the weight of the server. Attempting this procedure alone could result in equipment damage or personal injury. Sun Fire X4150 Installation Guide • September 2007... - Page 29 3. Insert the mounting brackets into the slide-rails, then push the server into the rack until the mounting brackets encounter the slide-rail stops (approximately 12 inches, or 30 cm). Chapter 2 Installing the Sun Fire X4150 Server Into a Rack with Slide-Rails...
-
Page 30: Installing The Cable Management Arm
Caution – Verify that the server is securely mounted in the rack and that the slide- rails locks are engaged with the mounting brackets before continuing. Installing the Cable Management Arm Use this procedure to install an optional cable management arm (CMA). FIGURE 2-8 shows the CMA. Sun Fire X4150 Installation Guide • September 2007... - Page 31 The CMA rail extension might be taped to the CMA arm. 4. Attach the CMA rail extension into the left slide-rail until the extension locks into place with an audible click. (See FIGURE 2-9 Chapter 2 Installing the Sun Fire X4150 Server Into a Rack with Slide-Rails...
- Page 32 Inserting the CMA Rail Extension Into the Back of the Left Slide-Rail FIGURE 2-9 Left slide-rail CMA rail extension Sun Fire X4150 Installation Guide • September 2007...
- Page 33 Note – Support the CMA in the remaining installation steps. Do not allow the arm to hang by its own weight until it is secured by all three attachment points. Chapter 2 Installing the Sun Fire X4150 Server Into a Rack with Slide-Rails...
- Page 34 6. Insert the CMA’s mounting bracket connector into the right slide-rail until the connector locks into place with an audible click. (See FIGURE 2-11 Inserting the CMA Mounting Bracket Into the Back of the Right Slide-Rail FIGURE 2-11 Right slide-rail CMA mounting bracket Sun Fire X4150 Installation Guide • September 2007...
- Page 35 (See FIGURE 2-12 Inserting CMA Slide-Rail Connector Into the Back of the Right Slide-Rail FIGURE 2-12 Assembly Right slide- rail assembly CMA slide-rail connector Chapter 2 Installing the Sun Fire X4150 Server Into a Rack with Slide-Rails...
- Page 36 (See FIGURE 2-13 Connecting the CMA Arm to the Rail Extension Connector FIGURE 2-13 CMA arm connector CMA extension (on left slide-rail) 9. Install and route cables to your server, as required. Sun Fire X4150 Installation Guide • September 2007...
- Page 37 Installing CMA Cable Straps FIGURE 2-14 CMA arm CMA cable hanger 11. Attach the right outer latch. 12. Attach the support latch to the left CMA extension. Chapter 2 Installing the Sun Fire X4150 Server Into a Rack with Slide-Rails...
-
Page 38: Verifying Operation Of The Slide-Rails And Cma
. Simultaneously push or FIGURE 2-7 pull both of the slide-rail release buttons, and push the server completely into the rack until both slide-rail locks engage. 5. Adjust the cable straps and CMA as required. Sun Fire X4150 Installation Guide • September 2007... -
Page 39: Setting Up The Sun Fire X4150 Server
C H A P T E R Setting Up the Sun Fire X4150 Server This chapter describes how to connect cables and power up the Sun Fire X4150 server for the first time. It includes the following topics: “Embedded LOM Service Processor Software Overview” on page 29 ■... - Page 40 A console can also be started to display system output. By default, the Embedded LOM output appears. The BIOS contains these serial redirection options. See the Sun Fire X4150 Server Product Notes and the Embedded Lights Out Manager (ELOM) Administration Guide for more information.
-
Page 41: Connecting The Cables
MGT Ethernet port Power supply unit 1 connector Gbit Ethernet ports LAN-0, 1, 2, 3 (Intel) System status LEDs USB 2.0 ports (0, 1) Serial management/RJ-45 serial port HD15 video connector Chapter 3 Setting Up the Sun Fire X4150 Server... -
Page 42: Cabling The Server
(6) for OS support. 6. Connect any additional external devices, as required, to the server’s USB (7) and/or Video (8) connectors (optional). 7. Go to the next section and connect to the Embedded LOM SP. Sun Fire X4150 Installation Guide • September 2007... -
Page 43: Connecting To The Embedded Lom Service Processor For The First Time
After you have determined the IP address of the SP, you can access SP firmware applications through the following Embedded LOM SP interfaces: Serial Port CLI ■ Secure (command) shell (SSH) CLI ■ Ethernet-based Web browser ■ Chapter 3 Setting Up the Sun Fire X4150 Server... -
Page 44: About Embedded Lom Ip Addresses
To access the BIOS and view the service processor (SP) IP address: 1. Power on the server (or restart the server if it is running). 2. When the Sun Microsystems splash screen appears during the POST (Power On Self Test) operation, press F2 to access the BIOS settings. -
Page 45: Method 2: Connect To The Service Processor Using A Serial Connection
7. Type the default user name root, and then type the default password changeme to log in to the Embedded LOM SP. The Embedded LOM displays a default command prompt, indicating that you have successfully logged in: - > Chapter 3 Setting Up the Sun Fire X4150 Server... -
Page 46: Modifying The Service Processor Ip Address
To change the SP DHCP IP address to a static IP address using the serial connection (system management port): 1. Connect a terminal (or a PC running terminal emulation software) to the server serial port. Sun Fire X4150 Installation Guide • September 2007... -
Page 47: Example 2: Set To Dhcp Ip Address
Example 2: Set to DHCP IP address To change the service processor (SP) static IP address to a DHCP IP address using the serial connection (system management port), perform the following steps: Chapter 3 Setting Up the Sun Fire X4150 Server... -
Page 48: Method 2: Using The Service Processor (Sp) Embedded Lom Web Browser Interface
To change a static IP address, using the service processor (SP) Embedded LOM Web Browser Interface: 1. Open a Sun Microsystems supported Web browser, such as Internet Explorer, Mozilla, or Firefox. 2. Type the IP address of the SP in the browser address bar. -
Page 49: Applying Power For The First Time
Configure the terminal device or the terminal emulation software running on a laptop or PC to the following settings: 8N1: eight data bits, no parity, one stop bit ■ 9600 baud ■ Chapter 3 Setting Up the Sun Fire X4150 Server... - Page 50 5. Install and configure the software, as required. Note – To switch back to the Embedded LOM command-line interface from the serial console, press Esc + Shift + 9, or press Esc ( , depending on your keyboard location. Sun Fire X4150 Installation Guide • September 2007...
-
Page 51: Configuring The Preinstalled Solaris 10 Operating System
10 Operating System (OS) that ™ might be preinstalled on your Sun Fire X4150 server. This chapter assumes that your server has a hard drive installed, with the Solaris operating system preinstalled. Your system might be different, depending on your hard drive configuration. -
Page 52: About The Grub Menu
1. Perform initial configuration of the service processor, and determine the server’s network settings. See “Setting Up the Sun Fire X4150 Server” on page 2. Gather the information that you will need to configure the server. See “Installation Worksheet” on page 3. - Page 53 Installation Information Description Enter System Configuration: Asterisk (*) indicates default. Network connection Is the system connected to a network? Networked Non-networked* DHCP Can the system use Dynamic Host Configuration Protocol (DHCP) to configure its network interfaces? If you are not If you are not using DHCP, supply the IP address using DHCP, address...
-
Page 54: Configuring Solaris Os
Time zone file Root password Choose a root password for the system. Configuring Solaris OS To configure the preinstalled Solaris OS: 1. Log in to the service processor as an administrator. For example: Sun Fire X4150 Installation Guide • September 2007... -
Page 55: Redirect The Console Output To The Video Port (Optional)
Login: root Password: changeme 2. To start the Embedded LOM console, perform the following sub-steps: a. Type cd /SP/AgentInfo b. Type start Console 3. Follow the Solaris 10 preinstallation onscreen instructions. 4. Type the system and network information when prompted. See TABLE 4-1 collected information. -
Page 56: Configuring Sun Fire X4150 Server Raid Drives
After you configure the Solaris OS, you might need to configure the RAID drives. RAID Drive Overview The Sun Fire X4150 Server has two optional RAID Host Bus Adapter (HBA) cards. You can access RAID configuration through the HBA card BIOS. To access the LSI card BIOS, press CTRL-C. -
Page 57: Raid Drive Options
The configuration procedure is different for each supported controller card. For example, a Sun StorageTek HBA card has many more options for RAID configuration than an LSI HBA card. Configure the RAID depending on your needs as shown in TABLE 4-3 RAID Drive Options shows the RAID drive options: TABLE 4-3... -
Page 58: Mirroring The Preinstalled Solaris Os With Lsi Raid
LSI RAID The Solaris OS supports hardware RAID and cannot be installed on an existing array if one has been created. Refer to the Sun Fire X4150 OS Installation Guide or an HBA card product guide. If you choose the preinstalled Solaris OS and want to make the OS part of a RAID set, and if you are using LSI RAID only, perform the following procedure to update the preinstalled Solaris OS to a mirrored RAID set. -
Page 59: Creating A Raid Set To Incorporate A Preinstalled Os Using The Sun Storagetek Card
1. Using your Solaris Server, log in and start Xserver. This graphical user interface is required for StorageTek Software Management. 2. From the supplied Sun Fire X4150 Tools & Drivers CD, copy the StorMan.ds application, located in the /drivers/sx86/StorageTek/MGMT directory, to a... -
Page 60: Solaris 10 Operating System User Information
Accessing Solaris 10 User Documentation You can access the various collections of the Solaris 10 OS user documentation at: http://docs.sun.com/app/docs/prod/solaris.10 Specifically, you can access the Solaris 10 OS Release and Installation collection at: http://docs.sun.com/app/docs/coll/1236.1 Sun Fire X4150 Installation Guide • September 2007... -
Page 61: Downloading Solaris 10 Os Software
CD or DVD image from the following URL: http://www.sun.com/software/solaris/get.jsp Solaris 10 6/06 is the minimum supported version for the Sun Fire X4150 server. See the Sun Fire X4150 Server Operating System Installation Guide for specific instructions on Solaris 10 installation. - Page 62 Sun Fire X4150 Installation Guide • September 2007...
-
Page 63: If You Need Help
“Contacting Support” on page 57 ■ Powering On and Off the Server Use the following procedures to power on and power off the Sun Fire X4150 server. Power On the Main Power To apply main power for all server components: 1. -
Page 64: Power Off From Main Power Mode
Caution – To completely power off the server, you must disconnect the AC power cords from the back panel of the server. Sun Fire X4150 Installation Guide • September 2007... -
Page 65: Setup Troubleshooting
Setup Troubleshooting This section contains information to help you troubleshoot minor server problems. If you experience problems while setting up your server, refer to the troubleshooting information in TABLE 5-2 Troubleshooting Procedures TABLE 5-2 Problem Possible solution Server powers on, •... - Page 66 4. Kill any processes that appear unresponsive or should not be running, by using the kill process_ID command. 5. Check the responsiveness of the Sun Fire X4150 server after each process is killed. If the this procedure does not work, power cycle the server: 1.
-
Page 67: Contacting Support
Contacting Support If the troubleshooting procedures in this chapter fail to solve your problem, use to collect information that you might need to communicate to the support TABLE 5-3 personnel. lists the Sun web sites and telephone numbers for additional TABLE 5-4 technical support. - Page 68 1-800-872-4786 (1-800-USA-4Sun), select Option 1 Lists international telephone numbers http://www.sun.com/service/contacting/solution.html for SunService support. Warranty and contract support contacts. http://www.sun.com/service/warrantiescontracts/ Links to other service tools. Warranties for every Sun product. http://www.sun.com/service/support/warranty Sun Fire X4150 Installation Guide • September 2007...
-
Page 69: Index
Index Access the BIOS, 34 delivery option, 41 attach bolt-on slide-rail assemblies, 16 DHCP IP address, 34, 37 attach tool-less slide-rail assemblies, 18 DHCP services, 34 DNS, 36 back panel, 7 Back Panel Connectors, 31 Embedded Lights Out Manager (ELOM) Administration Guide, 39 bolt-on rail assemblies, 10 Embedded Lights Out Manager (ELOM) service... - Page 70 NET MGT PORT, 34 static IP address, 34 Netmask, 36 Sun documents online, viii Sun Fire X4150 server documentation, ix Sun Fire X4150 Tools & Drivers CD, 49 Online, viii Sun StorageTek, 46 Sun StorageTek card BIO, 46 Sun StorageTek HBA card, 47...
- Page 71 verify CMA, 28 view service processor (SP) IP address, 34 Worksheet, 42 Index...
- Page 72 Sun Fire X4150 Installation Guide • September 2007...
Need help?
Do you have a question about the Fire X4150 and is the answer not in the manual?
Questions and answers