
Subscribe to Our Youtube Channel
Related Manuals for American Time H004595


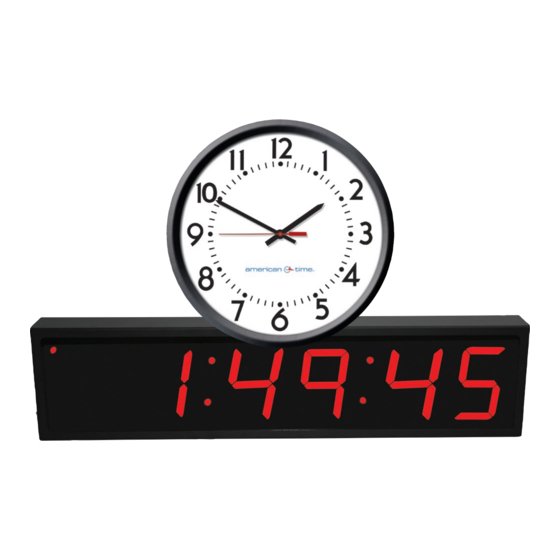
Summary of Contents for American Time H004595
- Page 1 Installation and Operation Manual Power over Ethernet (PoE) Clocks Part # H004595 Rev. 8 April 2015...
-
Page 2: Safety Precautions
The PoE clock should be installed in a secure location protected from: —Physical damage —Water, including condensation Operation of this product in a manner inconsistent with the instructions in the manual may result in personal injury and damage to the product and will void the warranty. © American Time... -
Page 3: Table Of Contents
Appendix B: Supported Time Zones ..........................30 Appendix C: Buzzer/Relay Scheduling Examples......................31 Appendix D: Brightness Control Scheduling Example ...................... 33 American Time 140 3rd Street South PO Box 707 Dassel, MN 55325-0707 Phone: 800-328-8996 800-789-1882 Fax: american-time.com © American Time... -
Page 4: Introduction
These Power over Ethernet Clocks are plug and play on networks with Dynamic Hosting Configuration Protocol (DHCP). A NIST time server is used for the default time server but may be changed using the Network Clock Connect application or the configuration web page. The clocks may also be configured using static IP addresses. © American Time... -
Page 5: Specifications
Dimensions: Varies by model Weight: Varies by model Power Consumption: PoE, IEEE802.3af compliant, 1W Operating Temperature: 32˚F to 104˚F (0˚ to 40˚C) Operating Humidity: 95% maximum, non-condensing Accuracy: ±1 second Buzzer Option Specifications Sound Level: 65dBA at 10 feet © American Time... -
Page 6: Digital Clocks
Maximum Switched Current: 1A Maximum Carrying Current: 1A Maximum Switch Power: 30W (DC), 60VA (AC) Buzzer Option Specifications Sound Level: 65dBA at 10 feet Common Activate Normally closed – Alarm Normally open System Connection Diagram Connector Relay Comm © American Time... -
Page 7: Relay
Operating Humidity: 95% maximum, non-condensing Accuracy: ±1 second Relay Specifications Dry Contacts: NO (or NC-special order) contacts with 2A 30vdc/0.5A 120vac rating and active closure time of 1-59 seconds Common Activate – Alarm Normally open System Comm Connection Diagram © American Time... -
Page 8: Analog Clocks
(Fig. 2) to the PoE receiver (F). • PoE Switch: Check with the Network Administrator for infrastructure needs. This part is not supplied by American Time. • PoE Injector (TMA200): This is an optional power source that may be purchased from American Time 2. -
Page 9: Digital Clocks
(Fig. 2) to the rear panel of the PoE clock. The time should display in less than one minute. • PoE Switch: Check with the Network Administrator for infrastructure needs. This part is not supplied by American Time. • PoE Injector (TMA200): This is an optional power source that may be purchased from American Time Note: When a DHCP network is not present at initial start-up, the PoE clock will default to a random Static IP in the range of 169.254.1.0 to 169.254.254.255. - Page 10 Connect the patch cable to the clock. Route field wiring away from sharp projections, corners and internal components. Re-attach the cover assembly to the enclosure base using the sheet metal screws removed in Step 1. Confirm correct operation of the clock. © American Time...
-
Page 11: Installation
Slide the digital clock into the wraparound making sure the screws and slots line up (see Figure 2), then tighten the 8 screws securely. Repeat steps 5 through 7 for the second clock Plate Bushing Wraparound Figure 1 Conduit Locknut Knockouts for ceiling mount Digital clock Wraparound Slots Digital clock Screws 4 square backbox Figure 2 (not supplied) WALL © American Time... -
Page 12: Relay
1. Apply power to the relay by connecting a CAT 5 (A) or higher Ethernet patch cable from a PoE switch or single injector to the PoE relay (D). • PoE Switch: Check with the Network Administrator for infrastructure needs. This part is not supplied by American Time. • PoE Injector (TMA200): This is an optional power source that may be purchased from American Time 2. - Page 13 User Notes PoE Installation Manual © American Time...
-
Page 14: Network Clock Connect
Network Clock Connect PoE Installation Manual Network Clock Connect has been developed by American Time for configuring and monitoring your network clocks. This application will allow the user to quickly manage all of the compatible network clocks installed on the network. -
Page 15: Main Screen
18. Export List Button – This button is used to export a list of clocks. This button cannot be pressed if no clocks are selected. •This is useful for saving the network clock list for future reference to identify clocks that may become nonresponsive. © American Time... - Page 16 21. Print List Button – This button is used to print the list of clocks. 22. Help Menu – This menu contains a shortcut to the American Time PoE clock support site. Manuals, firmware/software updates, and tutorials are contained on the support site.
-
Page 17: Configuration
“0”, only the time will be displayed. If date is set to “0” and time is set to anything other than “0”, only the date will be displayed. If neither time nor date are “0”, the time and date will toggle for the duration specified. © American Time... -
Page 18: Time Zone Tab
The Offset Facility Time checkbox must be checked for this field to be editable. Note: This function is typically used by school districts to accommodate bus schedules. d. Offset Facility Time – This checkbox enables the Facility Time Offset. 3. DST Tab © American Time... -
Page 19: Network Tab
If the server fails to provide a valid time the list is traversed until a valid time is received. This list may be user defined. A list of verified NIST time servers is available in Appendix A. © American Time... -
Page 20: Buzzer Tab
5. Buzzer Tab a. Activate Buzzer/Relay Button – This button will activate the relay or buzzer on all selected network relays or clocks that have the buzzer/relay option. 6. Manuf Tab This tab is used for manufacturing purposes only. © American Time... -
Page 21: Schedule Editor
16. Delete Button – This button is used to delete a selected event from the schedule. A confirmation dialog will appear prior to deleting the event. 17. Delete All Button – This button is used to delete all events from the schedule. A confirmation dialog will appear prior to deleting the events. © American Time... -
Page 22: Event Editor
<x> minutes – 0<x<60 • <x> hours – 0<x<24 • <x> days – 0<x<365 • <x> weeks – 0<x<53 Note: Select a period of one day in order to specify days on which the event will occur. © American Time... -
Page 23: Web Browser Interface
If the values aren’t changed, the current addresses will be kept. The PoE clock must be restarted for these changes to take effect. Addresses in the Network section must be entered in IPv4, dotted quad, format (xxx.xxx.xxx.xxx). © American Time... -
Page 24: Time Synchronization
Day of Week and Week of Month portion of the Start and Stop parameters are disabled. If the box is not checked, the Date portion of the Start and Stop parameters is disabled. The default setting is to have the box unchecked (Fixed Day disabled). © American Time... -
Page 25: Other Configurations
Sleep, Off). When in the Sleep setting, the time segments of the display will be off. Every 20 seconds the time segments will display the time for 2-3 seconds in a Low brightness and turn off again. Note: The Brightness setting is only available for digital clocks. © American Time... -
Page 26: Troubleshooting: Dhcp
D – Default Button F – PoE Receiver/Relay 5. Return PC to the previous settings noted above in Step 4. If the problem cannot be resolved after following these steps, please call Technical Support at American Time at 800-328-8996 © American Time... - Page 27 3. Apply power back to the clock (connecting the powered patch cable to the clock) while continuing to hold down the Set button. 4. 888 should scroll across the clock display. 5. Release the Set button. If the problem cannot be resolved after following these steps, please call Technical Support at American Time at 800-328-8996 © American Time...
-
Page 28: Troubleshooting Clock Time
Note: The hands may be off by minutes or seconds if the clock has been jarred. This procedure will reset the hands to 12 o’clock. If the problem cannot be resolved after following these steps, please call Technical Support at American Time at 800-328-8996... -
Page 29: Appendix A: Nist Time Servers
Mountain View, California nist1.symmetricom.com 069.025.096.013 San Jose, California nist1-sj.ustiming.org 216.171.124.036 San Jose, California nist1-la.ustiming.org 064.147.116.229 Los Angeles, California nNote: Please reference http:/tf.nist.gov/tf-cgi/servrs.cgi for the latest NIST Internet Time servers list, which includes the status of each server. © American Time... -
Page 30: Appendix B: Supported Time Zones
CONFIG UTC+11 CONFIG UTC+12 CONFIG UTC+13 CONFIG UTC-1 CONFIG UTC-2 CONFIG UTC-3 CONFIG UTC-4 CONFIG UTC-5 CONFIG UTC-6 CONFIG UTC-7 CONFIG UTC-8 CONFIG UTC-9 CONFIG UTC-10 CONFIG UTC-11 CONFIG UTC-12 CONFIG Custom Time Zone CONFIG CONFIG CONFIG © American Time... -
Page 31: Appendix C: Buzzer/Relay Scheduling Examples
• No End Date/Time is specified for the recurring event Step 3: Click Save in the Event Editor Step 4: Name the schedule in the Schedule Editor to LateStart.sch Step 5: Click Save in the Schedule Editor nNote: The maximum number of scheduled events is 100. © American Time... - Page 32 • The End Date/Time is specified as the start time plus the event duration. Therefore, October 31, 2011 at 15:45:08 (3:45:08 PM) Step 3: Click Save in the Event Editor Step 4: Name the schedule in the Schedule Editor to SpecialEvent.sch Step 5: Click Save in the Schedule Editor © American Time...
-
Page 33: Appendix D: Brightness Control Scheduling Example
• Countdown Duration is set to Off (available only with clocks with countdown functionality) • No End Date/Time is specified for the recurring event Step 3: Click Save in the Event Editor Step 4: Click on Add to prompt the Event Editor © American Time... - Page 34 • Countdown Duration is set to Off (available only with clocks with countdown functionality) • No End Date/Time is specified for the recurring event Step 6: Name the schedule in the Schedule Editor to BrightnessEvent.sch Step 7: Click Save in the Schedule Editor © American Time...
Need help?
Do you have a question about the H004595 and is the answer not in the manual?
Questions and answers