
Related Manuals for American Time SQA261RSAEA


Summary of Contents for American Time SQA261RSAEA
- Page 1 Installation and Operation Manual Wireless Digital Clock/ Elapsed Time Indicator with Code Blue Part # H004242 Rev. 4 October 2011...
- Page 2 Electric Shock Hazard WARNING: Hazardous voltage in electrical equipment can cause severe personal injury or death. Inspection, installation, and preventive maintenance should only be performed on equipment to which power has been turned off, disconnected and electrically isolated so no accidental contact can be made with energized parts. Electrostatic Sensitive Devices CAUTION: This equipment contains electronic devices that are sensitive to static electric charges.
-
Page 3: Table Of Contents
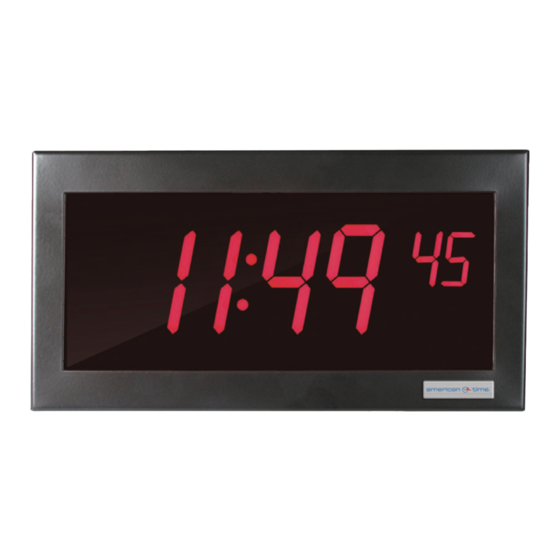
Appendix 2: Usin 3.g the Digital Clock/Timer as a Coun 3.t Up Elapsed Timer On 3.ly ................14 Appendix 3: Operator's Flowchart ............................. 15 American Time 140 3rd Street South PO Box 707 Dassel, MN 55325-0707 Phone: 866-748-3796 Fax: 800-789-1882 www.atsclock.com © American Time & Signal Co. - Page 4 6 Digit Clock Display - Used for displaying time of day, displaying counter value, for setting time, and setting up or down counter preset values. Digital Clock/Timer 12 3/8” ” 5 3/8” Control Station 4 9/16” CLOCK DOWN START/STOP RESET INCREMENT ENTER © American Time & Signal Co.
- Page 5 Join the two Molex connectors (B) together, placing excess wiring and Molex connectors into the gang box (D). Connect the 3-Communication Wire (C) which will be wired to the SQA261RSAEA (master clock) using UL approved wire nuts. See wiring details on page 5.
- Page 6 SQA261RSAES Typical Wiring Typical wiring for the DATA Slave Digital Timer CHASSIS NEUTRAL LABEL # H004273S 120VAC © American Time & Signal Co.
- Page 7 Join the two Molex connectors (C) together, placing excess wiring and Molex connectors into the gang box (D). If installing an SQA261RSAEA (Master Clock) connect the 3 Interconnecting Wires (J) from the SQA261RSAES (Slave Clock) using UL approved wire nuts.
-
Page 8: Switch Fun 3.Ction 3.S
Run/Set Switch is in Run position. This button can also be used to select a field (i.e. format, minute digits, hour digits) when the Run/ Set ENTER Switch is in Set position. CLOCK DOWN START/STOP RESET INCREMENT ENTER © American Time & Signal Co. -
Page 9: In 3.Stallation 3. In 3.Struction 3.S
(minimum) with 1/32” insulation (minimum) RESET CHASSIS PIEZO ENTER BUZZER NEUTRAL 120VAC START/STOP INCREMENT LABEL # H004273M Typical wiring for the Master Digital Timer with Control Station nNote: Just for use if installing master/slave clocks. © American Time & Signal Co. -
Page 10: Operation
SiteSync IQ system controller should appear. If using an SQA261RSAES, this clock will only copy what is displayed on the SQA261RSAEA it is connected to. If power is turned off to the master clock, this clock will also turn off. -
Page 11: Up Coun 3.Ter Elapsed Time Operation 3
When the timer reaches 00:00:00, the timer will stop counting and the audible alarm will sound for 2 seconds. During a DOWN count elapsed time operation, you can display any of the other time functions using the UP/DOWN/CLOCK switch as desired © American Time & Signal Co. -
Page 12: Code Blue
FROM OTHER EQUIPMENT 12 VAC/DC TO 30 VAC/DC SUPPLIED BY OTHERS RESET PIEZO CHASSIS ENTER BUZZER NEUTRAL 120VAC START/STOP INCREMENT Digital Clock/Timer Code Blue wiring using Control Station. The Control Station is connected as normal. © American Time & Signal Co. -
Page 13: Important Considerations
Code Blue timer will start over from 00:00:00. If the Code Blue contact is open when the power returns, the elapsed time where the Code Blue timer was stopped prior to the power failure will be displayed. © American Time & Signal Co. -
Page 14: Operating Maintenance
It is recommended that the operator remove 120vac power from the Digital Clock/Timer once per year for at least four hours. nNote: There is no 9v battey in the SQA261RSAES clock. Only the SQA261RSAEA clock it is connected to has a battery. -
Page 15: Appendix 1: Usin 3.G The Digital Clock/Timer As A Coun 3.T Down 3. Elapsed Timer On 3.Ly
For applications where the user does not want to use the clock and up count functions, the terminal block can be wired as shown below. When wired in this manner, the preset time cannot be changed and the alarm will not sound. CHASSIS RESET NEUTRAL 120VAC START/STOP © American Time & Signal Co. -
Page 16: Appendix 3: Operator's Flowchart
To stop and hold code blue time 12 3/8” for viewing, press START/STOP To Reset Clock/Timer to Normal Operation CLOCK DOWN Place SET/RUN switch START/STOP RESET momentarily in SET position and INCREMENT ENTER return switch to RUN position © American Time & Signal Co.
Need help?
Do you have a question about the SQA261RSAEA and is the answer not in the manual?
Questions and answers