Gliderol Glidermatic GRD+ Installation Instructions And Owner's Manual
Heavy duty automatic roller door operator
Hide thumbs
Also See for Glidermatic GRD+:
- Installation instructions manual (17 pages) ,
- Installation instructions and owner's manual (17 pages) ,
- Handset key settings (2 pages)

Related Manuals for Gliderol Glidermatic GRD+


Summary of Contents for Gliderol Glidermatic GRD+
- Page 1 Glidermatic GRD+ Heavy Duty Automatic Roller Door Operator Installation Instructions and Glidermatic GRD+ Owners Manual Glidermatic GRD+ Installation Instructions & owner’s manual Page 1...
- Page 2 Glidermatic GRD+ Heavy Duty Automatic Roller Door Operator IMPORTANT SAFETY INFORMATION - PLEASE READ CAREFULLY SAFETY INSTRUCTIONS WARNING! :-To reduce the risk of severe injury or death Never let children operate or play with the doors controls Keep the remote control away from children ...
-
Page 3: Installation Instructions
Installation Instructions The GRD+ unit may be retrofitted to any roller doors including non Gliderol doors and also it does not require any disassembly of the door during installation. The GRD+ unit may be retrofitted to either side of a roller door. Selection of the desired side may be determined by the available room, location of power and general installation. - Page 4 STOP WARNING: DO NOT ALLOW CHILDREN/PEOPLE AROUND THE DOOR WHEN PROPPED. SERIOUS PERSONAL INJURY AND/OR PROPERTY DAMAGE CAN RESULT FROM FAILURE TO FOLLOW THIS WARNING. d) Carefully loosen and remove the right hand spindle ‘U’ bolt e) Make sure the door supporting prop is secure. While the door is supported remove the right hand wall mount bracket.(Fig.
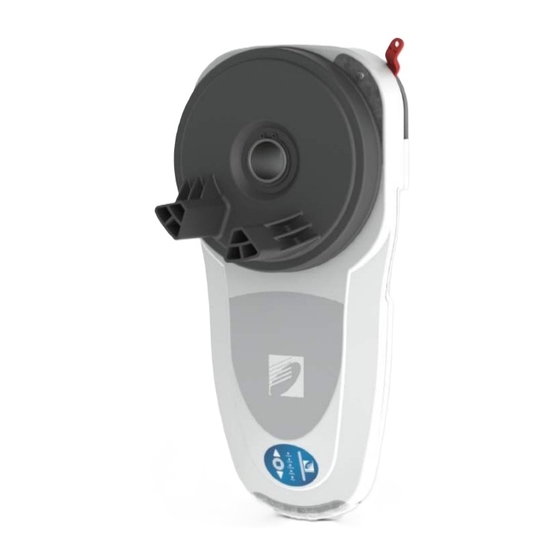
- Page 5 h) Replace right hand side wall mount bracket (Fig 4) Fig: 4a Fig: 4 Replace this picture showing G+ roller unit manual release. Fig: 5 i) Carefully remove the support from the door and rest spindle on the wall mount bracket j) Locate the Drive unit on the bracket and fit ‘U’...
- Page 6 Locate the weight bar on the centre of the bottom rail and drill two locating holes through the holes on the weight bar into the bottom rail. Secure the weight bar with two bolts provided. (Fig 6) Fig: 6 IMPORTANT: Security rivet / tek screw must always be applied to inner side of drum wheel as shown in Fig: 7a. Failure to do so may result in internal damage to the GRD drive unit.
- Page 7 PCB Index Motor Connector Hall Connector Transformer Connector Control Panel Connector Wireless Photocell Connector EAS Receiver Connector External Light Connector External I/O Terminal Glidermatic GRD+ Installation Instructions & owner’s manual Page 7...
- Page 8 User Interface MENU SETTING INDICATOR OPEN / MENU UP STOP / MENU ENTER CLOSE / MENU DOWN Transmitter Coding – By Controller 1. Press and hold [ENTER] for 2 seconds to enter menu selection 2. Using [UP] and [DOWN] to select Learn option, and press [ENTER] 3.
- Page 9 1. Press and hold [ENTER] for 2 seconds to enter menu selection 2. Using [UP] and [DOWN] to select Key option, and press [ENTER] 3. [INDICATOR] will lit to show current key configuration 4. Using [UP] and [DOWN], select the desire transmitter key setting from the below options Single Button Configuration: Any one of the three buttons in the transmitter can be used to control all three functions Stop/Open/Close.
- Page 10 1. Press and hold [ENTER] for 2 seconds to enter menu selection 2. Using [UP] and [DOWN] to select Limit option 3. To initiate door limit setting, and press [ENTER] 4. [INDICATOR] will lit to show current drive handing 5. Using [UP] and [DOWN], select the desire drive handing Left Hand Drive Right Hand Drive 6.
- Page 11 Force Setting 1. Press and hold [ENTER] for 2 seconds to enter menu selection 2. Using [UP] and [DOWN] to select Force option, and press [ENTER] 3. [INDICATOR] will lit to show current force configuration 4. Using [UP] and [DOWN], to adjust the force in the below manner Increase –...
- Page 12 LED Control Under 3 Keys transmitter mode, the LED can be switched on and off using the STOP key. This will also output to the EXTLIGHT terminal on-board. Vacation Mode Transmitter signal can be locked out by pressing STOP & CLOSE keys simultaneously and holding it for 3 seconds on the transmitter.
- Page 13 Photo Sensor Connection Diagram External Wall Switch Connection Diagram External Light Connection Diagram (Optional Interface Board Required) Glidermatic GRD+ Installation Instructions & owner’s manual Page 13...
- Page 14 Technical Specifications CHARACTERISTICS SYMBOL MIN. TYP. MAX. UNIT Input Voltage System Power Dissipation Transformer Power Transformer Output Voltage 21.6 26.4 Work Voltage of Motor MOTOR Lamp Power LED1~LED6 0.36 Buzzer Voltage Fuse FUSE Carrier Frequency Range Handset 389.9 390.1 Modulation Handset Deviation Handset...
- Page 15 Plug-in EAS Receiver (Optional) 1. Remove the LED lens and two screws 2. Lift up the control panel cover to find the PC board 3. Plug the EAS receiver into the EAS receiver sockets properly 4. Replace control panel cover and LED lens with screws Glidermatic GRD+ Installation Instructions &...
- Page 16 EAS Receiver Index GHI Transmitter Coding 1. Press and hold [1] SW1, until [2] LED blinks twice 2. Press buttons 4&5 simultaneously on the GHI transmitter to code 3. [2] LED will blink twice to confirm successful programming GHI Transmitter Code Erase 1.
- Page 17 GHI Transmitter Key Setting GHI transmitter operation key can be set using [3] SW2, by referring to the below dip switch configuration table Dip Switch Button 1 Button 2 Button 3 Button 4 Button 5 Shift + Button 1 Shift + Button 2 Shift + Button 3 Shift + Button 4 Shift + Button 5...
- Page 18 In addition, we offer our Gliderol Warranty as set out below. The benefits given to you by our Gliderol Warranty are in addition to other rights and remedies you may have under the Australian Consumer Law.
- Page 19 Gliderol’s control of delivery or installation is delayed Gliderol may extend the time of delivery or installation or if Gliderol is unable to deliver or install, the contract shall be voidable at Gliderol’s option with no right to either party for damage, loss, cost or expense.
- Page 20 NOTE: THIS FORM MUST BE COMPLETED BY THE INSTALLER AND PRODUCED AS PROOF OF PURCHASE DATE WHEN MAKING A SERVICE CALL UNDER WARRANTY, OTHERWISE SUCH CALLS ARE LIABLE TO SERVICE CHARGES. FOR SALES AND SERVICE, CONTACT GLIDEROL INTERNATIONAL PTY LTD ABN 92 007 928 949 Head Office Gliderol Garage Doors...
Need help?
Do you have a question about the Glidermatic GRD+ and is the answer not in the manual?
Questions and answers