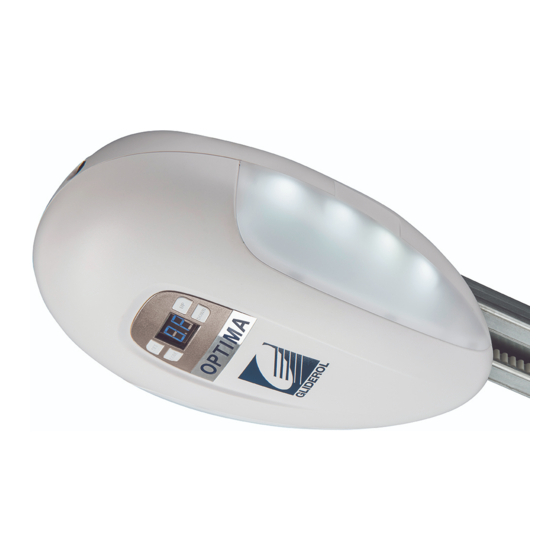
Summary of Contents for Gliderol GENESIS
- Page 1 GENESIS SERIES ® GENESIS & GENESIS OPTIMA Sectional Garage Door Opener Installation & User Guide...
-
Page 2: Table Of Contents
Contents Technical Features & Specifications Product Features Technical Information Preparing for Installation Tools Required Product Contents Installation Instructions Install Lintel Bracket Attach Manual Release Mechanism to Track Adjust the Belt Tension Secure Track to Power Unit Attach Track to Lintel Bracket Position Track and Power Unit Secure Track and Power Unit to Ceiling Install Door Hinge, J-Arm and Manual Release Cord... -
Page 3: Technical Features & Specifications
Power Input Frequency 24V DC Rolling Code Motor Decoding Working > -20 C, < +50 2 x 3V Lithium Cell 2016 Transmitter Power Temperature < 90% Relative Humidity Globe Genesis Optima Courtesy Light 1 minute Open/Close Force 800N 1200N Time... -
Page 4: Preparing For Installation
FOLLOWING INSTRUCTIONS. FAILURE TO COMPLY WITH THE FOLLOWING INSTRUCTIONS AND SAFETY WARNINGS MAY RESULT IN SERIOUS PERSONAL INJURY AND/OR PROPERTY DAMAGE. 2.1 Tools Required 2.2 Product Contents GENESIS OPENER GENESIS OPTIMA OPENER Description Description G+ Remotes G+ Remotes Genesis Powerhead 800N... -
Page 5: Installation Instructions
3.0 Installation Instructions 3.1 Install Lintel Bracket It is essential that the lintel above you garage opening have a fixing point that is made from substantial material (timber, brick, steel etc). Almost all the force generated by the automatic operator is concentrated on the Lintel Bracket, so it must be properly anchored to prevent serious injury and/or damage. -
Page 6: Adjust The Belt Tension
3.3 Adjust the Belt Tension Tension the belt within the shaft by adjusting the nut clockwise until all slack is removed from the belt, being careful not to overtighten. 3.4 Secure Track to Power Unit Place the track end over the geared shaft of the power unit and slide down, ensuring the track and the unit are correctly aligned. -
Page 7: Position Track And Power Unit
3.6 Position Track and Power Unit Raise the track and power unit and rest it on a ladder (or similar) so that it sits above the roller tracks. Open the door and confirm there is at least 30mm clearance between the door and the track. The final position of you track and power unit should be almost parallel with the open door. -
Page 8: Opener Programming
Use the below examples as a guide when positioning you door hinge and J-arm. Ensure J-arm does not touch bracing etc during normal operation. Attach manual release cord to complete installation. Once installed, prior to configurating your opener attach the stopping mechanism as shown below with your door in the fully opened position (refer below). -
Page 9: Optional Terminals And Connections
4.2. Optional Terminals and Connections 4.3 Control Panel Display The Control Panel Display is used to setup and adjust all functionality. 4.4 Initial Powering Up of Opener Once your Opener has been installed, push and pull the door by hand to ensure the manual release thrust block is locked into place before turning on the power. -
Page 10: Program Door Travel Limits
4.5 Program Door Travel Limits Setting your door travel limits is a vital part of the initial setup of your Gliderol opener. This communicates to the opener the specific distance it must travel to complete an open/close cycle. Item Description Display 4.5.1... -
Page 11: Opener Accessories Programming
5.0 Opener Accessories Programming 5.1 Enable Optional Photo Sensor Beams Optional Photo Sensor Beams are available to prevent a door from closing when an obstruction (person, object etc) is located in the beams path. By default, Photo Sensor Beams are disabled (setting ‘H0’) on all units. -
Page 12: Remote Programming
6.0 Remote Programming 6.1 Programming a New or Additional Remote Complete the below steps to program a new or additional remote for your opener. Please note, if you are replacing a lost or stolen handset we recommend erasing all existing handset data from your operator prior to programming your new handset. -
Page 13: Door Inspection Information
Every month check the door safety auto reversing works when the door contact 50mm high object placed on the floor. Adjust if necessary and recheck since an incorrect adjustment may present a hazard. If it is not functioning properly the door must be serviced by an authorised Gliderol service technician immediately. -
Page 14: Warranty
Gliderol Distributor or Gliderol Technician. (Excludes handsets, batteries, fuses & lights globes, which have no warranty) 1 year on parts only on Genesis and Gliderol Optima, if fitted by parties other than an authorised Gliderol Distributor or Gliderol Technician. - Page 15 Australian Consumer Law or other applicable laws, which may not be excluded. 4. Our Gliderol Warranty does not apply to any defect, loss or damage arising or caused directly or indirectly by or as a result of:-...
- Page 16 NOTE: THIS FORM MUST BE COMPLETED BY THE INSTALLER AND PRODUCED AS PROOF OF PURCHASE DATE WHEN MAKING A SERVICE CALL UNDER WARRANTY, OTHERWISE CALLS ARE LIABLE TO SERVICE CHARGES. FOR SALES & SERVICE CONTACT GLIDEROL INTERNATIONAL PTY LTD (ABN 92 007 928 949) Head Office...


Need help?
Do you have a question about the GENESIS and is the answer not in the manual?
Questions and answers