Table of Contents
Advertisement
Advertisement
Table of Contents

Related Manuals for SHOWTEC LED Light Bar RGB


Summary of Contents for SHOWTEC LED Light Bar RGB
- Page 1 LED Light Bar RGB ORDERCODE 42202...
- Page 2 For more information: iwant@showtec.info You can get some of the best quality, best priced products on the market from Showtec. So next time, turn to Showtec for more great lighting equipment. Always get the best -- with Showtec ! Thank you!
-
Page 3: Table Of Contents
Auto Run, Static Color)…..….………..….…………..…….. One LED Light Bar RGB (Sound Control)…………………………………………………..…………………. Multiple LED Light Bar RGB (Master/Slave control).…………………………..…………...……………….. Multiple LED Light Bar RGB (DMX control)……………………………………………………………………. Fixture Linking…………………....……..……………………………………..…………………..…………..…… Data Cabling………………..……..……………………………………………..………………………….…….. Control Panel….....……........………………………………………………………….…….. Control Mode........……………………………………………………………………….……… addressing........………………………………………………………………………….……. MENU OVERVIEW ……..……………………………………..…………………………………….…….……….…..- Auto Run Mode………………..........…………………..……………………..….. -
Page 4: Warning
Your shipment includes: • Showtec LED Light Bar RGB with IEC powercable 1,25m • 2 brackets for truss mounting • User manual LED Expected Lifespan LEDs gradually decline in brightness over time. - Page 5 If your Showtec device fails to work properly, discontinue use immediately. Pack the unit securely (preferably in the original packing material), and return it to your Showtec dealer for service.
-
Page 6: Operating Determinations
Always let the installation be carried out by an authorized dealer ! Procedure: If the LED Light Bar RGB is lowered from the ceiling or high joists, professional trussing systems have to be used. Use a clamp to mount the LED Light Bar RGB, with the mounting-bracket, to the trussing system. -
Page 7: Return Procedure
Return Procedure Returned merchandise must be sent prepaid and in the original packing, call tags will not be issued. Package must be clearly labeled with a Return Authorization Number (RMA number). Products returned without an RMA number will be refused. Highlite will not accept the returned goods or any responsibility. Call Highlite 0031-455667723 or mail aftersales@highlite.nl and request an RMA prior to shipping the fixture. -
Page 8: Description
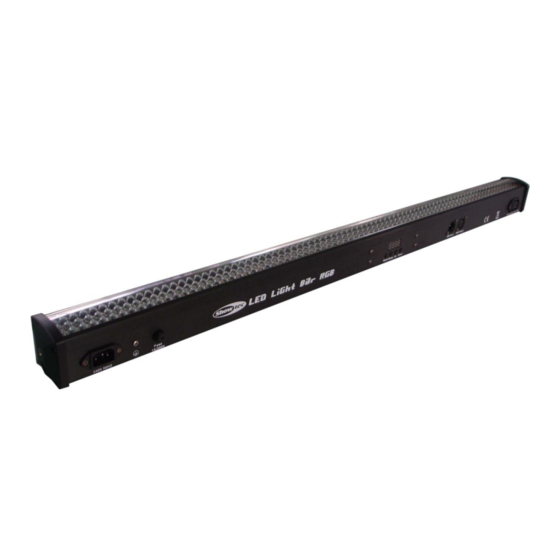
• DMX channel operation NOTE: Knowledge of DMX is required to fully utilize this unit. Overview Fig. 1 1) Adjustment Screw + Mountingbracket for Truss mounting 2) Total LED Light Bar RGB 252 LEDS Backside Fig. 2 3) Power In 4) Ground... -
Page 9: Installation
1. Fasten the effect light onto firm trussing. Leave at least 0,5 meter on all sides for air circulation. When the LED Light Bar RGB is not connected by a DMX-cable, it functions as a stand-alone device. Please see page 11, 12 and 13 for more information about the built-in programs. -
Page 10: Multiple Led Light Bar Rgb (Dmx Control)
Multiple LED Light Bars RGB (DMX Control) 1. Fasten the effect light onto firm trussing Leave at least 1 meter on all sides for air circulation. Always use a safety cable (ordercode 70140 / 70141). 3. Use a 3-p XLR cable to connect the LED Light Bars RGB and other devices. 4. -
Page 11: Fixture Linking
Fixture Linking You will need a serial data link to run light shows of one or more fixtures using a DMX-512 controller or to run synchronized shows on two or more fixtures set to a master/slave operating mode. The combined number of channels required by all the fixtures on a serial data link determines the number of fixtures the data link can support. -
Page 12: Control Panel
DMX Protocol Control Panel When the indicator light is on, means the LED Bar is working Fig. 5 A. LED Display D. Up Button B. MODE Button E. Down Button C. SETUP Button DMX Control Mode The fixtures are individually addressed on a data-link and connected to the controller. -
Page 13: Menu Overview
Menu Overview 1. Auto Program 2. DMX Address 3. Slave 4. Sound-controlled 5. Static Color 6. Built-in Programs... -
Page 14: Auto Run Mode
1) Press the MODE button on the device, until the display shows 2) With this menu you can set the Auto Mode of the LED Light Bar RGB. 3) Press Setup to enter the AUTO Menu. You can choose 4 different sub menus. -
Page 15: Master/Slave Mode
6. Built-in Programs 1) Press the MODE button on the device, until the display shows 2) With this menu you can set the Built-in Program Mode of the LED Light Bar RGB. You can choose 14 built-in programs , by using the Up / Down buttons. - Page 16 6. Built-in Programs...
-
Page 17: Dmx Channels
DMX Protocol The LED Light Bar RGB can be operated with a controller in control mode or without the controller in stand-alone mode. DMX Channels 3CH) Channel 1 – Red 0-255 Gradual adjustment Red from 0 – 100% Channel 2 – Green 0-255 Gradual adjustment Green from 0 –... -
Page 18: Channels (D-P4)
Channel 6 – Blue 0-255 Gradual adjustment Blue from 0 – 100% Channel 7 Strobe (Dimmer must be open 0-255 Strobe effect, from slow to fast (0-20 flashes/sec.) Channel 8 – Dimmer intensity 0-255 Gradual adjustment dimmer intensity from 0-100% DMX Channels 14CH) Channel 1 –... -
Page 19: Channels (D-P5)
Channel 13 Strobe (Dimmer must be open 0-255 Strobe effect, from slow to fast (0-20 flashes/sec.) Channel 14 – Dimmer intensity 0-255 Gradual adjustment dimmer intensity from 0-100% DMX Channels 2CH) Channel 1 – Colors / Programs No Function 10-19 20-29 Yellow 30-39... -
Page 20: Channels (D-P6)
DMX Channels 15CH) Channel 1 – Control / Operating Mode RGB Mode for CH2-15 10-249 Auto Program 250-255 Sound-controlled Channel 2 – Master Dimmer 0-255 Gradual adjustment dimmer intensity from 0-100% Channel 3 – Shutter / Strobe (Dimmer must be open No Function 10-255 Strobe effect, from slow to fast (0-20 flashes/sec.) -
Page 21: Channels (D-P7)
DMX Channels 7CH) Channel 1 – Red 0-255 Gradual adjustment Red from 0 – 100% Channel 2 – Green 0-255 Gradual adjustment Green from 0 – 100% Channel 3 – Blue 0-255 Gradual adjustment Blue from 0 – 100% Channel 4 – Colors / Programs No Function 10-19 20-29... -
Page 22: Maintenance
4. If all of the above appears to be O.K., plug the unit in again. 5. If you are unable to determine the cause of the problem, do not open the LED Light Bar RGB, as this may damage the unit and the warranty will become void. - Page 23 Problem Probable cause(s) Remedy No power to the fixture · Check that power is switched on One or more and cables are plugged in. fixtures are Primary fuse blown. · Replace fuse. completely dead. Fixtures reset The controller is not connected. ·...
-
Page 24: Product Specifications
Product Specification Model: Showtec LED Light Bar RGB Voltage : AC 230V-50Hz (CE) Peak Power 75 Watt Continuous Power 70 Watt LEDS: 252 RGB high intensity 10mm LEDs (Red 108, Green 72, Blue 72) Beam angle: 40 º DMX Input : 3-pin XLR Male connector...
Need help?
Do you have a question about the LED Light Bar RGB and is the answer not in the manual?
Questions and answers