Table of Contents
Advertisement
Quick Links
Advertisement
Table of Contents
Troubleshooting

Related Manuals for Amped Wireless APR175P ProSeries AC1750


Summary of Contents for Amped Wireless APR175P ProSeries AC1750
- Page 1 User’s Guide ProSeries High Power AC1750 Wi-Fi Access Point / Router APR175P...
-
Page 2: Table Of Contents
APR175P USER’S GUIDE CONTENTS WI-FI SETTINGS ............54 INTRODUCTION ............4 2.4GHz Status ..............54 GETTING STARTED ............5 2.4GHz Basic Settings ............ 55 Package Contents ............5 2.4GHz Security ............. 57 LED Indicators ..............6 2.4GHz Output Power ........... 59 Side Panel Description ............ - Page 3 APR175P USER’S GUIDE RADIUS Server ............... 80 System Logs ..............105 Internal RADIUS Server ..........82 Alarm and LED Settings ..........106 Radius Accounts ............84 Upgrade Firmware ............107 WMM / QoS ..............85 Save / Reload Settings ..........109 NETWORK SETTINGS ..........
- Page 4 APR175P USER’S GUIDE MANAGED AP SETTINGS ..........136 TECHNICAL SPECIFICATIONS ........153 DEFAULT SETTINGS ..........154 Access Points .............. 136 TROUBLESHOOTING & SUPPORT ......155 Wi-Fi Settings .............. 141 WARRANTY & REGULATORY INFORMATION .... 169 RADIUS Server Settings ..........146 LEGAL NOTICES AND DISCLAIMERS………………….……..177 Access Control ............
-
Page 5: Introduction
USER’S GUIDE INTRODUCTION Thank you for purchasing this Amped Wireless product. At Amped Wireless we strive to provide you with the highest quality products through innovation and advanced technology. We pride ourselves on delivering products that outperform the competition and go beyond your expectations. If you have any questions please feel free to contact us. -
Page 6: Getting Started
APR175P USER’S GUIDE GETTING STARTED Package Contents Check to make sure you have all the contents within your package: ProSeries High Power AC1750 Wi-Fi Access Point / Router 3 x Detachable High Gain 3dBi Antennas Magnetic Mounting Kit & Mounting Template ... -
Page 7: Led Indicators
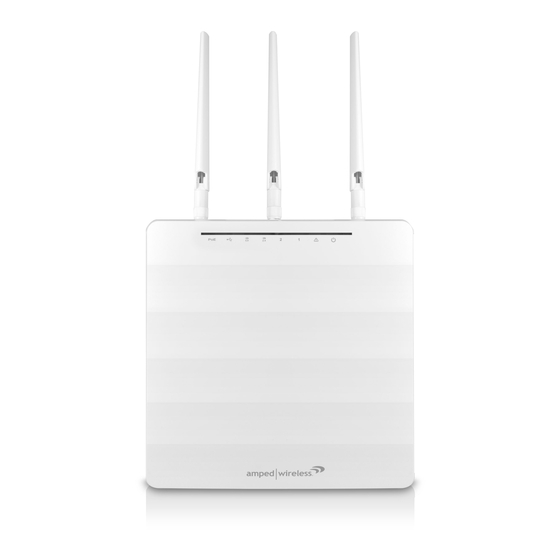
APR175P USER’S GUIDE LED Indicators From left to right: PoE: Indicates when there is an active PoE connection on the LAN1 wired port. LED will remain on. USB: Indicates when there is a USB device is attached to the USB port. 5.0GHz Wi-Fi: Blinks rapidly when Wi-Fi data traffic is transmitted or received over the wireless network. -
Page 8: Side Panel Description
APR175P USER’S GUIDE Side Panel Description PWR: Power adapter port. 12V 4A. LAN1 / WAN (PoE): Gigabit RJ-45 port with Power over Ethernet input. Connect wired devices or to a PoE switch to use the Access Point without the power adapter. Functions as the port connected to your network in Access Point modes and WAN port in Router mode. -
Page 9: Mounting Instructions
APR175P USER’S GUIDE MOUNTING INSTRUCTIONS Magnetic Mounting The mounting kit included with the Access Point provides a convenient method to mount the Access Point on a wall or ceiling. Once you have chosen the location for where you want to install the Access Point, locate the Mounting Template. -
Page 10: Getting Started
APR175P USER’S GUIDE GETTING STARTED a) Attach the included antennas to the antenna ports on the Access Point / Router. b) Power on the Access Point / Router by attaching either the power adapter to the Access Point / Router and plugging in the other end into a power outlet or attaching a PoE Ethernet cable to LAN1 / WAN on the side panel and the other end to an active PoE switch. -
Page 11: Operational Modes (Basic Setup)
APR175P USER’S GUIDE OPERATIONAL MODES (BASIC SETUP) The Access Point features five different operational modes that can be configured via the web menu: Router Access Point WDS Access Point Managed Access Point Access Point Controller... -
Page 12: Router Mode
APR175P USER’S GUIDE ROUTER MODE OVERVIEW Share a single Internet connection via a connection to a broadband modem or other Internet source and provide a secure firewall for your network. Router mode features 2.4GHz and 5.0GHz Wi-Fi connections as well as one wired port for local wired devices and switches. - Page 13 APR175P USER’S GUIDE ROUTER MODE BASIC SETUP Setup Preparations Disconnect and power off your existing router (if you have one). Disconnect your existing router from your computer, your broadband modem and its power outlet. If you do not have an existing router please continue to the next step.
- Page 14 APR175P USER’S GUIDE Connect the Router to your Modem a) Use the included Ethernet cable and connect one end of the cable to your modem. Connect the other end of the cable to the blue “Modem” port on the Router.
- Page 15 APR175P USER’S GUIDE Power on your Modem Plug in your modem’s power adapter and backup battery (if available):...
- Page 16 APR175P USER’S GUIDE Attach Antennas, Power On & Connect to your Computer a) Attach the included antennas to the antenna ports on the Access Point / Router. b) Power on the Access Point / Router by attaching either the power adapter to the Access Point / Router and plugging in the other end into a power outlet or attaching a PoE Ethernet cable to LAN1 / WAN on the side panel and the other end to an active PoE switch.
- Page 17 APR175P USER’S GUIDE Open your Web Browser a) Open your web browser. b) Type http://setup.ampedwireless.com into the web address bar. If the web menu fails to open, type in the following IP address into your web address bar: http://192.168.80.1 If you have problems accessing the Web Menu… Disable third-party firewalls such as Norton, Zone Alarm or Windows Defender.
- Page 18 APR175P USER’S GUIDE Select the Operational Mode a) After the web menu appears, select Dashboard from the navigation menu on the top of the page. b) Select Operational Mode from the left hand navigation. Using the dropdown menu, select Router Mode the Operational Mode and click Apply.
- Page 19 APR175P USER’S GUIDE Basic Setup Wizard Confirm that your hardware is correctly connected and Click Next begin. Internet Connection Detection The Wizard will try to detect your Internet settings and configure the router. Please be patient.
- Page 20 APR175P USER’S GUIDE If there was a problem with the Automatic Configuration, the wizard will notify you of the issue. If you continue to have problems, contact our support department at 888-573-8820. If the Internet connection detection was successful, you will see a green check.
- Page 21 APR175P USER’S GUIDE Wi-Fi Settings The default ID of your 5.0GHz Wi-Fi network and 2.4GHz Wi-Fi network is: Amped_APR_5.0 Amped_APR_2.4 To change it, enter a new name in the SSID field. Users connecting wirelessly to the Router will use these IDs to identify your wireless network.
- Page 22 APR175P USER’S GUIDE Setup Summary Once the Router has rebooted, it will load the Setup Summary page and provide you with the details of your setup. It is recommended that you print this page for your records. Open a new web browser window and check that you have access to the Internet.
-
Page 23: Access Point Mode
APR175P USER’S GUIDE ACCESS POINT MODE OVERVIEW Access Point mode creates a new Wi-Fi network for users to connect to by connecting to a local port on your network (i.e. via a network switch or local router network port). Devices connected to the Access Point are on the same network as the router and have the ability to access files from devices on the same network. - Page 24 APR175P USER’S GUIDE ACCESS POINT MODE BASIC SETUP Connect the Access Point to your Router/Network: a) Attach the antennas to the Access Point. b) Plug in the Power Adapter. Using the included RJ-45 Ethernet cable, attach one end to the Access Point’s LAN 1/WAN port and the other to your router’s network port (or any available port on a network switch).
- Page 25 APR175P USER’S GUIDE Open your Web Browser a) Open your web browser. b) Type http://setup.ampedwireless.com into the web address bar. If the web menu fails to open, type in the following IP address into your web address bar: http://192.168.80.1 If you have problems accessing the Web Menu: Disable third-party firewalls such as Norton, Zone Alarm or Windows Defender.
- Page 26 APR175P USER’S GUIDE Select the Operational Mode a) After the web menu appears, select Dashboard from the navigation menu on the top of the page. b) Select Operational Mode from the left hand navigation. Using the dropdown menu, select Access Point Mode for the Operational Mode and click Apply.
- Page 27 APR175P USER’S GUIDE Basic setup will detect your network settings and automatically configure the Access Point to your network. If there was a problem with the configuration, Basic Setup will notify you of the issue. If you continue to have problems, contact our support department at 888-573-8820.
- Page 28 APR175P USER’S GUIDE Wi-Fi Settings The default Wi-Fi network ID of your 5GHz Wi-Fi network and 2.4GHz Wi-Fi network is: Amped_APR_5.0 Amped_APR_2.4 To change it, enter a new name in the SSID field. Users connecting wirelessly to the Access Point will use these IDs to identify your wireless network.
- Page 29 APR175P USER’S GUIDE Setup Summary Once the Access Point has rebooted, it will load the Setup Summary page and provide you with the details of your setup. It is recommended that you print this page for your records. Open a new web browser window and check that you have access to the Internet.
-
Page 30: Wds - Access Point Mode
APR175P USER’S GUIDE WDS – ACCESS POINT MODE (WPS-AP) OVERVIEW WDS (Wireless Distribution System) Access Point mode enables the wireless interconnection of Access Points. Access Points traditionally connect to the network via a cable (see Access Point Mode), however in WDS- Access Point mode, Access Points connect to the network wirelessly and create a wireless or wired network for devices to connect to. - Page 31 APR175P USER’S GUIDE WDS – ACCESS POINT MODE (WPS-AP) BASIC SETUP Connect the Access Point to your Router/Network: a) Attach the antennas to the Access Point. b) Plug in the Power Adapter. Using the included RJ-45 Ethernet cable, attach one end to the Access Point’s LAN 1/WAN port and the other to your router’s network port (or any available port on a network switch).
- Page 32 APR175P USER’S GUIDE Open your Web Browser a) Open your web browser. b) Type in: http://setup.ampedwireless.com into the web address bar. If the web menu fails to open, type in the following IP address into your web address bar: http://192.168.80.1 If you have problems accessing the Web Menu: Disable third-party firewalls such as Norton, Zone Alarm or Windows Defender.
- Page 33 APR175P USER’S GUIDE Select the Operational Mode a) After the web menu appears, select Dashboard from the navigation menu on the top of the page. b) Select Operational Mode from the left hand navigation. Using the dropdown menu, select WDS - Access Point Mode for the Operational Mode and click Apply.
- Page 34 APR175P USER’S GUIDE WDS Settings WDS - AP mode requires additional Access Points also functioning in WDS - AP mode. Each WDS enabled Access Point connects to the other via MAC addresses. Enter the MAC addresses of the Access Points with WDS enabled into the corresponding fields that you wish to connect to.
- Page 35 APR175P USER’S GUIDE Wi-Fi Settings In addition to interconnecting Access Points, WDS-AP mode allows for Wi-Fi connections to the Access Point from Wi-Fi devices such as a PC or tablet. The default Wi-Fi ID’s of your 5GHz Wi-Fi network and 2.4GHz Wi-Fi network are: Amped_APR_5.0 Amped_APR_2.4...
- Page 36 APR175P USER’S GUIDE Setup Summary Once the Access Point has rebooted, it will load the Setup Summary page and provide you with the details of your setup. It is recommended that you print this page for your records. The Summary will display the status of each WDS connection and the signal strength of each connection.
-
Page 37: Managed Access Point Mode
APR175P USER’S GUIDE MANAGED ACCESS POINT MODE OVERVIEW Managed Access Point mode functions similarly to Access Point mode however the majority of settings of the Access Point are managed remotely from a single designated Access Point Controller. This mode is typically used for deployments where multiple Access Points are installed and configuring all devices simultaneously is more convenient. -
Page 38: Access Point Controller Mode
APR175P USER’S GUIDE ACCESS POINT CONTROLLER MODE OVERVIEW Access Point Controller mode creates a master Access Point to manage all Access Points (up to 7 simultaneously) that are functioning in Managed Access Point mode (Access Point Controllers cannot manage other devices in Router mode, Access Point mode or WDS-Access Point mode). The Access Point Controller provides a single web based interface to manage the Wi-Fi SSID, security, VLAN, group settings, firmware upgrades and much more for all Managed Access Points. - Page 39 APR175P USER’S GUIDE ACCESS POINT CONTROLLER MODE BASIC SETUP Connect the Access Point to your Router/Network: a) Attach the antennas to the Access Point. b) Plug in the Power Adapter. Using the included RJ-45 Ethernet cable, attach one end to the Access Point’s LAN 1/WAN port and the other to your router’s network port (or any available port on a network switch).
- Page 40 APR175P USER’S GUIDE Open your Web Browser a) Open your web browser. b) Type http://setup.ampedwireless.com into the web address bar. If the web menu fails to open, type in the following IP address into your web address bar: http://192.168.80.1 If you have problems accessing the Web Menu… Disable third-party firewalls such as Norton, Zone Alarm or Windows Defender.
- Page 41 APR175P USER’S GUIDE Select the Operational Mode a) After the web menu appears, select Dashboard from the navigation menu on the top of the page. b) Select Operational Mode from the left hand navigation. Using the dropdown menu, select Access Point Controller Mode for the Operational Mode and click Apply.
- Page 42 APR175P USER’S GUIDE Basic Setup Wizard Before we begin please check that: a) All Managed Access Points are powered on. b) All Managed Access Points are set to “Managed Access Point” operational modes. If they are not please do so from the Web Menu for each Access Point.
- Page 43 APR175P USER’S GUIDE Managed Access Point Detection Basic setup will scan for all available Managed Access Points on your network. This may take a minute. Once complete a list of available Managed Access Points will appear. Select the Access Points that you wish to configure.
- Page 44 APR175P USER’S GUIDE Each Managed Access Point will have a Status displayed on the right side. Below is a legend for each status color: Disconnected (Grey): The Access Point cannot be reached and is not available or disconnected from the network.
- Page 45 APR175P USER’S GUIDE Wi-Fi Settings Configure Wi-Fi settings (Primary and secondary network SSIDs and security) for the group of selected Managed Access Points from this page. The Access Points will all have the same settings. You can also configure the device name for each Access Point. The default Wi-Fi ID for 5.0GHz and 2.4GHz networks is: Amped_APR_5.0 Amped_APR_2.4...
- Page 46 APR175P USER’S GUIDE Once complete, you can choose to click Apply to apply the settings and choose a new group of Managed Access Points to configure with new settings. If you are finished, and have no other Managed Access Points to configure, click Next to continue to Wi-Fi Settings for the Access Point Controllers own Wi-Fi network.
- Page 47 APR175P USER’S GUIDE Wi-Fi Settings: AP Controller’s Local Wi-Fi The Access Point Controller also features its own Wi-Fi networks. By default the Access Point Controller’s Wi-Fi networks are disabled to optimize the performance of the Access Point Controller’s management functions. You can enable them here, however, during heavy usage, this may negatively impact the performance of the Access Point Controller.
- Page 48 APR175P USER’S GUIDE Setup Summary Once the Access Point has rebooted, it will load the Setup Summary page and provide you with the details of your setup. It is recommended that you print this page for your records. The Summary will display the Wi-Fi settings and groups of Managed Access Points using those Wi-Fi settings.
-
Page 49: More Settings
APR175P USER’S GUIDE MORE SETTINGS The Access Point has many additional features and settings that can be configured via the Web Menu. To access these settings start with the navigation menu located on the top of the Web Menu. Once the desired menu is selected, additional navigational options will appear on the left hand side. -
Page 50: Dashboard
APR175P USER’S GUIDE DASHBOARD Dashboard: System Status The Dashboard System Status will provide you with the current status of the Access Point. It provides you with glance at general setup information such as the current operational mode, firmware version and uptime of the Access Point. -
Page 51: Operational Mode
APR175P USER’S GUIDE Dashboard: Operational Mode The Operational Mode page lets you change the operating mode of the Access Point. As described earlier, the Access Point features five different modes: Router Access Point WDS Access Point Managed Access Point Access Point Controller From this page you can view your current operational mode or change the operational mode to any of the modes above. -
Page 52: Basic Setup
APR175P USER’S GUIDE Dashboard: Basic Setup The Basic Setup page will provide you with a simple, step by step, wizard for configuring basic settings of the current operational mode. As you change from one operational mode to another, the Basic Setup menu will also change to cater to the settings for the selected operational mode. -
Page 53: Connected Devices
APR175P USER’S GUIDE Dashboard: Connected Devices View the details of certain devices connected to the Access Point. Since this menu may constantly change as devices connect and disconnect from the network, a page refresh option is available to automatically update the data at set intervals. Connected devices are separated by those connected to the 2.4GHz Wi-Fi networks or 5.0GHz Wi-Fi networks. -
Page 54: Wds Settings
APR175P USER’S GUIDE Dashboard: WDS Settings If the Access Point has been set to WDS-Access Point operational mode, the WDS settings page will give you a glance at the status of current WDS connections. The page provides you with information for each frequency: 2.4GHz and 5.0GHz depending on your WDS configurations. -
Page 55: Wi-Fi Settings
APR175P USER’S GUIDE WI-FI SETTINGS 2.4GHz Wi-F Settings: Status The 2.4GHz Wi-Fi Status page provides you with a glance at basic information for your 2.4GHz Wi-Fi settings such as the Status, mode, security type, SSID among other details. -
Page 56: Ghz Basic Settings
APR175P USER’S GUIDE 2.4GHz Wi-F Settings: Basic Settings The Basic Settings page allows you to adjust settings for your 2.4GHz local wireless network. Enable Wi-Fi Radio: Disabling will turn off all 2.4GHz Wi-Fi activity. Users will no longer be able to connect wirelessly to your 2.4GHz network. - Page 57 APR175P USER’S GUIDE Auto Channel Selection: Enable or disable auto Wi-Fi channel assignment. When enabled the Access Point will automatically choose the best Wi-Fi channel for operation. Channel Scan Interval: Select the time intervals for when the Access Point re-checks for an optimal Wi-Fi channel to use.
-
Page 58: Ghz Security
APR175P USER’S GUIDE 2.4GHz Wi-F Settings: Security The Security page allows you to change the type of wireless security settings for your 2.4GHz wireless network. SSID Selection: Using the drop down menu, you can select which network you wish to configure and may adjust the security settings below. - Page 59 APR175P USER’S GUIDE Authentication Method: None: Authentication is disabled and devices are not required to enter a security key when connecting to the SSID. WEP is rated as a low level encryption and is compatible with all wireless devices and operating systems. Using WEP may slow down your wireless performance.
-
Page 60: Ghz Output Power
APR175P USER’S GUIDE 2.4GHz Wi-F Settings: Output Power Adjust the output power of the Access Point to control the coverage distance of your 2.4GHz wireless network. For a smaller coverage area, you can select a lower output power. For the maximum wireless coverage, select the 100% selection. -
Page 61: Ghz Site Survey
APR175P USER’S GUIDE 2.4GHz Wi-F Settings: Site Survey Scan for local Wi-Fi networks broadcasting within the vicinity of the Access Point. This feature is useful in determining what other networks are around you and what their basic configurations are in addition to their signal strength in comparison to the Access Point. -
Page 62: Ghz Wds
WDS mode allows the Access Point to interconnect with other WDS enabled Access Points and Bridges (such as the Amped Wireless REB175P ProSeries Wi-Fi Range Extender/Bridge). WDS allows you to extend your network by adding additional wirelessly connected Access Points, also referred to as a repeater, in addition to Bridges. - Page 63 APR175P USER’S GUIDE To further secure a WDS connection, VLAN IDs may be assigned to the WDS connection. Note: When using WDS, it is recommended that you configure the IP address of each WDS connected device to use the same IP subnet and/or ensure that there is only one active router or DHCP server on the network.
-
Page 64: Ghz Access Schedule
APR175P USER’S GUIDE 2.4GHz Wi-F Settings: Access Schedule Access Schedules will enable or disable your 2.4GHz wireless access at a set time based on your predefined schedule. This feature is often used for restricting access to all users (such as children, employees, guests) during specific times of the day for parental control or security reasons. -
Page 65: Ghz Advanced Settings
APR175P USER’S GUIDE 2.4GHz Wi-F Settings: Advanced Settings Advanced Wireless Settings should only be adjusted by technically advanced users. It is not recommended that novice users adjust these settings to avoid degrading wireless performance. Contention Slot: Used for contention windows in WMM mode. For more information please go to the WMM section of this User’s Guide. - Page 66 APR175P USER’S GUIDE Fragment Threshold: The default and recommended setting is at 2346, meaning the Router will never fragment any frames that it sends to wireless users. Multicast Rate: Adjust the transfer rate for multicast packets or choose the “auto” setting. Beacon Interval: Indicates the frequency interval of the beacon.
-
Page 67: Ghz Status
APR175P USER’S GUIDE 5.0GHz Wi-F Settings: Status The 5.0GHz Wi-Fi Status page provides you with a glance at basic information for your 5.0GHz Wi-Fi settings such as the Status, mode, security type, SSID among other details. -
Page 68: Ghz Basic Settings
APR175P USER’S GUIDE 5.0GHz Wi-F Settings: Basic Settings The Basic Settings page allows you to adjust settings for your 2.4GHz local wireless network. Enable Wi-Fi Radio: Disabling will turn off all 5.0GHz Wi-Fi activity. Users will no longer be able to connect wirelessly to your 5.0GHz network. - Page 69 APR175P USER’S GUIDE Auto Channel Selection: Enable or disable auto Wi-Fi channel assignment. When enabled the Access Point will automatically choose the best Wi-Fi channel for operation. Channel Scan Interval: Select the time intervals for when the Access Point re-checks for an optimal Wi-Fi channel to use.
-
Page 70: Ghz Security
APR175P USER’S GUIDE 5.0GHz Wi-F Settings: Security The Security page allows you to change the type of wireless security settings for your 5.0GHz wireless network. SSID Selection: Using the drop down menu, you can select which network you wish to configure and may adjust the security settings below. - Page 71 APR175P USER’S GUIDE Authentication Method: None: Authentication is disabled and devices are not required to enter a security key when connecting to the SSID. WEP is rated as a low level encryption and is compatible with all wireless devices and operating systems. Using WEP may slow down your wireless performance.
-
Page 72: Ghz Output Power
APR175P USER’S GUIDE 5.0GHz Wi-F Settings: Output Power Adjust the output power of the Access Point to control the coverage distance of your 5.0GHz wireless network. For a smaller coverage area, you can select a lower output power. For the maximum wireless coverage, select the 100% selection. -
Page 73: Ghz Site Survey
APR175P USER’S GUIDE 5.0GHz Wi-F Settings: Site Survey Scan for local Wi-Fi networks broadcasting within the vicinity of the Access Point. This feature is useful in determining what other networks are around you and what their basic configurations are in addition to their signal strength in comparison to the Access Point. -
Page 74: Ghz Wds
WDS mode allows the Access Point to interconnect with other WDS enabled Access Points and Bridges (such as the Amped Wireless REB175P ProSeries Wi-Fi Range Extender/Bridge). WDS allows you to extend your network by adding additional wirelessly connected Access Points, also referred to as a repeater, in addition to Bridges. - Page 75 APR175P USER’S GUIDE To further secure a WDS connection, VLAN IDs may be assigned to the WDS connection. Note: When using WDS, it is recommended that you configure the IP address of each WDS connected device to use the same IP subnet and/or ensure that there is only one active router or DHCP server on the network.
-
Page 76: Ghz Access Schedule
APR175P USER’S GUIDE 5.0GHz Wi-F Settings: Access Schedule Access Schedules will enable or disable your 5.0GHz wireless access at a set time based on your predefined schedule. This feature is often used for restricting access to all users (such as children, employees, guests) during specific times of the day for parental control or security reasons. -
Page 77: Ghz Advanced Settings
APR175P USER’S GUIDE 5.0GHz Wi-F Settings: Advanced Settings Advanced Wireless Settings should only be adjusted by technically advanced users. It is not recommended that novice users adjust these settings to avoid degrading wireless performance. Guard Interval: Used to ensure that data transmissions do not interfere with each other. - Page 78 APR175P USER’S GUIDE Multicast Rate: Adjust the transfer rate for multicast packets or choose the “auto” setting. Beacon Interval: Indicates the frequency interval of the beacon. A beacon is a packet broadcast by the router to synch the wireless network. Station Idle Timeout: This feature will disconnect connected devices that are no longer active based on a set interval of time.
-
Page 79: Wps Settings
APR175P USER’S GUIDE WPS Settings WPS is a Wi-Fi feature created to make Wi-Fi setup simple and easy. Some wireless routers and adapters support this feature with varying names (i.e. one touch setup or WPS). You may enable WPS setup here by selecting the type of WPS setup you wish to use. -
Page 80: Mac Address Filtering
APR175P USER’S GUIDE MAC Address Filtering MAC Address Filtering allows you to deny access or allow access to specific users connecting to the network. Each networking device has a unique address called a MAC address (a 12 digit hex number). By inputting the MAC address into the field, you can define whether that device is allowed into your network not allowed. -
Page 81: Radius Server
APR175P USER’S GUIDE RADIUS: RADIUS Server RADIUS servers provide an additional layer of security by requiring that devices be authenticated before gaining access to a network. Authentication normally includes the use of a user name and password that is verified on a predefined database also known as the RADIUS server. - Page 82 APR175P USER’S GUIDE Shared Secret: This is the shared password used by both your Access Point and the RADIUS server. The RADIUS server must also be using this exact password to ensure communication between the two. Enter a password (between 1-99 characters in length). Session Timeout: Set a duration when a connected device’s session will timeout.
-
Page 83: Internal Radius Server
APR175P USER’S GUIDE RADIUS: Internal RADIUS Server If you chose to use the Internal RADIUS server on the RADIUS Server settings menu you will need to configure the Access Point’s Internal, built-in, RADIUS server using this page. Internal Server: Enable or disable the Internal Server. EAP Internal Authentication: Select the EAP authentication type from this menu. - Page 84 APR175P USER’S GUIDE Session Timeout: Set a duration when a connected device’s session will timeout. (Between 0-86400) The timeout time begins once the connected device ceases activity with the Access Point. Termination Action: Select how the Internal RADIUS server handles a termination action: Re-authentication: Sends a RADIUS request to the Access Point Not-Re-authentication: Sends a default termination action to the Access Point Not-Send: No termination action is sent to the Access Point...
-
Page 85: Radius Accounts
APR175P USER’S GUIDE RADIUS: Radius Accounts If you chose to use the Internal RADIUS server on the RADIUS Server settings menu you will need to add User Accounts to authenticate devices that are logging into your network. Enter the name of each user in the User Accounts field. -
Page 86: Wmm / Qos
APR175P USER’S GUIDE WMM / QoS WMM, also known as Wi-Fi Multimedia, prioritizes multimedia (audio, video and voice) data going over Wi-Fi to ensure that they receive the needed bandwidth to perform undeterred. Using QoS, also known as Quality of Service) WMM prioritizes data packets in the following order: Voice, Video, Best Effort, and Background. -
Page 87: Network Settings
APR175P USER’S GUIDE NETWORK SETTINGS Local Network (LAN): Local Network (IPv4) These settings are for your local network only and do not apply to your Internet / ISP connection. DHCP: The Access Point includes a feature to help manage the IP addresses within your network automatically. -
Page 88: Lan Port Settings
APR175P USER’S GUIDE DHCP Client Range: The range of IP addresses provided by the DHCP server is defined by this field. You can limit how many IP addresses are used in your network by setting a smaller or larger range. DHCP Lease Time: The amount of time each device is given a specific IP is decided by the DHCP lease time. - Page 89 APR175P USER’S GUIDE Enable / Disable – Turn the specific wired port on or off Speed & Duplex – Select a speed for the port Flow Control – Enable to allow the Access Point to automatically manage data requests to the wired port and avoid packet collisions 802.3az –...
-
Page 90: Vlan
APR175P USER’S GUIDE Local Network (LAN): VLAN Virtual Local Area Networks, also known as VLANs, is a feature that allows you to virtually map connected devices and secure access for each wired port. VLAN ID: Devices that are connected to a wired port with a specific VLAN (Virtual Local Area Network) ID cannot access or see devices connected to SSIDs or wired ports with a different VLAN ID. -
Page 91: Domain Redirect
APR175P USER’S GUIDE Local Network (LAN): Domain Redirect Domain Redirect allows access to the web interface via a simple web URL: http:setup.ampedwireless.com Disabling Domain Redirect will require that you access the web menu using the IP address instead of the web URL. It is recommended that you note your IP address before disabling this mode, or refrain from disabling Domain Redirect. -
Page 92: Internet Network (Wan) Ipv4
APR175P USER’S GUIDE Internet Network (WAN): Internet Network (WAN) IPv4 Internet settings normally applies to the Access Point when it is in Router mode. Basic Setup will assist in the initial configuration of your Internet Network settings in Router mode, however, in the case that you wish to adjust settings manually, the options on this page provides you with the tools to do this easily. - Page 93 APR175P USER’S GUIDE If for some reason you do not get an IP address and you know that your Internet provider uses DHCP, try resetting your modem. Remove the power adapter from the modem as well as the backup battery (if available).
-
Page 94: Advanced Settings
APR175P USER’S GUIDE Advanced Settings These settings apply to the Local Network and your Internet Connection Network. If you are not familiar with these settings, please refer to a network administrator to avoid putting your network at risk. Enable uPnP: Universal Plug and Play is a network feature that allows uPnP enabled devices to “just work”... - Page 95 APR175P USER’S GUIDE Enable IPsec pass through on VPN connection: Allows the IP security protocol suite to pass through on a VPN connection. Enable PPTP pass through on VPN connection: Allows the PPTP protocol suite to pass through on a VPN connection.
-
Page 96: Advanced Settings
APR175P USER’S GUIDE ADVANCED SETTINGS Many of the features in the Advanced Settings menu are available only in the Router operational mode. If the Access Point is not in Router mode, these settings may not be available. Port Forwarding Port Forwarding is a rule that tells the Router that if a specific type of request comes in on a specific port, then that request should be forwarded to a specific device on the private network. -
Page 97: Port Filtering
APR175P USER’S GUIDE Port Filtering Port Filtering is a security measure that prevents users from using specific ports for reasons other than what those ports were originally intended for. For example, TCP port 21 is traditionally used for FTP. However, there is nothing stopping a user from using port 21 for purposes other than FTP access. -
Page 98: Dmz (Demilitarized Zone)
APR175P USER’S GUIDE DMZ (Demilitarized Zone) A DMZ is a network location or IP Address that is not protected by the firewall. When enabling DMZ, it is important to note that the device on the IP Address designated as part of the DMZ does not have any protection from the Router’s firewall. -
Page 99: Denial Of Service
APR175P USER’S GUIDE Denial of Service A Denial of Service attack is an attempt by a user (or users) to make a server’s or network’s services unavailable. The user sends a server multiple requests with false return addresses. The server will attempt to respond by sending a request back to the user;... -
Page 100: Ids (Intrusion Detection System)
APR175P USER’S GUIDE IDS (Intrusion Detection System) Monitor network activities for malicious activities and connection violations. IDS will allow you to block devices that repeatedly fail to connect. When “Block devices” is enabled and a device attempts to connect to the AP, but fails three times within sixty seconds, the device will be blocked for a duration of thirty minutes. -
Page 101: Administration
APR175P USER’S GUIDE ADMINISTRATION System Status The Administration System Status will provide you with the current status of the Access Point. It provides you with glance at general setup information such as the current operational mode, firmware version and uptime of the Access Point. From here you can quickly change the operational mode by clicking the “Change”... -
Page 102: Network Statistics
APR175P USER’S GUIDE Network Statistics Network statistics shows the data activity for each connection type on the Access Point / Router (Internet, Wireless and Wired). The Wireless Connection statistics shows all data activity for both the 2.4GHz and 5.0GHz wireless networks separately. -
Page 103: System Clock
APR175P USER’S GUIDE System Clock Maintain the internal clock for the Access Point by syncing with your computer’s time or through a network time server. Your system clock settings need to be accurate in order for logs and wireless access schedules to work correctly. -
Page 104: Advanced Settings
APR175P USER’S GUIDE Advanced Settings Product Name: The name of the product is used to easily identify the Access Point in the case where multiple Access Points are installed in the same location. Choose a name consisting of up to 32 characters. Management Protocol: The Access Point supports multiple management interfaces. - Page 105 APR175P USER’S GUIDE SNMP Trap: Enable or disable SNMP trap to notify managers or network errors SNMP Trap Community: Enter the SNMP Trap Community name for SNMP-TRAP requests SNMP Trap Manager: Specify the IP address for the SNMP Manager...
-
Page 106: System Logs
System Logs The System Log is useful for viewing the activity and history of the Access Point. The System Log is also used by Amped Wireless technicians to help troubleshoot your router when needed. It is recommended that you enable all logs in the event that troubleshooting is required. -
Page 107: Alarm And Led Settings
APR175P USER’S GUIDE Alarm and LED Settings The Access Point features an internal audio alarm which can be used for multiple purposes. The alarm can be used to easily identify the location of an Access Point. You can also set the duration for the sound. LED lights can also be turned on or off. -
Page 108: Upgrade Firmware
Internet, you can manually upgrade the firmware by downloading the firmware file from the Amped Wireless Elite Support website. The firmware update is downloaded as a zip file and you will need to have an unzipping program to open the file. Inside the file will be a text document with details on the current firmware release and instructions on how to upgrade the firmware. - Page 109 You can save the file to a USB drive and attach the USB drive to the Access Point, or you may save the file to your PC desktop and choose the file from the web menu. Firmware files may also be provided by Amped Wireless support reps. b. Click Browse and locate the file.
-
Page 110: Save / Reload Settings
APR175P USER’S GUIDE Save / Reload Settings Saving your current settings allows you to back-up your current settings which may be reloaded at a later time. You can save or load settings from your computer or from a USB drive attached to the Access Point. To save settings, click Save. -
Page 111: Password Settings
APR175P USER’S GUIDE Password Settings The default settings for the Router are: Login: admin Password: admin If you wish to enable a password to protect unauthorized access to the web menu, you may enter one here. -
Page 112: Access Point Controller Settings
APR175P USER’S GUIDE ACCESS POINT CONTROLLER SETTINGS Overview Access Point Controller mode creates a master Access Point to manage Access Points (up to 7 simultaneously) that are functioning in Managed Access Point mode (Access Point Controllers cannot manage other devices in Router mode, Access Point mode, WDS-AP mode). - Page 113 APR175P USER’S GUIDE Introduction If this is your first time setting up the Access Point Controller the Basic Setup is the easiest way to get up and running with a few Wi-Fi network configurations. Alternatively if you wish to manually configure additional Managed Access Points from the Access Point Controller you can follow these basic instructions: The AP Controller has the following management topology: 1) The AP Controller can configure settings of Managed Access Points (up to 7)
- Page 114 APR175P USER’S GUIDE To configure this: 1) Check that all Access Points are in Managed Access Point mode and are on the same physical network and same IP subnet as the Access Point Controller. 2) Click on Managed AP Settings on the top menu and check that all of your Managed Access Points appear in the Access Points list.
- Page 115 APR175P USER’S GUIDE 5) Click on Access Points from the Left side menu, and add an Access Point Group. After setting up the details of your Access Point Group, near the bottom you can configure the Profile Group Settings. Select the Wi-Fi network (WLAN) Group that you created with the Local Wi-Fi Networks.
-
Page 116: Dashboard
APR175P USER’S GUIDE ACCESS POINT CONTROLLER: DASHBOARD Dashboard: System Status The Dashboard System Status will provide you with the current status of the Access Point Controller. It provides you with glance at general setup information such as the firmware version and uptime of the Access Point Controller. -
Page 117: Operational Mode
APR175P USER’S GUIDE Dashboard: Operational Mode If the Access Point is already in Access Point Controller mode, then the Current Operational Mode should show Access Point Controller. There is nothing else needed to configure on this page if that is the intended operational mode. -
Page 118: Basic Setup
APR175P USER’S GUIDE Dashboard: Basic Setup Basic Setup for Access Point Controller Mode is covered earlier in this manual. Please visit the Operational Modes (Basic Setup) section to view the details of Basic Setup for Access Point Controller Mode. -
Page 119: Managed Ap Overview
APR175P USER’S GUIDE Dashboard: Managed AP Overview The Managed AP Overview provides you with information regarding the active Access Points being managed by the Access Point Controller. Access Point Controller Information provides you with basic information regarding the Access Point Controller name, IP address, MAC address and uptime. - Page 120 APR175P USER’S GUIDE Each Managed Access Point will have a Status displayed on the right side. Below is a legend for each status color: Disconnected (Grey): The Access Point cannot be reached and is not available or disconnected from the network.
- Page 121 APR175P USER’S GUIDE Sound the alarm/buzzer on the Access Point Test Network Connectivity of the Access Point (Ping Test) Reboot the Access Point...
-
Page 122: Managed Ap Map
APR175P USER’S GUIDE Dashboard: Managed AP Map The AP Map provides a visual map of all Managed Access Points and their coverage area. This map can be configured by clicking on the Configure button or going directly to the Managed AP Settings > Managed AP Map Edit menu. -
Page 123: Managed Ap Status
APR175P USER’S GUIDE ACCESS POINT CONTROLLER: MANAGED AP STATUS Access Points: Managed APs The Managed APs menu provides you with the full list of active Managed Access Points including information such as their MAC Address, name, IP address, Wi-Fi channel, connected devices, status and a menu of actions for each. - Page 124 APR175P USER’S GUIDE Error (Red): The AP Controller could not connect with the Access Point. This can be because of several reasons such as an authentication error or an incompatible management protocol. Busy (Orange): The AP Controller is in the process of configuring the Access Point. Connecting (Yellow): The AP Controller is attempting to connect to the Access Point.
- Page 125 APR175P USER’S GUIDE Access Points: Managed APs: Editing an Access Point Clicking on the Edit icon will provide you with a menu of options for configuring a specific Access Point. From this page you can edit an Individual Managed Access Point’s settings such as the device name, description of the Access Point, the AP Group that it belongs to as well as the IP address assignment for the Access Point.
- Page 126 APR175P USER’S GUIDE In addition to this topology, each Access Point Group can override settings from the Default System Group and each Access Point can override settings from the Access Point Group that it belongs to. VLAN settings and Wi-Fi Radio Settings can also be configured here, along with Profile Settings for associated WLAN Groups, RADIUS servers and MAC Filters used by the Access Point.
-
Page 127: Access Points: Managed Ap Groups
APR175P USER’S GUIDE Access Points: Managed AP Groups The Access Point Groups list shows the current grouping configuration of all Managed Access Points. These settings can be configured from the Managed AP Settings menu. By default there is a System Default group that all Managed Access Points are associated to until they have been configured to another Access Point Group. - Page 128 APR175P USER’S GUIDE The firmware for all Access Points in the group can also be upgraded using the firmware upgrade button. Access Points: Managed AP Groups: Editing an Access Point Group Clicking the Edit button for Access Point Groups will provide you with a menu of options for configuring the specific AP Group.
- Page 129 APR175P USER’S GUIDE In addition to this topology, each Access Point Group can override settings from the Default System Group and each Access Point can override settings from the Access Point Group that it belongs to. VLAN settings and Wi-Fi Radio Settings can also be configured here for the entire Group, along with Profile Settings for associated WLAN Groups, RADIUS servers and MAC Filters used by all Access Points within the Group.
-
Page 130: Wi-Fi Status: Active Wi-Fi Networks
APR175P USER’S GUIDE Wi-Fi Status: Active Wi-Fi Networks The Active Wi-Fi Networks page shows you all Wi-Fi networks that have been configured via the Wi-Fi Settings menu. Clicking on the Wi-Fi network name/ESSID allows you to edit the settings for that Wi-Fi network. Each WLAN Group can have a maximum of 16 Wi-Fi Networks associated to it. - Page 131 APR175P USER’S GUIDE Note: When creating a Wi-Fi Network, you cannot choose whether the network is a 2.4GHz network or a 5GHz network. That attribute, along with other Wi-Fi radio settings, is determined by the Access Point Group configuration. The Access Point Group can add the Wi-Fi Network Group to its 2.4GHz or 5.0GHz profile to associate the network IDs (SSIDs) and security settings configured on via the Wi-Fi Settings page to the associated Access Points.
-
Page 132: Wi-Fi Status: Active Groups
APR175P USER’S GUIDE Wi-Fi Status: Active Groups View all active Wi-Fi Network Groups and the Wi-Fi networks associated to each group. Each Wi-Fi Network must be added to a Wi-Fi Network Group to be associated to an Access Point Group and eventually to a Managed Access Point. -
Page 133: Connected Devices: Active Devices
APR175P USER’S GUIDE Connected Devices: Active Devices Active Connected Devices shows you information relating to all Wi-Fi devices associated to all Managed Access Points. The list may be refreshed automatically at set time intervals for real time information viewing. -
Page 134: Ap Statistics
APR175P USER’S GUIDE AP Statistics The statistics menu provides you with detailed information regarding each Managed Access Point. To view, select a specific Access Point from the drop down menu. The time intervals for the statistics are by the hour so you may need to wait for the Access Point to be active for at least an hour to begin seeing data on the graphs. -
Page 135: Managed Ap Logs
Managed AP Logs System Logs are useful for viewing the activity and history of any Access Point. The System Log is also used by Amped Wireless technicians to help troubleshoot your router when needed. In Access Point Controller mode, the System Log of any Managed Access Point can be viewed from the Events and Activities Log by selecting the specific Access Point from the dropdown menu. -
Page 136: Network Tools
APR175P USER’S GUIDE Network Tools The Access Point provides you with tools to maintain your network and troubleshoot network problems. To use the tools, simply enter a target IP or URL in the field to begin. Ping Test: Checks network connectivity by entering an IP address or URL into the field to perform a ping test. -
Page 137: Managed Ap Settings
APR175P USER’S GUIDE MANAGED AP SETTINGS Access Points The Managed Access Point Settings menu allows you to edit or delete the list of Managed Access Points controlled by the Access Point Controller. Access Point Groups can also be added, edited, cloned or deleted from this menu. - Page 138 APR175P USER’S GUIDE The AP Controller has the following management topology: The AP Controller can configure settings of Managed Access Points (up to 7) A Managed Access Point can belong to a single Access Point Group An Access Point Group can have a 2.4GHz WLAN Group and a 5.0GHz WLAN Group Each WLAN Group can have up to 16 unique WLAN networks or SSIDs (Wi-Fi Networks) Each Managed Access Point will have a Status displayed on the right side.
- Page 139 APR175P USER’S GUIDE Waiting Association (Blue): The Access Point has not yet been selected for management by the AP Controller. Each Access Point will also have Action icons associated with each: Disassociate the Access Point from management. Edit the Access Point information Flash the LED on the Access Point Sound the alarm/buzzer on the Access Point Test Network Connectivity of the Access Point (Ping Test)
- Page 140 APR175P USER’S GUIDE Access Points: Editing a Managed Access Point Clicking on the Edit button for Access Points will provide you with a menu of options for configuring a specific Access Point. From this page you can edit an Individual Managed Access Point’s settings such as the device name, description of the Access Point, the AP Group that it belongs to as well as the IP address assignment for the Access Point.
- Page 141 APR175P USER’S GUIDE Access Points: Adding an Access Point Group Clicking the Add or Edit button for Access Point Groups will provide you with a menu of options for configuring the specific AP Group. Access Point Group’s settings such as the group name, description and Managed Access Points that are associated to the Group (bottom of the page).
-
Page 142: Wi-Fi Settings
APR175P USER’S GUIDE Wi-Fi Settings The Wi-Fi settings page allows you to create or edit Wi-Fi networks (WLAN networks) and Wi-Fi Network Groups (WLAN Groups). Each WLAN Group can have a maximum of 16 Wi-Fi Networks associated to it. When adding a Wi-Fi Network, unique settings can be configured such as the SSID, Description of the network, Virtual LAN settings, security settings, load balancing as well as other advanced features. - Page 143 APR175P USER’S GUIDE Wi-Fi Settings: Adding a Wi-Fi Network The Wi-Fi settings page allows you to create or edit Wi-Fi networks (WLAN networks) that can then be associated to a Wi-Fi Network Groups (WLAN Groups). Name/ESSID: The identification name of a Wi-Fi network. VLAN ID: The VLAN ID is a feature that allows you to virtually map connected devices and secure access for each SSID created.
- Page 144 APR175P USER’S GUIDE Wireless Client Isolation: Enabling this feature provides an extra layer of security by preventing Wi-Fi devices connected to the selected SSID to communicate with one another (Device Isolation) or by preventing devices connected to an SSID to see devices on another SSID (SSID Isolation). Load Balancing: Limit the number of devices that can connect to the selected SSID.
- Page 145 APR175P USER’S GUIDE Smart Handover: When multiple Access Points are installed in an environment where devices roam over a larger area, Smart Handover allows the Access Point to disconnect a connected device once the signal is crosses a defined RSSI decibel (signal receiving sensitivity) threshold to allow it to easily connect to the neighboring Access Point.
- Page 146 APR175P USER’S GUIDE Each WLAN Group can have a maximum of 16 Wi-Fi Networks associated to it. The WLAN Groups can later be added to an Access Point Group for use with the Access Points associated to the Access Point Group. The VLAN ID settings for each Wi-Fi Network can also be overridden here.
-
Page 147: Radius Server Settings
APR175P USER’S GUIDE RADIUS Server Settings Internal and External RADIUS Servers and accounts can be added here and later assigned to a RADIUS Server Group. An Access Point Group can then add the RADIUS Server Group to its profile and use the RADIUS Server for all Access Points associated to that group and all devices connecting to through those Access Points. - Page 148 APR175P USER’S GUIDE you can select a RADIUS Group to use or you can override a RADIUS Group setting if one has already been set by the Default System Group. Note: Each Wi-Fi Network (WLAN/SSID) must also have RADIUS servers selected as Additional Authentication methods in order for the RADIUS Servers to work.
-
Page 149: Access Control
APR175P USER’S GUIDE Access Control MAC Address filtering can be configured for Access Point Groups to use. To do so, first add a list of MAC Addresses that you wish to apply to the MAC Address filtering rules. Each MAC Address should be separated by a space or a new line. - Page 150 APR175P USER’S GUIDE To do so, go to Managed AP Settings (Top Menu), then Access Points (Left Menu) to edit or add an Access Point Group. Under the Profile Group Settings for the Access Point Group, you can select a MAC Filter Group to use or you can override a MAC Filter Group setting if one has already been set by the Default System Group.
-
Page 151: Managed Ap Map Edit
APR175P USER’S GUIDE Managed AP Map Edit The Managed AP Map Edit menu allows you to upload custom floor plans and customize the Map based on your specific installation environment. Follow the instructions to do this: 1) Click Add to create a new floor plan 2) When the menu appears, clock Choose File to locate the image file for your floor plan. -
Page 152: Firmware Upgrade
APR175P USER’S GUIDE Firmware Upgrade The Access Point Controller provides the ability to upgrade the firmware to multiple Access Points simultaneously. 1) Select the firmware file that you wish to use and Upload it 2) Select the Access Points that you wish to upgrade or select Upgrade All to upgrade all Managed Access Points. -
Page 153: Local Access Point Settings
APR175P USER’S GUIDE LOCAL ACCESS POINT SETTINGS Local Access Point Settings are used to configure the Access Point settings of the Access Point Controller. While in Access Point Controller mode, the Access Point still functions as a standard Access Point and provides access to network devices through 2.4GHz and 5.0GHz Wi-Fi networks. -
Page 154: Technical Specifications
APR175P USER’S GUIDE TECHNICAL SPECIFICATIONS Wireless Standard: 802.11a/b/g/n/ac Ports: 1 x RJ-45 10/100/1000 LAN port Frequency Band: 2.4 GHz, 5.0GHz 1 x RJ-45 10/100/1000 Wireless Speed: 2.4GHz: Up to 450Mbps 5GHz: Up to 1300Mbps PoE / LAN / WAN Port ... -
Page 155: Default Settings
APR175P USER’S GUIDE DEFAULT SETTINGS The default settings for your Access Point are listed here. If for some reason you need to return your Access Point back to default settings, hold down the Reset button on the back panel for 10 seconds. The Access Point will reset back to factory settings as listed below: IP Address: 192.168.80.1 Web Menu Access:... -
Page 156: Troubleshooting & Support
APR175P USER’S GUIDE TROUBLESHOOTING & SUPPORT INFORMATION We are here to help. If you have any issues with your Access Point please contact us. To contact Amped Wireless’ Technical Support use one of the following methods: Phone: 888-573-8820 Email: techsupport@ampedwireless.com Web: www.ampedwireless.com/support... -
Page 157: Troubleshooting
APR175P USER’S GUIDE Troubleshooting The tips in this guide are listed in order of relevance. Try solution (a) before trying solution (b), etc. Troubleshooting: Web Menu Access Issues I entered setup.ampedwireless.com and it failed to open the web menu. Make sure your computer is connected to the Access Point wirelessly and NOT using a network cable. Ensure the power is plugged in and on. - Page 158 APR175P USER’S GUIDE h. If you are using a Static IP, you will need to enter the assigned IP Address into the web browser to access the web menu. When using a Static IP, the setup.ampedwireless.com shortcut will no longer work.
- Page 159 APR175P USER’S GUIDE Troubleshooting: Connection Issues I do not have Internet access when connecting to the Access Point. Your router or original network may not have Internet access. First check to see if you are able to access the Internet by connecting directly with your router. If you cannot, there is a problem with your router that needs to be fixed first.
- Page 160 APR175P USER’S GUIDE My Access Point was working fine previously, but now I can no longer access the Internet through the Access Point. The settings on your router’s network may have changed or you may have lost internet connection on your home router.
- Page 161 APR175P USER’S GUIDE Reset the Access Point back to default settings and try the Basic Setup again. To reset the Access Point back to default settings, hold the Reset Button (on the back panel) down for five (5) to ten (10) seconds. After the Access Point has fully reset, use an Ethernet cable and connect to the Access Point.
- Page 162 APR175P USER’S GUIDE Troubleshooting: Wireless Issues I am only getting 3 or 4 wireless signal bars on my wireless computer and I am within 10 feet of the Access Point. Step back at least 10 feet from the Access Point and check your signal again. The Access Point emits high power, long range Wi-Fi signals that may confuse your wireless adapter signal reading at close range.
- Page 163 APR175P USER’S GUIDE d. Adjust the Antennas of the Access Point in different angles. My wireless adapter does not connect at the maximum wireless speed. Your wireless network adapter may be outdated and have older wireless technology not capable of achieving the wireless network speeds of the Access Point.
- Page 164 APR175P USER’S GUIDE Troubleshooting: Web Menu Feature Issues My Wireless Access Schedule is being erratic and not working at the correct times. You need to adjust your Time Zone Settings from the Management web menu page. Wi-Fi Protected Setup (WPS) is not working. Push button configuration does not detect the connection. The Access Point supports WPS connections however some companies may use proprietary code for their own push button configurations.
- Page 165 APR175P USER’S GUIDE Many of the features in the Web Menu are greyed out and cannot be selected. For example, in Advanced Features most features are not selectable. Certain features such as Port Forwarding and DMZ are only available when the Access Point is in Router mode.
- Page 166 APR175P USER’S GUIDE Troubleshooting: Access Point Controller Issues I cannot access the Wi-Fi networks of the Access Point Controller. (Not the Wi-Fi networks of the Managed Access Points). The “Local AP Wi-Fi” settings for the AP Controller may be disabled. b.
- Page 167 APR175P USER’S GUIDE blocking communication between the Access Points, Basic Setup will not be able to discover the Access Points to configure them. Please make sure all Access Points are on the same network. Check that all Managed Access Points are on the same IP subnet as the Access Point Controller. Normally IP addresses are provided by the DHCP Server on your network’s router, however if your network is running a static IP configuration, you will need to manually enter the IP for the AP Controller and all Managed APs before configuring.
- Page 168 APR175P USER’S GUIDE I cannot configure Wi-Fi networks for my Managed Access Points. Access Point Controller Management Topology: The AP Controller can configure settings of Managed Access Points (up to 7). A Managed Access Point can belong to a single Access Point Group. An Access Point Group can have a 2.4GHz WLAN Group and a 5.0GHz WLAN Group.
- Page 169 APR175P USER’S GUIDE I have configured MAC Address Filtering and/or RADIUS servers, but they do not work for my Managed Access Points. Each Wi-Fi Network (WLAN/SSID) must also have RADIUS servers or MAC Filters selected as an Additional Authentication method in order for the feature to work. This can be configured here: Managed AP Settings >...
-
Page 170: Warranty & Regulatory Information
The Amped Wireless (A division of Newo Corporation, Inc.) Limited Warranty Warranty Period: The Amped Wireless Limited Warranty is for one (1) year from the date of purchase for new products. Refurbished products carry the Limited Warranty for thirty (30) days after the date of purchase. - Page 171 A dated proof of original purchase and the RMA number is required to process warranty claims. You are responsible for properly packaging and shipping the product at your cost and risk to Amped Wireless. The bearer of cost related to shipping repaired or replaced product back to the purchaser will be at the sole...
- Page 172 APR175P USER’S GUIDE discretion of Amped Wireless and determined based on the details of each RMA case. Customers outside of the United States of America are responsible for all shipping and handling costs including custom duties, taxes and all other related charges.
- Page 173 USER’S GUIDE Regulatory Information FCC Statement and Declaration: Amped Wireless declares that this device complies with Part 15 of the FCC Rules and Regulations. Operation of this device is subject to the following two (2) conditions: (1) This device may not cause harmful interference (2) This device must accept any interference received, including interference that may cause undesired operation.
- Page 174 APR175P USER’S GUIDE Connect the equipment to an outlet on a circuit different from that to which the receiver is connected. Consult the dealer or an experienced radio/TV technician for help. FCC Caution and Safety Notices: Any changes or modifications (including the antennas) made to this device that are not expressly approved by the manufacturer may void the user’s authority to operate the equipment.
- Page 175 APR175P USER’S GUIDE FCC Radiation Exposure Statement: This equipment complies with FCC radiation exposure limits set forth for an uncontrolled environment. This equipment should be installed and operated with minimum distance 20cm between the radiator & your body.
- Page 176 APR175P USER’S GUIDE Industry Canada Statement: This Class B digital apparatus complies with RSS-210 and ICES-003 of the Industry Canada Rules. Operation of this device is subject to the following two (2) conditions: (1) This device may not cause harmful interference (2) This device must accept any interference received, including interference that may cause undesired operation.
- Page 177 APR175P USER’S GUIDE Déclaration d’Industrie Canada : Cet appareil numérique de classe B est conforme aux réglementations RSS- 210 et ICES-003 d’Industrie Canada. Le fonctionnement de cet appareil est sujet aux deux conditions suivantes: (1) Cet appareil ne peut pas causer de brouillage préjudiciable (2) Cet appareil doit accepter toute interférence reçue, y compris les interférences pouvant provoquer un dysfonctionnement.
-
Page 178: Legal Notices And Disclaimers
LEGAL NOTICES & DISCLAIMERS Copyright Information and Trademark Usage Guidelines © 2014 Amped Wireless / Newo Corporation. All rights reserved. Amped Wireless, Newo Corporation, and the Amped Wireless logo are registered trademarks or trademarks of Newo Corporation. All non-Amped Wireless trademarks, logos, brands and products are trademarks or registered trademarks of their respective owners. - Page 179 USER’S GUIDE purposes is strictly prohibited. The Amped Wireless logo requires permission for use. For use of the Amped Wireless logo, please email legal@ampedwireless.com. Use of Amped Wireless' trademarks requires the use of the proper trademark symbol in all usage cases.
- Page 180 APR175P USER’S GUIDE damage to data arising out of the use or inability to use any Amped Wireless product, damages resulting from use of or reliance on information present, even with prior notice to Amped Wireless. All non-Amped Wireless trademarks, logos, brands and products are trademarks or registered trademarks of their respective owners.
- Page 181 Software, including but not limited to any Open Source Software, is solely at your own risk. Amped Wireless is not responsible for any such modification or tampering. Amped Wireless will not support or warrant any product in which you have or have attempted to modify the Software provided by Amped Wireless.
- Page 182 AMPED WIRELESS IS NOT RESPONSIBLE FOR ANY DAMAGE TO THE PURCHASER’S COMPUTER SYSTEM OR DATA. All title and copyrights in and to the Software and any copies thereof are owned by Amped Wireless or its partners/suppliers. All title and intellectual property rights in and to the content which may be accessed through use of the Software is the property of the respective content owner and may be protected by applicable copyright or other intellectual property laws and treaties.
- Page 183 This section describes how you agree to resolve any disputes with Amped Wireless regarding these Terms of Use or your purchase of any product from Amped Wireless and your use of that product. You and Amped Wireless agree to the following resolution process.
- Page 184 AAA Rules. If your claim against Amped Wireless is for less than $10,000, Amped Wireless will pay all arbitration fees. If your claim against Amped Wireless is for $10,000 or more, you are responsible for paying your own portion of the fees set forth in the AAA’s fee schedule for consumer disputes, and Amped Wireless will pay all remaining...
- Page 185 USER’S GUIDE As an exception to this arbitration agreement, Amped Wireless is happy to give you the right to pursue in small claims court any claim that is within that court's jurisdiction as long as you proceed only on an individual basis.
- Page 186 888-573-8820 e-mail techsupport@ampedwireless.com www.ampedwireless.com Amped Wireless A Division of Newo Corporation Copyright © 2014 Amped Wireless / Newo Corporation. All rights reserved. Amped Wireless, Newo Corporation, and the Amped Wireless Logo are registered trademarks or trademarks of Newo Corporation.
Need help?
Do you have a question about the APR175P ProSeries AC1750 and is the answer not in the manual?
Questions and answers