Table of Contents
Advertisement
Quick Links
Advertisement
Table of Contents

Related Manuals for Amped Wireless HighPower AC1750


Summary of Contents for Amped Wireless HighPower AC1750
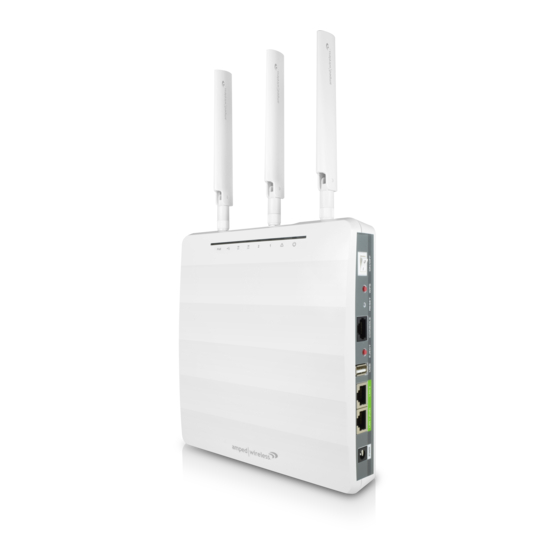
- Page 1 SETUP GUIDE PROSERIES HIGHPOWER AC1750 ACCESS POINT / ROUTER WI-FI ®...
-
Page 2: Table Of Contents
CONTENTS PACKAGE CONTENTS ..........2 WEB MENU NAVIGATION AND FEATURES ..44 Package Contents ..........2 WI-FI Settings ............45 LED Indicators ............3 Network Settings..........46 Mounting Instructions ........... 5 Advanced Settings ..........47 Administration ............. 47 GETTING STARTED ..........6 ACCESS POINT CONTROLLER FEATURES ..... -
Page 3: Package Contents
PACKAGE CONTENTS Package Contents Check to make sure you have all the contents within your package: ProSeries High Power AC1750 Wi-Fi Access Point / Router 3 x Detachable High Gain 3dBi Antennas Magnetic Mounting Kit & Mounting Template ... -
Page 4: Led Indicators
LED INDICATORS From left to right: PoE: Indicates when there is an active PoE connection on the LAN1 wired port. LED will remain on. USB: Indicates when there is a USB device is attached to the USB port. 5.0GHz Wi-Fi: Blinks rapidly when Wi-Fi data traffic is transmitted or received over the wireless network. 2.4GHz Wi-Fi: Blinks rapidly when Wi-Fi data traffic is transmitted or received over the wireless network. - Page 5 SIDE PANEL DESCRIPTION PWR: Power adapter port. 12V 4A. LAN1 / WAN (PoE): Gigabit RJ-45 port with Power over Ethernet input. Connect wired devices or to a PoE switch to use the Access Point without the power adapter. Functions as the port connected to your network in Access Point modes and WAN port in Router mode.
-
Page 6: Mounting Instructions
MOUNTING INSTRUCTIONS Magnetic Mounting The mounting kit included with the Access Point provides a convenient method to mount the Access Point on a wall or ceiling. Once you have chosen the location for where you want to install the Access Point, locate the Mounting Template. -
Page 7: Getting Started
GETTING STARTED a) Attach the included antennas to the antenna ports on the Access Point / Router. b) Power on the Access Point / Router by attaching either the power adapter to the Access Point / Router and plugging in the other end into a power outlet or attaching a PoE Ethernet cable to LAN1 / WAN on the side panel and the other end to an active PoE switch. -
Page 8: Operational Modes (Basic Setup)
OPERATIONAL MODES (BASIC SETUP) The Access Point features five different operational modes that can be configured via the web menu: Router Access Point WDS Access Point Managed Access Point Access Point Controller... -
Page 9: Router Mode
ROUTER MODE OVERVIEW Share a single Internet connection via a connection to a broadband modem or other Internet source and provide a secure firewall for your network. Router mode features 2.4GHz and 5.0GHz Wi-Fi connections as well as one wired port for local wired devices and switches. - Page 10 ROUTER MODE BASIC SETUP Setup Preparations Disconnect and power off your existing router (if you have one). Disconnect your existing router from your computer, your broadband modem and its power outlet. If you do not have an existing router please continue to the next step.
- Page 11 Connect the Router to your Modem a) Use the included Ethernet cable and connect one end of the cable to your modem. Connect the other end of the cable to the blue “Modem” port on the Router. Power On your Modem Plug in your modem’s power adapter and backup battery (if available):...
- Page 12 Attach Antennas, Power On & Connect to your Computer a) Attach the included antennas to the antenna ports on the Access Point / Router. b) Power on the Access Point / Router by attaching either the power adapter to the Access Point / Router and plugging in the other end into a power outlet or attaching a PoE Ethernet cable to LAN1 / WAN on the side panel and the other end to an active PoE switch.
- Page 13 Open your Web Browser a) Open your web browser. b) Type in: http://setup.ampedwireless.com into the web address bar. If the web menu fails to open, type in the following IP address into your web address bar: http://192.168.80.1 If you have problems accessing the Web Menu… Disable third-party firewalls such as Norton, Zone Alarm or Windows Defender.
- Page 14 Select the Operational Mode a) After the web menu appears, select Dashboard from the navigation menu on the top of the page. b) Select Operational Mode from the left hand navigation. Using the dropdown menu, select Router Mode the Operational Mode and click Apply. d) When the web menu has reloaded, select Basic Setup.
- Page 15 Basic Setup Wizard Confirm that your hardware is correctly connected and Click Next begin. Internet Connection Detection The Wizard will try to detect your Internet settings and configure the router. Please be patient.
- Page 16 If there was a problem with the Automatic Configuration, the wizard will notify you of the issue. If you continue to have problems, contact our support department at 888-573-8820. If the Internet connection detection was successful, you will see a green check.
- Page 17 Wi-Fi Settings The default ID of your 5.0GHz Wi-Fi network and 2.4GHz Wi-Fi network is: Amped_APR_5.0 Amped_APR_2.4 To change it, enter a new name in the SSID field. Users connecting wirelessly to the Router will use these IDs to identify your wireless network.
- Page 18 Setup Summary Once the Router has rebooted, it will load the Setup Summary page and provide you with the details of your setup. It is recommended that you print this page for your records. Open a new web browser window and check that you have access to the Internet.
-
Page 19: Access Point Mode
ACCESS POINT MODE OVERVIEW Access Point mode creates a new Wi-Fi network for users to connect to by connecting to a local port on your network (i.e. via a network switch or local router network port). Devices connected to the Access Point are on the same network as the router and have the ability to access files from devices on the same network. - Page 20 ACCESS POINT MODE BASIC SETUP Connect the Access Point to your Router/Network: a) Attach the antennas to the Access Point. b) Plug in the Power Adapter. Using the included RJ-45 Ethernet cable, attach one end to the Access Point’s LAN 1/WAN port and the other to your router’s network port (or any available port on a network switch).
- Page 21 Open your Web Browser a) Open your web browser. b) Type in: http://setup.ampedwireless.com into the web address bar. If the web menu fails to open, type in the following IP address into your web address bar: http://192.168.80.1 If you have problems accessing the Web Menu: Disable third-party firewalls such as Norton, Zone Alarm or Windows Defender.
- Page 22 Select the Operational Mode a) After the web menu appears, select Dashboard from the navigation menu on the top of the page. b) Select Operational Mode from the left hand navigation. Using the dropdown menu, select Access Point Mode for the Operational Mode and click Apply.
- Page 23 Basic setup will detect your network settings and automatically configure the Access Point to your network. If there was a problem with the configuration, Basic Setup will notify you of the issue. If you continue to have problems, contact our support department at 888-573-8820.
- Page 24 Wi-Fi Settings The default Wi-Fi network ID of your 5GHz Wi-Fi network and 2.4GHz Wi-Fi network is: Amped_APR_5.0 Amped_APR_2.4 To change it, enter a new name in the SSID field. Users connecting wirelessly to the Access Point will use these IDs to identify your wireless network.
- Page 25 Setup Summary Once the Access Point has rebooted, it will load the Setup Summary page and provide you with the details of your setup. It is recommended that you print this page for your records. Open a new web browser window and check that you have access to the Internet.
-
Page 26: Wds - Access Point Mode
WDS – ACCESS POINT MODE (WPS-AP) OVERVIEW WDS (Wireless Distribution System) Access Point mode enables the wireless interconnection of Access Points. Access Points traditionally connect to the network via a cable (see Access Point Mode), however in WDS- Access Point mode, Access Points connect to the network wirelessly and create a wireless or wired network for devices to connect to. - Page 27 WDS – ACCESS POINT MODE (WPS-AP) BASIC SETUP Connect the Access Point to your Router/Network: a) Attach the antennas to the Access Point. b) Plug in the Power Adapter. Using the included RJ-45 Ethernet cable, attach one end to the Access Point’s LAN 1/WAN port and the other to your router’s network port (or any available port on a network switch).
- Page 28 Open your Web Browser a) Open your web browser. b) Type in: http://setup.ampedwireless.com into the web address bar. If the web menu fails to open, type in the following IP address into your web address bar: http://192.168.80.1 If you have problems accessing the Web Menu: Disable third-party firewalls such as Norton, Zone Alarm or Windows Defender.
- Page 29 Select the Operational Mode a) After the web menu appears, select Dashboard from the navigation menu on the top of the page. b) Select Operational Mode from the left hand navigation. Using the dropdown menu, select WDS - Access Point Mode for the Operational Mode and click Apply.
- Page 30 WDS Settings WDS - AP mode requires additional Access Points also functioning in WDS - AP mode. Each WDS enabled Access Point connects to the other via MAC addresses. Enter the MAC addresses of the Access Points with WDS enabled into the corresponding fields that you wish to connect to.
- Page 31 Wi-Fi Settings In addition to interconnecting Access Points, WDS-AP mode allows for Wi-Fi connections to the Access Point from Wi-Fi devices such as a PC or tablet. The default Wi-Fi ID’s of your 5GHz Wi-Fi network and 2.4GHz Wi-Fi network are: Amped_APR_5.0 Amped_APR_2.4 To change it, enter a new name in the SSID field.
- Page 32 Setup Summary Once the Access Point has rebooted, it will load the Setup Summary page and provide you with the details of your setup. It is recommended that you print this page for your records. The Summary will display the status of each WDS connection and the signal strength of each connection.
-
Page 33: Managed Access Point Mode
MANAGED ACCESS POINT MODE OVERVIEW Managed Access Point mode functions similarly to Access Point mode however the majority of settings of the Access Point are managed remotely from a single designated Access Point Controller. This mode is typically used for deployments where multiple Access Points are installed and configuring all devices simultaneously is more convenient. -
Page 34: Access Point Controller Mode
ACCESS POINT CONTROLLER MODE OVERVIEW Access Point Controller mode creates a master Access Point to manage all Access Points (up to 7 simultaneously) that are functioning in Managed Access Point mode (Access Point Controllers cannot manage other devices in Router mode, Access Point mode or WDS-Access Point mode). The Access Point Controller provides a single web based interface to manage the Wi-Fi SSID, security, VLAN, group settings, firmware upgrades and much more for all Managed Access Points. - Page 35 ACCESS POINT CONTROLLER MODE BASIC SETUP Connect the Access Point to your Router/Network: a) Attach the antennas to the Access Point. b) Plug in the Power Adapter. Using the included RJ-45 Ethernet cable, attach one end to the Access Point’s LAN 1/WAN port and the other to your router’s network port (or any available port on a network switch).
- Page 36 Open your Web Browser a) Open your web browser. b) Type in: http://setup.ampedwireless.com into the web address bar. If the web menu fails to open, type in the following IP address into your web address bar: http://192.168.80.1 If you have problems accessing the Web Menu… Disable third-party firewalls such as Norton, Zone Alarm or Windows Defender.
- Page 37 Select the Operational Mode a) After the web menu appears, select Dashboard from the navigation menu on the top of the page. b) Select Operational Mode from the left hand navigation. Using the dropdown menu, select Access Point Controller Mode for the Operational Mode and click Apply.
- Page 38 Basic Setup Wizard Before we begin please check that: a) All Managed Access Points are powered on. b) All Managed Access Points are set to “Managed Access Point” operational modes. If they are not please do so from the Web Menu for each Access Point.
- Page 39 Managed Access Point Detection Basic setup will scan for all available Managed Access Points on your network. This may take a minute. Once complete a list of available Managed Access Points will appear. Select the Access Points that you wish to configure.
- Page 40 Each Managed Access Point will have a Status displayed on the right side. Below is a legend for each status color: Disconnected: The Access Point cannot be reached and is not available or disconnected from the network Error: The AP Controller could not connect with the Access Point. This can be because of several reasons such as an authentication error or an incompatible management protocol.
- Page 41 Wi-Fi Settings: Managed Access Points Configure Wi-Fi settings (Primary and secondary network SSIDs and security) for the group of selected Managed Access Points from this page. The Access Points will all have the same settings. You can also configure the device name for each Access Point. The default Wi-Fi ID for 5.0GHz &...
- Page 42 Once complete, you can choose to click Apply to apply the settings and choose a new group of Managed Access Points to configure with new settings. If you are finished, and have no other Managed Access Points to configure, click Next to continue to Wi-Fi Settings for the Access Point Controllers own Wi-Fi network.
- Page 43 Wi-Fi Settings: AP Controller’s Local Wi-Fi The Access Point Controller also features its own Wi-Fi networks. By default the Access Point Controller’s Wi-Fi networks are disabled to optimize the performance of the Access Point Controller’s management functions. You can enable them here, however, during heavy usage, this may negatively impact the performance of the Access Point Controller.
- Page 44 Setup Summary Once the Access Point has rebooted, it will load the Setup Summary page and provide you with the details of your setup. It is recommended that you print this page for your records. The Summary will display the Wi-Fi settings and groups of Managed Access Points using those Wi-Fi settings.
-
Page 45: Web Menu Navigation And Features
WEB MENU NAVIGATION AND FEATURES The Access Point / Router has many additional features and settings that can be configured via the Web Menu. To access these settings start with the navigation menu located on the top of the Web Menu. Once the desired menu is selected, additional navigational options will appear on the left hand side. -
Page 46: Wi-Fi Settings
Dashboard The Dashboard provides you with glance at general setup information and provides options for the basic setup of the Access Point. You can view the current operational mode, Wi-Fi settings, wired port information and IP settings from their corresponding status pages. The list of connected devices can also be accessed here along with any WDS settings that may be configured for the WDS- AP operational mode. -
Page 47: Network Settings
connected to SSID 1 will not be able to see or access devices or files on SSID 2 (VLAN 2). VLAN IDs can range between 1 and 4094. Wi-Fi security settings can also be accessed here that apply to each Wi-Fi network. These settings include SSID broadcasting, Internet only access, device isolation, load balancing and enabling MAC filtering access controls and RADIUS authentications. -
Page 48: Advanced Settings
Advanced Settings Many of the firewall security features in the Advanced Settings menu are available only in the Router operational mode. If the Access Point is not in Router mode, these settings may not be available. Administration Configure general settings such as, clock settings, management protocols, system logs, LED settings, alarm settings, upgrade firmware and password settings from the Administration Menu. -
Page 49: Access Point Controller Features
ACCESS POINT CONTROLLER FEATURES When the Access Point is in Access Point Controller Mode a more advanced web menu is provided to provide configuration options for a group of Managed Access Points (Up to 7) in addition to the Access Point Controllers own local Access Point settings. -
Page 50: Walk Through: Configuring An Access Point
Access Point Controller Management Topology When configuring the Access Point Controller it is important to understand the management topology: 1) The AP Controller can configure settings of Managed Access Points (up to 7) 2) A Managed Access Point can belong to a single Access Point Group 3) An Access Point Group can have a 2.4GHz WLAN Group and a 5.0GHz WLAN Group 4) Each WLAN Group can have up to 16 unique WLAN networks or SSIDs WALK THROUGH: How to Configure Managed Access Points... - Page 51 3) Go to Wi-Fi Settings on the left hand menu and add Local Wi-Fi Networks. 4) Once you have Local Wi-Fi Networks created, add them to a Local Wi-Fi Network Group...
- Page 52 5) Click on Access Points from the Left side menu, and add an Access Point Group. 6) After setting up the details of your Access Point Group, near the bottom you can configure the Profile Group Settings. Select the Wi-Fi network (WLAN) Group that you created with the Local Wi- Fi Networks.
-
Page 53: Dashboard
Dashboard System Status: Provides a glance at general setup information and its current settings. Operational Mode: Change operational modes to exit Access Point Controller mode. Basic Setup: Initial configuration of the Access Point Controller The Managed AP Overview: Provides information regarding the active Access Points being managed by the Access Point Controller. -
Page 54: Managed Ap Status
Managed AP Status Access Points: Managed APs: Provides the full list of active Managed Access Points including information such as their MAC Address, name, IP address, Wi-Fi channel, connected devices, status and a menu of actions for each. The menu of actions include: Access Points: Managed AP Groups: Provides the list of all active Managed Access Points categorized by their corresponding AP Groups. - Page 55 Managed AP Logs: View the activity and history of any Managed Access Point. The System Log is also used by Amped Wireless technicians to help troubleshoot your router when needed. In Access Point Controller mode, the System Log of any Managed Access Point can be viewed from the Events and Activities Log by selecting the specific Access Point from the dropdown menu.
-
Page 56: Managed Ap Settings
Managed AP Settings The Managed Access Point Settings: Edit or delete the list of Managed Access Points controlled by the Access Point Controller. Access Point Groups can also be created that include a single or multiple Managed Access Point (up to 7). Each Access Point Group can be assigned its own set of configurations and Wi-Fi settings by assigning a WLAN Group to each Access Point Group for 2.4GHz and 5.0GHz networks. - Page 57 Wi-Fi Settings: Local Wi-Fi Networks can be added, edited, cloned or deleted here. These Local Wi-Fi Networks (WLANs) can then be added to Wi-Fi Network Groups (WLAN Groups) which are then associated to an Access Point or Access Point Group. Each WLAN Group can have a maximum of 16 Wi-Fi Networks associated to it.
- Page 58 RADIUS Servers: Internal and External Radius Servers can be added here and later assigned to Wi-Fi networks and Access Point Groups. Access Control: MAC Address filtering can be configured for Access Point Groups to use to deny or allow access to specific devices via their MAC Address.
-
Page 59: Limited Warranty
The Amped Wireless (A division of Newo Corporation, Inc.) Limited Warranty Warranty Period: The Amped Wireless Limited Warranty is for one (1) year from the date of purchase for new products. Refurbished products carry the Limited Warranty for thirty (30) days after the date of purchase. - Page 60 A dated proof of original purchase and the RMA number is required to process warranty claims. You are responsible for properly packaging and shipping the product at your cost and risk to Amped Wireless. The bearer of cost related to shipping repaired or replaced product back to the purchaser will be at the sole discretion of Amped Wireless and determined based on the details of each RMA case.
-
Page 61: Legal Notices And Disclaimers
Technical Support: The Amped Wireless Limited Warranty is not related to the terms, conditions and policies of Amped Wireless Elite Support offerings. For questions regarding support, please contact techsupport@ampedwireless.com. LEGAL NOTICES AND DISCLAIMERS Copyright Information and Trademark Usage Guidelines © 2014 Amped Wireless / Newo Corporation. All rights reserved. Amped Wireless, Newo Corporation, and the Amped Wireless logo are registered trademarks or trademarks of Newo Corporation. - Page 62 Amped Wireless product, damages resulting from use of or reliance on information present, even with prior notice to Amped Wireless.
- Page 63 IEEE or Wi-Fi standards. Software Licenses / Disclaimers This product contains Software (including firmware), licensed to you, the purchaser, by Amped Wireless. This also includes Software downloaded from an authorized website, such as www.ampedwireless.com...
- Page 64 Software, including but not limited to any Open Source Software, is solely at your own risk. Amped Wireless is not responsible for any such modification or tampering. Amped Wireless will not support or warrant any product in which you have or have attempted to modify the Software provided by Amped Wireless.
- Page 65 AMPED WIRELESS IS NOT RESPONSIBLE FOR ANY DAMAGE TO THE PURCHASER’S COMPUTER SYSTEM OR DATA. All title and copyrights in and to the Software and any copies thereof are owned by Amped Wireless or its partners/suppliers. All title and intellectual property rights in and to the content which may be accessed through use of the Software is the property of the respective content owner and may be protected by applicable copyright or other intellectual property laws and treaties.
- Page 66 Wireless. Because we prefer to resolve our issues with you directly, you agree to arbitrate with Amped Wireless only in your individual capacity, not as a representative or member of a class. As such, your claims may not be joined with any other claims and there shall be no authority for any dispute to be arbitrated on a class-action basis or brought by a purported class representative.
- Page 67 If you believe you cannot afford the AAA’s fee, you may apply to the AAA for a waiver. As an exception to this arbitration agreement, Amped Wireless is happy to give you the right to pursue in small claims court any claim that is within that court's jurisdiction as long as you proceed only on an individual basis.
- Page 68 888-573-8820 e-mail techsupport@ampedwireless.com www.ampedwireless.com Amped Wireless A Division of Newo Corporation Copyright © 2015 Amped Wireless / Newo Corporation. All rights reserved. Amped Wireless, Newo Corporation, and the Amped Wireless Logo are registered trademarks or trademarks of Newo Corporation.
Need help?
Do you have a question about the HighPower AC1750 and is the answer not in the manual?
Questions and answers