Table of Contents
Advertisement
Quick Links
To w e r
®
Hobbies
guarantees
this kit to be
free from defects
in both material and
workmanship
at
the
date of purchase. This
warranty does not cover any
component parts damaged by
use or modification. In no case
shall Tower Hobbies' liability exceed
the original cost of the purchased kit.
Further, Tower Hobbies reserves the right to
change or modify this warranty without notice.
In that Tower Hobbies has no control over the final
assembly or material used for final assembly, no
liability shall be assumed nor accepted for any damage
resulting from the use by the user of the final user-
assembled product. By the act of using the user-assembled
product, the user accepts all resulting liability.
If the buyer is not prepared to accept the liability associated with the
use of this product, the buyer is advised to return this kit immediately in
new and unused condition to the place of purchase.
To make a warranty claim send the defective part or item to Hobby Services at
the address below:
Include a letter stating your name, return shipping address, as much contact information
as possible (daytime telephone number, fax number, e-mail address), a detailed description
problem will be evaluated as quickly as possible.
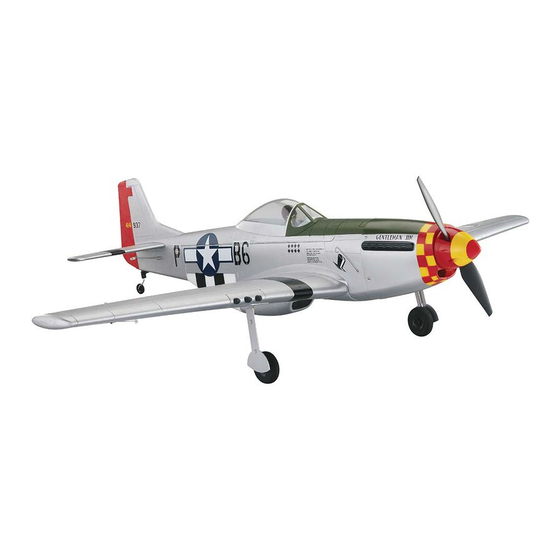
LENGTH
34 in [864 mm]
WINGSPAN
40 in [1016 mm]
WING AREA
303 in
2
[15.2 dm
2
]
READ THROUGH THIS MANUAL
BEFORE STARTING CONSTRUCTION.
IT CONTAINS IMPORTANT INSTRUCTIONS
AND WARNINGS CONCERNING THE
ASSEMBLY AND USE OF THIS MODEL.
INSTRUCTION
MANUAL
WEIGHT
29 .7–32 oz [840 –905 g]
WING LOADING
14.1–15.2 oz/ft
[43–46 g/dm
2
4-Channel minimum required
TOWER HOBBIES
Champaign, Illinois
(217) 398-8970 ext. 5
TOWA2000 Mnl 1.1
©2010 Tower Hobbies
]
2
RADIO
®
Advertisement
Table of Contents

Related Manuals for Tower Hobbies P-51D Mustang


Summary of Contents for Tower Hobbies P-51D Mustang
-
Page 1: Tower Hobbies
[15.2 dm 4-Channel minimum required change or modify this warranty without notice. In that Tower Hobbies has no control over the final assembly or material used for final assembly, no READ THROUGH THIS MANUAL liability shall be assumed nor accepted for any damage BEFORE STARTING CONSTRUCTION. -
Page 2: Table Of Contents
IMPORTANT: Two of the most important things you can do TABLE OF CONTENTS to preserve the radio controlled aircraft hobby are to avoid fl y- AMA ..........2 ing near full-scale aircraft and avoid fl... -
Page 3: Required Items
ORDERING REPLACEMENT PARTS We, as the kit manufacturer, provide you with a top quality, Replacement parts are available from Tower Hobbies for your thoroughly tested kit and instructions, but ultimately the P-51. Our order assistance representatives are ready to answer quality and fl... -
Page 4: Kit Contents
KIT CONTENTS 1. Fuselage and Motor 5. Main Landing Gear 9. Wing Tubes 2. Canopy / Hatch 6. Belly Scoop 10. Prop Adapter 3. Spinner 7. Horizontal Tail 4. Prop 8. Wings ASSEMBLE THE WING ❏ Read the Lithium Battery Handling and Usage section on page 11 of this manual. -
Page 5: Assemble The Fuselage
That completes the wing assembly. Set the wing aside and begin the fuselage assembly. ASSEMBLE THE FUSELAGE ❏ Slide the stabilizer into the opening in the fuselage. When you install the stabilizer, slide the right side of the stabilizer into the left side of the fuselage. -
Page 6: Radio Setup
To prepare your other battery packs, you may purchase more Great Planes hook and loop material (GPMQ4480) from Tower Hobbies. ❏ From the bottom of the battery tray, route the hook and loop battery strap through the slots in the tray. -
Page 7: Install The Landing Gear (Optional)
❏ Fit the radiator air scoop to the belly over the wing bolt. The magnets located in the scoop and fuselage hold it in place. ❏ Using your radio, center the aileron servos. Check to see that the ailerons are also centered. If they need adjustment, ❏... -
Page 8: Install The Propeller And Spinner
❏ ❏ Assemble the tailwheel as shown. Screw the set screw Fit the spinner backplate to the prop adapter. Fit the into the tailwheel guide. Slide the tailwheel guide onto the propeller, prop washer, and prop nut. Position the propeller so tailwheel post and tighten the set screw against the fl... -
Page 9: Check The Control Throws
If the control throws are too high, you can move the pushrod RIGHT AILERON connectors on the servo arms inward (toward the output shaft) RUDDER MOVES UP to decrease total travel. MOVES LEFT AILERON RIGHT MOVES DOWN These are the recommended control surface throws: HIGH RATE LOW RATE Down... -
Page 10: Apply The Decals
APPLY THE DECALS This is where your model should balance for the fi rst fl ights. Later, you may wish to experiment by shifting the C.G. up to 1/4″ [6mm] forward or 1/4″ [6mm] back to change the fl ying characteristics. Moving the C.G. forward may improve the smoothness and stability, but the model may then require more speed for takeoff and make it more diffi... -
Page 11: Lithium Battery Handling & Usage
■ Keep your face and body, as well as all spectators, away from Perform a Range Check the plane of rotation of the propeller as you operate the motor. As a precaution, an operational ground range test should be ■ Keep these items away from the prop: loose clothing, shirt performed before the fi... -
Page 12: Rog Take Off
If the surface is smooth (such as pavement or blacktop) the P-51 the glide path and altitude. Continue to apply elevator until the can take off from the ground. But most grass is probably too tall, model touches down at which time you should be holding full, so if fl...
Need help?
Do you have a question about the P-51D Mustang and is the answer not in the manual?
Questions and answers