WaterLogic WL250 Operating, Installation And Service Manual
Hide thumbs
Also See for WL250:
- Operating, installation and service manual (63 pages) ,
- Troubleshooting manual (12 pages) ,
- Pre-installation manual (10 pages)

Subscribe to Our Youtube Channel
Related Manuals for WaterLogic WL250


Summary of Contents for WaterLogic WL250
- Page 1 WL250 OPERATING, INSTALLATION, AND SERVICE MANUAL Waterlogic Commercial Products, LLC 11710 Stonegate Circle Omaha, NE 68164 (800) 288-1891 www.waterlogic.us...
-
Page 2: Table Of Contents
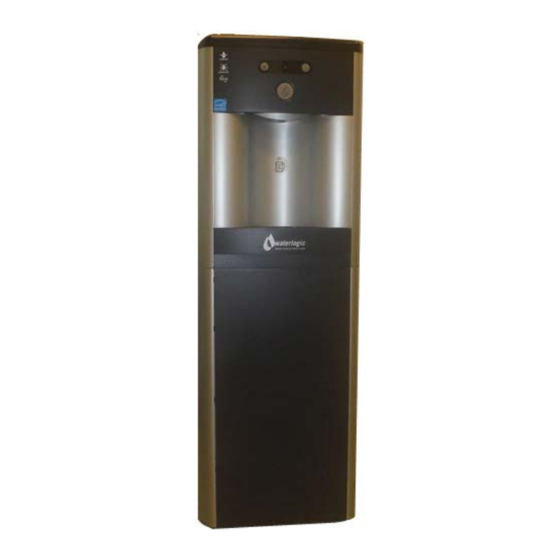
WL250 OPERATING, INSTALLATION, AND SERVICE MANUAL Congratulations on your choice of the Waterlogic WL250 water treatment system. The WL250 model dispenses cold, and hot. Every WL250 includes: Bio-Cote Anti-Microbial Protection Advanced In-Tank Ultraviolet (UV) Purification The Waterlogic WL250 provides exceptional quality and great tasting water with every use. -
Page 3: Features And Benefits
Child Safeguard WL250 requires Hot Water selection followed by main dispense for Hot Water, and defaults back to cold selection after 3 seconds of inactivity to prevent accidental dispensing of hot water. -
Page 4: Certifications
Intertek Labs (ETL) Certified the WL250 to ANSI/UL 399 Standard for Drinking Water Coolers. BPA Free - Waterlogic tests for BPA and declares that all of its products are Bisphenol-A FREE and contain no harmful BPA plastics. NSF/ANSI-61 – Certified Drinking Water System Components The WL-250 has been tested and certified by The Water Quality Association (WQA) to NSF/ANSI-61, Section 9. -
Page 5: Introduction And Safety Alert Symbols
INTRODUCTION Carefully read and follow all instructions to ensure proper and efficient operation of your WL250. Contact Waterlogic or an Authorized Waterlogic Dealer if you have any questions. Waterlogic and Authorized Waterlogic Dealers employ trained service personnel who are experienced in the installation, function and repair of Waterlogic equipment. This publication is written for use by these qualified individuals. -
Page 6: Safety Precautions
Dispenser Could Tip or Fall causing serious injury. Always install unit on a firm, flat, and level surface and secure the WL250 to the base cabinet with the screw provided to lock the components together. Never place heavy items on top of unit and never climb, stand, or hang on unit or storage cabinet to prevent injury and damage. -
Page 7: Model And Part Designations
UV Lamp System 0.15 Amps WL250 TOTAL 6.15 Amps #WL250 Counter Top is 17.75 in. tall and may not fit between countertops and cabinets - Check installation to ensure adequate clearance. WL250 Operating, Installation, and Service Manual Page 7 - Revision: 5-14-2015... -
Page 8: Operating Instructions
Cold Water Hot Water Select Select Dispensing Button The above picture shows front LCD display and control panel for the Waterlogic WL250. For Cold Water: Press Cold Water Select Button followed by the Dispensing Button (within 3 seconds). For Hot Water: Press Hot Water Select Button followed by the Dispensing Button (within 3 seconds). -
Page 9: Hot Tank Principles Of Operation
HOT TANK PRINCIPLES OF OPERATION All Waterlogic Hot Tanks have a built in Vent or Expansion Chamber in the top of the tank except for WL270 (GF) units. The Vent Chamber allows for expansion of the water when it is heated. -
Page 10: Flow Diagrams
WL250 COUNTER TOP WATER FLOW DIAGRAM WL250 Operating, Installation, and Service Manual Page 10 - Revision: 5-14-2015... - Page 11 WL250 TOWER WATER FLOW DIAGRAM Recommended Filtration WL250 Operating, Installation, and Service Manual Page 11 - Revision: 5-14-2015...
-
Page 12: Pre-Installation Procedures
Flush Filters CAUTION! FILTER FLUSH REQUIRED. WL250’s are not supplied with filters. Filters should be configured to optimize your system…Filters need to be configured and specified to do the job given the local water conditions, usage, maintenance schedule, and placement restrictions. - Page 13 ELECTRICAL SHOCK HAZARD. Do not plug in unit unless qualified. Only qualified personnel who have read and understand this entire manual should attempt to install or service this unit. WL250 Operating, Installation, and Service Manual Page 13 - Revision: 5-14-2015...
- Page 14 2 or 3 gallons of water will contain concentrated sanitizer. Use extreme care! Flushing the Sanitizer from the Machine 12. Place a pitcher, catch basin, or other container under the faucet of the WL250. 13. Flush the Cold Tank. Run several gallons of water through the faucet by dispensing cold water to dilute and remove the sanitizer from the cold circuit.
- Page 15 75°F to the factory set point of 185°F. Dispense a cup of hot water to ensure the temperature/odor/taste is acceptable. WARNING! VERY HOT WATER CAN BURN OR SCALD. Hot water should be dispensed carefully into insulated container to avoid injury. WL250 Operating, Installation, and Service Manual Page 15 - Revision: 5-14-2015...
-
Page 16: Draining Procedures
5. Remove the water supply line from the inlet line bulkhead fitting at back of machine. 6. Install dust cap or plug into water supply line bulkhead fitting. Drain the Cold Water Tank and Circuit 7. Remove top cover. WL250 Operating, Installation, and Service Manual Page 16 - Revision: 5-14-2015... - Page 17 9. Disconnect tubing from inlet elbows on both solenoids and allow water to drain. 10. Reconnect tubing into inlet elbows. 11. Dry inside of unit. 12. Replace front panel. WL250 Operating, Installation, and Service Manual Page 17 - Revision: 5-14-2015...
- Page 18 6. Install dust cap or plug into water supply line bulkhead fitting. Drain the Cold Water Tank and Circuit 7. Remove lower front panel to access tank feed lines. WL250 Operating, Installation, and Service Manual Page 18 - Revision: 5-14-2015...
- Page 19 8. Disconnect tank line feed lines from hot and cold inlet solenoids to drain into basin or catch. 9. Reconnect tubing into inlet elbows once drained. 10. Dry inside of unit if necessary. 11. Replace lower front panel. WL250 Operating, Installation, and Service Manual Page 19 - Revision: 5-14-2015...
-
Page 20: Installation Procedures
Pre-installation and sanitization procedures as prescribed in this manual must be performed before installing the WL250. Always install indoors and place the Waterlogic WL250 on a firm, flat and stable surface. WL250 Operating, Installation, and Service Manual Page 20 - Revision: 5-14-2015... - Page 21 Switches have internal LED that illuminates when placed in I=ON position. 3. Connect the power cord to the back of the Waterlogic WL250 and to a 120 Volt supply. 4. Fill the Cold Tank. Hold a container under the dispensing faucet, press and hold the main dispensing button until a continuous flow of water is obtained.
-
Page 22: Service Requirements
Read and understand the contents of this manual before attempting to service WL250. Failure to follow the instructions in this manual could result in death, serious personal injury, or severe property damage. Only trained and qualified technicians should attempt to install, maintain, or service Waterlogic Equipment. -
Page 23: Replacement Components
HT-3018 Tower WLUSA Part No 12-1405 Replacement parts can be obtained from Waterlogic or an Authorized Waterlogic Dealer. See Parts Layouts, Drawings, and Lists for additional repair parts. Hot Tank Service Hot Tanks (with controls) must be replaced at least every 5 years. Descaling hot tank may be required on a regular basis depending upon filtration and local water conditions. -
Page 24: Hot Tank Descaling Instructions
(colored water) comes out of the faucet. Container and drain basic will be required to catch water from the faucet. 4. Turn off water supply and remove sanitizing cartridge from inlet water supply. Reconnect water supply to inlet fitting. WL250 Operating, Installation, and Service Manual Page 24 - Revision: 5-14-2015... - Page 25 5. Allow descaling solution to remain in the Hot Tank for 15 minutes (length of time may vary depending on water conditions). 6. Place a pitcher, catch basin or other container under the faucet of the WL250. 7. Flush the Hot Tank until water runs clear.
-
Page 26: Resetting The Overload Or High Limit Safety
For demonstrative purposes, photos below have lowered the hot tank from the unit. WL250 Operating, Installation, and Service Manual Page 26 - Revision: 5-14-2015... - Page 27 Make sure the hot and cold tanks are filled with water BEFORE turning on the Red Heater and Compressor Power Switch Verify the cooler is fully operational before installing it at the customers’ site. WL250 Operating, Installation, and Service Manual Page 27 - Revision: 5-14-2015...
-
Page 28: Layout Drawings And Part Lists
WL250 COUNTER TOP LAYOUT DRAWING with PART NUMBERS Part No Description WLUSA Part No. PL-1249CN Top Cover Charcoal with BioCote® 12-8060 LP-7084 Button Label 12-8057 PL-1153 Silicon Button Key Mat 12-8056 Front Hatch Panel Charcoal - UV Inside Logo with... - Page 29 WL250 TOWER LAYOUT DRAWING with PART NUMBERS WL250 Operating, Installation, and Service Manual Page 29 - Revision: 5-14-2015...
- Page 30 WL250 TOWER LAYOUT DRAWING with PART NUMBERS WLUSA Hot and Cold Part No Description Part No. Cold Only PL-1150 Top Cover with BioCote® 12-8054 Front Hatch Panel Charcoal with UV Logo PL-1147-B 12-8051 - BioCote® LP-7084 Button Label Hot and Cold...
-
Page 31: Main Parts Drawings And Parts Lists
WL250 COUNTER TOP MAIN PARTS DRAWING WL250 Operating, Installation, and Service Manual Page 31 - Revision: 5-14-2015... - Page 32 Front Hatch Panel Charcoal with UV Logo with BioCote® 12-8051 LP-7084 Button Label 12-8057 PL-1152 Drip Tray Grill with BioCote® 12-8150 PL-1156 Drip Tray Body with Waterlogic Logo with BioCote® 12-8055 CO-9001-A Compressor (R134a 1/8 HP) 110V / 60Hz 10-2200 PL-1251-CN Unit Rubber Feet 12-3150 Bolt M6*30...
- Page 33 10-2701 PL-1079-BO Blue Faucet Nipple, with Stainless Steel Gauze 10-3048 CT-2007 Faucet O-Ring 10-2600 CO-9016 Starter Relay for Compressor 10-3003 Shown CO-9015 Thermal Overload (102°C - 221°F) 10-5018 Shown WL250 Operating, Installation, and Service Manual Page 33 - Revision: 5-14-2015...
- Page 34 WL250 TOWER MAIN PARTS DRAWING WL250 Operating, Installation, and Service Manual Page 34 - Revision: 5-14-2015...
- Page 35 Thermal Overload for Hot Tank, Manual Reset 12-1360 25b (Not Shown) HT-3013A Hot tank Thermostat 12-1303 Hot Tank Assembly 1.6 Liter Stainless with Thermostat HT-3018-A 12-1415 Tank (87°C - 189°F) WL250 Operating, Installation, and Service Manual Page 35 - Revision: 5-14-2015...
- Page 36 UV 3 Minute Timer Board / PCB Cold 12-8520 Not Shown PL-1011-A Faucet Nipple with BioCote® 10-2701 Not Shown PL-1013 Blue Faucet Nipple, with Stainless Steel Gauze 10-3048 Not Shown CT-2007 White Silicon Faucet O-Ring 10-2600 WL250 Operating, Installation, and Service Manual Page 36 - Revision: 5-14-2015...
-
Page 37: Wetted Parts Drawing And Parts List
WL250 TOWER WETTED PARTS DRAWING AND PARTS LIST Part No Description WLUSA Part No. PU-4028 JG Bulkhead Connector Union ¼” * ¼” – PI1208S 10-3067 PU-4031 JG LLD PE Tube – Blue OD ¼” – PE-08-BI-1000F-B PU-4008 JG Equal Elbow Connector ¼” – PI0308S PU-4007 JG Reducing Elbow Connector 5/16”... -
Page 38: Electrical Diagrams
WL250 COUNTER TOP ELECTRICAL DIAGRAM DANGER! HIGH VOLTAGE ELECTRICAL HAZARD. PCB (Printed Circuit Board) contains High Voltage. Only trained and qualified technicians should attempt live testing. WL250 Operating, Installation, and Service Manual Page 38 - Revision: 5-14-2015... - Page 39 WL250 TOWER ELECTRICAL DIAGRAM DANGER! HIGH VOLTAGE ELECTRICAL HAZARD. PCB (Printed Circuit Board) contains High Voltage. Only trained and qualified technicians should attempt live testing. WL250 Operating, Installation, and Service Manual Page 39 - Revision: 5-14-2015...
-
Page 40: Fault Codes And Troubleshooting
Check for source of leak. Dry out inside of unit. Flashing Red Light No LED Light FAULT CODE: Possible Reason Solution Power Problem Check for power disruption. No LED Light WL250 Operating, Installation, and Service Manual Page 40 - Revision: 5-14-2015... - Page 41 Listen for solenoid to activate, not button “click”. Adjust water pressure to 40-60 psi. Dispensing button is broken on Check PCB for loose or damaged button. Replace PCB as necessary. WL250 Operating, Installation, and Service Manual Page 41 - Revision: 5-14-2015...
- Page 42 If water now dispenses from the opposite side, this is an indication that there is a PCB problem. Replace PCB If both the Water Pressure and PCB have been ruled out, then it is the Solenoid. Solenoid Replace Solenoid. WL250 Operating, Installation, and Service Manual Page 42 - Revision: 5-14-2015...
- Page 43 Hot Water is not Hot (185° +/- 5° F) NOTE: The WL250 does NOT have Sleep or Power Saving Mode and the hot water should be a minimum of 185°F under normal operating conditions. The Hot temperature set point is 185° F and is controlled by a thermostat on the side of the tank.
- Page 44 Improper tubing attachment Check that the tubing is connected from tank outlets to from the hot tank to faucet or correct faucet attachments. Connect tubing to outlets as vice versa. needed. WL250 Operating, Installation, and Service Manual Page 44 - Revision: 5-14-2015...
- Page 45 Partner Area of the new Waterlogic.com website for more information. All Waterlogic Hot Tanks have a built in Vent or Expansion Chamber in the top of the tank except for WL270 (GF) units. The Vent Chamber allows for expansion of the water when it is heated.
- Page 46 Hot Tank outlet hole is scaled Inspect and descale or replace hot tank. over. Expansion chamber is not Replace the Hot Tank. sealed properly. WL250 Operating, Installation, and Service Manual Page 46 - Revision: 5-14-2015...
- Page 47 Display PCB Remove the PCB to inspect the front of the board. Solenoid Valve is Inspect valve components for proper function. Replace as Malfunctioning necessary. WL250 Operating, Installation, and Service Manual Page 47 - Revision: 5-14-2015...
- Page 48 Wait for cold tank to chill water to temperature prior to dispensing more cold water. Cold tank capacity is 4 liters for Tower and 2 liters for Counter A greater capacity of Waterlogic Water Systems is available. Top. Check continuity of thermostat with multimeter. Replace Cold Water Thermostat thermostat as required.
- Page 49 TROUBLESHOOTING Steady Drip Out of Faucet Possible Reason Solution Debris in Solenoid Inspect Solenoid for debris and clean out as needed. WL250 Operating, Installation, and Service Manual Page 49 - Revision: 5-14-2015...
- Page 50 Check Cold Solenoid: Disconnect elbow from outlet of cold open. solenoid. Select hot water and dispense (quickly releasing dispensing button to avoid much water coming out of cold solenoid. Replace solenoid as necessary. WL250 Operating, Installation, and Service Manual Page 50 - Revision: 5-14-2015...
- Page 51 Loose connection(s) on the on connections are secure into the board. Display PCB Remove the PCB to inspect the front of the board. Exhausted Filter Replace filters as needed. WL250 Operating, Installation, and Service Manual Page 51 - Revision: 5-14-2015...
- Page 52 Water is Not being Heated or Chilled Possible Reason Solution Red Heater and Compressor Turn Red Heater and Compressor Switch on. I = ON Switch on unit is off. WL250 Operating, Installation, and Service Manual Page 52 - Revision: 5-14-2015...
- Page 53 Displace on connections are secure into the board. PCB are loose. Remove the PCB to inspect the front of the board. Exhausted Filter Replace filters as needed. WL250 Operating, Installation, and Service Manual Page 53 - Revision: 5-14-2015...
- Page 54 Remove cold water outlet tube from tank to faucet. Pour tank outlet tube. some scale remover into cold tank. Expansion chamber in Cold Replace Cold Tank. Tank is not sealed properly. WL250 Operating, Installation, and Service Manual Page 54 - Revision: 5-14-2015...
- Page 55 Make sure unit is not under minimum ventilation Reduction of airflow into unit. requirements (2 to 4 inches). Compressor is running very Low or lost refrigerant. Refrigerant recharge required. hot. WL250 Operating, Installation, and Service Manual Page 55 - Revision: 5-14-2015...
- Page 56 Compressor Starting Circuit Inspect the starter and overload relay for any defects. Replace components(s) as needed. Turn Red Heater and Compressor Power Switch on I = O and retest compressor operation. WL250 Operating, Installation, and Service Manual Page 56 - Revision: 5-14-2015...
- Page 57 Remove the stem from the solenoid housing and allow water from the tank to flush out the contaminant(s). WL250 Operating, Installation, and Service Manual Page 57 - Revision: 5-14-2015...
- Page 58 Dirt or Foreign material is Inspect the push buttons and clean surrounding area. filling the gap around the Inspect faucet assembly inside the unit and clean as push-buttons. necessary. WL250 Operating, Installation, and Service Manual Page 58 - Revision: 5-14-2015...
- Page 59 TROUBLESHOOTING Run On “Run On” or “Carry On” is present in all Waterlogic pressure fed units without outlet solenoids. “Run On” is defined as the amount of water that continues to dispense out of the faucet after releasing the dispense button.
-
Page 60: Warranty
Waterlogic will, at its sole discretion, determine whether to correct the defect or replace the unit, free of charge to you. If Waterlogic determines that the unit should be returned for warranty service, Waterlogic will approve of return in writing and will issue a Return Authorization which you must obtain prior to shipping the product.
Need help?
Do you have a question about the WL250 and is the answer not in the manual?
Questions and answers