Table of Contents
Advertisement
Available languages
Available languages
Quick Links
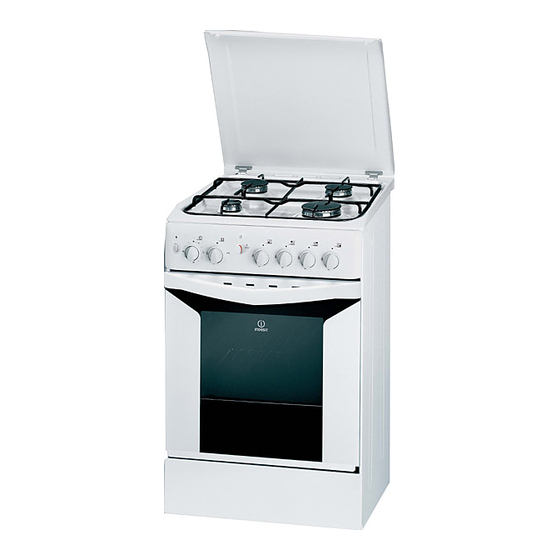
K 1G210/R
English
GB
Operating Instructions
COOKER AND OVEN
Contents
Operating Instructions,1
Description of the appliance-Control Panel,1
Description of the appliance-Overall view,2
Installation,3
Start-up and use,7
Cooking modes,8
Precautions and tips,10
Care and maintenance,11
Assistance,11
Р
RS
Р
а а
КУХОННАЯ ПЛИТА С ДУХОВЫМ ШКАФОМ
С
а
Р
а а
О
а
-Па
О
а
-О
М
а ,12
В
а а
П
а
П
Т
а
Т
а
Românã
RO
Instruc iuni de folosire
ARAGAZ
CUPTOR
ЄI
Sumar
Instrucţiuni de folosire,1
Descrierea aparatului-Panoul de control,1
Descrierea aparatului- Vedere de ansamblu,2
Instalare,21
Pornire şi utilizare, 25
Utilizarea cuptorului,26
Precauţii şi sfaturi,28
Întreţinere şi curăţire,29
Asistenţă,29
,1
а
,1
,2
,16
,19
а
,20
,21
,21
У а
а
UA
І
а а
КУХНЯ
З
І
а а ,1
О
а
-Па
О
а
-За а
В а
,35
В
а
П
а
а
За
а
а
Д
i
Д
а,43
1
4
3
2
Description of the appliance
GB
Control panel
1.GAS BURNER IGNITION button
2.TIMER knob
3.OVEN CONTROL knob
4.OVEN LIGHT button
5.Hob BURNER control knob
О
а
RS
Па
а
1.Э
а
а
2.Та
3.Р
а
а
4.К
а
5. Р
а
а
а
Descriere aparatului
RO
Panoul de control
1.Buton pentru activarea aprinderii electronice
2.Buton cronometru
3.Buton de comandã pentru cuptor
4.Buton pentru activarea luminii din cuptor
5.Butoane comandi ochiuri aragaz
О
UA
Па
а
GR
1. А
а
а а
2.С
а ТАЙМЕРА
3.Р
а ДУХОВКА
4.КНОПКА РОЖНА а ОСВІТЛЕННЯ ДУХОВКИ
5.Р
а
а
а
а
а а
а
,1
,2
,39
,39
,42
а
,43
5
а
а
а
Advertisement
Table of Contents

Related Manuals for Indesit K 1G210/R


Summary of Contents for Indesit K 1G210/R
-
Page 1: Operating Instructions
K 1G210/R У а а І а а КУХНЯ З І а а ,1 О а -Па а О а -За а English В а В а П а а Operating Instructions За а а COOKER AND OVEN Д а... - Page 2 Descriere aparatului Vedere de ansamblu 1. Arzătoare pe gaz 2. Grătare plită 3. Panou frontal de control 4. Grătarul cuptorului 5. Tavă de coacere 6 .Picioare reglabile 7. Plită 8. GHIDAJE alunecare rafturi 9. nivelul 5 10. nivelul 5 11. nivelul 5 12.
-
Page 3: Installation
Installation Disposing of combustion fumes ! Before operating your new appliance please read this instruction booklet carefully. It contains important The disposal of combustion fumes should be information concerning the safe installation and guaranteed using a hood connected to a safe and operation of the appliance. -
Page 4: Gas Connection
plug, ask an authorised technician to replace it. Do 200 mm away from its sides. HOOD not use extension cords or multiple sockets. • Any hoods must be installed according to Min. ! Once the appliance has been installed, the power the instructions listed in the supply cable and the electrical socket must be easily relevant operating manual. - Page 5 • Fits firmly into place at both ends, where it will the regulatory screw must be fastened as tightly as be fixed using clamps that comply with current possible. regulations. 3. While the burner is alight, quickly change the position of ! If one or more of these conditions is not fulfilled the knob from minimum to maximum and vice versa several or if the cooker must be installed according to the...
- Page 6 ! The oven and grill burners do not require primary air adjustment. K 1G210/R ! After adjusting the appliance so it may be used with a different type of gas, replace the old rating label with a new one that corresponds to the new type of gas (these labels are available from Authorised Technical Assistance Centres).
-
Page 7: Using The Hob
Start-up and use Using the hob Lighting the burners For each BURNER knob there is a complete ring showing To identify the type of burner, please refer to the the strength of the flame for the relevant burner. diagrams contained in the “Burner and nozzle To light one of the burners on the hob: specifications”. - Page 8 Grill Lower compartment To light the grill, bring a flame or gas lighter close to There is a compartment the burner and press the OVEN control knob while underneath the oven turning it in a clockwise direction until it reaches the that may be used to d position.
- Page 9 Oven cooking advice table...
-
Page 10: Precautions And Tips
Precautions and tips ! This appliance has been designed and manufactured in • If the appliance breaks down, under no circumstances should you attempt to repair the appliance yourself. compliance with international safety standards. Repairs carried out by inexperienced persons may cause The following warnings are provided for safety reasons and injury or further malfunctioning of the appliance. -
Page 11: Care And Maintenance
Care and maintenance Switching the appliance off remaining drops of water should also be dried. The cover Disconnect your appliance from the electricity supply before carrying out any work on it. If the cooker is fitted with a glass cover, this cover Cleaning the appliance should be cleaned using lukewarm water. - Page 12 У а а Д а В А Ра а В...
- Page 13 HOOD Min. ! Ф а а В а а а а а П а Э а а Га а а...
- Page 14 На а а а Га а а а а П а На а а а а а а Ха а На а а а Р а а а а: . П Э а а а Ха а а а...
- Page 15 На а а Ха а Та а а а K 1G210/R...
- Page 16 В а а Э а а а а В Э а а а а В а а М а а — а а а — а а • • • Ва М П а а а а •...
- Page 17 Н Р а Г Та...
- Page 18 Та а а...
- Page 19 П а О а а И а а , а а а а И а а а а а У а . Л а ( а а а а а а . П а а а а а а а Э...
- Page 20 Т а О а Ч а К а П а а. У а а а а а ! Да а а а За а а а Т а П а Ц Т О а...
- Page 21 М а а а а а а а а . М а а Ва У а www.hotpoint-ariston.com А а www.hotpoint-ariston. Е а а а В а ! П а а а а а Д а В а а а www.hotpoint-ariston.com...
-
Page 22: Instalare
Instalare Evacuarea gazelor de ardere ! Este important să păstraţi acest manual pentru a-l Evacuarea gazelor de ardere trebuie să fi e asigurată de putea consulta în orice moment. În caz de vânzare, o hotă legată la un coş cu tiraj natural, efi cient, sau de un cedare sau mutare, asiguraţi-vă... - Page 23 • priza să fi e compatibilă cu ştecărul aparatului. În • perdelele nu trebuie caz contrar înlocuiţi priza sau ştecărul; nu folosiţi să fi e montate în spatele HOOD prelungitoare sau prize multiple. aragazului şi nici la mai Min. puţin de 200 mm de ! După...
-
Page 24: Pornire Şi Utilizare
• este bine introdus la capete şi fi xat cu coliere de să fi e înşurubat complet. strângere, conform normelor naţionale în vigoare. 3. verifi caţi apoi ca, rotind rapid buşonul aragazului, de ! Dacă una sau mai multe din aceste condiţii nu sunt la maxim la minim, să... - Page 25 înlocuiţi eticheta veche de pe aragaz cu cea corespunzătoare noului gaz folosit; eticheta se găseşte la Centrele de Asistenţă Tehnică Autorizate. K 1G210/R ! Dacă presiunea gazului utilizat este diferită de cea prevăzută (sau variază) este necesar să instalaţi pe tuburile de alimentare un regulator de presiune, în...
-
Page 26: Utilizarea Cuptorului
Pornire şi utilizare Utilizarea aragazului Sfaturi practice pentru utilizarea arzătoarelor Aprinderea arzătoarelor Pentru a obţine un randament maxim al arzătoarelor, precum şi a economisi gazul, utilizaţi numai recipiente Fiecare buşon al aragazului are, în dreptul său, schiţa cu fundul plat, acoperite cu capac, de dimensiuni arzătoarelor;... - Page 27 Sertarul inferior ! Cuptorul este dotat cu un dispozitiv de siguranţă; de aceea este necesar să ţineţi apăsat buşonul CUPTORULUI timp de 6 secunde circa.* Sub cuptor este un sertar care poate ! Dacă fl acăra se stinge accidental, opriţi arzătorul şi fi...
- Page 28 Tabelul cu recomandări pt coacerea în cuptor Alimentul de Greutate Poziţ ia pe raftul Temperatura Durata de Durata de copt (kg) cuptorului (de (°C) preîncă lzire coacere jos în sus) (min) (min) Paste fă inoase Lasagna 60-75 Cannelloni 40-50 Paste gratinate 40-50 Carne Viţ...
-
Page 29: Precauţii Şi Sfaturi
Precauţii şi sfaturi întreţinere înainte de a fi scos ştecărul din priză. !Aparatul a fost proiectat şi construit conform normelor internaţionale de siguranţă. • În caz de defecţiune, nu umblaţi în nici un caz la Aceste avertizări sunt furnizate din motive de siguranţă mecanismele din interior şi nu încercaţi să... -
Page 30: Întreţinere Şi Curăţire
Întreţinere şi curăţire Decuplarea electrică După fi ecare spălare, se recomandă să îl clătiţi bine şi să îl ştergeţi. Este oportun în acelaşi timp să ştergeţi Înainte de orice operaţie, debranşaţi aparatul de la şi eventualele urme de apă. reţeaua de alimentare cu curent electric. Capacul Curăţarea aparatului Modelele dotate cu capac... - Page 31 В а а В . а Р а . а . а В а...
- Page 32 HOOD Min. ! П а а В а П а . а . Ка а а а а а П а Т Да П а а а а...
- Page 33 П а а а а На а а а а а а . а . а К . а А а а а На а а а На а а а а а В В а . а а Ха а а...
- Page 34 ТЕХНІЧНІ ДАНІ На а а Р Д ВxШxГ О ' К . а На а а а а . а Па а Ха а а K 1G210/R Та а а а Та З а П а...
-
Page 35: Дiа
В а К а Па ø Дiа В а К а В . а . а П а а а а... - Page 36 О Н Г . а . а а . а Та...
- Page 37 Та а С а Ва а П П Р а а Т а а а а а (°C) Ма а ( а а) М’ Р а П а Т...
- Page 38 За а а За а а а Да а а а а а а а У а П а а а а а а а . Б а ( а а : а а а а . В а а а...
- Page 39 Д а В К а Ч а . а К Т а а а ! Ц а а а а а За а а а Д а П...
- Page 40 11/2011 - 195048049.05 XEROX FABRIANO...
Need help?
Do you have a question about the K 1G210/R and is the answer not in the manual?
Questions and answers