Table of Contents
Advertisement
Available languages
Available languages
Quick Links
Mode d'emploi
FR
GB
Français, 1
English, 13
K6M1S/F
KN6M1S/FR
K6M1/F
CUISINIERE ET FOUR
Sommaire
Installation, 2-5
injecteurs
Programmes de cuisson
Conseils pratiques pour l'utilisation des plaques
électriques
Entretien robinets gaz
FR
Advertisement
Chapters
Table of Contents

Related Manuals for Indesit K6M1S/F


Summary of Contents for Indesit K6M1S/F
-
Page 1: Table Of Contents
Mise en marche et utilisation,7-10 Utilisation du plan de cuisson Mise en marche du four Programmes de cuisson Conseils pratiques pour l’utilisation des plaques électriques K6M1S/F Conseils de cuisson KN6M1S/FR Tableau de cuisson au four K6M1/F Précautions et conseils, 11 Sécurité... -
Page 2: Installation
Installation ! Conservez ce mode d’emploi pour pouvoir le Evacuation des fumées de combustion consulter à tout moment. En cas de vente, de La pièce doit prévoir un système d’évacuation vers cession ou de déménagement, veillez à ce qu’il l’extérieur des fumées de combustion réalisé au suive l’appareil. -
Page 3: Raccordement Électrique
• si la cuisinière est signalétique; installée sous un • la prise est bien compatible avec la fiche de HOOD élément suspendu, il l’appareil. Si ce n’est pas le cas, remplacez la faut que ce dernier soit prise ou la fiche, n’utilisez ni rallonges ni prises Min. -
Page 4: Adaptation Aux Différents Types De Gaz
• ne risque pas d’entrer en contact avec des corps 2. dévissez les injecteurs à tranchants, des arêtes vives, des parties mobiles l’aide d’une clé à tube de et ne soit pas écrasé; 7mm (voir figure), et • puisse être facilement contrôlable sur toute sa remplacez-les par les longueur pour vérifier son état de conservation;... -
Page 5: Caractéristiques Techniques
Dimensions du 32x43,5x43 cm four HxLxP Volume l 60 Dimensions utiles largeur 42 cm du tiroir chauffe- profondeur 46 cm K6M1S/F plats hauteur 8,5 cm KN6M1S/FR adaptables à n’importe quel type de K6M1/F Brûleurs gaz parmi ceux indiqués sur plaque signalétique Tension et fréquence... -
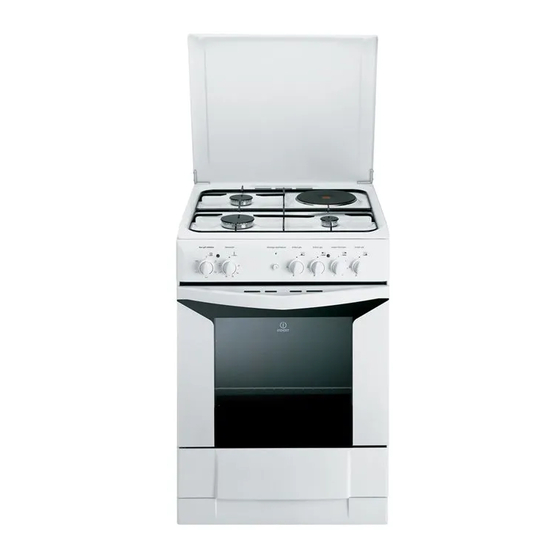
Page 6: Description De L'appareil
Description de l’appareil Vue d’ensemble Couvercle en verre* Plaque électrique Plateau du Brûleur à gaz plan de cuisson Grille du plan de cuisson GLISSIERES Tableau de bord de coulissement niveau 5 Support GRILLE niveau 4 niveau 3 Support LECHEFRITE niveau 2 niveau 1 Pied de réglage Pied de réglage... -
Page 7: Mise En Marche Et Utilisation,7-10
Mise en marche et utilisation Utilisation du plan de cuisson Toute position de la manette autre que la position “éteint” entraîne l’allumage du voyant de fonctionnement. Allumage des brûleurs Un petit cercle plein près de chaque bouton Conseils pratiques pour l’utilisation des brûleurs BRULEUR indique le brûleur associé... - Page 8 En cours de cuisson, on peut à tout moment : l’intérieur du four (250°C), il est par conséquent • modifier le programme de cuisson à l’aide du déconseillé de cuire en maintenant longuement le bouton PROGRAMMES; four dans cette position à moins qu’il ne s’agisse de •...
-
Page 9: Conseils De Cuisson
Conseils de cuisson Position Plaque normale ou rapide ! En cas de cuisson en mode GRIL, placer la lèchefrite au gradin 1 pour récupérer les jus de Eteint cuisson. Cuisson de légumes verts, poissons GRIL Cuisson de pommes de terre (à la vapeur) soupes, pois chiches, haricots •... -
Page 10: Tableau De Cuisson Au Four
Tableau de cuisson au four Position Aliments à cuire Poids Position Temps de Position Temps de sélecteur (Kg) gradins en préchauffage sélecteur de cuisson partant du (minutes) températures (minutes) 1 Statique - Canard 65-75 Traditionnel Rôti de veau ou de bœuf 70-75 Rôti de porc 70-80... -
Page 11: Précautions Et Conseils
Précautions et conseils ! Cet appareil a été conçu et fabriqué conformément • Ne pas tirer sur le câble pour débrancher la fiche de aux normes internationales de sécurité. la prise de courant. Ces conseils sont fournis pour des raisons de sécurité •... -
Page 12: Nettoyage Et Entretien
Nettoyage et entretien Mise hors tension Remplacement de l’ampoule d’éclairage du four Avant toute opération de nettoyage ou d’entretien couper l’alimentation électrique de l’appareil. 1. Débrancher le four, enlever le couvercle en verre du logement de la lampe ( voir figure ). 2. - Page 13 Control panel Start-up and use, 19-22 Using the hob Using the oven Cooking modes Practical advice on using the electric hotplates Practical cooking advice K6M1S/F Oven cooking advice table KN6M1S/FR K6M1/F Precautions and tips, 23 General safety Disposal Respecting and conserving the environment...
-
Page 14: Gb Positioning And Levelling
Installation ! Before operating your new appliance please read Disposing of combustion fumes this instruction booklet carefully. It contains important information concerning the safe installation The disposal of combustion fumes should be and operation of the appliance. guaranteed using a hood connected to a safe and efficient natural suction chimney, or using an electric fan that begins to operate automatically every time ! Please keep these operating instructions for future... -
Page 15: Electrical Connection
• If the cooker is • The socket can withstand the maximum power of the installed underneath a appliance, which is indicated by the data plate. HOOD wall cabinet, there must • The voltage is in the range between the values be a minimum distance indicated on the data plate. -
Page 16: Adapting To Different Types Of Gas
Adapting to different types of gas • Does not come into contact with blades, sharp corners or moving parts and that it is not It is possible to adapt the appliance to a type of gas compressed. other than the default type (this is indicated on the •... -
Page 17: Table Of Burner And Nozzle Specifications
Butane P.C.S. = 49.47 MJ/kg Natural P.C.S. = 37.78 MJ/m³ ø 180 TECHNICAL DATA Oven dimensions 32x43,5x43 cm (HxWxD) K6M1S/F 60 l Volume KN6M1S/FR Useful K6M1/F width 42 cm measurements depth 46 cm relating to the oven height 8.5 cm... -
Page 18: Description Of The Appliance
Description of the appliance Overall view Glass cover* ELECTRIC HOTPLATE Gas burner Containment surface Hob grid for spills Control panel GUIDE RAILS for the sliding racks position 5 GRILL rack position 4 position 3 DRIPPING PAN rack position 2 position 1 Adjustable foot Adjustable foot Control panel... -
Page 19: Start-Up And Use
Start-up and use Using the hob Practical advice on using the burners Lighting the burners For the burners to work in the most efficient way For each BURNER knob there is a complete ring possible and to save on the amount of gas showing the strength of the flame for the relevant burner. -
Page 20: Cooking Modes
• Stop cooking by turning the SELECTOR knob to DOUBLE GRILL mode the “0” position. The top heating element and the rotisserie spit will ! Always place cookware on the rack(s) provided. be activated. The grill is also highly recommended for dishes that require a high surface temperature: THERMOSTAT indicator light beef steaks, veal, rib steak, fillets, hamburgers... -
Page 21: Practical Cooking Advice
• We recommend that the power level is set to Timer* To activate the Timer proceed as follows: maximum. The top heating element is regulated 1. Turn the TIMER knob in a clockwise direction 4 by a thermostat and may not always operate for almost one complete revolution to set the buzzer. - Page 22 Oven cooking advice table Selector knob Food to be cooked Weight Cooking rack Preheating time Thermostat Cooking setting (in kg) position from (minutes) knob time bottom setting (minutes) Duck 65-75 1 Convection Roast veal or beef 70-75 Pork roast 70-80 Biscuits (short pastry) 15-20 Tarts...
-
Page 23: K6M1/F Precautions And Tips
Precautions and tips ! This appliance has been designed and manufactured • If the appliance breaks down, under no in compliance with international safety standards. circumstances should you attempt to perform the The following warnings are provided for safety repairs yourself. Repairs carried out by reasons and must be read carefully. -
Page 24: Care And Maintenance
Care and maintenance 11/2010 - 195042282.06 XEROX FABRIANO Switching the appliance off Replacing the oven light bulb 1. After disconnecting the oven from the electricity Disconnect your appliance from the electricity mains, remove the glass lid covering the lamp socket supply before carrying out any work on it.
Need help?
Do you have a question about the K6M1S/F and is the answer not in the manual?
Questions and answers