Intermec EasyCoder PM4i User Manual
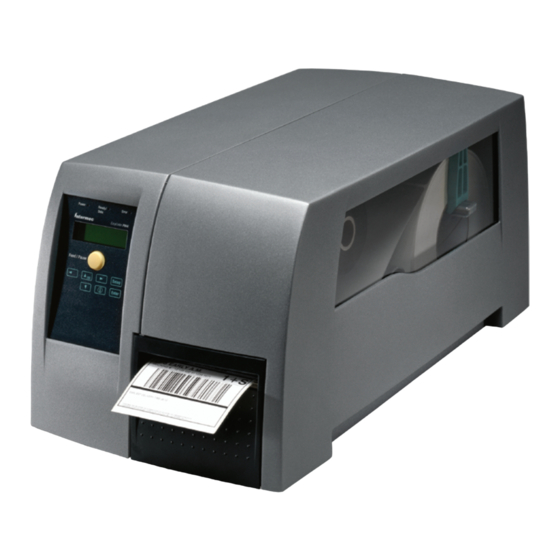
Bar code label
printer
Hide thumbs
Also See for EasyCoder PM4i:
- User manual (186 pages) ,
- Installation instructions manual (40 pages) ,
- Safety instructions (24 pages)
Table of Contents
Advertisement
Advertisement
Table of Contents
Troubleshooting

Related Manuals for Intermec EasyCoder PM4i


Summary of Contents for Intermec EasyCoder PM4i
- Page 1 User’s Guide EasyCoder PM4i Bar Code Label Printer (IPL Version)
- Page 2 The information contained herein is proprietary and is provided solely for the purpose of allowing customers to operate and service Intermec- manufactured equipment and is not to be released, reproduced, or used for any other purpose without written permission of Intermec.
- Page 3 Revised to support IPL v2.10. Information about EasyLAN Wireless interface added. Feb. 2004 Revised to support IPL v2.20. Information on Intermec Readiness Indicator added. New method for returning to fac- tory default added. More bar codes supported. Intermec EasyCoder PM4i—User’s Guide (IPL version)
- Page 4 EU Standard EN 55022 (The European Union) WARNING This is a Class A ITE product. In a domestic environment this product may cause radio interference in which case the user may be required to take adequate measures. Intermec EasyCoder PM4i—User’s Guide (IPL version)
- Page 5 89/336/EEC and 73/23/EEC Mölndal 2003-03-12 ..............Per-Ove Jacobsson /. Intermec assumes no responsibility regarding the CE Directive if the printer is handled, modifi ed, or installed in other manners than those described in Intermec’s manuals. Intermec EasyCoder PM4i—User’s Guide (IPL version)
- Page 6 Intermec EasyCoder PM4i—User’s Guide (IPL version)
-
Page 7: Table Of Contents
Global Services and Support ............xiii Warranty Information ........... xiii Web Support ..............xiii Telephone Support ............xiii Related Documents ............xiii Introduction Description of EasyCoder PM4i Printer .........2 Safety Summary ................3 Product Identifi cation ..............3 Installation Unpacking the Printer ..............6 Front View ..................7 Rear View ..................8... - Page 8 Label Reset Point ..........48 Form Adj Dots X ..........48 Form Adj Dots Y ..........48 Confi guration ..............49 Label Taken Sensor ..........49 Emulation ............49 Print Speed ............49 Cutter .............49 Returning to Factory Default Setup ..........50 viii Intermec EasyCoder PM4i—User’s Guide (IPL version)
- Page 9 Printhead Cleaning ..............70 External Cleaning ................73 Cleaning the Media Guides ............74 Printhead Replacement ..............75 Media Jams ..................78 Adjustments Narrow Media Adjustment ............80 Label Stop Sensor Position Adjustment ........81 Printhead Pressure ................82 Ribbon Break Shaft ..............83 Intermec EasyCoder PM4i—User’s Guide (IPL version)
- Page 10 Tickets with Gap ............95 Tickets with Black Mark ..........97 Interfaces RS-232 Interface ................100 Optional Interfaces ..............101 Intermec Supplies Direct Thermal Media ...............104 Thermal Transfer Media .............105 Transfer Ribbons ................106 Setting the Media Sensitivity Number ........107 Intermec EasyCoder PM4i—User’s Guide (IPL version)
-
Page 11: Before You Begin
Safety Summary Your safety is extremely important. Read and follow all warnings and cautions in this document before handling and operating Intermec equipment. You can be seriously injured, and equipment and data can be damaged if you do not follow the safety warnings and cautions. -
Page 12: Safety Icons
ESD guidelines to avoid damaging the equipment you are servicing. Note: Notes either provide extra information about a topic or contain special instructions for handling a particular condition or set of circumstances. Intermec EasyCoder PM4i—User’s Guide (IPL version) -
Page 13: Global Services And Support
To understand the warranty for your Intermec product, visit the Intermec web site at http://www.intermec.com and click Service & Support. The Intermec Global Sales & Service page appears. From the Service & Support menu, move your pointer over Support, and then click Warranty. Web Support Visit the Intermec web site at http://www.intermec.com... - Page 14 Before You Begin Intermec EasyCoder PM4i—User’s Guide (IPL version)
-
Page 15: Introduction
Introduction This chapter introduces the EasyCoder PM4i printer. The chapter covers the following topics: • Description of EasyCoder PM4i • Safety summary • Product identifi cation Intermec EasyCoder PM4i—User’s Guide (IPL version) -
Page 16: Description Of Easycoder Pm4I Printer
Chapter 1— Introduction Description of EasyCoder PM4i Printer The EasyCoder PM4i is a sturdy thermal transfer printer with a printhead resolution of 8 dots/mm = 203.2 dot/inch and a maximum print width of 104 mm (4.095 inches). It offers a large number of useful features, such as: •... -
Page 17: Safety Summary
Chapter 1—Introduction Safety Summary Intermec assumes no responsibility regarding the CE Directive if the printer is handled, modifi ed, or installed in any way other than that described in Intermec’s manuals. • Read this manual carefully before connecting the printer. - Page 18 Chapter 1— Introduction Intermec EasyCoder PM4i—User’s Guide (IPL version)
-
Page 19: Installation
Installation This chapter explains how to unpack and install the EasyCoder PM4i and also describes the printer’s vari- ous parts in detail. It covers the following topics: • Unpacking the printer • Parts on the printer’s front • Parts on the printer’s rear plate •... -
Page 20: Unpacking The Printer
The printer works within 90 to 265 VAC, 50 to 60 Hz. If the printer has been damaged in any way during transportation, com- plain to the carrier immediately. If the delivery is incorrect or any parts are missing, report it immediately to the distributor. Intermec EasyCoder PM4i—User’s Guide (IPL version) -
Page 21: Front View
The printed labels, tickets, or tags are presented at the front of the print mechanism, which is covered by a door. Indicator lamps Display window Feed/Pause button Keyboard Side door Print mechanism Front door Intermec EasyCoder PM4i—User’s Guide (IPL version) -
Page 22: Rear View
Wireless antenna (option) Memory card slot Provision for IEEE 1284 parallel interface board On/Off Switch (not used) AC Power cord socket RS-232 serial interface (not used) Machine label Intake slot for external media supply Intermec EasyCoder PM4i—User’s Guide (IPL version) -
Page 23: Media Compartment
There is also an optional rotating media supply hub. Also see Chapter 9, “Options.” Lock (option) Side door Thermal transfer Inspection mechanism window Media supply roll post with edge guide Keyboard Integral liner takeup Front door Slack absorber Print mechanism Intermec EasyCoder PM4i—User’s Guide (IPL version) -
Page 24: Media Supply Roll Post
Setup Mode. There are also a 3-inch adapter and a label roll retainer. Another option is an internal guide for media placed behind the printer (for example fan-folds). For illustrations, see Chapter 8 “Options”. Intermec EasyCoder PM4i—User’s Guide (IPL version) -
Page 25: Print Mechanism
Ribbon supply hub Ribbon break shaft Thermal printhead Pressure arm Finisher interface Tear bar (tear upwards) Edge guide Platen roller Tear bar Label stop sensor (tear downwards position adjustment and peel-off)) Printhead lift lever Intermec EasyCoder PM4i—User’s Guide (IPL version) -
Page 26: Connections
3 Connect the power cord from the socket on the rear plate to an elec- trical outlet (90 to 265 VAC). Computer The Easycoder PM4i is fi tted with one 9-pin D-style subminiature (DB9) socket for the RS-232 serial interface port (see Appendix C). RS-232 Serial Interface Before you can use the serial interface, you may need to set up the com- munication parameters, such as baud rate, parity, etc. -
Page 27: Controls And Indicators
Chapter 2— Installation Controls and Indicators The EasyCoder PM4i has several ways of communicating directly with its operator: three colored indicator lamps, a display window, a mem- brane-switch keyboard with 8 keys and buttons on the printer’s front, and a beeper. -
Page 28: Display
The beeper acknowledges that a key has been pressed. Optionally, an audible alarm can be enabled using an IPL command. It will start beep- ing at paper out and ribbon our and will continue beeping until the start of reload. Intermec EasyCoder PM4i—User’s Guide (IPL version) -
Page 29: Starting Up
Starting Up This chapter explains how to start up the printer after installation or after having been switched off. Intermec EasyCoder PM4i—User’s Guide (IPL version) -
Page 30: Switching On The Printer
Initializing When the initialization is completed, a label is fed out. The following message appears, indicating that the printer is ready for operation. IPL 2.20 The message indicates the IPL version number. Intermec EasyCoder PM4i—User’s Guide (IPL version) -
Page 31: Media Load
• Tear-Off (straight-through) • Peel-Off (self-strip), requires optional integral self- strip unit with liner takeup • Cut-Off (requires optional cutter) • External supply (fan-folds), fan-fold guide available as option Intermec EasyCoder PM4i—User’s Guide (IPL version) -
Page 32: Tear-Off (Straight-Through)
Chapter 4—Media Load Tear-Off (Straight-through) The EasyCoder PM4i can print on labels, tickets, tags, and continuous stock in various forms. This section describes the case when the media is torn off manually against the printer’s tear bar. This method is also known as “straight-through printing.”... - Page 33 Fold up and adjust the edge guide position. Remove any empty core from so the roll becomes fl ush with the center the media supply roll post. section. Intermec EasyCoder PM4i—User’s Guide (IPL version)
- Page 34 This diagram shows the media path. Adjust the position of the green edge Turn the printhead lift lever counter- guide so the media is guided with a clockwise to engage the printhead. minimum of play. Lock with the nut. Intermec EasyCoder PM4i—User’s Guide (IPL version)
- Page 35 Press the Feed/Pause button to advance the media and adjust the media feed. Tear off the media by pulling it down- wards. Intermec EasyCoder PM4i—User’s Guide (IPL version)
-
Page 36: Peel-Off (Self-Strip)
Chapter 4—Media Load Peel-Off (Self-strip) The EasyCoder PM4i can print on labels, tickets, tags, and continuous stock in various forms. This section describes the case when self-adhesive labels are separated from the liner immediately after printing, which requires optional integral self-strip unit with liner takeup. This is also known as “Self-strip”... - Page 37 Pull out the edge guide as far as it goes and fold it down to a horizontal Pull out the handle to collapse the position. Remove any empty core from takeup hub, then remove any liner. the media supply roll post. Intermec EasyCoder PM4i—User’s Guide (IPL version)
- Page 38 Route the liner around the tear bar and of the takeup hub, then rotate the hub the liner drive roller and back under the counterclockwise a few turns to wind up print mechanism and guide shafts. some of the liner. Intermec EasyCoder PM4i—User’s Guide (IPL version)
- Page 39 Adjust the position of the edge guide on guide so the media is guided with a the label slack absorber according to minimum of play. Lock with the nut. the width of the media. Intermec EasyCoder PM4i—User’s Guide (IPL version)
- Page 40 Chapter 4—Media Load Peel-Off , cont. Press the Feed/Pause button to advance Close the front and side doors. the media and adjust the media feed. Intermec EasyCoder PM4i—User’s Guide (IPL version)
-
Page 41: Cut-Off
Chapter 4—Media Load Cut-Off The EasyCoder PM4i can print on labels, tickets, tags, and continuous stock in various forms. This section describes the case when the media is to be cut off by an automatic paper cutter (option). Cut-off can be used for: •... - Page 42 Fold up and adjust the edge guide position. Remove any empty core from so the roll becomes fl ush with the center the media supply roll post. section. Intermec EasyCoder PM4i—User’s Guide (IPL version)
- Page 43 This diagram shows the media path. Adjust the position of the green edge Turn the printhead lift lever counter- guide so the media is guided with a clockwise to engage the printhead. minimum of play. Lock with the nut. Intermec EasyCoder PM4i—User’s Guide (IPL version)
- Page 44 Press the Feed/Pause button to advance the media and adjust the media feed. Close the side door and the cutter while The labels can be collected on an pulling the media tight. optional tray. Intermec EasyCoder PM4i—User’s Guide (IPL version)
-
Page 45: External Supply (Fanfold)
Chapter 4—Media Load External Supply (Fan-fold) The EasyCoder PM4i can print on labels, tickets, tags, and continuous stock in various forms. This section describes the case when the media supply is placed behind the printer, usually in the form of fan-folded tickets or tags. - Page 46 Chapter 4—Media Load Intermec EasyCoder PM4i—User’s Guide (IPL version)
-
Page 47: Thermal Transfer Printing
Thermal Transfer Printing This chapter explains how to load the printer with ribbon for thermal transfer printing. Intermec EasyCoder PM4i—User’s Guide (IPL version) -
Page 48: Ribbon Load
The EasyCoder PM4i can use transfer ribbon rolls wound with the ink- coated side facing either outward or inward. Illustrations in this manual show the ink-coated side facing inward. - Page 49 Turn the printhead lift lever clockwise to Open the front and side doors. raise the printhead. In case of ribbon reload, remove any Unpack a roll of original Intermec used ribbon and empty ribbon core. thermal transfer ribbon. Intermec EasyCoder PM4i—User’s Guide (IPL version)
- Page 50 Without releasing the ribbon, turn the Slide the empty cardboard core onto printhead lift lever counterclockwise the ribbon rewind hub so the ribbon to engage the printhead and lock the is wound up when the hub rotates ribbon. counterclockwise. Intermec EasyCoder PM4i—User’s Guide (IPL version)
- Page 51 Turn the printhead lift knob counter- clockwise to engage the printhead. Close the front and side doors. Intermec EasyCoder PM4i—User’s Guide (IPL version)
- Page 52 Chapter 5—Thermal Transfer Printing Intermec EasyCoder PM4i—User’s Guide (IPL version)
-
Page 53: Setting Up The Printer
It covers the following topics: • Description • Default setup • Setup Parameters in regard of communication, test/ service, media, and confi guration. Intermec EasyCoder PM4i—User’s Guide (IPL version) -
Page 54: Description
Check the list below to see if the printer’s default setup matches your requirements. If not, you will have to change the setup. To enter the Setup Mode, press the <Setup> key on the printer’s built-in keyboard and follow the instructions in Chapter 7, “Setup Mode.” Intermec EasyCoder PM4i—User’s Guide (IPL version) -
Page 55: Default Setup
Paper type Label length 1200 dots Sensitivity Darkness Label rest point Form adj dots X Form adj dots Y Confi guration Emulation None Print speed 4 in/sec Cutter Not installed Label taken sensor Not installed Intermec EasyCoder PM4i—User’s Guide (IPL version) -
Page 56: Setup Parameters
• 8 Characters ASCII 000 to 255 decimal (default) Parity The parity decides how the fi rmware will check for transmission errors. There are four options: • None (default) • Even • Odd • Space Intermec EasyCoder PM4i—User’s Guide (IPL version) -
Page 57: Stop Bits
XOFF, the printer will resend an XOFF after receiv- ing every 15 characters from the host. Condition Character Buffer already full Printhead raised Ribbon fault No label stock Buffer now full Printhead hot Label at strip pin Label skipping Printing Intermec EasyCoder PM4i—User’s Guide (IPL version) - Page 58 Chapter 6—Setting Up the Printer Intermec Standard Protocol The Intermec Printer Standard Protocol is a half-duplex protocol. All data transmissions to the printer consist of status inquiry (ENQ), status dump (VT), or message blocks. Each message block starts with the Start of Text (STX) character and ends with the End of Text (ETX) character.
-
Page 59: Test/Service
• WINS Name • MAC Address • IP Selection • IP Address • Netmask • Default Router • Name Server • Mail Server • Primary WINS Server • Secondary WINS Server • Network Statistics Intermec EasyCoder PM4i—User’s Guide (IPL version) -
Page 60: Data Dump
There are two options. The memory will be reset to factory default as soon as an option has been selected and <Enter> is pressed. Select between “All”, which resets the entire memory and “Confi guration” which just resets the confi guration part of the memory. Intermec EasyCoder PM4i—User’s Guide (IPL version) -
Page 61: Media
fi rmware can optimize the heating of the printhead and the print speed. Standard supplies from Intermec are labeled with a 3-digit media sensitivity number (see Appendix D) which is used to specify the media grade. -
Page 62: Darkness
Form Adj Dots Y Specifi es where the Y-position of the origin should be placed on the label. Allowed range is -30 (closest to the center section) to 30 (furthest from the center section). Default is 0. Intermec EasyCoder PM4i—User’s Guide (IPL version) -
Page 63: Confi Guration
If the label taken sensor does not work properly, the sensitiviy can be calibrated in the Setup Mode. Select “LTS Calibration” and follow the instructions in the display. Make sure that no direct sunlight or interior lighting interferes with the the label taken sensor. Intermec EasyCoder PM4i—User’s Guide (IPL version) -
Page 64: Returning To Factory Default Setup
fi les are removed. This means that EasyLAN Wireless settings (SSID, keys, etc.) will retain their values from the pre- vious start. However, the next reboot will reset them to factory default. Intermec EasyCoder PM4i—User’s Guide (IPL version) -
Page 65: Setup Mode
Setup Mode This chapter describes how to navigate in the setup mode, and provides overviews of the Setup Mode. Intermec EasyCoder PM4i—User’s Guide (IPL version) -
Page 66: Navigating In Setup Mode
Move up one level and escape without changing the setting. Move forward on the same level. Move down one level. Acknowledge and move to next menu. Exit the Setup Mode. Can be used anywhere in Setup Mode. Intermec EasyCoder PM4i—User’s Guide (IPL version) - Page 67 Mode. The diagram below shows the options in the main loop. Detailed over- views are shown on the pages that follow. Starting point SETUP: SETUP: SER-COM NETWORK Option SETUP: CONFIGURATION SETUP: TEST/SERVICE SETUP: MEDIA Intermec EasyCoder PM4i—User’s Guide (IPL version)
-
Page 68: Setup Mode Overviews
Scroll back 115200 BAUDRATE; Scroll forward 1200 BAUDRATE; Scroll back 2400 BAUDRATE; 4800 Scroll forward Scroll back Legend: Dotted boxes and lines indicate options. Thick boxes indicates default options. Values inside brackets indicate default settings. Intermec EasyCoder PM4i—User’s Guide (IPL version) - Page 69 IP ADDRESS NETMASK DEFAULT ROUTER NAMESERVER MAC ADDRESS IP SELECTION: IP ADDRESS: NETMASK: DEFAULT ROUTER: NAMESERVER: MAC ADDRESS: DHCP+BOOTP 192.168.1.79 255.255.255.0 192.168.1.1 192.168.1.7 00104017b80e PARITY: MANUAL PARITY: Read-only Read-only Read-only Read-only Read-only DHCP PARITY: BOOTP Intermec EasyCoder PM4i—User’s Guide (IPL version)
- Page 70 ALL: PRINT UDC PRINT UDFs Scroll forward PRINT FORMATS PRINT PAGES Scroll back TEST/SERVICE: TEST/SERVICE: DATA DUMP MEMORY RESET DATA DUMP: MEMORY RESET: CONFIG: CONFIG: CONFIGURATION Scroll forward Scroll forward Scroll back Scroll back Intermec EasyCoder PM4i—User’s Guide (IPL version)
- Page 71 LBL REST POINT: FORM ADJ DOTS X: FORM ADJ DOTS Y: 0/2/4/6/8/10/15/ 0/2/4/6/8/10/15/ 0/2/4/6/8/10/15/ 20/25/30/-30/-25/ 20/25/30/-30/-25/ 20/25/30/-30/-25/ -20/-15/-10/-8/-6/ -20/-15/-10/-8/-6/ -20/-15/-10/-8/-6/ -4/-2 -4/-2 -4/-2 Scroll forward Scroll forward Scroll forward Scroll back Scroll back Scroll back Intermec EasyCoder PM4i—User’s Guide (IPL version)
- Page 72 86XX-15MIL DISABLE REMOVE LABEL AND 7 IN/SEC PRINT SPPED: Scroll forward Scroll forward PRESS ENTER 8 IN/SEC Scroll back Scroll back <Enter> Scroll forward Scroll back SENSITIVITY 9 OUT OF 8-14 Read only, press<Enter> Intermec EasyCoder PM4i—User’s Guide (IPL version)
-
Page 73: 8 Options
Options This chapter describes the options available for the EasyCoder PM4i printer. The options can be factory installed, fi eld-installed by an authorized service tech- nician, or in some cases installed by the operator. Intermec EasyCoder PM4i—User’s Guide (IPL version) -
Page 74: Introduction
Chapter 8—Options Introduction The EasyCoder PM4i provides a high degree of fl exibility because it has a modular design. By adding options to the basic printer, the EasyCoder PM4i can be adapted for a variety of applications. Most options should be installed by an authorized service technician or are only available as factory-installed options. -
Page 75: Integral Liner Takeup Unit
The Label Taken Sensor (LTS) is a photoelectric sensor that enables the printer’s fi rmware to detect if the latest printed label, ticket, tag, etc. has been removed before printing another copy. The LTS cannot be used in connection with a paper cutter. Intermec EasyCoder PM4i—User’s Guide (IPL version) -
Page 76: Internal Fan-Fold Guide
A number of interface boards are available for use with the EasyCoder PM4i printer. The interface boards are either factory-fi tted or can easily be fi tted by an authorized service technician. The EasyCoder PM4i can accommodate one EasyLAN interface board plus one IEEE 1284 Parallel Interface Board. EasyLAN boards: •... -
Page 77: Troubleshooting
Troubleshooting This chapter describes how the Intermec Readiness Indicators work. It also lists various possible cases of inferior printout quality, describes possible causes, and suggests remedies. Intermec EasyCoder PM4i—User’s Guide (IPL version) -
Page 78: Intermec Readiness Indicator
Easy ADC Console. The Easy ADC Console is a PC-based software which allows a supervisor to monitor all connected devices that have an Intermec Readiness Indicator, including handheld computers, access points, and printers. Intermec EasyCoder PM4i—User’s Guide (IPL version) - Page 79 “MANUAL” and “IP ADDRESS” to “0.0.0.0”. This will indicate that the user does not regard the lack of network connection as an error. Note 3: No trap can be sent when this error/event occurs. Intermec EasyCoder PM4i—User’s Guide (IPL version)
- Page 80 Note 4: This error indicates that the printer has not received an IP address. It is only applicable for printers with IP SELECTION set to DHCP and/or BOOTP. Note 5: At most, but not all, printer crashes, the console is reset. This will make the IRI go off. Intermec EasyCoder PM4i—User’s Guide (IPL version)
-
Page 81: Troubleshooting List
Contrast value too Change parameter Chapter 6 high Printhead pressure Adjust Chapter 11 too high Faulty energy Replace CPU board Call Service control Dark lines along Foreign objects on Clean printhead Chapter 10 media path printhead Intermec EasyCoder PM4i—User’s Guide (IPL version) - Page 82 Wrong LSS position Check/change Chapter 11 Dirty sensors Clean media guides Chapter 10 Faulty sensors Replace Call Service Compressed text or Too high print Lower print speed Chapter 6 bar code speed for large media roll Intermec EasyCoder PM4i—User’s Guide (IPL version)
-
Page 83: Maintenance
• Printhead cleaning • External cleaning • Cleaning the media guides • Printhead replacement • Media jams When cleaning or replacing the printhead, take ample precautions to avoid electrostatic discharges. Intermec EasyCoder PM4i—User’s Guide (IPL version) -
Page 84: Printhead Cleaning
Isopropyl alcohol [(CH CHOH; CAS 67-63-0] is a highly fl ammable, moderately toxic, and mildly irritating sub- stance. Turn the printhead lift lever clockwise to Open the front and side doors. raise the printhead. Intermec EasyCoder PM4i—User’s Guide (IPL version) - Page 85 Read the Remove any media and transfer ribbon. warning text. Insert most of the cleaning card under the printhead (1). Engage the printhead Pull out the cleaning card (1) and raise (2). the printhead (2). Intermec EasyCoder PM4i—User’s Guide (IPL version)
- Page 86 fl uid to dissolve the residue. printhead (2). Pull out the cleaning card. If necessary, repeat the process with a fresh cleaning Allow the cleaned parts to dry before card. loading any media (and ribbon). Intermec EasyCoder PM4i—User’s Guide (IPL version)
-
Page 87: External Cleaning
Never use any sharp tools for removing Never spray the printer. Protect it from stuck labels. The printhead and rollers water when cleaning the premises. are delicate. Intermec EasyCoder PM4i—User’s Guide (IPL version) -
Page 88: Cleaning The Media Guides
Loosen the screw on the edge guide. Pull both the upper LSS guide and the edge guide straight out. After cleaning, put back the parts in reverse order making sure that the LSS shafts fi ts into the holder on the upper LSS guide. Intermec EasyCoder PM4i—User’s Guide (IPL version) -
Page 89: Printhead Replacement
While replacing the printhead, the power must be off. The fi rmware will not detect the new printhead resistance until the printer has been restarted. Turn the printhead lift lever clockwise to Open the front and side doors. raise the printhead. Intermec EasyCoder PM4i—User’s Guide (IPL version) - Page 90 Note the snap-lock on the inner arrows and pull out the printhead as far connector. Pull at the connectors—not as the cables allow. at the cables! Intermec EasyCoder PM4i—User’s Guide (IPL version)
- Page 91 Turn the printhead lift lever counter- clockwise so the magnet engages the Load a new supply of media and ribbon, printhead bracket. as described earlier in this manual. Intermec EasyCoder PM4i—User’s Guide (IPL version)
-
Page 92: Media Jams
CHOH; CAS 67-63-0] is a highly fl ammable, moderately toxic, and mildly irritating substance. • Reload the media as descibed in Chapter 4. • Switch on the power. • Readjust the media feed by pressing the <Feed/Pause> key. Intermec EasyCoder PM4i—User’s Guide (IPL version) -
Page 93: 11 Adjustments
This chapter describes how the operator can adjust the printer. The chapter covers the following topics: • Narrow media adjustment • Label stop sensor position adjustment • Printhead pressure adjustment • Ribbon break shaft adjustment Intermec EasyCoder PM4i—User’s Guide (IPL version) -
Page 94: Narrow Media Adjustment
• After having centered the arm, lock it by tightening the nut. • Remember to adjust all edge guides too. Knurled nut Pressure arm Center of media Edge guide Intermec EasyCoder PM4i—User’s Guide (IPL version) -
Page 95: Label Stop Sensor Position Adjustment
• Rotate the screw clockwise to move the sensor towards the center sec- tion. • Rotate the screw counterclockwise to move the sensor outwards, away from the center section. Point of detection Adjustment screw Intermec EasyCoder PM4i—User’s Guide (IPL version) -
Page 96: Printhead Pressure
To return to the factory setting, tighten the screw (+) as far as it goes and then loosen it (-) four full turns. Do not use a higher printhead pressure than necessary, because it may increase the wear of the printhead and shorten its life. Adjustment screw Intermec EasyCoder PM4i—User’s Guide (IPL version) -
Page 97: Ribbon Break Shaft
(bw) to move the outer end of the break shaft backward. Before readjusting the break shaft, make sure that there is no other cause for the wrinkling of the ribbon. (See Chap- ter 9, “Troubleshooting.”) Adjustment screw Ribbon Break Shaft Intermec EasyCoder PM4i—User’s Guide (IPL version) - Page 98 Chapter 11—Adjustments Intermec EasyCoder PM4i—User’s Guide (IPL version)
-
Page 99: Technical Data
Technical Data This appendix lists the technical data for the printer. Please note that Intermec reserves the right to change without prior notice and that this information does not represent a commitment on the part of Intermec. Intermec EasyCoder PM4i—User’s Guide (IPL version) - Page 100 20 to 80% non-condensing Electronics Microprocessor 32 bit RISC On-board Flash SIMMs 2 sockets for 4MB or 8MB each Std. 1 x 4MB On-board SDRAM SIMM 1 socket for 8 MB or 16 Mb Std. 8MB Intermec EasyCoder PM4i—User’s Guide (IPL version)
- Page 101 Liner Takeup operation Rotating Media Supply Option Replaces supply post 3-inch Adapter for Media Option Supply hub only Media Roll Retainer Option Supply hub only Internal Fan-fold Guide Option Side Door with Keylock Option Intermec EasyCoder PM4i—User’s Guide (IPL version)
- Page 102 External Alphanumeric Option Keyboard CompactFlash Cards Option 8MB-1GB /. The max. print length is also restricted by the amount of free SDRAM memory. /. Latin, Greek, and Cyrillic fonts according to Unicode standard are included. Intermec EasyCoder PM4i—User’s Guide (IPL version)
-
Page 103: Media Specifi Cations
Media Specifi cations This appendix specifi es the physical measures for vari- ous types of media. Intermec EasyCoder PM4i—User’s Guide (IPL version) -
Page 104: Media Roll Size
Media rolls to be loaded inside the printer should be wound with the printable side facing outwards. The media supply must not be exposed to dust, sand, grit, etc. Any hard particles, however small, can damage the printhead. Intermec EasyCoder PM4i—User’s Guide (IPL version) -
Page 105: Media
Appendix B—Media Specifi cations Media Non-Adhesive Strip ⇐ a ⇒ Media Width Maximum: 114.3 mm (4.50 inches) Minimum: 25.0 mm (1.00 inches) Media Type Setup • Fix length strip • Var length strip NON-ADHESIVE STRIP Intermec EasyCoder PM4i—User’s Guide (IPL version) -
Page 106: Self-Adhesive Strip
⇐ c ⇒ Media Width (excluding liner) Maximum: 112.7 mm (4.43 inches) Minimum: 23.8 mm (0.94 inches) Media Type Setup • Fix length strip • Var length strip SELF-ADHESIVE STRIP Intermec EasyCoder PM4i—User’s Guide (IPL version) -
Page 107: Self-Adhesive Labels
(e) to be larger than 7 mm (0.28 inches), that batch printing is used, and that no pull back of the media is performed. Intermec does not guarantee that such short labels will work, but it is up to the user to test this in his unique application. - Page 108 Appendix B—Media Specifi cations SELF-ADHESIVE LABELS FEED DIRECTION Intermec EasyCoder PM4i—User’s Guide (IPL version)
-
Page 109: Tickets With Gap
(e) to be larger than 7 mm (0.28 inches), that batch printing is used, and that no pull back of the media is performed. Intermec does not guarantee that such short tickets will work, but it is up to the user to test this in his unique application. - Page 110 Appendix B—Media Specifi cations TICKETS & TAGS FEED DIRECTION Intermec EasyCoder PM4i—User’s Guide (IPL version)
-
Page 111: Tickets With Black Mark
Note: The black mark should be non-refl ective carbon black on a whitish background. Do not allow any perforations to break the edge of the media as this may cause the media to split and jam the printer. Intermec EasyCoder PM4i—User’s Guide (IPL version) - Page 112 Appendix B—Media Specifi cations TICKETS WITH MARKS FEED DIRECTION Intermec EasyCoder PM4i—User’s Guide (IPL version)
-
Page 113: C Interfaces
Interfaces This appendix describes the interface connectors found on the printer’s rear plate. It covers the follow- ing topics: • RS-232 interface • Optional interface boards Intermec EasyCoder PM4i—User’s Guide (IPL version) -
Page 114: Rs-232 Interface
Request to send – Not used /. The external +5V is limited to 500 mA and is automatically switched off at overload. Interface Cable Computer end: Depends on computer model Printer end: DB-9pin plug Intermec EasyCoder PM4i—User’s Guide (IPL version) -
Page 115: Optional Interfaces
fi tted with one of the following EasyLAN interface boards for connection to a Local Area Network (LAN): • EasyLAN Ethernet Interface • EasyLAN Wireless Interface IEEE 1284 Parallel Interface Board Parallel interface connector EasyLAN Ethernet Interface RJ-45 connector Intermec EasyCoder PM4i—User’s Guide (IPL version) - Page 116 Appendix C—Interfaces EasyLAN Wireless Interface EasyLAN antenna Intermec EasyCoder PM4i—User’s Guide (IPL version)
-
Page 117: Intermec Supplies
Intermec Supplies This appendix describes the supplies offered by Intermec for use with this printer, that is, direct ther- mal media, thermal transfer ribbons, and receiving face materials for thermal transfer printing. Intermec EasyCoder PM4i—User’s Guide (IPL version) -
Page 118: Direct Thermal Media
Appendix D—Intermec Supplies Direct Thermal Media Intermec offers two quality grades of direct thermal media for the Easy- Coder printers: Premium Quality Top-coated media with high demands on printout quality and resistance against moisture, plasticisers, and vegetable oils. Examples: Europe... -
Page 119: Thermal Transfer Media
Appendix D—Intermec Supplies Thermal Transfer Media Intermec offers stock labels for thermal transfer printing in a wide range of quality grades. Uncoated Papers Economical high-volume printing. To be used with GP/TMX 1500 rib- bons. Examples: Europe North America TTR Uncoated –... -
Page 120: Transfer Ribbons
Appendix D—Intermec Supplies Transfer Ribbons Intermec offer three ranges of thermal transfer ribbons optimized for dif- ferent purposes: • General Purpose (GP/TMX 1500) transfer ribbons allow high speed printing and give a good printout, but are somewhat sensitive to smearing. They may be the best choice for uncoated and coated papers. -
Page 121: Setting The Media Sensitivity Number
Intermed has developed heating schedules (the amount of heat required to image a label) to produce the highest possible print quality for Intermec media and ribbon combinations on Intermec printers. Look for the three-digit media sensitivity number on: • The side of the media roll. Use the last three digits (140 in the exam- ple below) of the 15-digit number stamped on the roll for the media sensitivity number. - Page 122 1. At the DOS prompt, type the following command and press Enter: MODE COM1 96,E,7,1,N 2. Type the following command lines and press Enter: COPY CON COM1 <STX><SI>g1,567<ETX>^Z where: sets the media sensitivity number to 567. <SI>g1,567 Intermec EasyCoder PM4i—User’s Guide (IPL version)
- Page 123 (Plastic) mium-3/6/7 Duratran Syntran/Premium-3/6/7 European Polyethylene/Premium Duratran Kimdura/Premium-3/6/7 European Duratran Kimdura/Pre- mium 500 Series Medium Sensitivity Duratran II-1/Premium-3/6/7 (Paper) Duratran II Tag-7mil/ Premium-3/6/7 European Coated/Premium 300 Series Low Sensitivity (Plastic) Super Prem. Poly./Super Prem.-7 Intermec EasyCoder PM4i—User’s Guide (IPL version)
- Page 124 Appendix D—Intermec Supplies Intermec EasyCoder PM4i—User’s Guide (IPL version)
- Page 126 Intermec Technologies Corporation Corporate Headquarters 6001 36th Avenue West Everett, WA 98203 U.S.A. tel +425.348.2600 fax +425.355.9551 www.intermec.com EasyCoder PM4i Bar Code Label Printer, User’s Guide (IPL Version) *1-960584-02* *1-960584-02*...
Need help?
Do you have a question about the EasyCoder PM4i and is the answer not in the manual?
Questions and answers