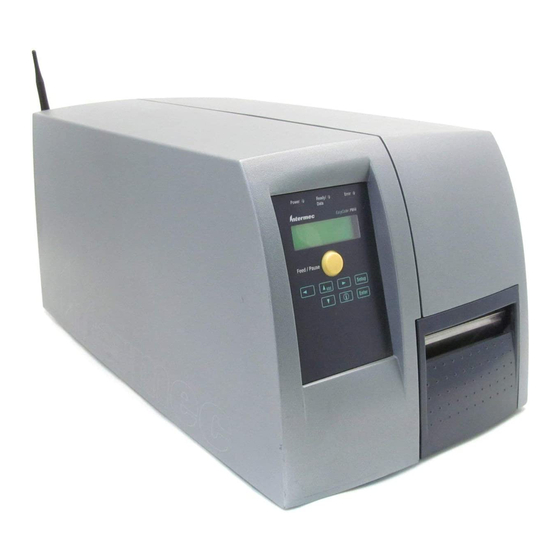
Intermec EasyCoder PM4i Installation Instructions Manual
Cutter kit
Hide thumbs
Also See for EasyCoder PM4i:
- User manual (186 pages) ,
- Installation instructions manual (40 pages) ,
- Safety instructions (24 pages)
Table of Contents
Advertisement
Quick Links
Advertisement
Table of Contents

Summary of Contents for Intermec EasyCoder PM4i
-
Page 1: Installation Instructions
Installation Instructions Cutter Kit (for EasyCoder PM4i) - Page 2 Service support: +46 31 869500 The information contained herein is proprietary and is provided solely for the purpose of allowing customers to operate and/or service Intermec manufactured equipment and is not to be released, reproduced, or used for any other purpose without written permission of Intermec.
-
Page 3: Table Of Contents
Contents Introduction ... iv Printer Firmware ... iv Installation Kit ... iv Description General Information ... 2 Media ... 3 Measures and Weight ... 4 Physical Installation Installation Instructions ... 6 Fingerprint Control Activating the Cutter... 10 Controlling the Cut Position... 10 IPL Control Activating the Cutter... -
Page 4: Introduction
The installation instructions also describes how to control the cutter in Intermec Fingerprint and in Intermec Programming Language (IPL). Printer Firmware The printer must be fi tted with Intermec Fingerprint v8.00 (or later) or IPL v2.00 (or later). Installation Kit The Cutter Kit contains: •... -
Page 5: Description
Description This chapter describes the cutter and provides essen- tial technical data. Cutter Kit (EasyCoder PF4i-series) Installation Instructions... -
Page 6: General Information
General Information The cutter is a factory-installed or fi eld-installable option for the Easy- Coder PM4i printer. The cutter automatically cuts off the media after printing according to instructions in the controlling fi rmware. The cut off portions of media are presented at the front of the cutter and can be collected on a removable tray. -
Page 7: Media
Media The cutter is primarily intended to cut paper-based media in the form of continuous stock. It is also possible to cut through the liner between labels, but be careful not to cut through the labels themselves, because the adhesive will stick to the cutting blade and may cause malfunction. Avoid cutting soft plastic-based media. -
Page 8: Measures And Weight
Chapter 1 — Description Measures and Weight When a cutter is installed, the measures of the printer are: 154 mm (6.06 in.) 593 mm (23.35 in.) 747 mm (29.41 in.) 644 mm (25.35 in.) The weight is increased by approximately 1.8 kg (4.0 pounds) -
Page 9: Physical Installation
Physical Installation This chapter describes how to physically install the cutter in an EasyCoder PM4i printer. Cutter Kit (EasyCoder PF4i-series) Installation Instructions... -
Page 10: Installation Instructions
Installation Instructions Install the cutter this way: • Turn the printer upside down on a soft piece of cloth or similar. • Remove the front door, which is held by two #T20 Torx screws. • Insert the cutter bracket between the printer’s bottom plate and print mechanism so the three thread bushings on the bracket fi... -
Page 11: Fingerprint Control
Fingerprint Control This chapter describes how to control the cutter in an EasyCoder PM4i printer when running Intermec Fingerprint v8.00 (or later). Cutter Kit (EasyCoder PF4i-series) Installation Instructions... -
Page 12: Activating The Cutter
Chapter 3 — Fingerprint Control Activating the Cutter The cutter is activated by CUT or CUT ON statements, see the Intermec Fingerprint v8.xx, or the Intermec Direct Protocol v8.xx manuals. Applica- tion programs may have related facilities for operating the cutter. -
Page 13: Ipl Control
IPL Control This chapter describes how to control the cutter in an EasyCoder PM4i printer when running IPL v2.00 (or later). Cutter Kit (EasyCoder PF4i-series) Installation Instructions... -
Page 14: Activating The Cutter
Chapter 4 — IPL Control Activating the Cutter The cutter is activated in the Setup Mode (Setup/Confi guration/Cutter) or by the commands <SO> (cut) and <SI>c1 (enable cutter) or <SI>c0 (disable cutter). Application programs may have related facilities for operating the cutter. Cutter Kit (EasyCoder PF4i-series) Installation Instructions... - Page 16 Intermec Printer AB Idrottsvägen 10, P.O. Box 123 S-431 22 Mölndal, Sweden tel +46 31 869500 fax +46 31 869595 www.intermec.com Cutter Kit (EasyCoder PM4i-series) Installation Instructions *1-960595-00* *1-960595-00*...


Need help?
Do you have a question about the EasyCoder PM4i and is the answer not in the manual?
Questions and answers