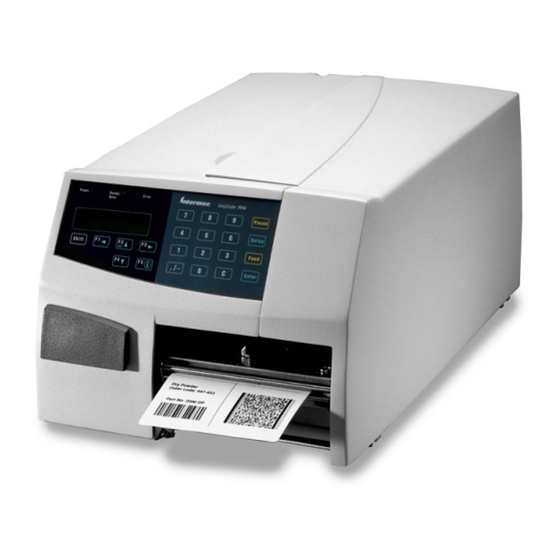
Intermec EasyCoder PF2i Installation Instructions Manual
Double serial interface kit
Hide thumbs
Also See for EasyCoder PF2i:
- Service manual (270 pages) ,
- User manual (194 pages) ,
- Installation instructions manual (72 pages)

Subscribe to Our Youtube Channel
Related Manuals for Intermec EasyCoder PF2i


Summary of Contents for Intermec EasyCoder PF2i
-
Page 1: Installation Instructions
Installation Instructions Double Serial Interface Kit (for EasyCoder PF2i, PF4i, PF4ci, PM4i, PX4i and PX6i) - Page 2 Th e information contained herein is proprietary and is provided solely for the purpose of allowing customers to operate and service Intermec- manufactured equipment and is not to be released, reproduced, or used for any other purpose without written permission of Intermec.
-
Page 3: Table Of Contents
Contents Introduction Description... 2 Printer Firmware ... 2 Installation Kit ... 2 Physical Installation EasyCoder PF2/4i printers ... 4 EasyCoder PM4i printers ... 9 EasyCoder PX4/6i printers ... 15 Serial Interface "uart2:" and "uart4:" RS-232 Non-isolated ... 20 RS-422 Isolated, Full duplex ... 22 RS-485 Isolated, Half duplex ... - Page 4 Contents Double Serial Interface Kit Installation Instructions...
-
Page 5: Introduction
Introduction Th is chapter describes the Double Serial Interface Kit for EasyCoder PF2/4i-, PM4i-, and PX4/6i-series printers. Double Serial Interface Kit Installation Instructions... -
Page 6: Description
Printer Firmware Th e printer must be fi tted with Intermec Fingerprint v8.00 (or later). For some combinations of two interface boards in EasyCoder PM4i and PX4/6i printers, Fingerprint v8.30 (or later) is required. Th is kit does not work with IPL. -
Page 7: Physical Installation
Physical Installation Th is chapter describes how to physically install the Double Serial Interface Kit in an EasyCoder PF2/4i-, PM4i-, or PX4/6i-series printer. Take precautions against electrostatic discharges, for example by wearing grounded bracelets. Double Serial Interface Kit Installation Instructions... -
Page 8: Easycoder Pf2/4I Printers
Th e electronic compartment contains wires and compo- nents with dangerous voltage (up to 380V). Make sure that the printer is switched off and the power cord is discon- nected before the left-hand cover is removed. • Open the right-hand door. - Page 9 • Remove the two #T10 Torx screws that hold the interface cover plate. Remove the cover plate. • Save the cover plate for possible later use. Keep the screws. • Remove the #T20 Torx screw fi tted on the hexagonal spacer at the CPU board.
- Page 10 • Insert the interface board with the component side facing right, as seen from behind. • Attach the interface board to the printer’s rear plate using the two screws left over when you removed the original cover plate. • Using the #T20 Torx screw you previously removed, attach the inter- face board to the hexagonal spacer on the CPU board.
- Page 11 UARTB RS232: IC21, J6A RS422: IC22, J6B, J7, J8 20MACL: IC23, IC24, J5 J9*, J10* *: TRANSM.=J9, RECEIV.=J10 PASSIVE=B, ACTIVE=A+C RS232: IC11, J2A RS422: IC12, J3, J4 RS485: IC13, J1, J4* *: IF END OF CABLE UARTA • Th e fl at cable should run as illustrated below. Double Serial Interface Kit Installation Instructions Chapter 2 —...
- Page 12 Take care so the console cable runs above the ribbon motor (if any) and does not become entangled in the headlift mechanism. • Connect the communication cables to the connectors on the printer’s rear plate. • Connect the power cord and switch on the power.
-
Page 13: Easycoder Pm4I Printers
• Switch off the printer and disconnect the power cord. • Disconnect all communication cables. • Turn the printer over so it rests on its left-hand cover. Use a soft cloth or similar to avoid scratches. • Open the right-hand door. - Page 14 Chapter 2 — Physical Installation • Remove the two #T10 Torx screws that hold the cover plate. Always start with the inner one. Remove the cover plate. • Save the cover plate for possible later use. Keep the screws. • Remove the #T20 Torx screw fi tted on the hexagonal spacer at the center of the CPU board.
- Page 15 • Insert the interface board with the component side facing right, as seen from behind. • Attach the interface board to the printer’s rear plate using the two screws left over when you removed the original cover plate. • Using the #T20 Torx screw you previously removed, attach the inter- face board to the hexagonal spacer on the CPU board (see next page).
- Page 16 Chapter 2 — Physical Installation UARTB RS232: IC21, J6A RS422: IC22, J6B, J7, J8 20MACL: IC23, IC24, J5 J9*, J10* *: TRANSM.=J9, RECEIV.=J10 PASSIVE=B, ACTIVE=A+C RS232: IC11, J2A RS422: IC12, J3, J4 RS485: IC13, J1, J4* *: IF END OF CABLE UARTA •...
- Page 17 • In case of two interface boards, the fl at cable should run as illustrated below. • Put back the cover over the electronics compartment. • Connect the console cable to J50 on the CPU board and put back the cover over the electronics compartment.
- Page 18 Chapter 2 — Physical Installation Allowed interface combinations (Fingerprint v8.30 or later) Left-hand slot Ports Double Serial uart2: + uart3: Double Serial uart2: + uart3: Double Serial uart2: + uart3: Double Serial uart2: + uart3: Serial/Industrial uart2: Serial/Industrial uart2: Serial/Industrial uart2: Serial/Industrial uart2:...
-
Page 19: Easycoder Px4/6I Printers
Th e electronics compartment contains high voltage compo- nents and wires. Do not open the electronics compartment before the printer is safely disconnected from any AC supply. • Remove the one or two cover plates depending on how many interface boards you are going to install. - Page 20 Illustration shows installation of one IEEE 1284 and one Double Serial interface board. • Installation of one board: Attach the interface board in the innermost slot in the printer’s rear plate using the two screws left over when you removed the original cover plate. Using the #T20 Torx screw you previously removed, attach the interface board to the hexagonal spacer at the center of the CPU board.
- Page 21 P1 on the interface board, as illustrated below. • Th e fl at cable should run as illustrated below. • Put back the cover over the electronics compartment. • Connect the communication cables to the connectors on the printer’s rear plate. Double Serial Interface Kit Installation Instructions...
- Page 22 Chapter 2 — Physical Installation • Connect the power cord and switch on the power. • In case the interface board provides additional serial communication ports, enter the Setup Mode to set the proper communication param- eters for these ports. Allowed interface combinations (Fingerprint v8.30 or later) Left-hand slot Ports...
-
Page 23: Serial Interface "Uart2:" And "Uart4
Th is chapter describes how to modify the interface board for RS-232 non-isolated (standard), RS-422 isolated/full duplex, or RS-485 isolated/half duplex on the "uart2:", "uart3:", or "uart4:" port and explains the confi guration of the interface connector. Th e connector is marked “UART A” on the interface board. -
Page 24: Rs-232 Non-Isolated
Chapter 3 — Serial Interfaces "uart2:", "uart3:", and "uart4:" RS-232 Non-isolated (standard) Strap fi tted on J2 A RS-232 circuit fi tted on IC11 IC23 UARTB IC24 RS232: IC21, J6A RS422: IC22, J6B, J7, J8 20MACL: IC23, IC24, J5 J9*, J10* *: TRANSM.=J9, RECEIV.=J10 PASSIVE=B, ACTIVE=A+C RS232: IC11, J2A... - Page 25 Chapter 3 — Serial Interface "uart2:", "uart3:", and "uart4:" Connector Confi guration (RS-232 on "uart2:", "uart3:", or "uart4:") DB-9 socket Signal – +5V (0.5 RS-232 socket as seen from the outside. Double Serial Interface Kit Installation Instructions Meaning External +5VDC max 500 mA (automatic switch- off...
-
Page 26: Rs-422 Isolated, Full Duplex
Chapter 3 — Serial Interfaces "uart2:", "uart3:", and "uart4:" RS-422 Isolated, Full Duplex (reconfi guration required) Remove strap on J2 A Fit straps on J3 and J4 Remove RS-232 circuit on IC11 Fit RS-422 circuit Th e RS-422 circuit is available as a spare part, see the on IC12 Spare Parts Catalog. - Page 27 Chapter 3 — Serial Interface "uart2:", "uart3:", and "uart4:" Connector Confi guration (RS-422 Isolated on "uart2:", "uart3:", or "uart4:") DB-9 socket Signal +TXD +RXD – GNDE -RXD -TXD – GNDE -TXD +RXD -RXD +TXD +5V (0.5 A) if GND strap fitted RS-422 socket as seen from the outside.
-
Page 28: Rs-485 Isolated, Half Duplex
Chapter 3 — Serial Interfaces "uart2:", "uart3:", and "uart4:" RS-485 Isolated, Half Duplex (reconfi guration required) Remove strap on J2 A Remove RS-232 circuit on IC11 Fit RS-485 driver circuit on IC13 Fit strap on J4 if end of cable (terminator) Fit strap on J1 Th e RS-485 circuit is available as a spare part, see the... - Page 29 Chapter 3 — Serial Interface "uart2:", "uart3:", and "uart4:" Connector Confi guration (RS-485 Isolated on "uart2:" only) DB-9 socket Signal +DATA – – GNDE – – -DATA – GNDE -DATA +DATA +5V (0.5 A) if GND strap fitted RS-422 socket as seen from the outside. Note: Th e increased use of LAN networks has made the RS- 485 interface somewhat obsolete, because RS-485 requires a special communication protocol and a dedicated wiring system...
- Page 30 Chapter 3 — Serial Interfaces "uart2:", "uart3:", and "uart4:" Double Serial Interface Kit Installation Instructions...
-
Page 31: Serial Interface "Uart3:" And "Uart5
Th is chapter describes how to modify the interface board for RS-232 non-isolated (standard), RS-422 non-isolated/full duplex, or 20 mA current loop on the "uart3:", "uart4:", and "uart5:" port and explains the confi guration of the interface connector. Th e con- nector is marked “UART B”... -
Page 32: Rs-232 Non-Isolated
Chapter 4 — Serial Interface "uart3:", "uart4:", and "uart5:" RS-232 Non-isolated (standard) Strap fi tted on J6 A RS-232 circuit fi tted on IC21 IC23 UARTB IC24 RS232: IC21, J6A RS422: IC22, J6B, J7, J8 20MACL: IC23, IC24, J5 J9*, J10* *: TRANSM.=J9, RECEIV.=J10 PASSIVE=B, ACTIVE=A+C RS232: IC11, J2A... - Page 33 Chapter 4 — Serial Interface "uart3:", "uart4:", and "uart5:" Connector Confi guration (RS-232 on "uart3:", "uart4:", or "uart5:") DB-9 socket Signal – +5V (0.5 RS-232 socket as seen from the outside. Double Serial Interface Kit Installation Instructions Meaning External +5VDC max 500 mA (automatic switch- off...
-
Page 34: Rs-422 Non-Isolated, Full Duplex
Chapter 4 — Serial Interface "uart3:", "uart4:", and "uart5:" RS-422 Non-isolated, Full Duplex (reconfi guration required) Move strap from J6 A to J6 B Fit straps on J7 and J8 Fit RS-422 circuit on IC22 Remove RS-232 circuit from IC21 Th e RS-422 circuit is available as a spare part, see the Spare Parts Catalog. - Page 35 Chapter 4 — Serial Interface "uart3:", "uart4:", and "uart5:" Connector Confi guration (RS-422 Non-isolated on "uart3:", "uart4:", or "uart5:") DB-9 socket Signal +TXD +RXD – GNDE -RXD -TXD – -TXD +RXD -RXD +TXD +5V (0.5 A) RS-422 socket as seen from the outside. Double Serial Interface Kit Installation Instructions Meaning External +5VDC max 500 mA (automatic switch-off...
-
Page 36: 20 Ma Current Loop
Chapter 4 — Serial Interface "uart3:", "uart4:", and "uart5:" 20 mA Current Loop (reconfi guration required) Remove strap from J6 A Fit strap on J10 if printer is receiver: A+C = active B = passive Fit strap on J9 if printer is... - Page 37 Chapter 4 — Serial Interface "uart3:", "uart4:", and "uart5:" Connector Confi guration (20 mA Current Loop on "uart3:", "uart4:", or "uart5:") DB-9 socket Signal +TXD +RXD – GNDE -RXD -TXD – -TXD +RXD -RXD +TXD +5V DC if GND strap fitted 20 mA Current Loop socket as seen from the outside.
- Page 38 Chapter 4 — Serial Interface "uart3:", "uart4:", and "uart5:" Double Serial Interface Kit Installation Instructions...
- Page 40 Intermec Technologies Corporation Corporate Headquarters 6001 36th Avenue West Everett, WA 98203 tel 425.348.2600 fax 425.355.9551 www.intermec.com Double Serial Interface Kit Installation Instructions *1-960592-01* *1-960592-01*...
Need help?
Do you have a question about the EasyCoder PF2i and is the answer not in the manual?
Questions and answers