Table of Contents
Advertisement
Quick Links
Advertisement
Table of Contents

Related Manuals for Microh Ultra Spot 700


Summary of Contents for Microh Ultra Spot 700
- Page 2 Table of content ················································ ························································· ················································ ····································································· ····································································· ················································ ····································································· ················································ ······································ ················································ ················································ ····································································· ····································································· ················································ ························································· ················································ ························································· ················································ ························································· ················································ ················································ ················································ ·························································...
-
Page 3: Open The Box And Checking
1. Open the box and checking Congratulations on choosing our products! Please carefully read this instruction manual in its entirety and keep it well for using reference. This manual contained about the installation and the relative using inform ation of this products. Please according to this manual's relative speaking when using this equipment. - Page 4 CAUTION ! EYEDAMAGES ! Avoid looking directly into the light source (meant especially for epileptics) ! Ø Installation Make sure all parts for fixing the projector are in a good state of repair. Make sure the point of anchorage is stable before positioning the projector. The safety chain must be properly hooked onto the fitting and secured to the framework, so that, if the primary support system fails, the fitting falls as little as possible.
-
Page 5: Operating Determinations
Ø Maintenance Before starting any maintenance work or cleaning the projector, cut off power from the mains supply. After switching off, do not remove any parts of the fitting for at least 10 minutes. After this time the likelihood of the lamp exploding is virtually nill. If it is necess ary to replace the lamp, wait for another 15 minutes to avoid getting burnt. -
Page 6: Rigging The Fixture
The lamp used in this projector is a discharge lamp.After switching off don't attempt to restart the projector until la mp has cooled,this will require approx 15 minutes.Switc hing the lamp on and off at short intervals will reduce the life of both the lamp and the projector.But occasional bre aks will prolong the lamp and projector 4.Rigging the fixture... - Page 7 W hen rigging, derigging or servicing the fixture staying in the area below the installation place, on bridges, under high working places and other endangered areas is forbidden. The operator has to make sure that safety-relating and machine-technical installations are approved by an expert before taking into operation for the first time and after changes before taking into operation another time.
- Page 8 onnection If you wish to change the power supply settings, see the chapter Appendix. Connect the fixture to the mains with the enclosed power cable and plug. The earth has to be connected! Cable EU Cable US International Brown Black Live Light blue White...
-
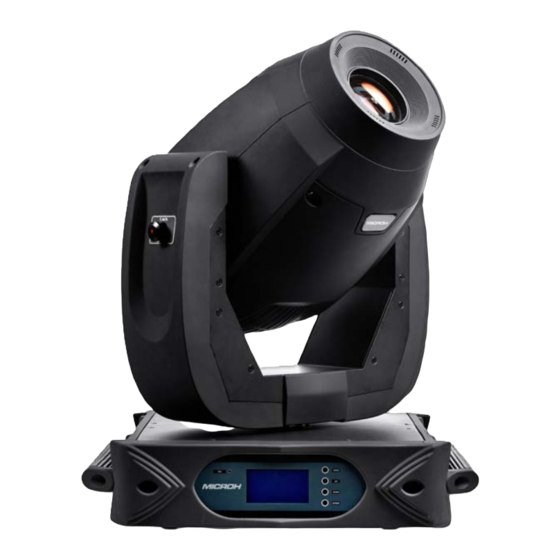
Page 9: Description Of The Device
4 3 3 DMX Terminator Diagram - For installations where the DMX cable has to run a long distance or is in an electrically noisy environment it is recommended to use a DMX terminator. This help in preventing corruption of the signal by electrical noise. - Page 10 6.Dimension...
-
Page 11: Navigation In The Menu
7 Display Control 7.1 Navigation in the Menu The Control Board o ers several features: you can simply set the starting address, switch on ando the lamp, run the preprogrammed program or make a reset. The main menu is accessed by pressing the Mode-button until the display starts ashing. -
Page 12: Standard Version
7 3 Menu Maps Standard version Set Dmx Address A001~AXXX Value Display PAN Moving…… Auto Program Master Function Alone Mode Music Control Master Alone Time Info Current Time ON/OFF Total Run Time ON/OFF Lamp Run Time ON/OFF Clear Fixture Time ON/OFF Information Temp. - Page 13 wireless version Set Dmx Address A001~AXXX Value Display PAN Moving…… Auto Program Master Alone Function Mode Music Control Master Alone Time Info Current Time ON/OFF Total Run Time ON/OFF Lamp Run Time ON/OFF Clear Fixture Time ON/OFF Information Temp. Info Base Temp ON/OFF Head Temp...
-
Page 14: Dmx Protocol
8 DMX protocol MODEL1 MODEL2 NAME FUNCTION DMX VALUE PAN 8BIT 0-255 Pan 16BIT 0-255 TILT 8BIT 0-255 TILT 16BIT 0-255 max to min speed 0-225 blackout by movement 226-235 Speed pan/tilt movement blackout by all wheel changing 236-245 no function 246-255 Open / white 0-17... - Page 15 gobo 4 40-49 gobo 5 50-59 gobo 6 60-69 gobo 7 70-79 gobo 8 80-89 gobo 9 90-99 Gobo 1 shake slow to fast 100-109 Gobo 2 shake slow to fast 110-119 Gobos index, cont.rotation Gobo 3 shake slow to fast 120-129 Gobo 4 shake slow to fast 130-139...
- Page 16 Macro 7 176-183 Macro 8 184-191 Macro 9 192-199 Macro 10 200-207 3 facet rotating Macro 11 208-215 prism, Prism / Macro 12 216-223 Gobo macros Macro 13 224-231 Macro 14 232-239 Macro 15 240-247 Macro 16 248-255 Frost 0~100% 0-191 Pulse opening fast to slow 192-223...
-
Page 17: Maintenance And Cleaning
9.Maintenance and cleaning DANG ER : Disconnect from the mains before starting any maintenance work The front objective lens will require weekly cleaning as smoke-fluid tends to building up residues, reducing the light-output very quickly. The cooling-fans should be cleaned monthly The gobos m ay be cleaned with a soft brush. - Page 18 10. Electric equipment specification SOURCE : PHILIPS MSR GOLD TM 700/2 MINI FASTFIT POWER CONSUMPTION : 980W AC220V/50HZ VOLTAGE : AC100-240V 50/60HZ NET WEIGHT 24 8KG 10 1 Channel Characteristics 22 DMX CHs Scan: Pan 540°,Tilt260°.Scan speed adjustable. Scan following with shutter. Fixture could auto reset.
Need help?
Do you have a question about the Ultra Spot 700 and is the answer not in the manual?
Questions and answers