Table of Contents
Advertisement
Quick Links
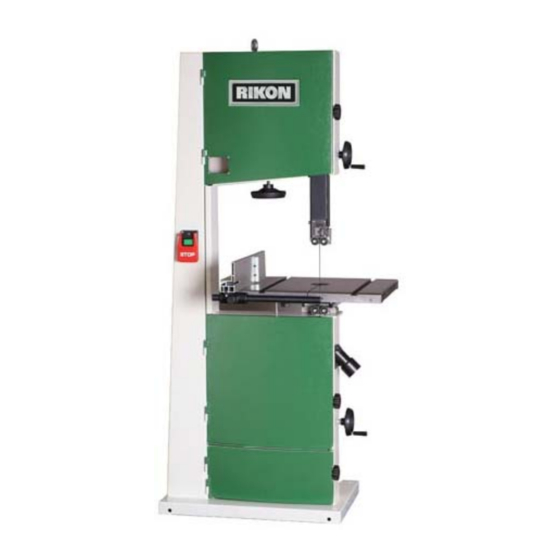
16" Bandsaw
Model: 10-336
16" Bandsaw
Model: 10-336
Record the serial number and date of purchase
in your manual for future reference.
Record the serial number and date of purchase
Serial number:
in your manual for future reference.
Date of purchase:
Serial number:
Date of purchase:
For more information:
www.rikontools.com
info@rikontools.com
or
For Parts or Questions:
For more information:
techsupport@rikontools.com or 877-884-5167
www.rikontools.com
info@rikontools.com
or
Part # 10-336M1
For Parts or Questions:
techsupport@rikontools.com or 877-884-5167
Part # 10-336M1
Advertisement
Table of Contents

Summary of Contents for Rikon Power Tools 10-336
- Page 1 16” Bandsaw Model: 10-336 16” Bandsaw Model: 10-336 Record the serial number and date of purchase in your manual for future reference. Record the serial number and date of purchase Serial number: in your manual for future reference. Date of purchase:...
-
Page 4: California Proposition 65 Warning
California Proposition 65 Warning WARNING: Some dust created by power sanding, sawing, grinding, drilling, and other construction activities contains chemicals known to the State of California to cause cancer and birth defects or other reproductive harm.Your risk from exposure to these chemicals varies, depending on how often you do this type of work. -
Page 5: Getting To Know Your Bandsaw
1.0 Getting to know your bandsaw 1.0 Getting to know your bandsaw A. Lifting Ring H. Rise & Fall Handwheel A. Lifting Ring H. Rise & Fall Handwheel B. Tension Indicator Window K. Rise & Fall Lock Knob B. Tension Indicator Window K. - Page 6 Lifting Ring Fig.1 Fitting Working Table With the help of another person, lift the working table onto the trunnion. Mount the working table to the trunnion using the supplied (4) hex bolts and (4) washers (A--Fig.2) Using Hex socket screw, washers and leveling plate (B--Fig.2) for the working table flatness.
- Page 7 4.0 Adjustment 4.0 Adjustment 4.0 Adjustment Setting the Table Square to Saw Blade Setting the Table Square to Saw Blade Setting the Table Square to Saw Blade The table may be set at 90 to the saw blade by adjusting the table stop screw under the table. The table stop screw rests on the top of the lower wheel bandwheel housing.
- Page 8 Adjusting the Blade Guides Upper Guides: To adjust the position of the back rotating bearing k rotating plate forward or backward, loose the socket head screw ket head screw (A-Fig.9) before adjusting, then tight it. t it. To adjust the position of the side rotating bearing rotating plate (D-Fig.9) to left or right direction, loose the screw ose the locking...
- Page 9 Changing the Blade Speed WARNING! Before carrying out any adjustment or maintenance, ensure that the machine is isolated and disconnected from the electricity supply. This Bandsaw has two blade speeds, low speed and high speed. The lower bandwheel (A--Fig.12) has two, integral, High Speed multi-vee form pulleys and the motor shaft has a Fig.12...
-
Page 10: Operation
5.0 Operation The blade cuts on a continuous downstroke. With both hands, fi rmly hold the workpiece down on the table, and feed it towards the blade slowly, keeping your hands away from the blade. For best results the blade must be sharp. A dull blade will not cut correctly, especially when straight cutting, and causes excess pressure to be applied on the rear guide bearings. -
Page 11: Troubleshooting
8.0 Troubleshooting WARNING: FOR YOUR OWN SAFETY, ALWAYS TURN OFF AND UNPLUG THE MACHINE BEFORE CARRYING OUT ANY TROUBLESHOOTING. TROUBLE PROBABLE CAUSE REMEDY The machine does 1. No power supply. Check the cable for breakage. not work when 2. Defective switch. Contact your local dealer for repair. -
Page 12: Parts Diagram
9.0 Parts diagram... -
Page 13: Parts List
10.0 Parts list Frame Part No. Description M6X12GB80B Screw JMBS1601020001 Pulley JMBS1601011000B Frame JMBS1601020003 Rubber tyre M12GB825Z Screw CLP47GB893D1B Retaining ring JL26010001 Window BRG180204GB278D Bearing RVT3X7GB12618A Rivet JL26010018-001S Tube JMBS2203040009 Shaft JMBS1601022100 Lower wheel PIN5X18GB879B Roll pin M27X2GB6171Z WSH10GB97D1Z Washer WSH27GB93Z Washer M10GB6170Z... - Page 14 Table...
- Page 15 Guide...
- Page 16 Table Part No. Description Guide Part No. Description JL28061101 Bracket M5X10GB70Z Screw JL93010018 Tube WSH5GB97D1Z Washer JL46084000A-001S Handle M6X16GB70Z Screw JMBS1602060001 Fence WSH6GB96Z Washer JMBS1601060002 Plate M6X15GB/T17880D3Z JMBS1601060003 Handle base JMBS1602051000A Guard WSH6GB97D1Z Washer JL29043001 Sight cover JL28060017 Handle M4X8GB818Z Screw M6X20GB70Z Screw...
-
Page 17: Year Limited Warranty
Warranty 2-Year Limited Warranty RIKON Power Tools, Inc. (“Seller”) warrants to only the original retail consumer/purchaser of our products that each product be free from defects in materials and workmanship for a period of two (2) years from the date the product was purchased at retail. This warranty may not be transferred. - Page 18 For more information: 16 Progress Road Billerica, MA 01821 877-884-5167/781-933-8400 techsupport@rikontools.com www.rikontools.com Printed in China Copyright RIKON Power Tools, Inc. 2010...


Need help?
Do you have a question about the 10-336 and is the answer not in the manual?
Questions and answers