Table of Contents
Advertisement
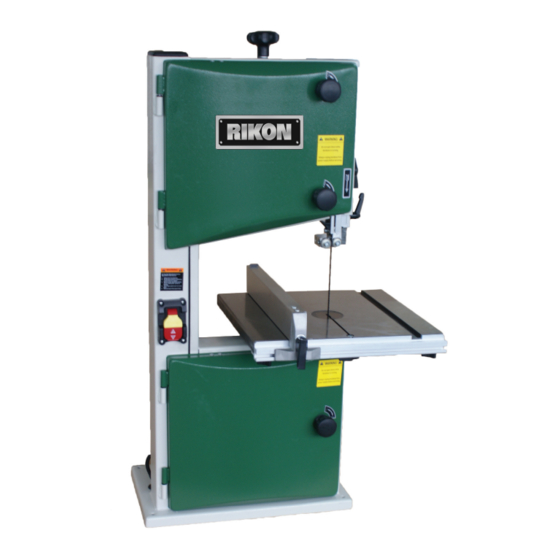
10" Woodworking Bandsaw
Model: 10-305
Record the serial number and date of purchase
in your manual for future reference.
Serial number:
Date of purchase:
For more information:
www.rikontools.com
info@rikontools.com
or
For Parts or Questions:
techsupport@rikontools.com or 877-884-5167
Part # 10-305M4
Advertisement
Table of Contents

Related Manuals for Rikon Power Tools 10-305


Summary of Contents for Rikon Power Tools 10-305
- Page 1 10” Woodworking Bandsaw Model: 10-305 Record the serial number and date of purchase in your manual for future reference. Serial number: Date of purchase: For more information: www.rikontools.com info@rikontools.com For Parts or Questions: techsupport@rikontools.com or 877-884-5167 Part # 10-305M4...
-
Page 2: Table Of Contents
TABLE OF CONTENTS Table of contents........................................2 Specifications......................................2 Safety instructions........................................2 Assembly..........................................4 Getting to know your bandsaw......................................5 Adjustment..........................................6 Operation...........................................8 Maintenance........................................8 Troubleshooting.........................................9 Electrical schematic/ Requirements......................................9-10 Parts list/ Parts diagram........................................12-13 SPECIFICATIONS Throat width 9-5/8” Max. cutting depth 4-15/16” Blade length 70-1/2” Blade width 1/8” – 1/2” Table size 12-1/12”... - Page 3 Always Wear Proper Apparel. Never wear loose clothing or jewelry that might get caught in moving parts. Rubber-soled footwear is recommended for the best footing. Always Use Safety Glasses and Wear Hearing Protection. Also use a face or dust mask if the cutting operation is dusty. Never Overreach.
-
Page 4: Assembly
UNPACKING AND CHECKING CONTENTS Wing Nut M6............1 The 10-305 10” Bandsaw is shipped complete in one box. a. Separate all parts from carton and check each item with “Table of Carton Contents” to make sure all items are accounted for, before Hex. -
Page 5: Getting To Know Your Bandsaw
d. Place the blade tension knob on to the blade tensioner (See Fig. FIG. 1 FIG. 4 b. Fasten the guide rail with two each star knob screw and washer to the table. Use the hex socket head cap screw, washer and wing e. -
Page 6: Adjustment
ADJUSTMENT 3. TILTING THE TABLE 1. CENTERING THE TABLE For bevel cuts, the table tilts 0 through 45 degrees. a. Loosen the four hex. bolts mounting the table to the upper table trunnion. (See Fig. 7) a. To tilt the table, loosen the wing nut on the table trunnion, set the table to the required angle and tighten the wing nut again (See Fig. - Page 7 a. Remove the rip fence, the guide rail, the wing nut and screw from c. Set the blade guide to the required height by turning the guide the table. post adjusting knob. b. Open the upper and lower doors by turning the door locking d.
-
Page 8: Operation
d. When the correct adjustment is reached, lock the rear roller guide in position with the guide adjusting screw (D) Fig.16 Hex. socket head cap screw Guide adjusting Lock nut screw (C) FIG. 17 c. Using a clip pliers (not provided) remove the retaining ring from Guide adjusting screw (D) FIG. -
Page 9: Troubleshooting
TROUBLESHOOTING Problem Diagnosis Remedy The machine does not work when switched 1. No power supply. 1. Check the cable for breakage. 2. Defective switch. 2. Replace the lock switch. 3 Defective motor. 3. Defective motor. The saw blade does not move with the 1. - Page 10 ELECTRICAL REQUIREMENTS In the event of a malfunction or breakdown, grounding provides a path of least resistance for electric current to reduce the risk of electric shock. This tool is equipped with an electric cord having an equipment-grounding conductor and a grounding plug. The plug must be plugged into a matching outlet that is properly installed and grounded in accordance with all local codes and ordinances.
- Page 11 ATTENTION!!! PRINTING ERROR - Please note that the RIKON 10” Bandsaw # 10-305 DOES NOT include a miter gauge with the machine. The miter gauge is erroneously listed on PAGE 4 (IN PARTS BAG) and PAGE 12 (PARTS LIST DRAWING). We apologize for this error.
-
Page 12: Parts List/ Parts Diagram
PARTS LIST... - Page 13 KEY NO. DESCRIPTION KEY NO. PART NO. DESCRIPTION PART NO. Spring 1-JL20061101-001S Door locking knob Cap 1-0802004 Rod Guide Hex. Bolt M6x45 1-M6X45GB5781Z 1-JL22061005A Fence Door locking knob body 1-JL20061102-001S 1-JL22061001D Flat Countersunk Head Screw M6x10 1-M6GB6172Z Hex. Nut M6 1-M6X10GB819Z Rod Guide 1-JL20010010F...
- Page 14 WARRANTY 5-Year Limited Warranty RIKON Power Tools Inc. (“Seller”) warrants to only the original retail consumer/purchaser of our products that each product be free from defects in materials and workmanship for a period of fi ve (5) years from the date the product was purchased at retail. This warranty may not be transferred.
- Page 15 ACCESSORIES 13-913 10” Bandsaw Stand 13-920 Miter Gauge C10-393 Table Insert (4pk) Bandsaw Blades Where to buy: Contact RIKON at 877-884-5167 or info@rikontools.com.
- Page 16 © Copyright RIKON Power Tools Inc. 2013 Printed in China...
Need help?
Do you have a question about the 10-305 and is the answer not in the manual?
Questions and answers