Table of Contents
Advertisement
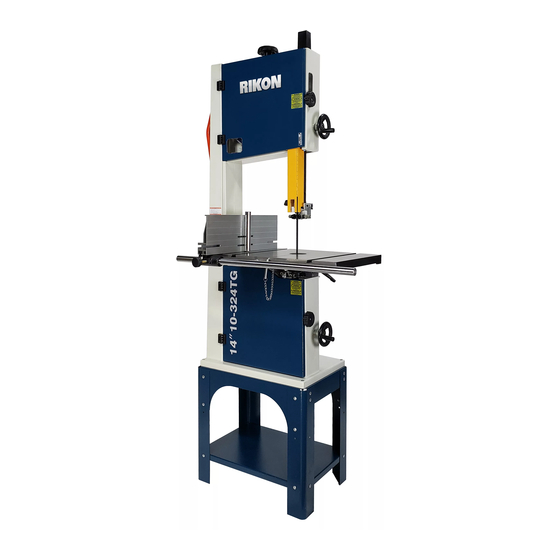
10-324TG
14" Bandsaw
4001824
Operator's Manual
Record the serial number and date of purchase in your manual for future reference.
The serial number can be found on the specification label on the rear of your machine.
Serial Number: _________________________
Date of purchase: _________________________
For technical support or parts questions, email techsupport@rikontools.com or call toll free at (877)884-5167
www.rikontools.com
10-324TGM1
Advertisement
Table of Contents

Related Manuals for Rikon Power Tools 10-324TG


Summary of Contents for Rikon Power Tools 10-324TG
- Page 1 10-324TG 14″ Bandsaw 4001824 Operator’s Manual Record the serial number and date of purchase in your manual for future reference. The serial number can be found on the specification label on the rear of your machine. Serial Number: _________________________ Date of purchase: _________________________ For technical support or parts questions, email techsupport@rikontools.com or call toll free at (877)884-5167...
-
Page 2: Table Of Contents
TABLE OF CONTENTS Specifications........................2 Safety Instructions ......................3 - 6 Getting To Know Your Machine ....................7 Contents of Package .....................8 - 9 Installation ........................9 Assembly ........................10 - 13 Adjustments.......................13 - 22 Operation ........................22 Maintenance ........................23 Electricals & Wiring Diagram ..................5 & 23 Troubleshooting ......................24 - 27 Parts Diagrams &... -
Page 3: Safety Instructions
SAFETY INSTRUCTIONS IMPORTANT! Safety is the single most important consideration in the operation of this equipment. The following instructions must be followed at all times. Failure to follow all instructions listed below may result in electric shock, fire, and/or serious personal injury. There are certain applications for which this tool was designed. - Page 4 SAFETY INSTRUCTIONS 12. KEEP PROTECTIVE GUARDS IN PLACE AND IN 25. ALWAYS WEAR A DUST MASK TO PREVENT WORKING ORDER. INHALING DANGEROUS DUST OR AIRBORNE PARTICLES, including wood dust, crystalline silica dust 13. AVOID ACCIDENTAL STARTING. Make sure that and asbestos dust. Direct particles away from face and the power switch is in the “OFF”...
-
Page 5: Electricals & Wiring Diagram
SAFETY INSTRUCTIONS ELECTRICAL SAFETY EXTENSION CORDS THIS TOOL IS PRE-WIRED FOR 115V THE USE OF AN EXTENSION CORD WITH THIS MACHINE IS NOT RECOMMENDED. For CIRCUITS, AND MUST BE GROUNDED WHILE IN USE TO PROTECT THE OPERATOR FROM ELECTRIC SHOCK. best power and safety, plug the machine directly into a dedicated, grounded electrical outlet that is within the IN THE EVENT OF A MALFUNCTION OR BREAKDOWN,... - Page 6 SAFETY INSTRUCTIONS SPECIFIC SAFETY INSTRUCTIONS FOR BAND SAWS This machine is intended for the cutting of natural, solid woods, composite materials, plastics and non-ferrus metals. The permissible workpiece dimensions must be observed (see Technical Specification). Any other use not as specified, including modification of the machine or use of parts not tested and approved by the equipment manufacturer, can cause unforeseen damage and invalidate the warranty.
-
Page 7: Getting To Know Your Machine
GETTING TO KNOW YOUR MACHINE A. Stand Drive Belt Tension Hand Wheel B. Lower Door Storage Shelf C. Rip Fence & Front Rail Assembly 4” Dust Port D. ON / OFF Switch Table Tilt Hand Wheel E. Blade Tension Window Table Locking Handle F. -
Page 8: Contents Of Package
CONTENTS OF PACKAGE Model 10-324TG 14” Bandsaw is shipped complete in one box. Unpacking, Checking Contents & Clean-up 1. Carefully remove all contents from the shipping carton. Compare the contents with the list of contents to make sure that all of the items are accounted for, before discarding any packing material. Place parts on a protected surface for easy identification and assembly. -
Page 9: Installation
CONTENTS OF PACKAGE TABLE OF LOOSE PARTS continued Table Assembly: A. Fence Support Bolt and Nut B. 90° Table Leveling Stop Bolt and Nut C. Rip Fence Front Rail and Hardware D. Table Leveling Pin and Lanyard E. Table Mounting Bolts and Washers F. - Page 10 SHELF 4 LEGS & HARDWARE See Page 41 for the Stand’s Parts List LINK TO 10-324TG PRODUCT PAGE ASSEMBLY VIDEO 1. Check the contents of the Stand against the parts list above, and lay out the parts for quick reference.
-
Page 11: Assembly
ASSEMBLY THE MACHINE MUST NOT BE PLUGGED IN AND THE POWER SWITCH MUST BE IN THE OFF POSITION UNTIL ASSEMBLY IS COMPLETE. NOTE: Parts referenced throughout the manual refer to the different sheets and key numbers of the Parts Diagrams and Parts Lists on pages 28 to 40. Example: (#7A) refers to Part #7 on Sheet A. - Page 12 ASSEMBLY INSTALL THE FENCE SUPPORT BOLT THE MACHINE MUST NOT BE PLUGGED IN AND THE POWER SWITCH MUST BE IN On the rear, left corner lip of THE OFF POSITION UNTIL ASSEMBLY IS COMPLETE. the table install the Fence Support Bolt and Nut (#32B) in the pre-bored and tapped hole.
-
Page 13: Adjustments
ASSEMBLY INSTALL THE PUSH STICK HOLDER 1. Assemble the Push Stick Hanger Bolt and Nut (#50A, 51A) to the column’s left side with a 5mm hex wrench. Handy storage for the push stick when not in use. FIG. 9. INSTALL THE GUIDE POST CAP 1. - Page 14 ADJUSTMENTS SETTING THE TABLE SQUARE TO THE SAW THE MACHINE MUST NOT BE BLADE’S BACK PLUGGED IN AND THE POWER SWITCH MUST BE IN THE OFF POSITION UNTIL ALL ADJUSTMENTS ARE COMPLETE. While pre-set before shipping, if needed, the table may also be re-set at 90°...
- Page 15 ADJUSTMENTS ADJUSTING THE BLADE TENSION Always tension the blade with the Quick Release Lever (#17C) in the “ON” position. Failure to do so could result in lack of blade tension or tension failure. Figure 16. NOTE: Release / turn ‘OFF’ the Tension Lever only to Quick Release Lever change the blade, or to prolong the life of the blade when the saw is not in use for extended periods.
- Page 16 ADJUSTMENTS ADJUSTING THE BLADE TENSION STOP If you can not set full tension on a new blade, the blade is most likely welded a bit longer than the standard 111” length, and so just beyond the pre-set tensioning range of the saw. To fix this, behind the top bandsaw wheel is the threaded Blade Tension Rod (#2C).
- Page 17 ADJUSTMENTS ADJUSTING THE BLADE GUIDES The 10-324TG Bandsaw features industrial, ball bearing blade guides for controlling the side-to-side and rear movement of the blade. With the bandsaw blade properly centered on the drive wheels, the guide bearings can then be set. To adjust the blade...
- Page 18 ADJUSTMENTS ADJUSTING THE BLADE GUIDES - continued Lower Guides - continued: 2. Set both side bearing guides to within 1/16” of the saw blade - about the same thickness of a business card. Do not set the bearing guides too close, or touch 1/16”...
- Page 19 4. ADJUSTING THE RIP FENCE FOR DRIFT The 10-324TG Bandsaw can be adjusted to eliminate ‘drift’ - bringing the fence back to being parallel to the blade - by two methods. To adjust the fence for drift: Method 1.
- Page 20 ADJUSTMENTS ADJUSTING THE FENCE TO THE TABLE Check that the fence is lying flat, or parallel to the table surface. The gap between the table and the THE MACHINE bottom of the fence should be equal along the whole MUST NOT BE length of the fence.
- Page 21 ADJUSTMENTS 3 Loosen the two Hex Screws (#10F, Fig. 35, A) which hold the Rip Fence (#1F) to the Fence Carrier (#6F). Slide the fence forward to remove it from the carrier’s Sliding Block (#5F). 4. Turn the fence around 180° end-to-end and slide it back onto the sliding block.
-
Page 22: Operation
ADJUSTMENTS ON/OFF SWITCH FIGURE 42 To operate the saw, Press the top, round “ON” button in to its full depth to turn the saw on. There should be a ‘click’ to indicate the ‘on’ contact is made. Once work is finished, hit the bottom red safety paddle switch to turn the saw OFF. -
Page 23: Maintenance
MAINTENANCE BEFORE CLEANING OR CARRYING OUT MAINTENANCE WORK, DISCONNECT THE MACHINE FROM THE POWER SOURCE (WALL SOCKET). NEVER USE WATER OR OTHER LIQUIDS TO CLEAN THE MACHINE. USE A BENCH BRUSH. DO NOT USE COMPRESSED AIR NEAR BEARINGS. REGULAR MAINTENANCE OF THE MACHINE WILL PREVENT UNNECESSARY PROBLEMS. 1. -
Page 24: Troubleshooting
TROUBLESHOOTING FOR YOUR OWN SAFETY, ALWAYS TURN OFF AND UNPLUG THE MACHINE BEFORE CARRYING OUT ANY TROUBLESHOOTING. TROUBLE PROBABLE CAUSE REMEDY The machine does not 1. No power supply. Check the cable for breakage. work when switched on. 2. Defective switch. Contact your local dealer for repair parts. - Page 25 TROUBLESHOOTING THE MACHINE MUST NOT BE PLUGGED IN AND THE POWER SWITCH MUST BE IN THE OFF POSITION UNTIL ALL ADJUSTMENTS ARE COMPLETE. LOWER WHEEL SHAFT CHANGING THE MOTOR DRIVE BELT Before changing the belt, make sure that the bandsaw is unplugged from the power source.
- Page 26 TROUBLESHOOTING LOWER WHEEL ADJUSTMENTS The following instructions will correct common blade issues related to the lower wheel’s alignment in relation to the upper wheel. These adjustments will correct the blade position on the lower wheel and blade oscillation (wobble). These are critical adjustments which affect the performance and accuracy of the bandsaw.
- Page 27 TROUBLESHOOTING If a blade is tracking on the rear of the lower wheel, away from the door, follow these steps: De-tension the saw blade. Loosen 9 o’clock shaft bolt to take pressure off the shaft. Loosen 6 o’clock shaft bolt one half rotation. Tighten the 12 o’clock shaft bolt until the shaft touches the 6 o’clock adjusting bolt.
-
Page 28: Parts Diagrams & Parts Lists
PARTS DIAGRAM... - Page 29 PARTS LIST...
- Page 30 PARTS DIAGRAM TABLE ASSEMBLY SHEET B NOTE: Please reference the Manufacturer’s Part Number when calling for Replacement Parts. For Parts under Warranty, the Serial Number of your machine is required.
- Page 31 PARTS LIST TABLE ASSEMBLY SHEET B KEY NO. DESCRIPTION QTY. PART NO. Set screw M6x4 1-M6X4GB77B Table insert 1-JL26050008A-001S Table 1-JMBS1404030100A-001G Table alignment pin & lanyard 1-JMBS1404030002 Washer 1-WSH4GB96D1B Pan head screw M4x10 1-M4X10GB818B Hex nut 1-M8GB6170B Hex bolt M8x25 1-M8X25GB5783B Washer 1-WSH8GB97D1B...
- Page 32 PARTS DIAGRAM BLADE TENSION & TRACKING ASSEMBLY SHEET C...
- Page 33 PARTS LIST BLADE TENSION & TRACKING ASSEMBLY - SHEET C KEY NO. DESCRIPTION QTY. PART NO. Blade tension handwheel 1-JL21025000A001S Blade tension rod 1-JL28032000A Special hex nut 1-JL28030003 Washer 1-WSH12GB97D1Z Hex socket screw M6x12 1-M6X12GB70D1Z Washer 1-WSH6GB5287Z Upper shaft 1-JL28030008 Slide bracket 1-JL28031000 Tube...
- Page 34 PARTS DIAGRAM BLADE GUARD & TOP GUIDE ASSEMBLY SHEET D NOTE: Please reference the Manufacturer’s Part Number when calling for Replacement Parts. For Parts under Warranty, the Serial Number of your machine is required. See page 39 for the UPPER BLADE GUIDE’S Parts Diagram &...
- Page 35 PARTS LIST BLADE GUARD & TOP GUIDE ASSEMBLY - SHEET D DESCRIPTION QTY. PART NO. KEY NO. Locking handle 1-JL82240011-001S Hex bolt M6x16 1-M6X16GB5783B Washer 1-WSH6GB96B Guide bracket 1-JL27040006 Set screw M6x12 1-M6X12GB77B Gear 1-1501006 Fixed bolt 1-JL26040006 Fixed plate 1-JL26040007 Guide bracket cover 1-JL27040002A...
- Page 36 PARTS DIAGRAM...
- Page 37 PARTS LIST...
- Page 38 PARTS DIAGRAM & PARTS LIST FENCE ASSEMBLY SHEET F QTY. PART NO. DESCRIPTION Fence 1-JMBS1404060001 Tube 1-JL93010018 Bolt 1-JMBS1403061002 Lock handle 1-KTSB-1-A-M6X50 Sliding block 1-JMBS1404060003 NOTE: Please reference the Rip fence carrier 1-JMBS1601060003 Manufacturer’s Part Number Locking handle knob 1-JL28060017 when calling for Washer 1-WSH6GB97D1B...
- Page 39 PARTS DIAGRAM & PARTS LIST UPPER BLADE GUARD ASSEMBLY SHEET G DESCRIPTION QTY. PART NO. Upper guide 1-JL21042001C Washer 1-WSH5GB97D1Z Bearing 1-BRG608-2RSGB276 Bearing bush 1-JL20042002 Sleeve 1-JL61020013 Locking handle 1-JMBS1001051008-001S Locking handle 1-JMBS1001051007-001S Fine tuning knob 1-JL21042005 Rubber seal 1-SLG9X1D8GB3452D1 Short sleeve 1-JL21042010 Long bolt...
- Page 40 PARTS DIAGRAM & PARTS LIST LOWER BLADE GUARD ASSEMBLY SHEET H NOTE: Please reference the Manufacturer’s Part Number when calling for Replacement Parts. For Parts under Warranty, the Serial Number of your machine is required. DESCRIPTION QTY. PART NO. Adjustable handle 1-KTSB-1-A-M6X50 Lower guide support 1-JL21043001C...
-
Page 41: Warranty
PARTS DIAGRAM & PARTS LIST STAND ASSEMBLY SHEET I 1I , 3I NOT SHOWN DESCRIPTION PART NO. Hex flat head bolt M6x50 1-M6X50GB70D3Z to attach saw to stand Upper frame 1-JMBS1404100001A-076U 1-M6GB6177D1B Hex nut with flange to attach saw to stand Shelf 1-JMBS1404100008-076U Carriage bolt M6x16... -
Page 42: Accessories
ACCESSORIES NOTES C10-395 ALUMINIUM TABLE INSERT Replacement cast aluminium insert with central slot for positioning the bandsaw blade. Provides solid support and includes rear table C10-391 TABLE INSERTS - PACK of 4 leveling screws. Replacement plastic inserts with with central slot for positioning the bandsaw blade, and rear threaded holes for hex screw levelers. -
Page 43: How To Guide For All Band Saw Blades
OPERATION... - Page 44 10-324TG For more information: 16 Progress Road Billerica, MA 01821 LINK TO RIKON WEBSITE 877-884-5167 / 978-528-5380 techsupport@rikontools.com www.rikontools.com 10-324TGM1...
Need help?
Do you have a question about the 10-324TG and is the answer not in the manual?
Questions and answers