Table of Contents
Advertisement
Quick Links
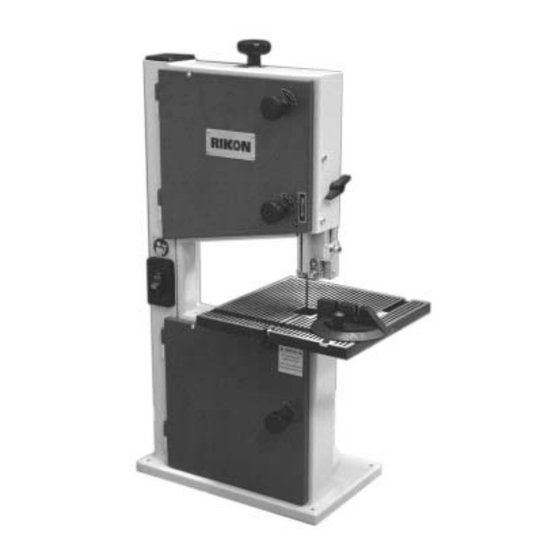
10" Woodworking Bandsaw
Model: 10-300
Record the serial number and date of purchase
in your manual for future reference.
Serial number:
Date of purchase:
For more information:
www.rikontools.com
info@rikontools.com
or
For Parts or Questions:
techsupport@rikontools.com or 877-884-5167
Part # 10-300M1
Advertisement
Table of Contents

Summary of Contents for Rikon Power Tools 10-300
- Page 1 10” Woodworking Bandsaw Model: 10-300 Record the serial number and date of purchase in your manual for future reference. Serial number: Date of purchase: For more information: www.rikontools.com info@rikontools.com For Parts or Questions: techsupport@rikontools.com or 877-884-5167 Part # 10-300M1...
-
Page 2: Table Of Contents
TABLE OF CONTENTS Safety Instructions...............................3-4 Carton Contents..............................5 Hardware Package Contents..........................5 Assembly................................6 Installing the Table................................6 Centering the Table..............................6 Setting the Table Square with the Blade........................6 Mounting the Bandsaw..............................7 Dust Collection................................7 Installing/Changing the Blade..........................7-8 Tracking the Bandsaw Blade............................8 Adjusting the Blade Guides..............................8 Setting the Cutting Height............................8 Tilting the Bandsaw Table............................8 Operation................................9... -
Page 3: Safety Instructions
SAFETY INSTRUCTIONS General Safety Warnings KNOW YOUR POWER TOOL. Read the owner’s manual carefully. Learn the tool’s applications, work capabilities, and its Always Ground All Tools. If your tool is equipped with a three-pronged plug, you must plug it into a three-hole electric receptacle. If you use an adapter to accommodate a two-pronged receptacle, you must attach the adapter plug to a known ground. - Page 4 Never Overreach. Keep your proper footing and balance at all times. Never Stand on Tools. Serious injury could occur if the tool is tipped or if the cutting tool is accidentally contacted. Always Disconnect Tools. Disconnect tools before servicing and when changing accessories such as blades, bits, and cutters. Always Avoid Accidental Staring.
-
Page 5: Carton Contents
CARTON CONTENTS CARTON CONTENTS The model 10-300 10” Bandsaw is shipped complete in one box. Item Description Q’ty. Main Machine..............1 Unpacking and Checking Contents Table...................1 Owner’s Manual.............1 Upper Table Trunnion Assembly........1 a. Separate all parts from carton and check each item with Bag of Loose Parts............1... -
Page 6: Assembly
ASSEMBLY Initial Assembly The machine is supplied partly assembled. Prior to use, the following items have to be installed: bandsaw table, star knob (blade tensioning) and rip fence. WARNING: To avoid injury, do not attempt to run or use this machine until all parts are assembled and working properly. -
Page 7: Mounting The Bandsaw
Mounting the Bandsaw For maximun stability during use, it is strongly recommended that the bandsaw be mounted on a sturdy bench or worktable. It should be bolted down utilizing the 1/4” holes in the bandsaw base plate. (See Fig. 6) Dust Collection The bandsaw has a 2-1/2”... -
Page 8: Tracking The Bandsaw Blade
Installing/Changing and Setting the Saw Blade Cont. h. Replace leveling wing nut and screw to table. i. Close and lock both bandsaw wheel doors before recon- necting the power supply. Wing Nut Tracking Knob Tracking the Bandsaw Blade Set the tracking of the blade before setting the blade guides. Once the blade is installed and tensioned, track the blade by adjusting the tracking knob by hand (See Fig. -
Page 9: Operation
OPERATION 1. The blade cuts on a continuous down-stroke. 2. Check all the necessary settings and adjustments, and ensure that all the recommended safety procedures are in place. 3. Start the bandsaw by placing the switch towards the ‘on’ position. 4. -
Page 10: Maintenance
MAINTENANCE WARNING: To avoid injury due to unexpected starting, Changing Drive Belt before cleaning or carring out maintenance work, switch off and disconnect the bandsaw from the power source. 1. Release saw blade tension by turning star knob on the top of upper bandsaw cabinet counter-clockwise. -
Page 11: Troubleshooting
TROUBLE SHOOTING Problem Diagnosis Remedy The machine does not work when 1. No power supply. 1. Check the cable for breakage. switched on. 2. Defective switch. 2. Check the fuse or breaker. 3. Contact you local dealer for repair parts. The blade does not move with the motor 1. -
Page 12: Electrical Requirements
Eletrical Requirements In the event of a malfunction or breakdown, grounding provides a path of least resistance for electric current to reduce the risk of electric shock. This tool is equipped with an electric cord having an equipment-grounding conductor and a grounding plug. The plug must be plugged into a matching outlet that is properly installed and grounded in accordance with all local codes and ordinances. -
Page 13: Parts List
Parts List Key No. Part# Description Key No. Part# Description JL20061101-081S Knurled Knob Cap 1-JL22042004 Bearing Mount Cylinder 1-M6X40GB5781Z Hex. Bolt M6x45 1-M6X10GB80B Hex. Socket Set Screw M6x10 1-JL20061102-081S Knurled Knob Body 1-JL22043001 Lower Guide Body 1-M6GB6172Z Hex. Nut M6 1-JL22043002 Lower Guide Shaft 1-JL20010010D... -
Page 14: Parts Explosion
Parts Explosion... -
Page 15: Notes
Notes... -
Page 16: Warranty
Warranty 2-Year Limited Warranty RIKON Power Tools/Richen Enterprise, Inc. (“Seller”) warrants to only the original retail consumer/ purchaser of our products that each product be free from defects in materials and workmanship for a period of two (2) years from the date the product was purchased at retail. This warranty may not be transferred. - Page 17 For more information: 400 West Cummings Park, Suite 1000 Woburn, MA 01801 877-884-5167/781-933-8400 techsupport@rikontools.com www.rikontools.com Copyright Richen Enterprise, Inc. 2005 Printed in China 11/05...


Need help?
Do you have a question about the 10-300 and is the answer not in the manual?
Questions and answers