Advertisement
Quick Links
Advertisement

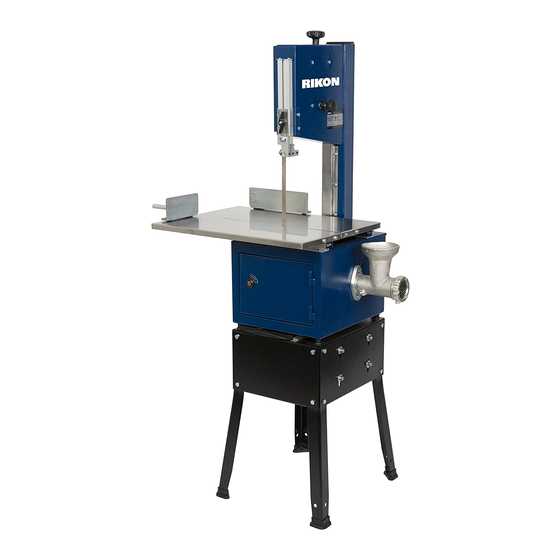
Summary of Contents for Rikon Power Tools 10-308
- Page 1 1 0 ”...
-
Page 2: Table Of Contents
Saw Operation ....................... 14 Grinder Operation & Cleaning.................. 14 Parts Breakdown ..................... 15 - 17 Parts List ......................17, 18 Warranty ........................19 Specifications Model: 10-308 Type Floor Model Motor/Phase 1ph TEFC Voltage/Amps 110V / 5A 3/4 HP... - Page 3 General Safety Guidelines IMPORTANT — REQUIRED READING! Safety is the single most important consideration in the operation of this equipment. The following safety instructions must be adhered to at all times. WARNING Failure to read and understand this manual before you unpack, assemble, wire, op- erate and maintain this machine may result in serious injury to yourself or others.
- Page 4 General Safety Guidelines aligned parts or guards need to be fixed before operation. Check for alignment or binding of moving parts and any other condition that may effect its proper operation. Always disconnect the machine from the power source before inspecting or repairing it. Do not over-exert yourself.
- Page 5 Safety Guidelines Follow all electrical and wiring codes in your area to prevent shock or electrocution. Accidental Starting: Make sure the switch is in the “OFF” position before plugging in power cord. Magnetic switches or starter switches may start unintentionally if accidentally bumped. Disconnect ma- chine from power source when changing blades (tooling), making adjustments or servicing the machine.
-
Page 6: Package Contents
Package Contents If you suspect freight damage please save all packing materials for inspection and contact your RIKON dealer where you purchased your saw. The meat bandsaw is heavy. Be careful when lifting and moving the carton prior to assembly. Get help if necessary. - Page 7 Identifying Features Blade Tension Knob Top Access Door Blade Guard Post & Upper Guides Sliding Table Case On/Off Switch Motor Guide Locking Knob Blade Tracking Knob Support Fences Sliding Table Grinder Lower Access Door Bottom Base Legs & Feet...
-
Page 8: Electrical
Electrical Electrical This bandsaw is designed to operate on 110v. It is Motor Connection your responsibility to ensure that the bandsaw is electrically connected in a safe and correct manner. Any electrical work should be performed by a compe- Motor tent electrician and installed in a way that meets all blue white... -
Page 9: Assembly
Assembly Leg Assembly To assemble the legs proceed as follows. Set the main saw body on its side. Gather up the following parts: a. Legs (4) b. Hex Head Bolts (16) c. Hex Nuts (16) d. Rubber feet (4) ... - Page 10 Assembly Fence Assembly There are 2 fences to support the meat and adjust for slice thickness. Gather up the following parts and components a. Rod Holders (2) b. Lock Knobs (2) c. Long Rod (1) d. Short Rod (1) e.
-
Page 11: Adjustments
Adjustments Blade Changes Guide Lock Over time blades can become dull and need to be Knob changed. To change the blade you need to remove the sliding table, the sliding rail next to the column and the corre- Upper Guide sponding cover plate underneath. -
Page 12: Blade Changing, Tension & Tracking
Adjustments Blade Tension & Tracking From time to time it may be necessary to tension and track the bandsaw blade especially after replace- Tacking ment. Make sure the blade is all the way on the Adjustment wheels and all blade guards are in place. Lock Knob ... -
Page 13: Blade Guide Adjustments
Adjustments Blade Guide Adjustment Proper guide adjust is important to the proper opera- tion of the bandsaw and will extend the life of the Thrust Bearing bandsaw blade. Cap Screw In general the guide bearings should be close enough to guide the bandsaw blade to control deflec- Block tion during the cut but not tight against the blade. - Page 14 Operation Feed cubed meat, about 1-1/2” square, into the Processing Meat grinder. Do not feed any bone into the grinder. WARNING Always use the stuffer to push meat through the grinder. Never use your fingers for any reason. Processing meat can be dangerous as meat is usu- ...
-
Page 16: Parts Breakdown
Parts Breakdown... - Page 17 WASHER HEX NUT...
-
Page 19: Warranty
POWER TOOLS 5-year Limited WARRANTY RIKON Power Tools, Inc. (“Seller”) warrants to only the original retail consumer/purchaser of our products that each product be free from defects in materials and workmanship for a period of five (5) years from the date the product was purchased at retail. This warranty may not be transferred. - Page 20 10-308 For more information: 16 Progress Rd Billerica, MA 01821 877-884-5167/978-528-5380 techsupport@rikontools.com www.rikontools.com 10-308M2 Printed in China...


Need help?
Do you have a question about the 10-308 and is the answer not in the manual?
Questions and answers