Amplicomms PowerTel M7000 Operating Instructions Manual
Hide thumbs
Also See for PowerTel M7000:
- Operating instructions manual (92 pages) ,
- Quick start manual (36 pages)
Table of Contents
Advertisement
Quick Links
Advertisement
Table of Contents

Related Manuals for Amplicomms PowerTel M7000


Summary of Contents for Amplicomms PowerTel M7000
- Page 1 PowerTel M7000 mobile phone Operating Instructions...
- Page 2 M7000 HAC Hearing Aid Compatible to M4 / T4 Rating The M7000 Phone has a built in Induction Coil and is hea- ring aid compatible. To ensure optimum benefit, users with hearing aids may wish to select the T setting on their hearing aids. Exposure to the receiver at full volume for a long period could cause ear damage.
-
Page 3: Table Of Contents
ONTENTS Quick Start Guide............2 The phone in details .............14 Using the phone ............20 “Phonebook“ menu ............28 “Messages“ menu............35 “Call center“ menu ............40 “SOS“ menu ..............47 “Settings“ menu ............52 “Organizer“ menu............63 “Services“ menu ............67 Appendix ................68 Index ................82 Menu tree ...............86 Helpline 0844 800 6503 (See page 69 for costs and hours of operation) -
Page 4: Quick Start Guide
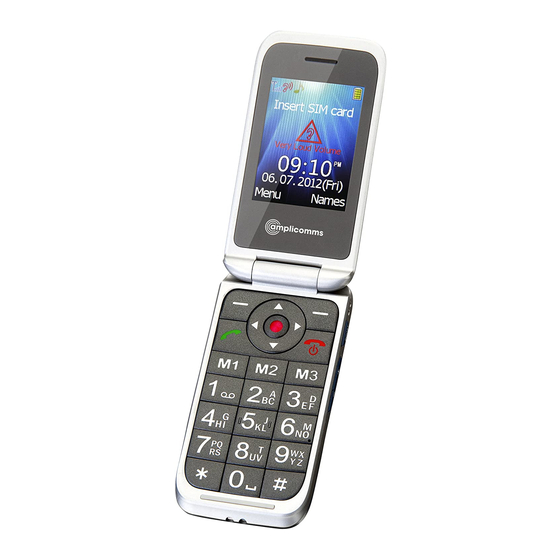
UICK TART UIDE Quick Start Guide Important: Before you start, please read the safety information on page 74. Quick Glance 1 Earpiece 13 Boost key/ 2 Display Flashlight key 3 Left softkey 14 Volume control 4 Navigation key 15 LED Charging/Low battery 5 Call key 16 LED New calls/New SMS 6 Direct call keys... -
Page 5: Quick Start Guide
UICK TART UIDE Helpline 0844 800 6503 (See page 69 for costs and hours of operation) -
Page 6: Installing The Sim Card And Battery
UICK TART UIDE What is in the box The box contains: 1 mobile phone 1 power adapter plug 1 li−ion battery 1 operating manual 1 desktop charging unit Installing the SIM card and battery Risk of swallowing small objects! The SIM card can be removed. Small children can swallow them. - Page 7 UICK TART UIDE • If there is already a battery inside, remove it. • Slide the SIM card with the golden contacts facing down in the moulded SIM card hol- der. The SIM card must be located under the metal retaining bar to be in the cor- Battery rect position.
-
Page 8: Charging The Battery
UICK TART UIDE Charging the battery • Before starting to charge the battery, check that it has been installed properly. Do not remove the battery while it is being charged. This could damage the phone. • When charging the battery for the first time, it should be charged for at least 4 hours. -
Page 9: Battery Status
UICK TART UIDE • It may take a few seconds before the phone indicates the charging process. Battery status The current battery charge status is indicated in the dis- play as follows: Full - - > - - > - - > - - > - - > - - > - - Empty When the battery charge is low, a corresponding warning message appears in the display. -
Page 10: Make Sure You Are In Range Of Your Network
UICK TART UIDE Some SIM cards will require you to enter a PIN code. Fol- low the prompts on the screen. The SIM code (PIN of the SIM card) that you received with your SIM card, protects the SIM card against unauthori- sed use. -
Page 11: Setting The Time And Date
Clear Delete the last digit if incorrect Dial the phone number Advanced Settings and Functions For more details about setting up your Amplicomms M7000 and other functions follow the descriptions in this user guide. Helpline 0844 800 6503 (See page 69 for costs and hours of operation) -
Page 12: Questions And Answers
UICK TART UIDE Examples: • Set your one−touch dialling keys -> page 33. • Store numbers in the phone book -> page 28. Questions and Answers In the majority of cases your M7000 phone is supplied with out a SIM card. You may find the following “Questi- ons and Answers“... - Page 13 SIM card design. Can I use a SIM card from any mobile phone company? Yes. The Amplicomms mobile phone is what is termed as Helpline 0844 800 6503 (See page 69 for costs and hours of operation)
- Page 14 UICK TART UIDE an open SIM card phone and so it is not restricted to any particular service provider or mobile phone company. How do I pay for my calls? There are two main types of registration with a service provider or mobile phone company.
- Page 15 UICK TART UIDE details of a short number to dial in order to check your balance. These access codes differ between mobile phone companies so please check the details specific to your ser- vice provider. Key in your number, press the talk button and the credit balance will be announced to you.
-
Page 16: The Phone In Details
HE PHONE IN DETAILS The phone in details Keys and Parts for the explanation of keys and parts please refer to page 2. Special key functions Left softkey In standby -> open the main menu In menus the function changes due to the term in the display above the softkey (e. - Page 17 HE PHONE IN DETAILS to a one-touch dialling key“ page 33). Note: Since this operation only requi- res a short press of a button, it could lead to unintentional dialling. Call key - Take a call or dial a number. - Open the call list and the redial list End call key - End or reject a call...
- Page 18 HE PHONE IN DETAILS ▼ - Alarm: Setting an alarm time. ◄ - User profiles: Activation/Custo- misation of a user profile. ► - Tone settings: Settings for ringtone, alarm tone etc. ◉ - red button in the centre of the navigation key In standby: open the menu In menus: function “OK“.
- Page 19 HE PHONE IN DETAILS Note: If prompted, it may be neces- sary to enter your network's voice mail number first. Refer to the docu- mentation supplied with your SIM card for this number. Star key - to enter the international prefix “+“ in pre-dialling (press 2 times) or to enter P (pause)/ W (wait) (may be necessary for call-through numbers...
-
Page 20: Icons In The Display
HE PHONE IN DETAILS Volume control +/- keys: - In standby: adjusts the volume level of the key tone - Whilst on a call -> adjusts the ear- piece or Hands-free volume. Boost key In standby: press and hold for approx. - Page 21 HE PHONE IN DETAILS Call forwarding active Alarm is activated Boost is activated Profile “General“ is activated Profile “Outdoor“ is activated Profile “Indoor“ is activated Profile “Meeting“ is activated A headset is connected Bluetooth is activated The “Roaming” symbol will appear if the phone switches to an alternate network provider.
-
Page 22: Using The Phone
SING THE PHONE Using the phone General All the functions can be accessed via the various menus. Use the arrow keys ▲ /▼ to scroll though the menus • and the lists (e. g. phonebook). • Press Back, to return to the last step. •... - Page 23 SING THE PHONE the first letters are OK, then press Select, then conti- nue by typing the next letter key, if this is incorrect use the option bar at the bottom of the screen which should have appeared, showing individual letters and characters then press choose a letter and press Select.
- Page 24 SING THE PHONE the same key, press the key the respective number of times to enter the first character. Then wait for approx. 2 sec. and enter the second letter. Use the arrow keys ▲ /▼/ ◄/► to place the cursor and •...
-
Page 25: Using The Torch
SING THE PHONE Using the torch Switch on: Press and hold the boost key in standby for approx. 2 sec. Switch off: Press and hold the boost key in standby for approx. 2 sec. Note: - The light is generated by a high-power LED. Do not shine directly into eyes or optical devices. -
Page 26: Dialling With The Speed Dialling Keys
SING THE PHONE • Press the green call key to dial the phone number. • Press the red end call key for ending the call. Dialling with the speed dialling keys • Make sure, a phone number is assigned to the respective key. -
Page 27: Taking A Call
SING THE PHONE calls). Select an entry using the arrow keys ▲ /▼. • Press the green call key to dial the selected phone number. Taking a call • If your phone is ringing press the green call key. • Press the red end call key to reject the call. -
Page 28: Setting The Volume
SING THE PHONE Setting the volume • During a call you can set the volume using the + / - keys on the right hand side of the phone. The setting will be saved. Hands-free • During a call press H-Free. You can hear the caller via the loudspeaker. - Page 29 SING THE PHONE • Call the first subscriber. • Press Options, select New call and press OK. • Enter the phone number for the second subscriber or press Options and Phonebook, to select a phonebook entry. • Press Options, select Call and press OK. •...
-
Page 30: Phonebook" Menu
“P “ HONEBOOK MENU “Phonebook“ menu You can save names and phone numbers in the internal memory (up to 500 entries) and on the SIM card. Opening the phonebook • In standby press Names • During a call press Options, select Phonebook and press OK. - Page 31 “P “ HONEBOOK MENU Please note: If you selected “SIM card“ you can only enter the name and one telephone number. Enter the name and press ▼. • Enter the (first) phone number and press ▼. • • If necessary enter additional phone numbers (Home number/Office number).
-
Page 32: Calling From The Phonebook
“P “ HONEBOOK MENU • Press Options -> Done -> OK. Press Yes in the follo- wing confirmation query. Note: Your personal ringtone You can record e. g. “Peter is calling“ as a ringtone. Did you associate this ringtone to phonebook entry “Peter“, your phone will announce calls from Peter with: “Peter is calling“. -
Page 33: Deleting A Phonebook Entry
“P “ HONEBOOK MENU Deleting a phonebook entry • Press Names to open the phonebook. • Select an entry, press Options, select Delete and press OK. Press Yes in the following confirmation query. Deleting all phonebook entries • Press Names -> Options -> Phonebook settings -> OK - >... -
Page 34: Copying All Phonebook Entries
“P “ HONEBOOK MENU Copying all phonebook entries • Press Names -> Options -> Phonebook settings -> OK - > Copy contacts. Select whether the contacts in the phone should be copied to the SIM card or vice-versa and confirm. Storing a phonebook entry to a speed dialling key •... - Page 35 “P “ HONEBOOK MENU Select Edit number -> OK, enter a phone number and presse OK. Press Yes in the following confirmation query. Storing a phonebook entry to an one−touch dialling key • Press Menu -> Settings -> Direct Number -> OK •...
- Page 36 “P “ HONEBOOK MENU • View: The entry is shown • Send text message: Send a SMS to the respective phone number. • Edit: You can edit the entry. • Delete: The entry will be deleted. • Copy: You can copy the entry to the telephone or to the SIM card.
-
Page 37: Messages Menu
“M “ ESSAGES MENU “Messages“ menu You can send and receive text messages (SMS / Short Message Service). Received SMS are stored either inter- nally in the phone or on the SIM card. Unread text mes- sages are stored in the Inbox. When a new SMS is recei- ved, a message appears on the display. - Page 38 “M “ ESSAGES MENU • Broadcast message: If your provider supports this ser- vice you can change some parameters in this menu. Note: These settings should only be changed by advanced users. • Templates: Open the list of templates. • SMS settings: You can change some of the SMS rela- ted parameters.
-
Page 39: Writing And Sending A Sms
“M “ ESSAGES MENU • Press Options, select Edit and press OK. • Select the SMSC address (the phone number for your provider’s SMS centre) and press OK. • If necessary delete the phone number with Clear, enter a new number using the digit keys and press OK. Note: Please contact your network provider for this number. - Page 40 “M “ ESSAGES MENU • Press Options, select Send and press OK. • Select Add from Phonebook and press OK. • Select an entry and press OK. • The selected entry will be shown. • Press Options, select Send and press OK. Reading/deleting SMS and further options •...
- Page 41 “M “ ESSAGES MENU Advanced Use number: You can make a call to the sender, store the number in the phonebook or send a SMS to the number. Copy to phone: Copy the SMS from the SIM card to the phone. Move to phone: Move the SMS from the SIM card to the phone.
- Page 42 “C “ ALL CENTER MENU “Call center“ menu A new call is shown on the display. • Press Back to delete the message. The icon for a new call appears in the display. You can see this call “nor- mally“ in the Missed calls list. •...
-
Page 43: Call Center" Menu
“C “ ALL CENTER MENU Add to block list: Add the entry to the block list. Edit before call: Edit the phone number before cal- ling back. Delete: Delete the entry. Deleting the calls list • Press Menu, select Call center -> Call history and press •... -
Page 44: Call Settings
“C “ ALL CENTER MENU following confirmation query. • Select Text msg. counter and press OK. You will see the number of SMS Sent and Received. Select Back (left softkey) to reset the counters. Press Yes in the fol- lowing confirmation query. Call settings •... - Page 45 “C “ ALL CENTER MENU beep in the earpiece. Deactivate: The second caller will get the busy tone. Query status: Information on the current setting. • Call divert: Settings for call diversion. Divert all voice calls: You can Activate a call diversion for all voice calls (enter subsequently a destination or select To voicemail, if you want to divert to your voice mail box), deactivate a...
- Page 46 “C “ ALL CENTER MENU Divert if busy: Call diversion, if your phone is busy. For information on settings please refer to “Divert all voice calls“. Divert all data calls: Diversion for all “No voice“ calls. For information on settings please refer to “Divert all voice calls“.
- Page 47 “C “ ALL CENTER MENU calls will be signalled - You are not available. The setting When roaming bars all incoming calls, if you are not in your home land (e. g. abroad on vacation). Cancel all: Cancel all barrings. Change barring password: Changing the pas- word for activating/deactivating the call barring.
- Page 48 “C “ ALL CENTER MENU matically (interval 5 min, max. 5 attempts). Call time display: If the function is activated, the duration of the call is displayed. Call time reminder: You can specify whether you want to be alerted during a call by a beep in the earpiece after a certain time of call duration.
-
Page 49: Sos" Menu
“SOS“ MENU “SOS“ menu This phone is equipped with an emergency call function. You can register up to 5 personal phone numbers for automatic periodic dialling or an emergency phone num- ber for an emergency call centre. Selecting an emergency call destination •... -
Page 50: Select An Outgoing Emergency Voice Message
“SOS“ MENU from the phonebook or Edit number, to enter the phone number manually. • Select Call center number -> OK and enter the desired phone number. Note: It is forbidden to enter a public emergency number such as police, fire and rescue control cen- tre. -
Page 51: Emergency Call Procedure
“SOS“ MENU record the personal outgoing message before (see below). Recording a personal emergency voice mes- sage • Press Menu, select SOS -> SOS setting -> Set out- going voice MSG and press OK. • Press Options, select Record and press OK. •... - Page 52 “SOS“ MENU • The first phone number will be dialled. • If the first phone number will not answer the next phone number will be dialled and so on. All phone numbers (max. 5) will be called one by one subse- quently.
-
Page 53: Cancel The Emergency Call Function
“SOS“ MENU • Note: Please mention explicitly in your personal emergency message, that the called party will have to press key “0“ to be able to speak with you. If not, the loop continues. This prevents the emergency loop from terminating, when, for example, an answe- ring machine takes your emergency call. -
Page 54: Settings" Menu
“S “ ETTINGS MENU “Settings“ menu User profiles You can store different profiles (special settings depen- dent on user and surroundings), which you can switch quickly. • Press Menu, select Settings -> User profiles and press • Select one of the profiles from the list and press Opti- ons. - Page 55 “S “ ETTINGS MENU Power on - Set the tone for powering on the phone. Power off - Set the tone for powering off the phone. Cover open - Set the tone for opening the phone’s cover. Cover close - Set the tone for closing the phone’s cover.
-
Page 56: Direct Number
“S “ ETTINGS MENU Ring type: You can select Single, Repeat or Ascending. Extra tone: You can switch different tones for special circumstances on and off (Warning / Error / Network connect / Call connect). Answer mode: With the setting Cover answer activated an incoming call will be taken by ope- ning the cover. -
Page 57: Tone Control
“S “ ETTINGS MENU • Select a one–touch dialling key and press OK. • Change the name if necessary (max. 4 characters) and press ▼. • Press edit and select an entry from the phonebook, enter the phone number manually or delete the displayed phone number. -
Page 58: Phone Settings
“S “ ETTINGS MENU During a call the volume control can be used to adjust the volume level in both Boost ON or OFF modes. See page 18. Prolonged listening at full speaker volume can cause hearing damage. Phone settings •... - Page 59 “S “ ETTINGS MENU function. Select whether the phone should be swit- ched on (“Power on“) or switched off (“Power off“). Enter the desired time and press OK. Note: Please note that depending on the set- tings entering the SIM PIN is required when switching the phone on.
- Page 60 “S “ ETTINGS MENU Power on display/Power off display: Select an animation which should be played when powe- ring the phone on/off. Dedicated key: You can assign quick access for some menus to the navigation key ▲ /▼/ ◄/►. Pres- sing the respective key in standby opens the assig- ned menu directly.
-
Page 61: Network Settings
“S “ ETTINGS MENU ween 8 pm and 8 am off (Night mode) or always deactivated (Off). Network settings • Press Menu, select Settings -> Network settings and press OK. • You have the following options: Network selection: Select whether the network selection should be automatic or manual (Selection mode), start a New search or select a network from the list (Select network). - Page 62 “S “ ETTINGS MENU • You have the following options: SIM lock: You can turn on or off the request for the SIM PIN when the phone is switched on. This is not allowed for some SIM cards/providers. Change password: You can change the following passwords: PIN (of the SIM card) PIN2 (of the SIM card)
- Page 63 “S “ ETTINGS MENU My device: For connecting the phone to another Bluetooth device with audio profile (e. g. Headset or car kit). Previously the "Search audio device" and the "pai- ring" with the device has to be carried out. After selecting the device and Options you have the follo- wing options: Connect (with the paired device)
-
Page 64: Restore Factory Settings
“S “ ETTINGS MENU Advanced: After pressing Options you have the fol- lowing options: Audio path: Determine whether the audio remains on the phone or is routed to a Bluetooth headset. My address: The phone’s Bluetooth address. Note: If your phone is connected to a Bluetooth hands- free device you must copy your phone book entries from your SIM card to the phone (see page 32) before you can use the hands-free device to call those num-... -
Page 65: Organizer" Menu
“O “ RGANIZER MENU “Organizer“ menu Calender You can set the calendar from January 1970 to December 2030. With Options the following functions are available: • View • View all • Add event • Delete event • Jump to date Calculator The phone can support four continuous mixed arithmetic operations. - Page 66 “O “ RGANIZER MENU • Enter the next digit(s) • Press OK or the red button in the centre of the naviga- tion key to carry out the operation. Alarm You can set 5 different alarms, which will sound once, daily or only on certain days.
- Page 67 “O “ RGANIZER MENU Tasks After pressing Add you can define tasks. There are vario- us options available. Stopwatch The stopwatch has various features. • Typical stopwatch • Split timing: Stopwatch with split timing and total time. Press Start to start the function, Split to take the split time (the total time is still displayed), Pause or the red button in the centre of the naviga- tion key stops the stopwatch with saving ability,...
- Page 68 “O “ RGANIZER MENU centre of the navigation key stops the stopwatch with saving ability, and after pressing Options you can Reset or Continue the stopwatch. • View records: list of the stored records. • nWay stopwatch The nWay stopwatch is composed of 4 parallel stop- watches that you can individually start with the naviga- tion key ▲...
-
Page 69: Services" Menu
“S “ ERVICES MENU “Services“ menu The items in this menu depend on your network operator. Please check with your provider for details. Helpline 0844 800 6503 (See page 69 for costs and hours of operation) -
Page 70: Appendix
PPENDIX Appendix Technical data Dual-Band GSM 900 / DCS 1800 Additional functions Bluetooth, torch, emergency call function Battery Li-Ion, 3.7V, 900 mAh Maximum earpiece volume +40 dB (distortion < 5 %) Talk time up to 7 hours Standby time up to 8 days Dimensions 102 x 51 x 17 mm (closed) 195 x 51 x 11 mm (open) -
Page 71: Service Hotline
PPENDIX Service hotline Should problems arise with the telephone, please refer to the following information first. In the event of technical problems, please contact our service hotline under tel. 0844 800 6503 (Using a UK landline, at the time of going to print: calls cost 6p for connection charge and then 5p a minute. - Page 72 PPENDIX No signal quality is No network displayed. connection. The mobile phone is in a location where there is no network service. Move to a diffe- rent location or contact your ser- vice provider. Keypad does not The operating speed of the dis- function or only play is reduced in the case of functions very slowly.
- Page 73 PPENDIX Screen frozen or no Remove the battery for 3 minu- response when tes and try again. pressing keys. No connection to the Contact your service provider. mobile telecommunicati- on network. The “Insert SIM“ mes- Ensure that the SIM card has sage appears in the been installed correctly.
-
Page 74: Tips On The Battery
PPENDIX unit with a soft, dry cloth. − Charge the mobile for 4 hours. Tips on the battery • Only use batteries, cables and charging unit approved by the manufacturer, otherwise the battery could be damaged. • Do not short circuit the battery. Always leave the batte- ry in the phone to avoid accidentally short circuiting the battery contacts. -
Page 75: Intended Use
PPENDIX Intended use This mobile phone is designed for use when connected to a mobile phone network. Any other use is considered unintended use. Unauthorised modification or recon- struction is not permitted. Under no circumstances open the device or complete any repair work yourself. Areas of use •... -
Page 76: Safety Information
PPENDIX Safety Information • Prevent exposure to smoke, dust, vibration, chemicals, moisture, heat and direct sunlight. The phone is not waterproof; therefore, keep it dry. • Only use original accessories and batteries. Never attempt to connect other products. • If you want to connect the phone to another device, read the manual supplied with that device with regard to any detailed safety information. - Page 77 PPENDIX • The ringing tone is issued via the loudspeaker. Take an incoming call first and then hold the phone to your ear. This prevents any possible hearing damage. • Only use the phone while driving or riding a transport vehicle in road traffic when using the approved hands- free equipment and appropriately positioned holders.
-
Page 78: Power Adapter Plug
PPENDIX • This phone is hearing aid compatible. If you wear a hearing aid, however, please contact your doctor or the hearing aid manufacturer to inquire about any pos- sible impairments through mobile communication equipment. • Do not rely on the mobile phone as a safeguard for emergencies. - Page 79 PPENDIX Disposal In order to dispose of your device, take it to a collection point provided by your local public waste authorities (e.g. recycling centre). Accor- ding to laws on the disposal of electronic and electrical devices, owners are obliged to dispo- se of old electronic and electrical devices in a separate waste container.
-
Page 80: Declaration Of Conformity
CE mark on the device. To view the complete Declaration of Conformity, please refer to the free downlo- ad available on our web site www.amplicomms.com Helpline 0844 800 6503 (See page 69 for costs and hours of operation) - Page 81 Clean the housing surfaces with a soft, fluff−free cloth. Do not use any cleaning agents or solvents. Guarantee AMPLICOMMS equipment is produced and tested accor- ding to the latest production methods. The implementati- on of carefully chosen materials and highly developed technologies ensure trouble−free functioning and a long...
- Page 82 If your device shows signs of defect during the period of guarantee, please return it to the sales outlet in which you purchased the AMPLICOMMS device together with the purchase receipt. All claims under the terms of guarantee in accordance with this agreement can only be asserted at...
- Page 83 PPENDIX the sales outlet. No claims under the terms of guarantee can be asserted after a period of two years from the date of purchase and hand−over of the product. Helpline 0844 800 6503 (See page 69 for costs and hours of operation)
-
Page 84: Index
NDEX Index 3-party conference..26 Calling ....23 Calls list... 24, 40 Cancel the emergency Alarm. - Page 85 NDEX Display ....57 Disposal ... . . 77 Icons in the display ..18 Installing the SIM card and battery.
- Page 86 NDEX Rejecting a call ..9 Network settings ..59 Restore factory settings 62 One−touch Safety Information..74 dialling ..24, 33, 54 Service hotline .
- Page 87 NDEX Time and date..9 Tips on the battery..72 Tone control ..55 Torch ....23 User profiles .
-
Page 88: Menu Tree
ENU TREE Menu tree Messages Write message Inbox Drafts Outbox Sent Delete messages Broadcast messages Templates SMS settings Profile settings Voicemail server Common settings Delivery report Reply path Save sent messages Memory status Preferred storage Phonebook (Option) View Add new contact Send text message Edit Delete... - Page 89 ENU TREE Add to block list Caller groups Phonebook settings Preferred storade Speed dial Memory status Copy contacts Move contacts Delet all contacts Call center Call history Missed calls Dialled calls Received calls Delete call logs Call timers Call costs Text msg.
- Page 90 ENU TREE Call time display Call time reminder SOS setting SOS mode setting Set SOS numbers Call center number Set outgoing voice MSG Record SOS MSG Settings User profiles Direct Number Tone Control Boost Phone settings Time and date Schedule power on/off Language Pref.
- Page 91 ENU TREE Incoming and SMS LED Charge LED Network settings Network selection Preferences Security settings SIM lock Change password Bluetooth Bluetooth Visibility My device Search audio device My name Advanced Audio path My address Restore factory settings Organizer Calendar Calculator Alarm Tasks Stopwatch...
- Page 92 4 250711 989422 Distribution: Audioline GmbH D-41460 Neuss 03/2013 – Edition 1.3...
Need help?
Do you have a question about the PowerTel M7000 and is the answer not in the manual?
Questions and answers