Table of Contents
Advertisement
Advertisement
Table of Contents

Subscribe to Our Youtube Channel
Related Manuals for Amplicomms PowerTel M9000


Summary of Contents for Amplicomms PowerTel M9000
- Page 1 PowerTel M9000 mobile phone Operating Instructions...
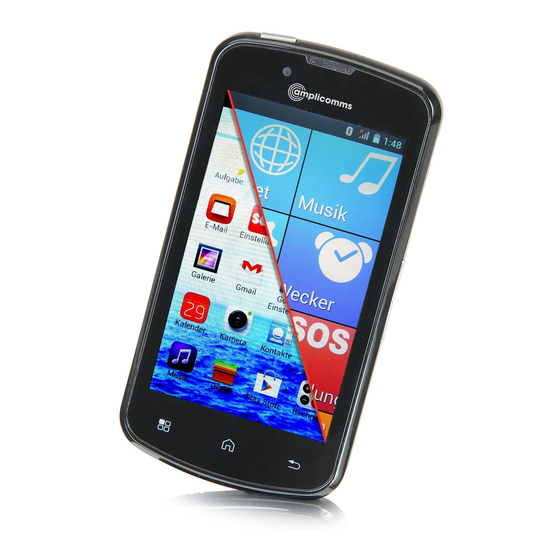
- Page 2 M9000 Basic Information The Amplicomms M9000 is a Smartphone customized for special needs with an Android 4.2.2 operating system. In addition to the “normal” options on a Smartphone it offers a special user interface with large, clearly arran- ged menu items, an especially large display, increased handset volume, and an emergency call button.
-
Page 3: Table Of Contents
ONTENTS Get to know your M9000 ................4 At a glance ....................4 Delivery Contents ..................6 Insert SIM Card and Battery..............6 Charging the battery .................8 Battery status .....................8 Turning On/Off your Mobile Phone ............9 Make sure you are in range of your Network ........10 Set Language ...................10 Setting the Date and Time ..............10 Basic Operating Instructions ..............11... - Page 4 ONTENTS Call logs.....................23 General......................23 Settings .....................24 Messaging....................29 Read messages received .................29 Write a message..................30 Settings .....................31 Contacts ....................35 Create a new contact ................35 Options for all Contacts ................36 Options for individual contacts...............38 Gallery .......................43 Camera ......................45 Browser.....................47 Music ......................53 Alarms .......................54 11.1 Basic Settings ...................55 Calendar ....................56 SOS Emergency Call ................58...
- Page 5 ONTENTS Appendix ......................76 Technical data .....................76 Service hotline ....................76 Tips on the battery .....................77 Intended use ......................77 Areas of use .......................77 Safety information ....................77 Power adapter plug....................78 Disposal.......................79 Maintenance ......................79 Declaration of Conformity ................79 Guarantee ......................80 Index ........................82 Helpline 0844 800 6503 ( ee page 76 for costs and hours of operation)
-
Page 6: Get To Know Your M9000
M9000 ET TO KNOW YOUR Get to know your M9000 Important: Before beginning please read the safety information on page 77. At a glance Receiver On-Off Switch Micro-USB socket (Loading/PC Con- Front nection) Camera Touch screen Volume (Display) buttons +/- Options Back Touch Key Touch Key... - Page 7 M9000 ET TO KNOW YOUR Main Camera Speaker Emergency call (SOS) Button Helpline 0844 800 6503 ( ee page 76 for costs and hours of operation)
-
Page 8: Delivery Contents
M9000 ET TO KNOW YOUR Delivery Contents Mobile phone 1 Lithium Ion Battery 1 Battery charger 1 USB cable 1 Quick Start Guide Insert SIM Card and Battery Possible risk of swallowing small parts! The SIM card can be removed. Small children could swallow it. Please make sure that the SIM card is not bent or scratched. - Page 9 M9000 ET TO KNOW YOUR Your phone supports two SIM cards. This enables you to, for example, • continue to use your “old” phone’s SIM card and to insert a prepaid data SIM card as well. This allows you to keep your phone number and you do not need to cancel, or change, your current contract.
-
Page 10: Charging The Battery
M9000 ET TO KNOW YOUR Contacts Insert the battery. In doing so, the battery’s contacts will be on the left • and point up. Press lightly on the bottom end of the battery until it snaps into place (as shown above). •... -
Page 11: Turning On/Off Your Mobile Phone
M9000 ET TO KNOW YOUR Turning On/Off your Mobile Phone To turn on your phone hold the on/off button, top left, down until the dis- play lights up. Depending on the setting of your SIM card you may then be prompted to enter your PIN. -
Page 12: Make Sure You Are In Range Of Your Network
M9000 ET TO KNOW YOUR Make sure you are in range of your Network Some networks offer better coverage than others in different areas. The icon indicates you have a signal and are connected to the network. Set Language In the event that the language is not automatically detected by the SIM card inserted please read the following Chapter Basic Operating Instructions first and familiarize yourself, where applicable, with the operation of the phone. -
Page 13: Basic Operating Instructions
ASIC PERATING NSTRUCTIONS Basic Operating Instructions General Information for Operating the Telephone Your mobile phone is equipped with a touch screen which is used for the actual operation of the phone. The touch screen should not be scratched. Do not touch it with sharp objects and do not let it come into contact with water. -
Page 14: The Start Screen
ASIC PERATING NSTRUCTIONS The Start Screen The status bar at the top of edge of the screen shows the signal strength, current statuses and the battery level. In addition, the time and date, and, if applicable, other information, are also displayed here. By swiping to the left you will reach the individual menus. -
Page 15: Screen Lock
ASIC PERATING NSTRUCTIONS Screen lock After a pre-set amount of time the screen will be locked in order to prevent unintentional touch interaction with your screen. Note: You can also lock the screen by quickly pressing the On/Off key. If you wish to unlock the screen, quickly press the on/off key in order to activate the display screen. -
Page 16: Turning The Screen
ASIC PERATING NSTRUCTIONS Turning the screen You can turn the screen in order to view a larger image when, for example, looking at pictures, surfing the internet or writing an SMS/MMS. Please note that not all applications support this function. (Example: SMS-entry) 2.10 Entering text... -
Page 17: Connecting Your Mobile Phone To A Computer
ASIC PERATING NSTRUCTIONS screen. The symbol will be entered. • To enter a comma, click on (to the left of the space key). If you hold the key down for a moment the touch key for the entry options will be displayed (Input languages/Android key settings). - Page 18 ASIC PERATING NSTRUCTIONS this case neither the phone memory nor the SD card will be connected with the computer as external drives. Please note: Properly eject the mobile phone’s storage media displayed on the computer as external drives with the corresponding computer function before disconnecting the USB cable, in order to avoid loss of data.
-
Page 19: Calling
ALLING Calling Entering the phone number by hand Tap on the symbol. The dialling keypad is displayed. Enter the phone number and then tap the green phone icon. The phone number will be dialled. key displays all the calls that you have received, dialled, or missed. -
Page 20: Dialling From Your Contacts
ALLING Dialling from your contacts Tap the icon. Your contacts will open. Tap the entry field and then enter the first few let- ters of the desired entry Scroll through your contacts in order to find the desired entry. icon opens the list of all calls that you have received, dialled, or rejected. -
Page 21: Dialling From The Call Log
ALLING Dialling from the call log Tap the icon. The call log will open. Scroll through the call log in order to find the desired entry. to see all calls. in order to see only the calls you dialled. in order to see only the calls you received. in order to see only the calls you missed. -
Page 22: Incoming Calls
ALLING Incoming Calls An incoming call is indicated with the set ringtone (active audio profile) and on the display screen. If the caller is entered in your contact list the name and picture are also displayed, and a special ringtone used. These options are only accessible if the contact is stored on the mobile and not on the SIM card. -
Page 23: Options During A Call
ALLING Options during a call Whilst in a call tap the Options touch key. You can record the call. Please note that you are obliged to inform the person you are talking with before you can record the call. Tap the icon. -
Page 24: Initiate An Emergency Call
ALLING Initiate an Emergency Call Press the emergency call button for approx. 3 seconds. You will hear a siren and the emergency call will be sent to the emergency number(s) specified. The emergency call button also works when the screen lock is on. For configuring the emergency call numbers and further settings refer to page 58. -
Page 25: Call Logs
ALL LOGS Call logs General All calls are stored in the call log menu. Tap on the icon. The call list is opened. Scroll through the call list in order to find the desi- red entry. in order to view all calls. in order to view only calls dialled. -
Page 26: Settings
ALL LOGS Settings 1 - Settings for voice calls, see (1) 2 - Settings for video calls, see (2) 3 - Additional settings, see (3) Tap an entry. (1) Voice call settings Voice mail settings (Mailbox), see (1.1) Settings for calls with a prefix number, see (1.2) Settings for call forwarding, see (1.3) Settings for call barring, see (1.4) Additional settings, see (1.5) - Page 27 ALL LOGS (1.2) Settings for IP calls Enter the prefix for IP calls. This prefix will always be dialled before the actual phone num- ber when you start an “IP call” (1.3) Call forwarding settings 1-4 The current status is displayed. Select one of the conditions displayed and enter the phone number.
- Page 28 ALL LOGS Block all incoming calls; calls are no longer sig- nalled. You can no longer be reached. Block all incoming calls while roaming; calls are no longer signalled if you are outside your home network (i.e. in a foreign country during vacation).
- Page 29 ALL LOGS (2) Video call settings You can select an image that will be displayed during a video call when the built-in camera is not used. If this function is enabled ( ), it will be display- ed under (3) stored image, when the Peer- Video is unavailable.
- Page 30 ALL LOGS (3) Other Settings Settings for call restriction, see (3.1). If the function is enabled ( ), you will hear an advisory tone every 50 seconds during a call. A list with ready-made quick responses, that may be changed. Settings for the TTY Mode (Text-Telephone).
-
Page 31: Messaging
ESSAGING Messaging Read messages received Tap on the icon. The list of existing messages is opened. Tap an entry in order to display the entire message. Tap the Options icon. You will receive the following options: Select the message for further editing (edit/forward/delete). -
Page 32: Write A Message
ESSAGING Write a message Open SMS/MMS and click on „New Message“. Tap „Select Contact“. Enter the first letter of the desired contact. After selecting the entry the text window for writing the message will be opened. Write your message (for additional help on entering text see page 14). -
Page 33: Settings
ESSAGING You can also turn the mobile in order to increase the size of the keyboard. After entering the text click on „Done“. Click on the icon in order to send the message. Settings Open SMS/MMS and click on Options. You will receive the following options: Enter a search term. - Page 34 ESSAGING (1) Settings for SMS/MMS Settings for SMS, see (1.1) Settings for MMS, see (1.2) Settings for notifications, see (1.3) General settings, see (1.4) (1.1) Settings for SMS Settings for delivery report ( = enabled) Display of the messages stored on the SIM card.
- Page 35 ESSAGING (1.2) Settings for MMS Settings for sending a MMS to a group/multi- ple recipients ( = enabled) Settings for the delivery report ( = enabled) Settings for read confirmation for a MMS sent = enabled). Settings for a read report for a MMS received = enabled).
- Page 36 ESSAGING (1.4) General Settings Select the chat wallpaper. Set the font size for messages. Include e-mail in contact results = enabled) Delete old messages (SMS and MMS) when set limit is reached. Separate settings for SMS/MMS possible. Broadcast settings (Broadcast must be suppor- ted by your network provider.
-
Page 37: Contacts
ONTACTS Contacts Click on the icon. Your contacts will be displayed. Click on the entry field and enter the first letter of the entry Scroll through your contacts in order to find the desired entry. You can enter information about yourself. Click on the desired entry in order to call or send an SMS to this contact, to edit or delete the contact (see also page 18). -
Page 38: Options For All Contacts
ONTACTS Then enter the information for the contact. After each entry click Next in order to move to the next entry field. Click Done in order to store the contact. Options for all Contacts Click on Options. Deleting contacts, see (1.1) Setting the display (SIM card, phone, etc.). - Page 39 ONTACTS (1.2) Copying your contacts Select the source from which the contacts will be copied and click Next. Select the location to which you want to copy your contacts and click on Next. Click on a contact in order to select it ( enabled) or 2 - Click on selected and then on Select all, in order to select all contacts.
-
Page 40: Options For Individual Contacts
ONTACTS Options for individual contacts Select a contact and click on Options. The contact will be added to your favourites. You can edit the contact. You can share the contact, see (1.1) The contact will be deleted. You can assign the contact its own ringtone, see (1.2) Should an incoming call from this call be block- ed, i.e. - Page 41 ONTACTS (1.1) Share contacts You can send the selected contact as a .vcf file. Click whether you want to send the file using Bluetooth, e-mail, etc. and following the additional instructi- ons. (1.2) Set an individual ringtone for the contact You can assign the selected contact its own ringtone.
- Page 42 ONTACTS Click on the red dot and speak into the microphone. End the recording by clicking on the white square. Click on “Save”. Helpline 0844 800 6503 ( ee page 76 for costs and hours of operation)
- Page 43 ONTACTS Tap on the entry in the list and hold your finger down for approx. 2 seconds until the icon appears in front of the entry. Click on the music clef and answer the following prompt by clicking OK. Helpline 0844 800 6503 ( ee page 76 for costs and hours of operation)
- Page 44 ONTACTS 2nd Step: Selecting your personal ringtone Your new ringtone will be assumed in the ringtone list and can then be set for one of your contacts. Helpline 0844 800 6503 ( ee page 76 for costs and hours of operation)
-
Page 45: Gallery
ALLERY Gallery All photo and video albums are displayed in the gallery. Click on the icon. Click on “Albums”, in order to change the sort (Albums/Locations/Times). Click on the camera icon in order to switch to the camera. Click on an album in order to open it, see (1). By clicking on Options you can select one or more albums (the album will be surrounded by a border). - Page 46 ALLERY (1) View Photos/Videos The photos in the open album will be displayed as a grid, or a film strip view (setting top left). Click on an image to open it: Back to overall view Send image via SMS/MMS, Bluetooth or E-Mail etc.
-
Page 47: Camera
AMERA Camera You can take photos and videos using the built-in camera. In addition there is a forward facing camera which you can use, for example, for video calls. Click on the icon. The camera is turned on. In this view you have the following options The photo is automatically triggered if a smile is identified. - Page 48 AMERA (1.2) Camera Settings Shutter delay (ZSD=Zero Shutter Delay), affects the auto-focus Turns on/off face detection Setting for self-timer Settings for number of captures per second for photo series Setting for picture size/resolution Setting for the preview size (not visible on the screenshot) Setting for sen- sitivity (ISO) (1.3) Video Settings Turning on/off the microphone during video...
-
Page 49: Browser
ROWSER Browser You will need a SIM card that supports this service, or a wireless network (WLAN/Wi-Fi) that you can log into to access the internet. See also Wi-Fi settings, page 64. Click on the icon. Click on the entry line and enter the desired IP address. - Page 50 ROWSER pages. 11 - Settings: See following explanations (1) Browser Settings (Overview) see (1.1) see (1.2) see (1.3) see (1.4) see (1.5) see (1.6) (1.1) Browser Settings (General) Set the homepage by entering the web address. Activate the auto-fill for web forms = enabled) Entries for the text for the auto-fill Helpline 0844 800 6503...
- Page 51 ROWSER (1.2) Browser Settings (Privacy & Security) Deletes the contents of the cache. A cache is a storage area for the temporary storage of data. If you have accessed password protected, con- fidential information, or a security service, or have attempted to access them, empty your cache afterwards.
- Page 52 ROWSER 12 - Select whether the automatic receipt of notifi- cations that some webpages send should be Always on, As required, or Off. 13 - Delete notification access for all webpages. (1.3) Browser Settings (Accessibility) Adjusts the magnification (zoom) of the websi- te display to your settings ( = enabled) Preview of the text size, can be changed with...
- Page 53 ROWSER (1.4) Browser Settings (Advanced) Select the search engine to be used New Tabs (i.e. additional websites that can be called up using a link) are displayed behind the current tab ( = enabled) JavaScript enables dynamic change of content and interaction with the user ( = enabled) Open multiple websites and switch between...
- Page 54 ROWSER (1.5) Browser Settings (Bandwidth management) Setting for automatic preloading of search results (Never, only with WLAN, Always) Setting for automatic preloading of linked web- pages (Never, only with WLAN, Always) Setting for the display of images on webpages = enabled) (1.6) Browser Settings (Labs) Display of controls in the Browser (Bookmark/Forward/Back, etc.) by moving...
-
Page 55: Music
USIC Music You can listen to saved music and other audio files on your mobile. Click on the icon. List of saved music (by performer) List of saved music (by Album) List of saved music (by title) Display saved playlists (compiled data files) Call up the search function by specific titles During playback click on Options Shuffle saved titles... -
Page 56: Alarms
LARMS Alarms You can programme several independent alarms on your mobile. Click on the icon. Slide the switch to “On” Click on the icon in order to see the setting Add a new alarm clock Click on the time and enter the desired alarm time. -
Page 57: Basic Settings
LARMS 11.1 Basic Settings Click on Options Setting the style (Analog/Digital clock) Add home time when staying in another time zone ( = enabled) Setting the home time zone Settings for automatically stopping the alarm Setting the snooze length (amount of time before alarm is repeated) Setting the alarm volume Settings for the volume buttons when alarm... -
Page 58: Calendar
ALENDAR Calendar There is a calendar on your mobile. You can enter appointments/events that you wish to be reminded of by your mobile. Click on the icon. The current calendar will be displayed. Click here and select the display (Day, Week, Month, Appointment overview) Click on Options Enter a new appointment/event... - Page 59 ALENDAR (1) Calendar Settings Click on General Settings. There may be additional accounts which are accessible (G-mail account, etc.) that can be synchronized. Hides declined events ( = enabled) Display week number ( = enabled) Determine the day the week starts on. Keep home time zone ( = enabled) When Item 4 is on you can select the home...
-
Page 60: Sos Emergency Call
SOS E MERGENCY CALL SOS Emergency Call Your mobile is equipped with an emergency call function. Up to 5 personal phone numbers can be entered for an automatic emergency call sequence, or the phone number for an emergency call centre. 13.1 Sequence of an emergency call Press the emergency call button on the back of the device for approx. -
Page 61: Settings
SOS E MERGENCY CALL 13.3 Settings Tap the icon. Setting the SOS mode, see (1.1) Enter emergency call numbers, see (1.2) Enter the phone number of the emergency call centre, the same way as in (1.2) Set emergency call message, see (1.3) Set emergency SMS message, see (1.4) Select the SIM card for the emergency call (only when two SIM cards are inserted), see... - Page 62 SOS E MERGENCY CALL (1.2) Set SOS Numbers / Call Centre Number Enter the desired phone numbers Tap Next after entering each phone number Entering public authorities such as the Police Department, Fire Department, or Rescue Coor- dination Centres is not permitted. This is a purely “private”...
- Page 63 SOS E MERGENCY CALL (1.4) Set SMS message Tap in the entering section and enter your per- sonal emergency SMS. When finished tap Save. (1.5) SIM Selection If you have inserted two SIM cards you can select which one will be used to send the emergency call = enabled) Helpline 0844 800 6503 ( ee page 76 for costs and hours of operation)
-
Page 64: Settings
ETTINGS Settings In this menu you will find the different settings for your mobile. Tap the icon. Settings for the SIM card(s) see (1.1) Turn on/off WLAN, display available networks, Wi-Fi log-in, see (1.2) Turn on/off Bluetooth, search for new connecti- ons, etc., see (1.3) Information on data use, see (1.4) Various settings, see (1.5) - Page 65 ETTINGS 18 - Accessibility settings, see (1.18) 19 - Settings for the start user interface, see (1.19) 20 - Design options: You should only make changes in this menu if you know what the results of those changes will be. In the worst case scena- rio your mobile will no longer function! 21 - Information on the current software version with an update option (wireless update), legal...
- Page 66 ETTINGS (1.1) SIM Management Information on the SIM cards used (Provider, telephone number, etc.) Turn on/off data connection via GSM. In case of activation consider that regardless of your mobile communications contract you may be responsible for additional costs. Alternative: data connection via WLAN, see (1.2).
- Page 67 ETTINGS (1.2.1) Wi-Fi Options By tapping on Options you will receive the follo- wing options Starts search for available networks WPS-PIN entry (for WPS log-in) Wi-Fi connection directly to a PC (without a Router). The PC must support this function. Advanced Options, see (1.2.2) (1.2.2) Advanced Wi-Fi Settings Notification in the event of available open net-...
- Page 68 ETTINGS (1.3.1) Bluetooth Options By tapping on Options you will have the following additional options Rename the phone Limit the time of the Bluetooth device’s visibili- Display the data downloaded and/or uploaded with Bluetooth with the option of deleting an entry (tap on entry ->) or to delete the entire list (via the Options tab) Important information when operating with motor vehicle hands-free...
- Page 69 ETTINGS (1.5) More ... Turn on/off airplane mode (send functions are turned off, = enabled) Set up a VPN (Virtual Private Network). Before set-up you must set an unlock code for the dis- play (PIN, password, etc.), see also “Security/Display-Lock”, page 71). You can use your phone for internet access via USB, Bluetooth (tethering), or as a WLAN-Hot- spot.
- Page 70 ETTINGS (1.7) Display Setting for notifications also on the lock screen = enabled) Selection of wallpaper Automatically turn display when the phone is turned ( = enabled) Setting the display-brightness Settings for screensaver Setting the font size Setting the amount of time after which the phone will go into sleep mode if it is not being used (1.8) Storage...
- Page 71 ETTINGS (1.9) Battery Information on the battery Show the battery charge, in addition to the icon, in percent ( = enabled) Current status of the battery Projected estimated battery life under current conditions Current energy use by load Refresh the display (1.10) Apps Information about the applications (Apps), found on the phone...
- Page 72 ETTINGS (1.11) Location Access Allow your phone to access your location ( enabled). Some Apps only function if location access is enabled. If location access is enabled you can determine the type of location tra- cking, see below Location tracking via GPS satellite (very accura- te, however, generally only functions outside of buildings).
- Page 73 ETTINGS (1.12) Security Set whether a PIN, password, or the like is required to unlock the phone from sleep mode You can enter an owner ID which will be dis- played on the lock screen. If the SIM lock is enabled (= ), it will be necessary to enter the SIM PIN when turning on the phone.
- Page 74 ETTINGS (1.13) Language & nput Set the desired language You can use a spell checker ( = enabled) If the spellchecker is enabled you have selecti- on and/or settings options (Selection only for multiple installed spell checkers). Please set the language used (Tap on and select the cor- responding language).
- Page 75 ETTINGS (1.14) Backup & Reset Backup your data (Apps/Wi-Fi passwords and other settings) on Google servers ( = enab- led). Information about the backup account (see above) When you have backed up your data you can automatically reset an App after the reinstallati- Delete all DRM licenses Reset the phone to factory condition.
- Page 76 ETTINGS (1.16) Date & Time Select whether the network-provided or GPS- provided date/time should be used (not possi- ble in all cases) Select whether the network-provided time zone should be used ( = enabled) Enter date manually (only possible when Auto- matic date&time is not enabled) Enter time manually (only possible when Auto- matic date&time is not enabled)
- Page 77 ETTINGS (1.18) Accessibility With a software upgrade you can, if necessary, install a service from the Google Playstore. Options for magnification of the screen display End a call by pushing the on/off switch ( enabled) Speak passwords during entry ( =enabled) Turn on/off the quick access for accessibility.
-
Page 78: Appendix
PPENDIX Appendix Technical data Quadband GSM/DCS 850 / 900 / 1800 / 1900 MHz Dual cards SIM / UIM M4/T4 Processor Dual Core 1.2 GHz Android 4.2.2 Memory 512 MB RAM, 4 GB ROM, supports a TF Memory Card up to 32 GB (optional) Camera Front 300 K pixel, Rear 5 M pixel, Autozoom WiFi... -
Page 79: Tips On The Battery
PPENDIX Tips on the battery • Only use batteries, cables and charging unit approved by the manufacturer, otherwise the battery could be damaged. • Never throw the battery into fire or water. • Do not short circuit the battery. • Always leave the battery in the phone to avoid accidentally short circuiting the battery contacts. -
Page 80: Power Adapter Plug
PPENDIX • All mobile communication equipment is subject to interference which may impair its performance. • Keep the phone and accessories out of the reach of children. • The SIM card can be removed. Caution! Small children can swallow them. •... -
Page 81: Disposal
Conformity with the above mentioned directive is confirmed by the CE mark on the device. To view the complete Declaration of Conformity, please refer to the free download available on our web site www.amplicomms.com Helpline 0844 800 6503 ( ee page 76 for costs and hours of operation) -
Page 82: Guarantee
If your device shows signs of defect during the period of guarantee, please return it to the sales outlet in which you purchased the AMPLICOMMS device together with the purchase receipt. All claims under the terms of guarantee in accordance with this agreement can only be asserted at the sales outlet. - Page 83 PPENDIX Helpline 0844 800 6503 ( ee page 76 for costs and hours of operation)
-
Page 84: Index
NDEX Index Connecting your mobile phone to a computer ..... 15 Accessibility ....50, 75 Contacts . - Page 85 NDEX Initiate an Emergency Call ..22 Schedule power on/off ..74 Input ......72 Screen lock .
- Page 86 NDEX Wi-Fi ......64 Wi-Fi Options ....65 Write a message .
- Page 88 4 250711 992132 Audioline GmbH D-41460 Neuss 09/2014 – Edition 1.1...
Need help?
Do you have a question about the PowerTel M9000 and is the answer not in the manual?
Questions and answers