Table of Contents
Advertisement
Advertisement
Table of Contents
Troubleshooting

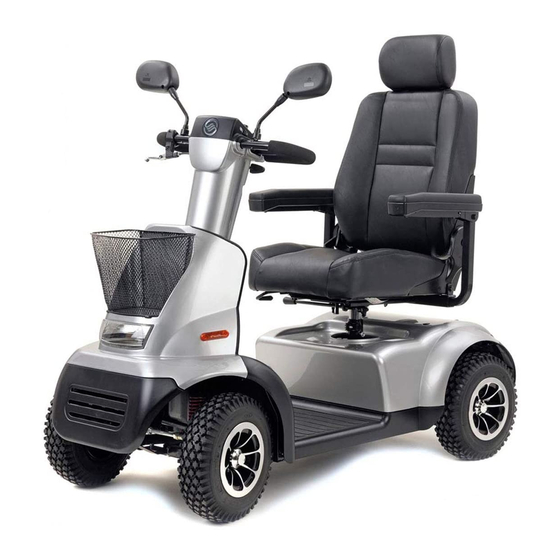
Summary of Contents for Afikim Breeze-C
- Page 1 -- Revision 3, 19/7/2013 -- PRC4014b Maintenance Manual...
-
Page 2: Table Of Contents
Contents Safety instructions Specific Tools for technicians Specific Parts: Options / Accessories assembling : Mechanical Adjustments Front Electronics Board Setup Controller Programming / Setup Periodic maintenance Check Mechanical Fault troubleshooting Control and Electronics system fault troubleshooting 10.1 General control system and Front Board Troubleshoots 10.2 Controller Troubleshoots Mechanical assembly drawings... - Page 3 1.1.1 Technicians who are servicing the scooter should be authorized to service the scooter. 1.1.2 Technicians who are servicing the scooter should be aware and follow all safety instructions within the User Manual. 1.1.3 Technician should follow general safety instruction like using gloves, safety glasses when needed.
-
Page 4: Specific Tools For Technicians
Specific Tools for technicians Standard tool box (wrenches, socket-head cap screw, hexagon keys, Phillips (crosshead) tip and/or screwdrivers, etc.) Voltmeter (To measure 24VDC) Air pressure gauge (To measure 35 psi) Batteries tester (under load) Density meter ... -
Page 5: Options / Accessories Assembling
Options / Accessories assembling : Most accessories based on the rear square pipe The accessories are : 4.1 – 4.2 – Seat safety belt 4.3 – Rear Basket Walker Holder 4.4 – 4.5 – 4.6 – Cane Clip Attachment Single Cane Holder Double Cane Holder... -
Page 6: Mechanical Adjustments
Mechanical Adjustments Description Where How to Adjust Seat Height Seat pin under the battery Release both secure bolt and cover. level bolt. Change pin Level hole as required . Rescuer both level bolt and secure bolt. Adjustments : 3 x 20 mm. See attached assembling drawing:... - Page 7 Armrest Adjust the width . Adjust the angle. Front lights Release the screw and adjust The angle of the front lights.
-
Page 8: Front Electronics Board Setup
Front Electronics Board Setup The Horns can be setup to work in one of the follows options : Controller alarms, Tiller push button , Reverse alarm , Blinkers alarms. The front board include setup options for the Horn. This can be done with the dipswitch DSW1 that is on the front board. -
Page 9: Controller Programming / Setup
7. Controller Programming / Setup If the user cannot find a position on the half speed limit switch control that suits him, the controller can be programmed to meet his needs. The controller can be programmed in two ways – with an SP1 Programmer or specialist PC software and interface cable. - Page 10 7.1 Controller Programming with hand programmer SP1 : The list of parameters fit to power-units 950W-12km/h,10km/h and 15km/h. The parameters refer to "S-Drive 120" controller with hand programmer "SP1" To program through the "Charge Socket" use the adaptor. Programmer SP1 Adaptor to the Charger Socket Instructions to change the parameters : 1.
-
Page 11: Periodic Maintenance Check
8. Periodic maintenance Check Type of Service Frequency Check air pressure in User Every week all tires. Check normal drive User Every Month and stop Check tires wear User Every Month Check for missing User When receiving the Breeze C or after a long time parts and damaged not using it. -
Page 12: Mechanical Fault Troubleshooting
9. Mechanical Fault troubleshooting Description Probable cause Repair action Noises from front Check front suspension for Replace wear parts, steering and clearances and secure of bolts. secure bolts. suspension Check front shock absorbers. Replace if needed. system Check the rod end for clearance. -
Page 13: Flat Tire
speed downhill. 10 Noises from motor Wear of brushes. Check brushes and replace if needed. Faulty motor. Replace motor. 11 Flat tire and Flat tire Repair / replace tire's uneven and not tube. smooth drive Take out the cover Open the central nut. Take out the air. -
Page 14: Control And Electronics System Fault Troubleshooting
10. Control and Electronics system fault troubleshooting 10.1 General control system and Front Board Troubleshoots The front board is the center of all peripheral functions of the scooter: Lights , Horn , Information goes to the LEDS on the display . Elimination troubleshoots: The Front Board wiring connections are all quick connectors. -
Page 15: Controller Troubleshoots
10.2 Controller Troubleshoots The controller is the center of all driving functions of the Breeze S: Speed control , acceleration , deceleration , EMB (Electro Magnetic Brake used as parking brake) , Reverse drive , Speed limiting etc. . But still the functions of the controller are all connected to all the wiring, connectors and as well the Front board, power units and batteries. - Page 16 10.3 The fault code from the SP1 Programmer : (More codes you can see on the hand programming SP1). When the fault exists, connect the SP1 programmer's connector directly to the controller SDRIVE or to the charging socket, using a special wiring adaptor. The fault will be displaed on the SP1 programmer display.
-
Page 17: Mechanical Assembly Drawings
11. Mechanical assembly drawings See attached assembling drawings: "Breeze C (3, 4W) assembling.pdf". 12. Spare parts list : Can be found, using the assembling drawings. 13. General Wiring diagram:...


Need help?
Do you have a question about the Breeze-C and is the answer not in the manual?
Questions and answers
Green light on dash blinking twice,scooter does not move,new battery’s just installed
If the green light on the Afikim Breeze-C scooter dashboard is blinking twice and the scooter does not move after installing new batteries, it likely indicates fault code 3D02. This means there may be an issue with the motor wiring or the connections to the controller. Check the motor wiring and controller connections, then retest.
This answer is automatically generated