Table of Contents
Advertisement
Quick Links
OWNER'S MANUAL
H-Class 510
Indoor Training Cycle
Model 6100
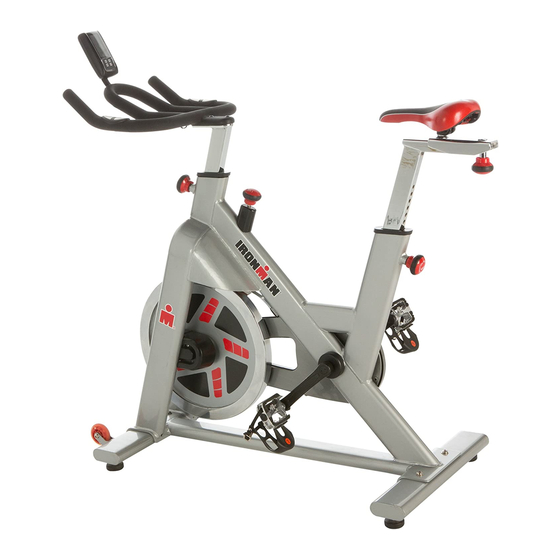
The specifications of this product may vary from this photo and are subject to change without notice.
IRONMAN, IRONMAN TRIATHLON and M-DOT are registe ed trademarks of World Triathlon Corporation.
This product is licensed by the World Triathlon Corporation.
Advertisement
Table of Contents

Related Manuals for Ironman Fitness H-Class 510


Summary of Contents for Ironman Fitness H-Class 510
- Page 1 OWNER’S MANUAL H-Class 510 Indoor Training Cycle Model 6100 The specifications of this product may vary from this photo and are subject to change without notice. IRONMAN, IRONMAN TRIATHLON and M-DOT are registe ed trademarks of World Triathlon Corporation. This product is licensed by the World Triathlon Corporation.
- Page 2 6200.1-0 1514...
-
Page 3: Table Of Contents
TABLE OF CONTENTS SERVICE ------------------------------------------------------------------------ 4 LABEL PLACEMENT --------------------------------------------------------- 5 PRODUCT SAFETY ---------------------------------------------------------- 6 OVERVIEW DRAWING ------------------------------------------------------ 7 PART LIST ---------------------------------------------------------------------- 8 HARDWARE AND TOOLS ------ ------------------------------------------- 9 ASSEMBLY --------------------------------------------------------------------- 10 ADJUSTMENT ----------------------------------------------------------------- 16 COMPUTER -------------------------------------------------------------------- 18 TROUBLESHOOT & MAINTENANCE -------- --------------------------- 21 WARM UP ----------------------------------------------------------------------- 22 WARRANTY -------------------------------------------------------------------- 23 FAX FORM ---------------------------------------------------------------------- 24... -
Page 4: Service
SERVICE IMPORTANT: FOR NORTH AMERICA ONLY To request product service and order replacement parts, please call our customer service department at: 1-844-641-7922 Monday through Friday, 8:00 AM-5:00 PM Pacific Standard Time, service@paradigmhw.com or email us at: Please visit our website at www.paradigmhw.com. Please have the following information ready when requesting for service: Your name Phone number... -
Page 5: Label Placement
LABEL PLACEMENT... -
Page 6: Product Safety
PRODUCT SAFETY Basic precautions should always be followed, including the following safety instructions when using this equipment. Read all instructions before using this equipment. 1. Read all the instructions in this manual and do warm up exercises before using this equipment. 2. -
Page 7: Overview Drawing
OVERVIEW DRAWING... -
Page 8: Part List
PART LIST Description Description Bolt Φ7.8*30*M6*15*S5 22 Seat Bracket Bearing 608ZZ Φ8 23 Seat 6801 Wheel Φ71*Φ19*24 25 Sensor Bolt M6*12*S5 26 Bolt M5*12*Φ8.5 Hexagon Socket Pan Head 27 Bottle holder Cap Bolt (Silver) M10x25xS6 Washer d10*Φ20*2.0 28 Bolt M10*16*S6 Foot pad M10*30*Φ52*49 29 Front stabilizer post Nut M10*H7*S17... -
Page 9: Hardware And Tools
HARDWARE AND TOOLS (6) Washer (5) Hexagon Socket Pan 4PCS Head Cap Bolt M10x25xS6 4PCS (13) Hexagon Socket Pan (14) Washer Head Cap Bolt M10x25xS6 2PCS (31) Multi Hex Tool with Phillips (32) Allen Wrench S6 1PCS Screwdriver S13, S14, S15 1PCS... -
Page 10: Assembly
ASSEMBLY 1. Remove Front and Rear Loosen the Bolt (28) and Washer (6) with Allen Wrench S6 (32) provided, and Front (29) Main Frame (34). Repeat the same procedure (32) Allen Wrench S6 1PCS 4PCS... - Page 11 ASSEMBLY 2. Front and Rear Stabilizers Installation the Front Stabilizer (9) in of the Main Frame (34) and align bolt holes. with two Hexagon Socket Pan Head Cap Bolt (5) two Washer (6). Tighten with the Allen Wrench S6 (32) provided. (5) Hexagon (32) Allen Wrench S6 Socket Pan Head...
- Page 12 ASSEMBLY 3. Water Bottle Holder Installation Attach the Water Bottle Holder (27) onto Main Frame (34) with two Bolts (26) and two Washers (42) (31) Multi Hex Tool with Phillips Screwdriver (26) Bolt (42) Washer 2PCS d5 13x1 2PCS 4. Foot Pedal Installation The Cranks and Foot Pedals are marked “R”...
- Page 13 ASSEMBLY 5. Seat Installation Turn the Round Knob (17) on the Main Frame (34) in counter-clockwise direction until it can be pulled out. Pull the Round Knob as you insert the Seat Post (21). Release the Round Knob and slide the Seat Post up or down until the Round Knob pops into the hole.
- Page 14 ASSEMBLY 6. Handlebar Post Installation Turn the Round Knob (17) on the Main Frame (34) in counter-clockwise direction until it can be pulled out. Pull the Round Knob as you insert the Handlebar Post (15). lide the Handlebar Post up or down until the Round Knob “pops” down into the hole.
- Page 15 ASSEMBLY 8. Computer Installation Attach the Computer (11) onto the plate using Screw (20) Connect Sensor Wires (11a, 36a) Connect Pulse Sensor Wire (39) into the Computer (31) Multi Hex Tool with Phillips Screwdriver (20) Phillips Pan Head Cap Screw 4 PCS...
-
Page 16: Adjustment
ADJUSTMENT Adjusting the Brake Knob Turn the Brake Knob clockwise to increase tension, counter-clockwise to decrease tension. Press down the Brake Knob to stop the flywheel Handlebar Height Adjustment Turn Round Knob counter-clockwise to loosen. Pull and hold Round Knob as you raise or lower the handlebar. - Page 17 ADJUSTMENT Seat Height Adjustment Turn Round Knob counter-clockwise to loosen. Pull and hold Round Knob as you raise or lower the seat. Release the Round Knob and allow it to into the hole. Tighten the Round Knob by turning clockwise Round Knob Seat Slide Adjustment Turn...
-
Page 18: Computer
COMPUTER BUTTONS MODE To confirm all settings. To set up the value of TIME, DISTANCE, CALORIES and PULSE. You can hold the button to increase the value fast. (The computer has to be in stop condition.) RESET To clear the set-up value. Press RESET key and hold for 2 seconds to reset all function figures. - Page 19 COMPUTER OPERATION PROCEDURE 1. Install 2 pcs of 1.5V AAA batteries 2. Get access to the set-up mode of TIME/DISTANCE/CALORIES/PULSE. When you are in each set- up mode, for example in the time set-up mode, time value is confirmation. The set-up of DISTANCE, CALORIES & PULSE is the same as TIME. , the value of TIME, DISTANCE, CALORIES start to count up preset target ( TIME DISTANCE or...
- Page 20 COMPUTER 6. Recovery: A fitness test which measures how quickly your heart rate returns to normal after exercising After exercis press RECOVERY and hold both hands on handpulse. TIME starts counting down from Screen will display your heart rate recovery status with the F1,F2….to F6. F1 represents the fastest recovery time, F6 represents the slowest.
-
Page 21: Troubleshoot & Maintenance
TROUBLE SHOOTING & MAINTENANCE TROUBLE SHOOTING PROBLEM: The training bike wobbles when in use. SOLUTION: Turn the ear stabilizer end cap as needed to level the bike. PROBLEM: The training bike makes a squeaking noise when in use. SOLUTION: The bolts may be loose on the training bike. Please inspect all of the bolts and tighten any loose bolts. -
Page 22: Warm Up
WARM UP Quadriceps Stretch With one hand against a wall for balance, reach behind you and pull your right foot up. Bring your heel as close to your buttocks as possible. Hold for 15 counts and repeat with left foot up. Inner Thigh Stretch Sit with the soles of your feet together with your knees pointing outward. -
Page 23: Warranty
WARRANTY MANUFACTURER’S LIMITED WARRANTY Paradigm Health & Wellness warrants to the original purchaser that this product is free fromdefects in material and workmanship when used for the purpose intended, under the conditions that it has been installed and operated in accordance with Paradigm’s Owner’s Manual. Paradigm’s obligation under this warranty applies to the following: COMPONENT LENGTH OF WARRANTY... -
Page 24: Fax Form
Paradigm Health & Wellness, Inc. PARTS REQUEST FAX FORM Please fax this form to (1-626-810-2166) OR YOU CAN EMAIL CUSTOMER SERVICE REQUESTS TO service@paradigmhw.com NAME: _______________________________________________________ ADDRESS: ____________________________________________________ CITY ______________ STATE ______________ ZIP ___________________ TELEPHONE: (Day) _____________________________________________ (Night) ____________________________________________ (Email Address) ____________________________________ SERIAL#: __________________________________________ MODEL#: __________________________________________ PURCHASE DATE: ______________________________________________...
Need help?
Do you have a question about the H-Class 510 and is the answer not in the manual?
Questions and answers