Table of Contents
Advertisement
Advertisement
Table of Contents

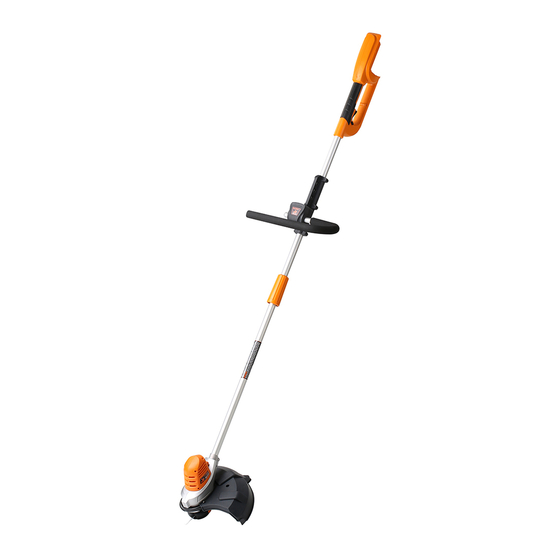
Summary of Contents for LawnMaster CLGT4012K
-
Page 1: Operators Manual
Operators Manual EN p. 2 40V-12" Li-Ion Cordless Grass Trimmer CLGT4012K Shoulder Strap Included CLGT2412K Read all safety rules and instructions carefully before operating this tool. Distributed By Cleva North America 601 Regent Park Court Greenville, SC 29607 (866)-384-8432... -
Page 2: Table Of Contents
CONTENTS CONTENTS PRODUCT SPECIFICATIONS GENERAL SAFETY RULES ELECTRICAL INFORMATION SYMBOLS KNOW YOUR CORDLESS GRASS TRIMMER ASSEMBLY 10-11 OPERATION 12-14 MAINTENANCE 14-15 TROUBLESHOOTING WARRANTY POLICY EXPLODED VIEW PARTS LIST NOTES PRODUCT SPECIFICATIONS 40V LITHIUM-ION CORDLESS GRASS TRIMMER Type Cordless, Battery-Powered Rated No Load Speed 7200 r/ min Line Diameter 0.080"... -
Page 3: General Safety Rules
GENERAL SAFETY RULES WARNING Read and understand all instructions before using this product. Failure to follow all • Do not operate power tools in explosive atmospheres such as in the presence of flammable liquids, gases, or dust. Power tools create sparks which may ignite the dust or fumes. •... -
Page 4: General Safety Rules
GENERAL SAFETY RULES • Use only identical manufacturer’s replacement parts and accessories. Use of any other parts may create a hazard or cause product damage. • Do not charge battery tool in rain, or damp or wet location. Following this rule will reduce the risk of electric shock. -
Page 5: Electrical Information
ELECTRICAL INFORMATION • If the power supply cord is damaged, it must be replaced only by the manufacturer or by an authorized service center to avoid risk. • Do not point the grass trimmer in the direction of people or pets. •... -
Page 6: Symbols
SYMBOLS On the product, the rating label and within these instructions you will find among others he following symbols and abbreviations. Familiarise yourself with them to reduce hazards like personal injuries and damage to property. Volts Voltage Amperes Current Hertz Frequency (cycles per second) Watts Power... -
Page 7: Save These Instructions
SYMBOLS The following signal words and meanings are intended to explain the levels of risk associated with this product. SYMBOL SIGNAL MEANING DANGER Indicates an imminently hazardous situation, which, if not avoided, will result in death or serious injury. WARNING Indicates a potentially hazardous situation, which, if not avoided, could result in death or serious injury. -
Page 8: Know Your Cordless Grass Trimmer
KNOW YOUR CORDLESS GRASS TRIMMER KNOW YOUR PRODUCT The safe use of this product requires an understanding of the information on the product and in this operator’s manual as well as a knowledge of the project you are attempting. Before use of this product, familiarize yourself with all operating features and safety rules. -
Page 9: Know Your Cordless Grass Trimmer
KNOW YOUR CORDLESS GRASS TRIMMER 1. Battery Dock 12. Motor Housing 1 a. Slot 13. Air Vents 2. Rear Handle 14. Safety Guard 3. On/off Switch 15. Fixed Line Trimmer Head 4. Lock-off Button 16. Release Button 5. Upper Shaft 17. -
Page 10: Assembly
ASSEMBLY J-handle NOTE: The 2 screws needed for attaching the J handle to the upper shaft are found already in the J handle. They must be removed for installation. 1. Align the J-handle with the front handle connector on the upper shaft (Fig. 1). 2. -
Page 11: Fixed Line Trimmer Head
ASSEMBLY Fixed Line Trimmer Head 1. Make sure that the safety guard has been attached properly. 2. Rotate the backing flange until its hole is aligned with the notch in the gear head. 3. Insert the spindle lock rod into the hole to lock the spindle. 4. -
Page 12: Operation
OPERATION Intended Use This cordless grass trimmer is designated with rated voltage of 36V D.C. . It is designed only to be used with battery packs 40LB4001. The fixed line trimmer head installed on this product is intended to cut smaller types of weed, lawn grass or similar soft vegetation in areas that are hard to reach, e.g. - Page 13 OPERATION Trimming • Attach the trimming head to cut smaller types of weed, lawn grass or similar soft vegetation. • Hold the product firmly with a gap between the product and your right side. • Stand upright, do not lean forward and pay attention to posture.
-
Page 14: Maintenance
OPERATION • Pay special attention when performing the work close to trees and bushes. The trimming head could damage sensitive bark, and damage fence posts (Fig. 15). • Carefully maneuver the product around objects, such as trees and bushes, ensuring it does not come into contact with them. After Use •... - Page 15 MAINTENANCE Replacing The Trimmer Head • Lay the product on a flat stable surface with the trimmer head (16) facing upward. • Rotate the backing flange until one of the notches is aligned with the hole in the gear head. •...
-
Page 16: Troubleshooting
TROUBLESHOOTING Problem Possible Cause Solution 1. Product does not 1.1. Battery pack not properly 1.1. Attach properly start attached 1.2. Remove and charge 1.2. Battery pack discharged battery pack 1.3. Battery pack damaged 1.3. Check by a specialist 2. Product does not electrician reach full power 1.4. -
Page 17: Warranty Policy
WARRANTY POLICY We take pride in producing a high quality, reliable product. That’s why LawnMaster tools carry a limited two (2) year warranty against defects in workmanship and materials from date of purchase under normal household use. If product is to be used for commercial, industrial or rental use, a thirty (30) day limited warranty will apply. -
Page 18: Exploded View
EXPLODED VIEW CLGT4012K EXPLODED VIEW... -
Page 19: Parts List
PARTS LIST CLGT4012K PARTS LIST PART NO. PART DESCRPTION GE71DC.10.00 Rear Handle GE70DC.00.16 Shoulder Strap GE71DC.40.00 J-handle BOA1XP.50.16 Screw EA34FA.40.02 Backing Flange GE70DC.50.05.X1.03 Fixed Line Trimmer Head FG1131.09.01 Trimmer Line GE71DC.20.03.X1.01 Front Handle w/ Motor Assembly GE01BC.50.10.X1.01 Safety Guard Assembly BOA1SP.50.12.BX... -
Page 20: Notes
NOTES...


Need help?
Do you have a question about the CLGT4012K and is the answer not in the manual?
Questions and answers