Table of Contents
Advertisement
installation and
opEration Manual
English | Français | Español
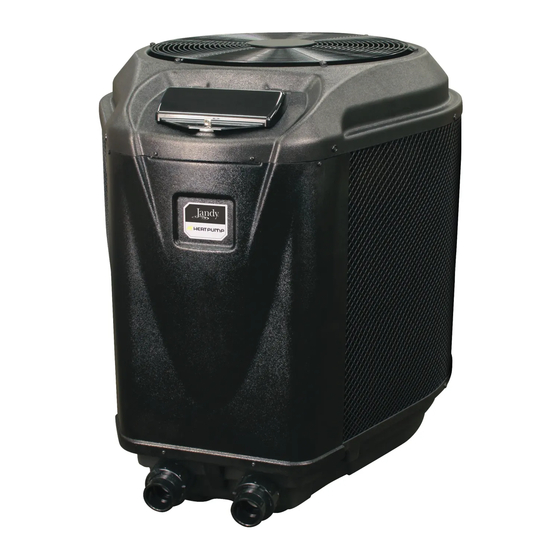
Jandy
Pro Series
®
JE Heat Pump
WARNING
For Your saFEtY - This product must be installed by a licensed HVAC technician certified in heat
pump repair and maintenance by the jurisdiction in which the product will be installed where such
state or local requirements exists. The technician must possess and comply with all certifications and
regulations regarding the purchasing, handling, transportation and reclamation of R410A refrigerant.
In the event no such state or local requirement exists, the installer or maintainer must be a
professional with sufficient experience in pool equipment installation and maintenance so that all of
the instructions in this manual can be followed exactly. Before installing this product, read and follow
all warning notices and instructions that accompany this product. Failure to follow warning notices
and instructions may result in property damage, personal injury, or death. Improper installation and/
or operation can create an electrical hazard which can cause serious injury, property damage, or
death. Improper installation and/or operation will void the warranty.
Advertisement
Table of Contents

Related Manuals for Zodiac Jandy Pro Series JE1500T


Summary of Contents for Zodiac Jandy Pro Series JE1500T
-
Page 1: Operation Manual
installation and opEration Manual English | Français | Español Jandy Pro Series ® JE Heat Pump WARNING For Your saFEtY - This product must be installed by a licensed HVAC technician certified in heat pump repair and maintenance by the jurisdiction in which the product will be installed where such state or local requirements exists. -
Page 3: Table Of Contents
Bonding ............. 15 Ordering Information ......... 26 Optional Remote Controls ........ 15 Zodiac JE Heat Pumps Parts List ..... 26 Zodiac JE1500 Heat Pumps Exploded View ... 27 section 5. operation ........18 Zodiac JE2000 Heat Pumps Exploded View ... 28 Zodiac JE Single Phase Electric Box .... - Page 4 ® Jandy Pro Series JE Heat Pumps Installation and Operation Manual Page 2 ENGLISH...
-
Page 5: Section 1. General Information
Read these installation and operation installation instructions for water temperature instructions completely before proceeding with guidelines before setting temperature. the installation. Consult Zodiac Pool Systems, Inc. (“Zodiac”) with any questions regarding this equipment. To obtain additional copies of this manual contact us at WarninG 800-822-7933. -
Page 6: Warranty
Make all warranty claims to your Zodiac ® dealer or • Lack of awareness of impending hazard directly to Zodiac. Claims must include the heat pump • Failure to perceive heat serial number and model (this information can be found •... -
Page 7: Specifications
When pool equipment is located below the pool Plastic 2” PVC (Unions included) surface, a leak from any component can cause Flow rate large scale water loss or flooding. Zodiac cannot Maximum 70 gpm (265 lpm) Optimum 60 gpm (230 lpm) - Page 8 ® Jandy Pro Series JE Heat Pumps Installation and Operation Manual Page 6 ENGLISH...
-
Page 9: Figure 1. Zodiac ® Je Heat Pumps Dimensions
® Jandy Pro Series JE Heat Pumps Installation and Operation Manual ENGLISH Page 7 Figure 1. Jandy pro series JE Heat pumps dimensions MODEL SIZE DIMENSIONS JE1500T 33” 34” 12.5” 9” 7” 39” JE2000/2500T 36” 40” 13.8” 19” 15” 43” JE3000T 36”... -
Page 10: Section 3. Water Connections
Zodiac cannot be responsible Place the clamps at the base of the heat pump in for such water loss or flooding or the damage caused the locations indicated in Figure 2. -
Page 11: Multiple Unit Installation
The Zodiac ® heat pump may be plumbed with a gas or electric heater or any combination of heat sources including solar. -
Page 12: Main Power
® Jandy Pro Series JE Heat Pumps Installation and Operation Manual Page 10 ENGLISH Main power Electrical wiring to the heat pump must be in WarninG accordance with the latest edition of the National Electric Code (NEC ), ANSI/National Fire Protection ®... -
Page 13: Figure 4. Standard Plumbing Layout
® Jandy Pro Series JE Heat Pumps Installation and Operation Manual ENGLISH Page 11 VENT FOR INDOOR INSTALLATION ONLY POOL HEATER CHEMICAL LOOP OR OPTIONAL CHLORINE GENERATION SYSTEM (JANDY AQUAPURE ® SHOWN) CHEMICAL FEEDER FILTER POOL PUMP FROM POOL OR SPA CHECK VALVE TO POOL OR SPA MANUAL BYPASS VALVE... -
Page 14: Figure 6. Two (2) Heat Pump Plumbing Layout
® Jandy Pro Series JE Heat Pumps Installation and Operation Manual Page 12 ENGLISH Optional Isolation Valves 2” PVC From Filter 3” PVC Manual Bypass Valve To Pool Figure 6. two (2) Heat pump plumbing layout Optional Isolation Valves 2” PVC From Filter 3”... -
Page 15: Figure 8. Je Single-Phase Electrical Supply Wiring Diagram
® Jandy Pro Series JE Heat Pumps Installation and Operation Manual ENGLISH Page 13 Figure 8. JE single-phase Electrical supply Wiring diagram... -
Page 16: Figure 9. Je 3-Phase Electrical Supply Wiring Diagram
® Jandy Pro Series JE Heat Pumps Installation and Operation Manual Page 14 ENGLISH Figure 9. Jandy pro series JE 3-phase Electrical supply Wiring diagram... -
Page 17: Bonding
® Jandy Pro Series JE Heat Pumps Installation and Operation Manual ENGLISH Page 15 CONNECTOR FOR SERVICE ACCESS HIGH VOLTAGE WIRES PANEL (5 SCREWS) CONNECTOR FOR LOW VOLTAGE WIRES Figure 10. Jandy pro series JE Heat pump Front View Bonding panel to the heat pump unit and the cover to the junction box (see Figure 10). -
Page 18: Figure 11A. Remote Pool-Off-Spa Connection (3-Wire Connection)
® Jandy Pro Series JE Heat Pumps Installation and Operation Manual Page 16 ENGLISH Press the up or down button to display two-Wire Connection to an aqualink ® rEMotE. The sElECt rEMotE oFF or tstat (default remote) appears, use the up or down Configure the aqualink rs Control button to scroll through the Remote options. -
Page 19: Figure 12. Aqualink
MEnu button for 5 seconds to enter the User Setup Mode and then enable the Zodiac Remote. The wires coming from the Jandy Pro Series JE heat pump can be “doubled up” on the red terminal... -
Page 20: Section 5. Operation
® Jandy Pro Series JE Heat Pumps Installation and Operation Manual Page 18 ENGLISH section 5. operation This lets the filter system and heat pump operate continuously until the water reaches the temperature setting on the temperature control. When that happens, Caution the heat pump will automatically shut off, but the filter pump will keep running. -
Page 21: Operating Features Of Hybrid Units With Optional Chiller
® Jandy Pro Series JE Heat Pumps Installation and Operation Manual ENGLISH Page 19 set point. After 5 seconds of inactivity, the new set point spa Mode - (normal Heat) is stored in memory. When the water temperature rises To enable the spa mode, press spa . The associated left to 1 degree above the temperature setting after a 5 green LED indicator will light and the unit will display... -
Page 22: User Setup Options
® Jandy Pro Series JE Heat Pumps Installation and Operation Manual Page 20 ENGLISH in memory. pool or spa to exit the User Setup mode. user setup options spa timer setup The User Setup options allow the user to select specific Make sure the control is in the oFF mode. -
Page 23: Set Point Lockout
5 feet (1.5 m) above or 10 feet heat exchanger. (3 m) below the pool surface. Consult your local Zodiac dealer for recommendations. ® section 6. General Maintenance On some installations, the piping from the heat pump to the pool is very short. -
Page 24: Winterizing
Perform the following steps to completely drain Zodiac recommends that you inspect your heat pump the heat pump (see Figure 15). on a regular basis and especially after abnormal weather Turn off the electrical power to the heat pump at conditions. -
Page 25: Section 7. Professional Maintenance And Service
Adequate airflow is required to move warm air through the large evaporator. Heat pump design Compressor - The compressor compresses the The Zodiac heat pump is one of the most efficient ® refrigerant gas to a higher pressure, increasing the ways to heat a pool or spa. -
Page 26: Section 8. Troubleshooting
® Jandy Pro Series JE Heat Pumps Installation and Operation Manual Page 24 ENGLISH section 8. troubleshooting troubleshooting Guide The following table provides symptoms and solutions for general troubleshouting problems for the heat pump. table 4. Heat pump troubleshouting Guide sYMptoM CorrECtiVE aCtion Heat pump will not start, no control board display. -
Page 27: Diagnostics
® Jandy Pro Series JE Heat Pumps Installation and Operation Manual ENGLISH Page 25 diagnostics In the event a pressure switch opens or another fault condition occurs, the LCD screen will display the fault until the problem has been resolved. Please refer to the following table for the list of diagnostic conditions. table 5. -
Page 28: Section 9. Replacement Parts
To order or purchase parts for the JE models of heat pumps, contact your nearest Zodiac dealer or distributor. See the Zodiac web site at www.Zodiac.com for the nearest service center. If they cannot supply you with what you need, contact Zodiac customer support department, telephone (800) 822-7933. -
Page 29: Zodiac Je1500 Heat Pumps Exploded View
Pro Series JE Heat Pumps Installation and Operation Manual ENGLISH Page 27 Zodiac ® JE 1500 Heat pumps Exploded View *See Figure 19 for detail DETAIL C SCALE 1 : 8 Figure 16. Zodiac JE Heat pumps Exploded View (JE1500 shown) -
Page 30: Zodiac Je2000 Heat Pumps Exploded View
Pro Series JE Heat Pumps Installation and Operation Manual Page 28 ENGLISH Zodiac ® JE 2000, JE2500 & JE3000 Heat pumps Exploded View *See Figure 20 for detail DETAIL C SCALE 1 : 8 Figure 17. Zodiac JE Heat pumps Exploded View (JE2000 shown) -
Page 31: Zodiac Je Single Phase Electric Box
Pro Series JE Heat Pumps Installation and Operation Manual ENGLISH Page 29 Zodiac ® JE single phase Electric Box JE1500 ONLY Figure 18. Zodiac JE single phase Electric Box Zodiac ® JE three phase Electric Box Figure 19. Zodiac JE three phase Electric Box... - Page 32 2115 South Service Road West, Unit 3 Oakville, ON L6L 5W2 1-888-647-4004 | www.ZodiacPoolSystems.ca ZODIAC ® is a registered trademark of Zodiac International, S.A.S.U., used under license. All trademarks referenced herein are the property of their respective owners. ©2013 Zodiac Pool Systems, Inc. H0408600 Rev C...
Need help?
Do you have a question about the Jandy Pro Series JE1500T and is the answer not in the manual?
Questions and answers
how to service the **** on the JE2000T, runs very loud
To reduce loud operation of the Zodiac Jandy Pro Series JE1500T heat pump, check and service the following components:
1. Fan Grille and Blade – Inspect for debris or damage. Clean or replace if necessary.
2. Fan Motor – Ensure it is functioning properly and not making excessive noise. Replace if faulty.
3. Anchor Brackets – Check for secure installation to minimize vibrations.
4. Service/Access Panel – Ensure all screws are tightened to prevent rattling.
5. Phase Rotation Monitor (if applicable) – Verify correct wiring for three-phase models.
If the noise persists, contact a Zodiac dealer or customer support for further assistance.
This answer is automatically generated