Advertisement
Advertisement
Table of Contents

Related Manuals for Body Champ BRB 5200


Summary of Contents for Body Champ BRB 5200
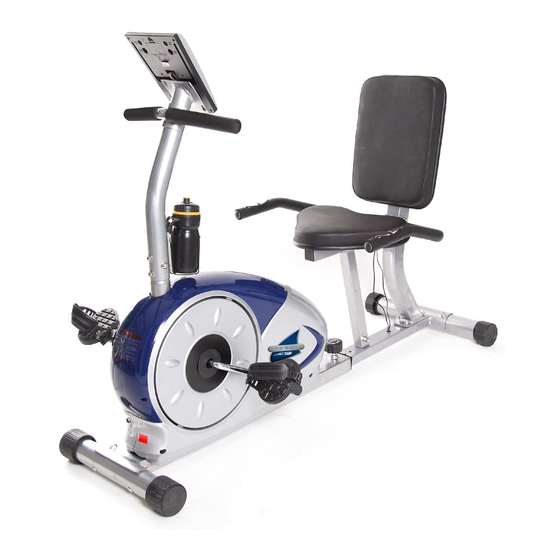
- Page 1 BRB 5200 M A G N E T I C RECUMBENT BIKE OWNER’S MANUAL...
- Page 2 This page intentionally left blank...
-
Page 3: General Information
You should avoid storage in Fax: (909) 598 - 6707 excessively cold or damp places as this may Email: info@bodyflexsports.com lead to corrosion and other related problems. Weight Limit Your product is suitable for users weighing: 250 pounds or less. BRB 5200 Page 1... - Page 4 The following hardware is used to assemble your unit. Please take a moment to familiarize yourself with these items. Please note some of this hardware is already pre-assembled on the machine. Do not be alarmed if you see parts on this page that are not included in your hardware packet BRB 5200 Page 2...
-
Page 5: Parts Listing
Seat cushion support frame Washer (M8) Grommet Bolt (M8*55mm) Rear handle bar Carriage bolt (M8*90mm) Foam grip (long) Bolt (M8*70mm) Pulse sensor Screw (M5*10mm) End cap 50*50mm Washer (M5) Backrest cushion Screw (M4*8mm) Seat cushion Screw (M4*19mm) BRB 5200 Page 3... -
Page 6: Exploded Diagram
Please continue to the next page to begin the assembly process and use this page only as a reference guide for parts and hardware. BRB 5200 Page 4... -
Page 7: Assembly Instructions
(#35)[M8] then through four Washers (#37)[M8] followed by the Backrest cushion frame (#12) and then bolted into the Bottom frame (#3). Hardware Required The diagram below denotes the hardware required to complete the steps shown on this page. BRB 5200 Page 5... - Page 8 (#12) using a total of four Bolts (#34)[M8 x 15mm] and four Washers (#37)[M8]. Bolt the Seat cushion (#20) to the Seat cushion frame (#21) using a total of four Bolts (#34)[M8 x 15mm] and four Washers (#37)[M8]. Hardware Required BRB 5200 Page 6...
- Page 9 Attach the Rear handle bar (#15) to the Seat cushion frame (#21) using two Bolts (#34)[M8 x 15mm] two Spring Washers (#35)[M8] and two Washers (#37)[M8]. Connect the Sensor wire (#11B) to the Sensor wire (#11A). Hardware Required BRB 5200 Page 7...
- Page 10 Bolts (#34)[M8 x 15mm] and four Arc washers (#32)[M8 x R30]. Attach the Water bottle holder (#30) to the Front post (#24) using two Screws (#43) [M4 x8mm] and two Washers (#42)[M5]. Insert the Water bottle(#29) into the Water bottle holder(#30). Hardware Required BRB 5200 Page 8...
- Page 11 Right pedal (#7R) clockwise. Screw in the opposite Left pedal (#7L) by screwing counterclockwise. The assembly process is complete. Please ensure all nuts, bolts and knobs are securely tightened before using the cycle. Hardware Required BRB 5200 Page 9...
-
Page 12: Computer Operation
B. STOP : Indicates the program selected has stopped. And, users are free to change the programs and the value of functions applied. C. PROGRAM n: Indicates the programs selected from PROGRAM 1 to PROGRAM 15 (or 17). D.LEVEL n: Indicates the level of resistance selected from LEVEL 1 to LEVEL 16. BRB 5200 Page 10... - Page 13 J. TARGET H.R./BMI/AGE Display: Displays the value of TARGET HEART RATE or BMI or AGE depending on the programs. K.HEART RATE/BODY TYPE Display: Display the value of HEART RATE or BODY TYPE depending on the programs. BRB 5200 Page 11...
- Page 14 “00:00”. C. Programs Selection: There are 17 programs and 1 Recovery function (including 1 Manual Program,6 Preset Programs,1 Body Fat Program,4 Heart Rate Control Programs,4 User Setting Programs,1 WATT Control Program, and 1 Pulse Recovery BRB 5200 Page 12...
- Page 15 Program 8 (Body Fat) Program 9 (Target H.R.) Program 10 (60%H.R.C.) Program 11 (70%H.R.C.) Program 12 (85%H.R.C.) Program 13 (User Setting) Program 14 (User Setting) Program 15 (User Setting) Program 16 (User Setting) Program 17 (Watt Control) BRB 5200 Page 13...
- Page 16 Program2 to Program7 are the preset programs .Press “ENTER” key to select TIME, DISTANCE, and AGE. Then, press▲ or ▼ key to adjust the values. Users may exercise with different level of loading in different intervals as the BRB 5200 Page 14...
- Page 17 ▲ or ▼ key, and they will not change the level of loading stored in the memory. With the input of age, the computer may suggest a target heart rate to exercise. The BRB 5200 Page 15...
- Page 18 “RECOVERY” key and then stop exercising. After the key is pressed, please also apply the heart rate detector appropriately. the test will last for 1 minute and the result will show in the display. BRB 5200 Page 16...
-
Page 19: Proof Of Purchase
Proof of purchase Model Number BRB 5200 BRB 5200... - Page 20 Body Flex Sports, Inc. • 21717 Ferrero Parkway, Walnut, CA 91789 • Telephone: (888) 266 - 6789 • Email: info@bodyflexsports.com...
Need help?
Do you have a question about the BRB 5200 and is the answer not in the manual?
Questions and answers
BRB 5200 My control panel is not coming on, what are the possible reasons? I have it plugged into a 120 volt wall plug.
The possible reasons for the control panel not turning on for the Body Champ BRB 5200 could include:
1. Power Supply Issue – The AC/DC adapter may not be properly connected, defective, or incompatible.
2. Faulty Electrical Connection – The power cord might be loose or damaged.
3. Monitor Reset Required – Holding the START/STOP button for 2 seconds may be needed to reset the monitor.
4. Battery or Internal Component Failure – If the unit uses batteries, they may be depleted or incorrectly installed.
5. Environmental Factors – Excessively cold or damp storage conditions may have caused corrosion or other issues.
6. Hardware Malfunction – Internal wiring or components of the control panel may have failed.
7. Weight Limit Exceeded – If the machine was used by a person over 250 pounds, it might have caused stress on electrical components.
Checking the power supply, connections, and performing a reset can help diagnose the issue.
This answer is automatically generated
E1 reading and beeping when first plug in. How do I fix this ang get cycling again?
To fix the E1 reading and beeping issue on the Body Champ BRB 5200 and get it cycling again, check and ensure proper connection of the sensor wires.
Follow these steps:
1. Disconnect and reconnect all sensor wires:
- Upper sensor wire (#23C) to the monitor.
- Middle sensor wire (#23B) to lower sensor wire (#23A).
- Sensor wire (#11D) to sensor wire (#11E).
2. Make sure all connections are secure and undamaged.
3. If the E1 error persists, inspect the sensor and wiring for any signs of damage or misalignment.
If the issue continues after checking all connections, the sensor or monitor may need replacement.
This answer is automatically generated
My dog chewed the wires that are located at the back of the seat. Can you tell me what the connectors were and can I buy replacements to repair this. I also need to purchase the neoprene type covering that goes on the handle bars on the seat.
Where do batteries go