
Subscribe to Our Youtube Channel
Related Manuals for Body Champ BRB 5007


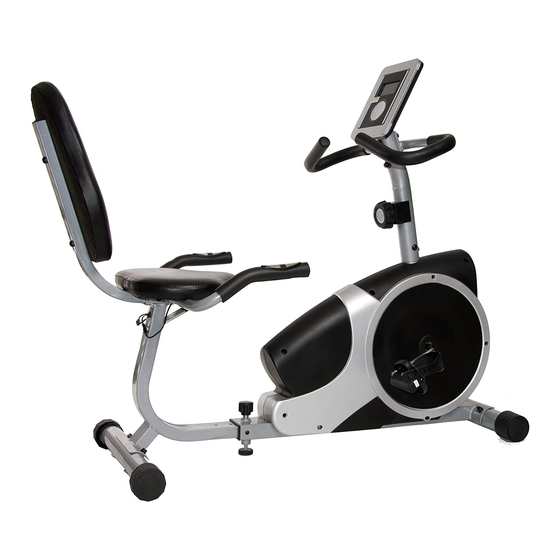
Summary of Contents for Body Champ BRB 5007
- Page 1 BRB 5007 M A G N E T I C RECUMBENT BIKE * This item is for consumer use only and it is not meant for commercial use. OWNE R’ S M ANUAL...
-
Page 2: General Information
21717 Ferrero Parkway, Walnut, CA 91789 - 1 x Philips (”Crosshead”) Screw Driver Telephone: (888) 266 - 6789 Weight Limit Fax: (909) 598 - 6707 Email: info@bodyflexsports.com Your product is suitable for users weighing: 250 pounds or less. BRB 5007 Page 1... - Page 3 #33. Spring Washer (M8) #32. Arc Washer (M8) [10 pieces] [3 pieces] [9 pieces] Pre-assembled Pre-assembled [3 pieces] #31. Nut (M8) [8 pieces] Tool #49. Wrench 1 (5 mm) #50. Wrench 2 [1 piece] [2 pieces] Page 2 BRB 5007...
-
Page 4: Parts Listing
Tension Controller Foam Grip Inner Cap (25*50mm) Seat Cushion Round Inner Cap (25mm) Backrest Cushion Carriage Bolt (M8X65mm) Wrench 1 (5mm) Screw (M8X65mm) Wrench 2 Screw (M8X80mm) Screw (M8X35mm) Screw (M8X45mm) Screw (M8X15mm) Screw (M5X30mm) P age 3 BRB 5007... -
Page 5: Exploded Diagram
Please continue to the next page to begin the assembly process and use this page only as a reference guide for parts and hardware. Page 4 BRB 5007... -
Page 6: Assembly Instructions
Push knob back inward until it clicks and then tighten it by turning clockwise. Stability Knob The Knob Bolt (#16) comes pre-assembled on the unit and serves to enhance its safety and stability. No installation or adjustments are necessary. BRB 5007 Page 5... - Page 7 TENSION WIRE ASSEMBLY Insert the tip of the Tension Controller(#19) wire into the Tension Controller Cable (#36) head at an angle. Tilt the Tension Controller (#19) wire into the crevice and then pull upward. SENSOR WIRE ASSEMBLY Page 6 BRB 5007...
- Page 8 Attach the Front Handle Bar (#07) to the Front Post (#06) using two Screws (#23), two Arc Washers (#32), and secure with two Nylon Nuts (#31). #23. Screw (M8x65 mm) [2 pieces] Washer #32. Arc Washer (M8) [2 pieces] #31. Nut (M8) [2 pieces] Page 7 BRB 5007...
- Page 9 Screw the Left Pedal (#11) into the left Crank (#10) by turning the Washer Left Pedal (#7R) counterclockwise. Screw in the opposite Right Pedal (#12) into the right Crank (#10) (not visible in diagram below) by screwing clockwise. #34. Washer (M8) [6 pieces] Page 8 BRB 5007...
- Page 10 HAND PULSE SIGNAL After complete assembly: If the computer is not picking up your hand pulse signal (or you are getting inaccurate readings), Please refer to our “Troubleshooting” section on Page 12 for other troubleshoot issues. BRB 5007 Page 9...
-
Page 11: Computer Operation
(SPEED / DISTANCE / CALORIES / TIME / PULSE) or SCAN mode. 2. Hold for 3 seconds to reset all of the values to zero. Press any of these buttons to browse through functions. ▲ ▼ Page 10 BRB 5007... - Page 12 9. Reset Press MODE for 3 seconds and all the function values will be reset to zero. Note: 1. If the computer displays abnormally, please re-install the battery and try again. 2. Battery Spec: AAA (2PCS). Page 11 BRB 5007...
-
Page 13: Troubleshooting
For your safety, please do not discard this Troubleshooting sheet or the Owner’s Manual, and keep them in a place where you can easily access/refer to them at any time. If you are still having any troubleshooting issues, please contact our Customer Support for further assistance. Page 12 BRB 5007... -
Page 14: Warm-Up Instructions
1. Lie on your back and raise your right leg as you clasp both hands under the back of the knee. Keep your left leg straight. 2. Gently pull your right leg toward your trunk without raising your upper body. Switch leg positions and repeat. Page 13 BRB 5007... - Page 15 Switch leg positions Reverse arm positions and and repeat. repeat. Page 14 BRB 5007...
-
Page 16: Proof Of Purchase
Proof of purchase Model Number BRB 5007 version: 8-16-2012 BRB 5007...
Need help?
Do you have a question about the BRB 5007 and is the answer not in the manual?
Questions and answers